From the random hat of categories for the assignment in May came the subject “Night” (no flash).
Light-painting
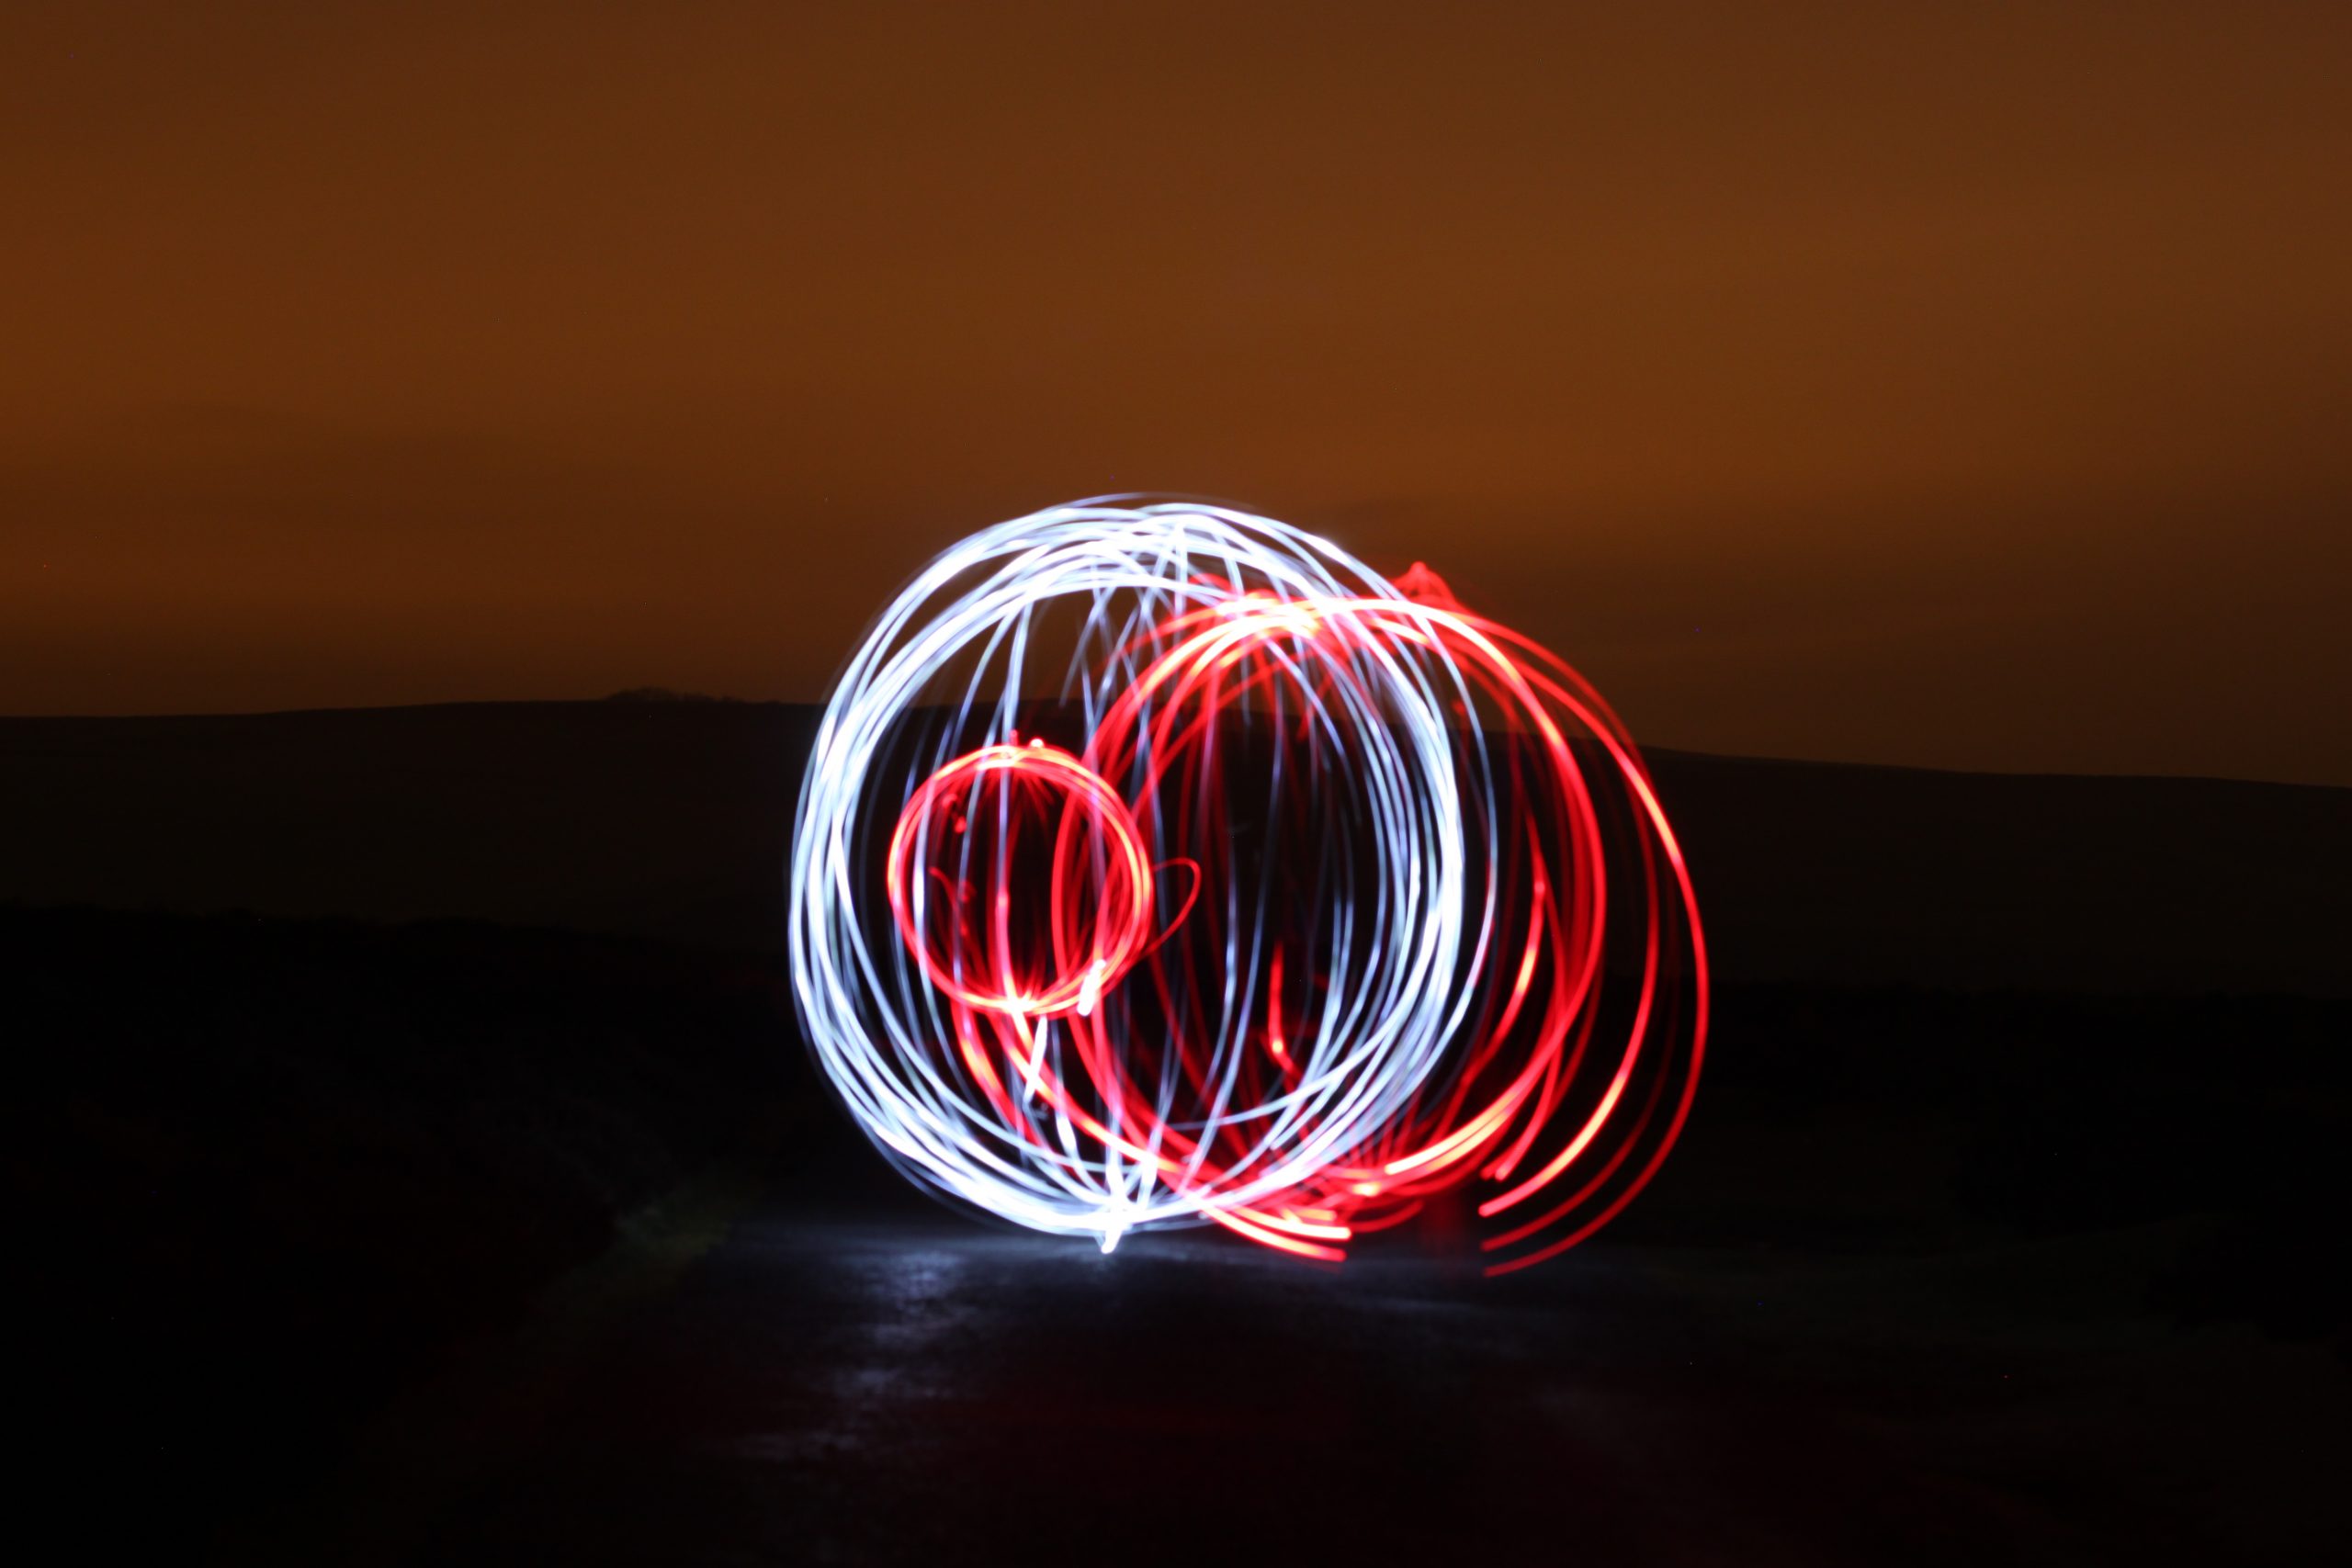
I’d already been playing with some ideas on Low Light and light painting images. In the gallery here you can see one of the light painting pictures with the three orbs. This was just my Canon 500D in BULB mode, which keeps the shutter open for as long as you hold the button down for, (in the good old days it was a squishy bulb that held the shutter in using air) The shutter was kept open for 133 seconds ISO200 and an F stop of 4.5. I stood in front of it with an LED Torch on a piece of string. Once it was on I started spinning it in a vertical circle and I moved around on the spot. This I did three times, changing the LEDs to White for one of the orbs. There was a set of images in my flickr photo-stream that these are a part of which were mainly taken up on the top of Church Stretton. Great for hardly any light pollution.
Zoom Pulling
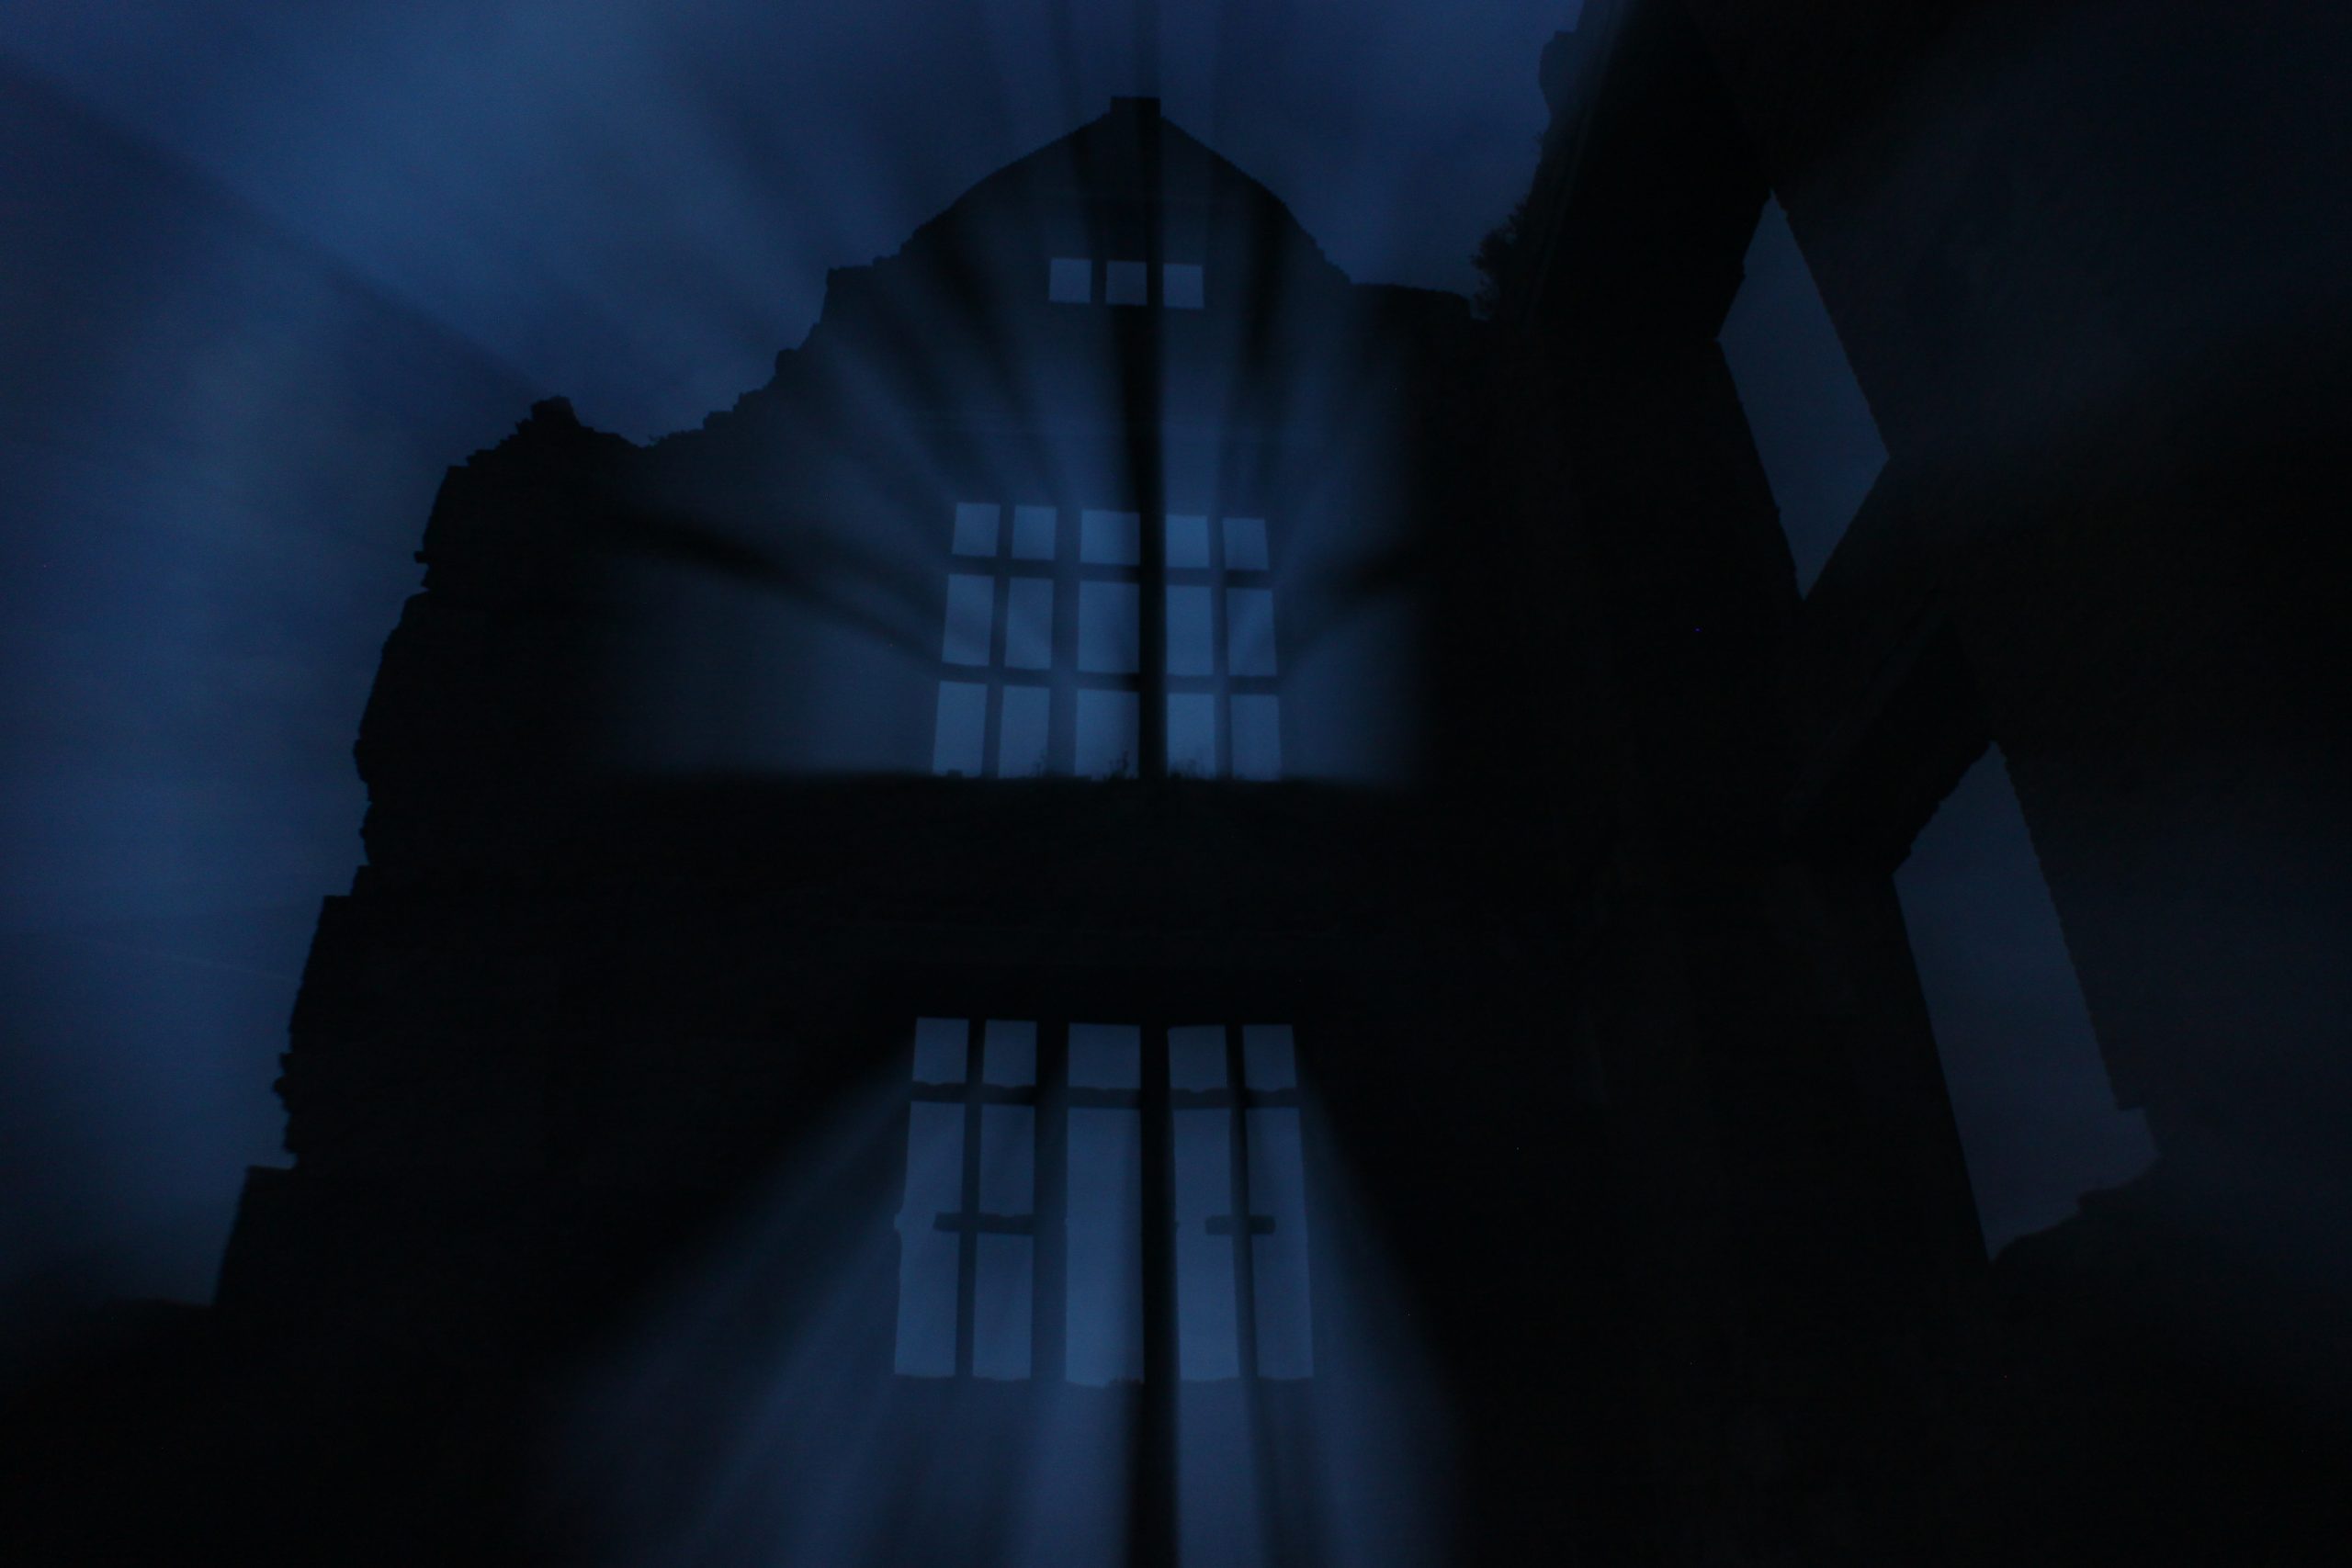
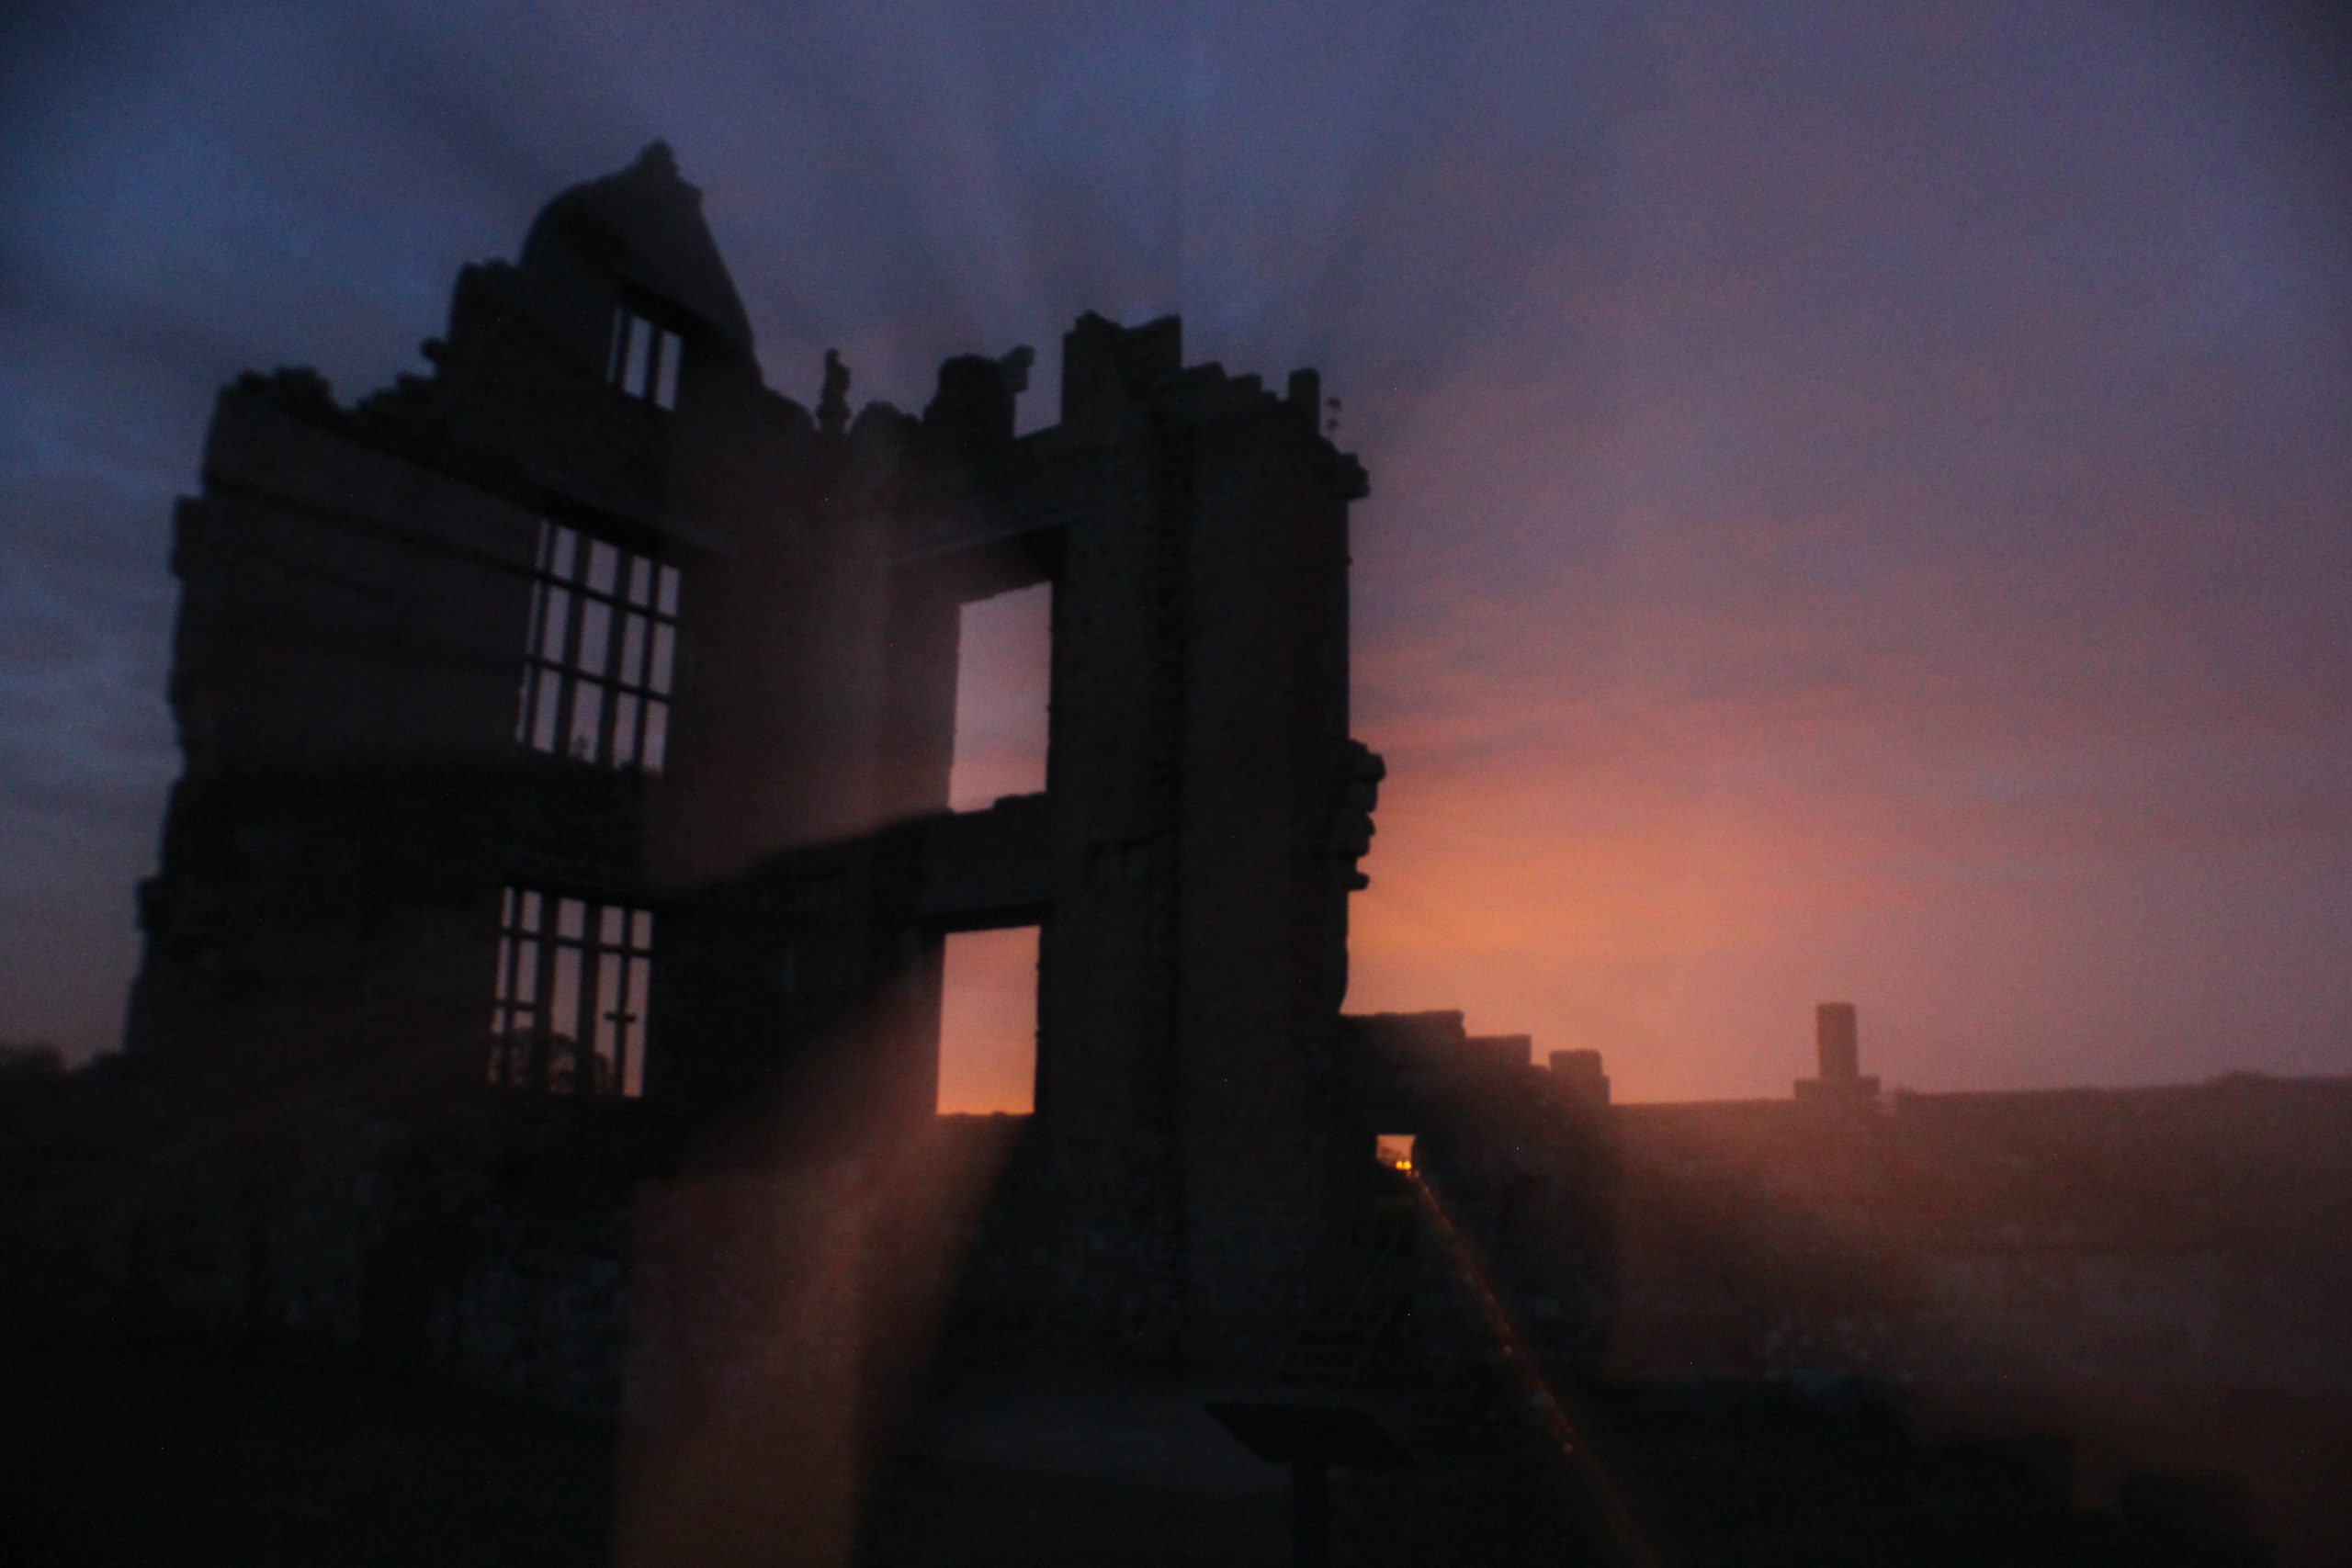
My next series of pictures from which I would ultimately choose a photo for the submission were at Moreton Corbet Castle, an old ruin on the outskirts of Shawbury. The two pictures in this gallery are distinctly different in colours but the effect is the same. In my submission you can see what looks like the suns rays coming through the ruined building, in actual fact that glow comes from the moon rising, it was a good big and bright moon that evening. To get the effect you can see I did a Zoom Pull, (not sure if that’s the correct term). I mounted my camera on a tripod, focussed on the picture and zoomed right in using my 18-55mm stock lens. After finding the right settings (f/5.6 ISO1600,6seconds) I pressed the remote shutter release for the 6 secs and then zoomed out from the picture, nice and smoothly being careful not to move the camera. I like this effect and think you should give it a try! It gives great motion to kids coming down slides, on faster shutter speeds of course. You’d also have to zoom out quickly too!
Wrekin at night
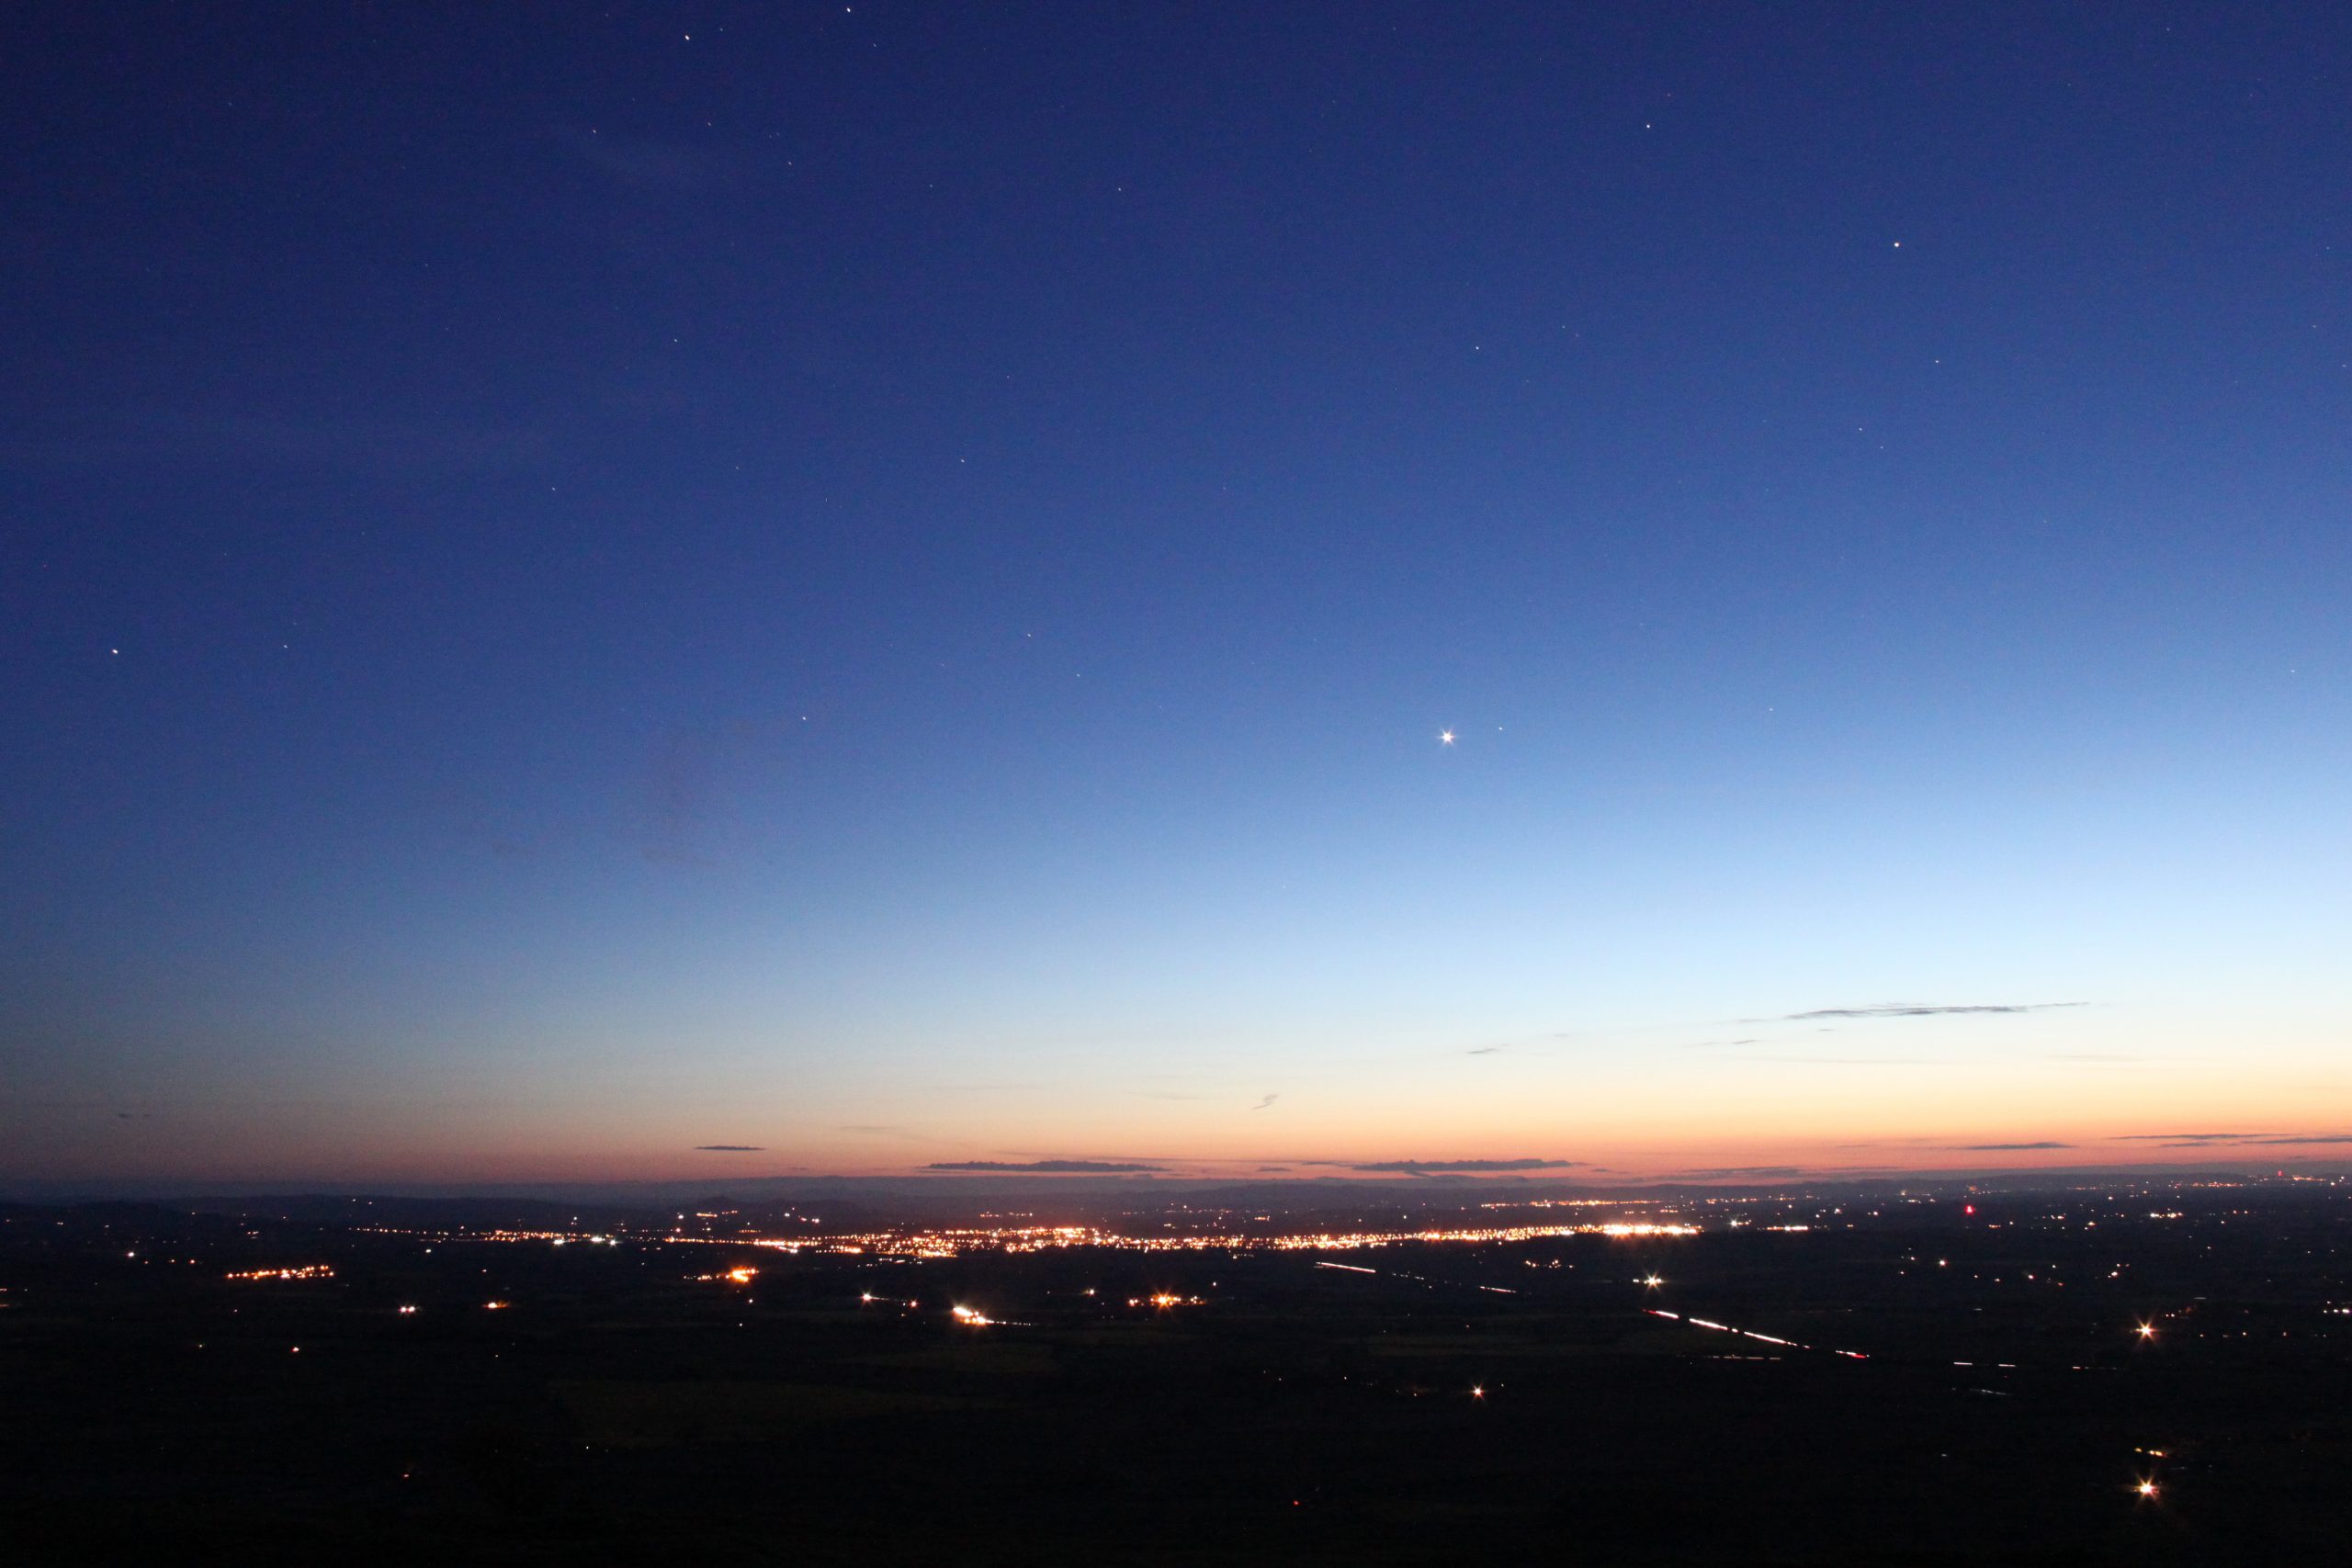
Five of the pictures in the gallery are from the Wrekin, a local beauty spot, hill on the outskirts of Wellington. There are the trees where I took a photo of the night sky 9:30pm through the branches, the sun was under the horizon but was still lighting up the distant sky a little. Same as the wide landscape from the top when you can also see some twinkly stars. That picture had a shutter open for 15 secs, that helped me capture the stars sparkle without them moving. Well, to be scientific, they don’t move the Earth does.
Star Trails
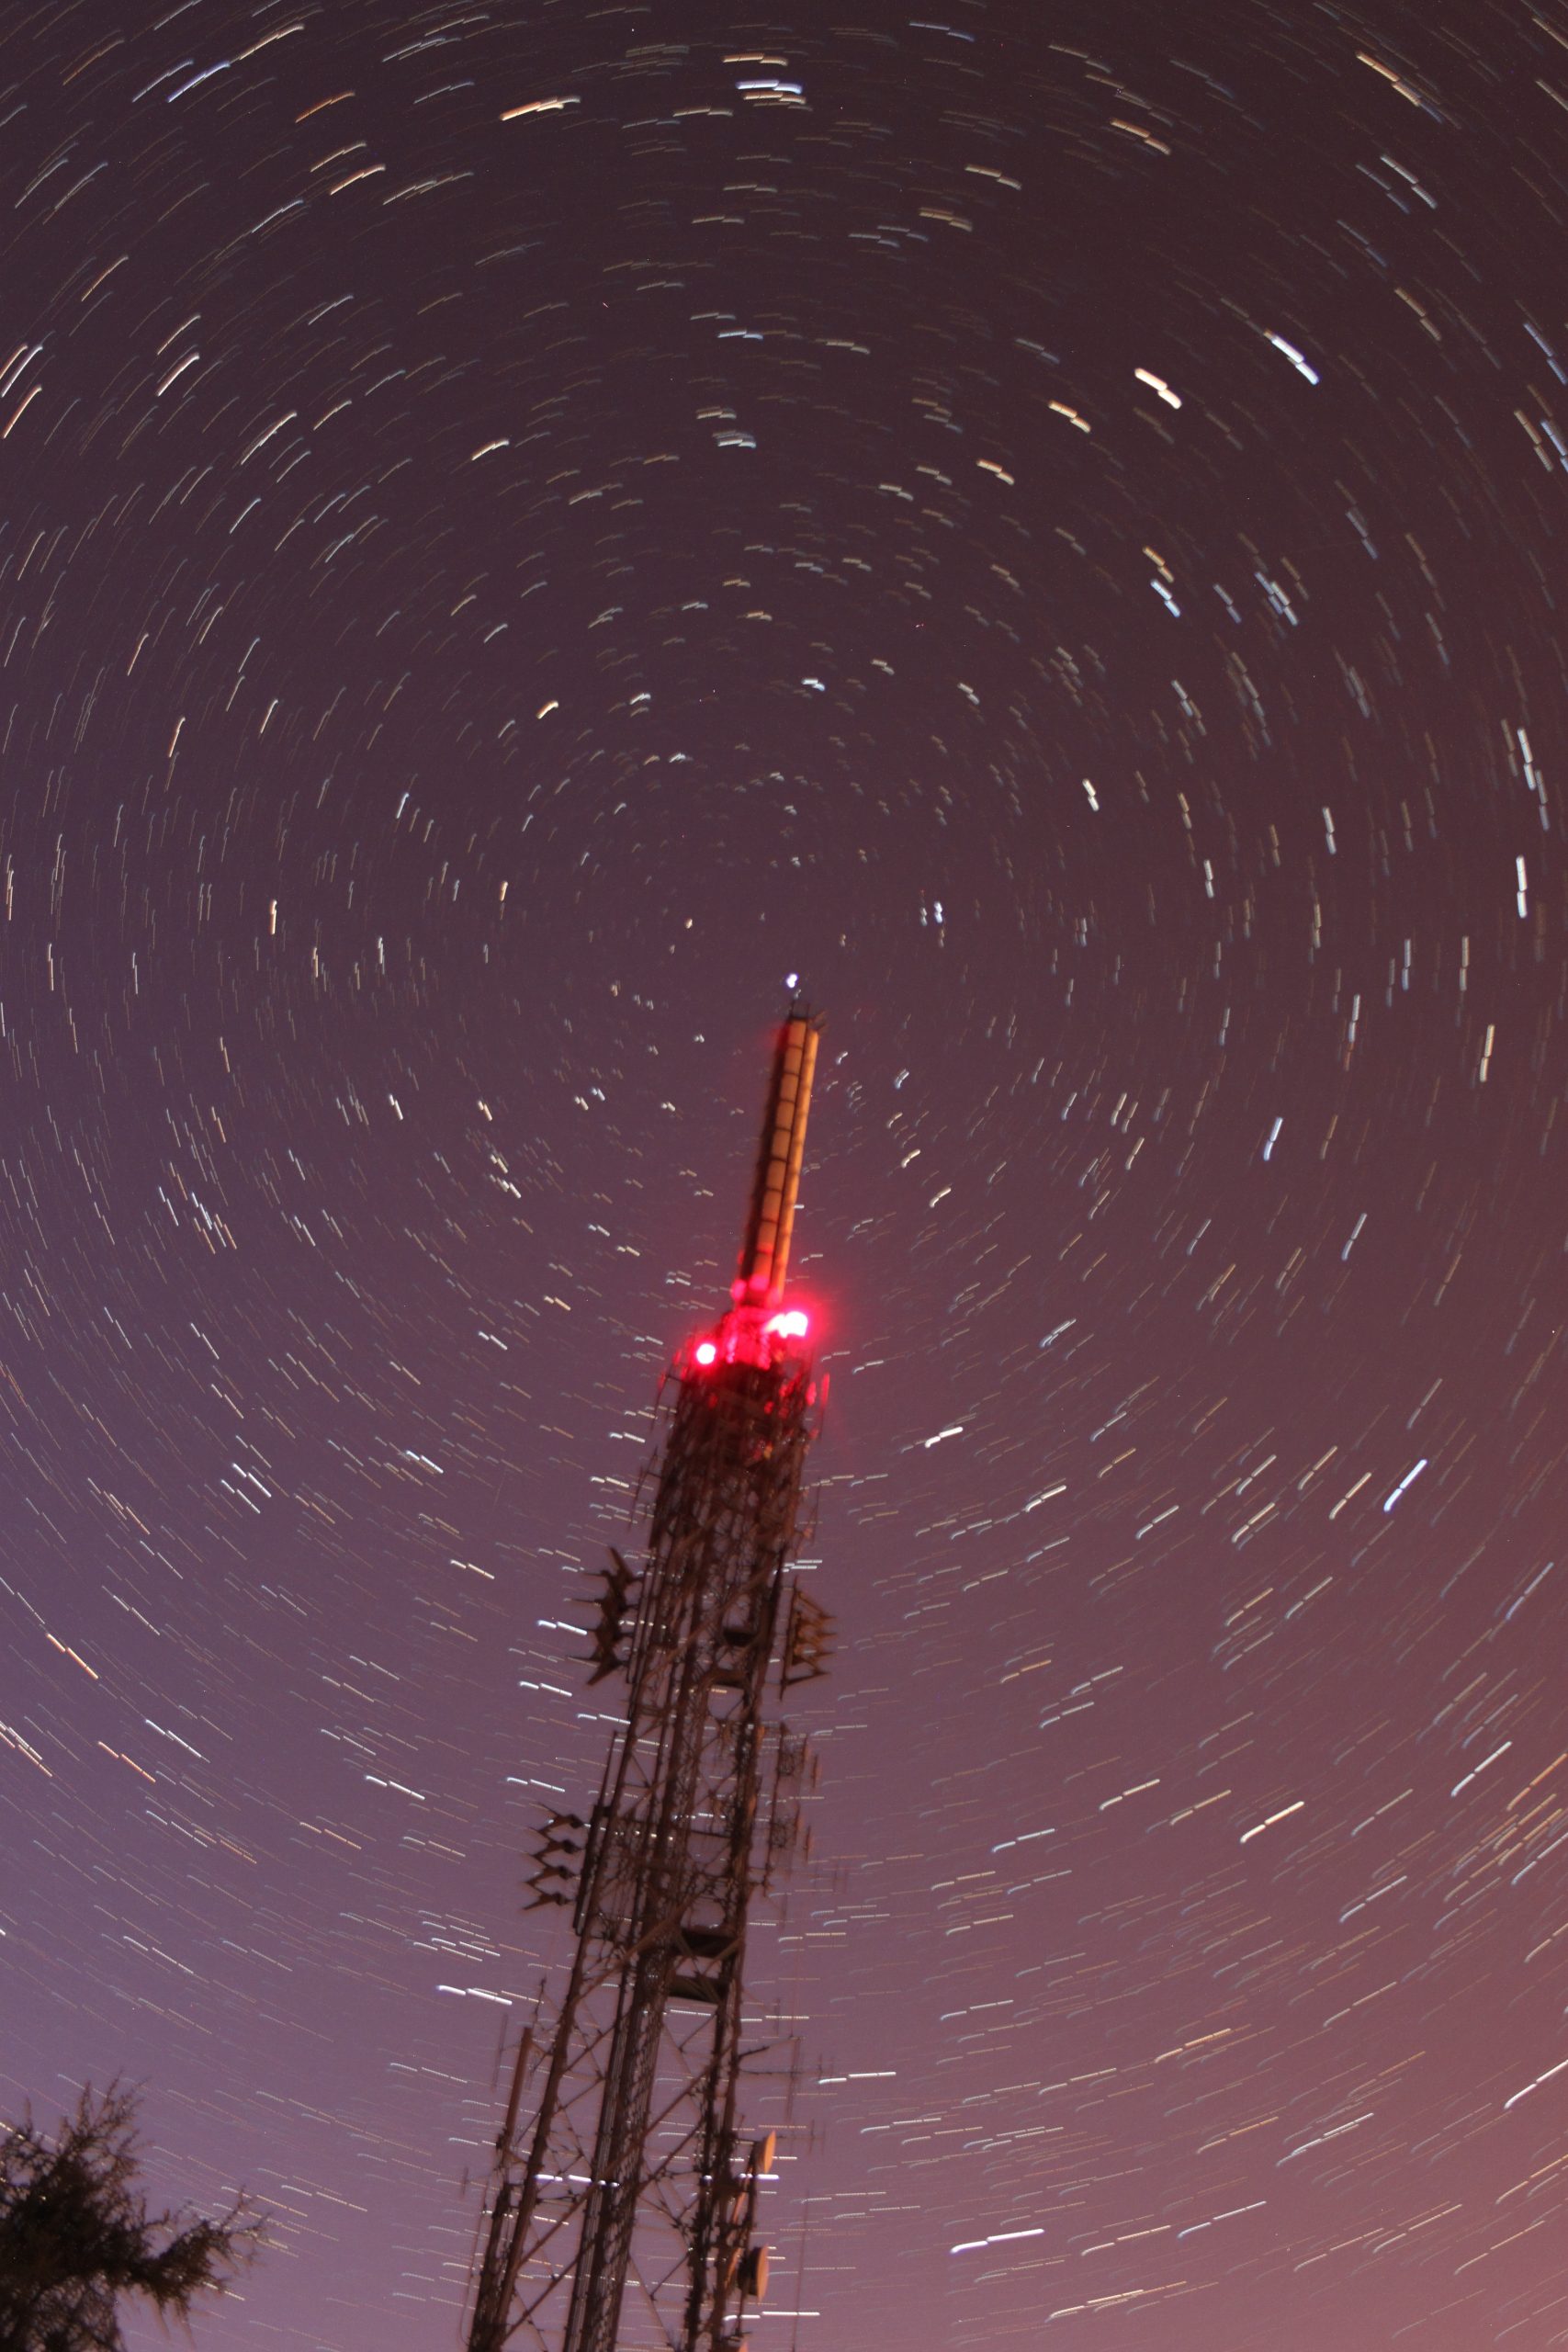
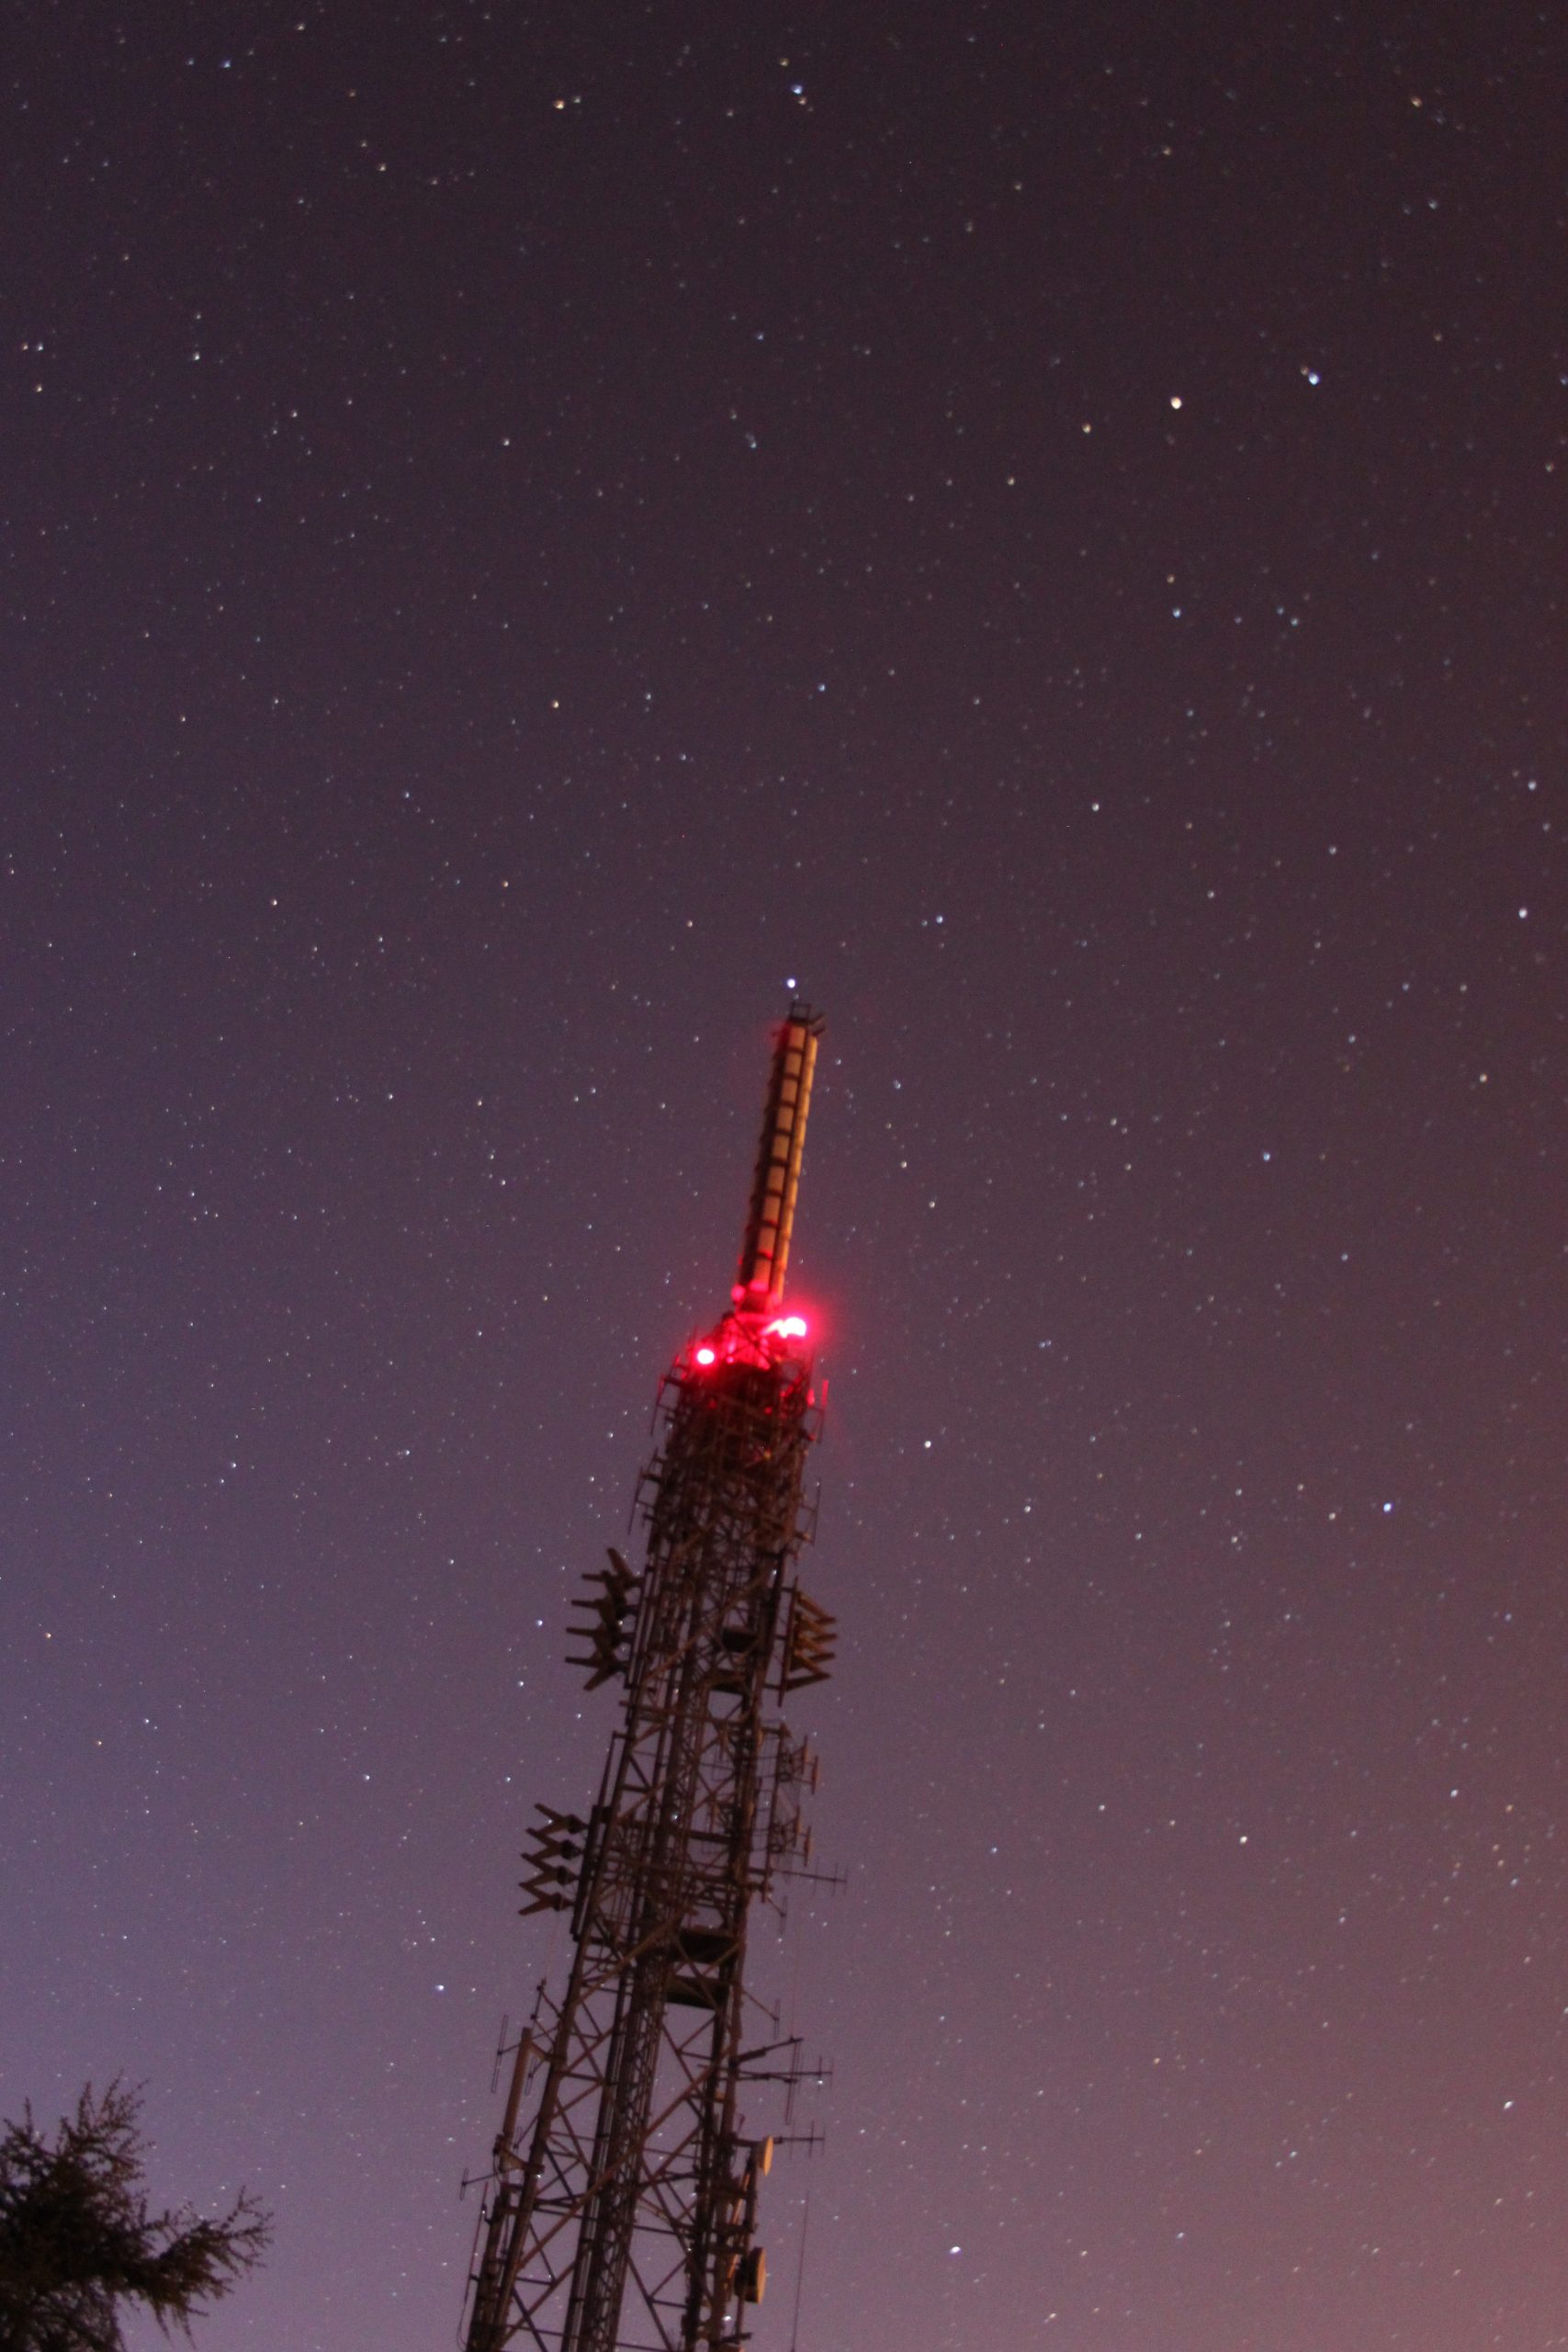
The main reason for my trip up there though was Star Trails, I set up the tripod at around 11pm with the Pole Star (Polaris) on the top of the Wrekin Television Transmitter Antenna. The first picture in my set on here shows the antenna with the stars in the background, Notice the single star just above the antenna. I then set the manual mode to 30secs shutter speed , f/3.5 and ISO1600 to allow good light pick up but not have too much noise in the photo. High ISO = more noise.
With these settings I altered the Drive Mode to Continuous Shooting and used my Remote Shutter release to hold the button down. My little camera sat there taking a photo for 30 secs and repeating until gone midnight, taking well over 120 images. The reason behind taking this many is so that I could use a good piece of software called startrails to merge them together and build up the photo that you can see that looks like I kept the shutter open for the whole time. The reason the stars all look as though they’re moving circular is that the Pole star stays still (virtually) in our sky and the earth spins underneath it, hence the reason I perched it on the antenna. The further away from the pole star in that hemisphere the stars will travel faster and look like they’ve travelled further on the picture.
The only issue I had with the last 40 or 50 photos was that it turned cold and the lens built up condensation, which is the explanation behind the big pink blob in that photo. I wish I’d spotted it sooner as the trails would have been much better. I plan to revisit this location to do the startrails properly too!
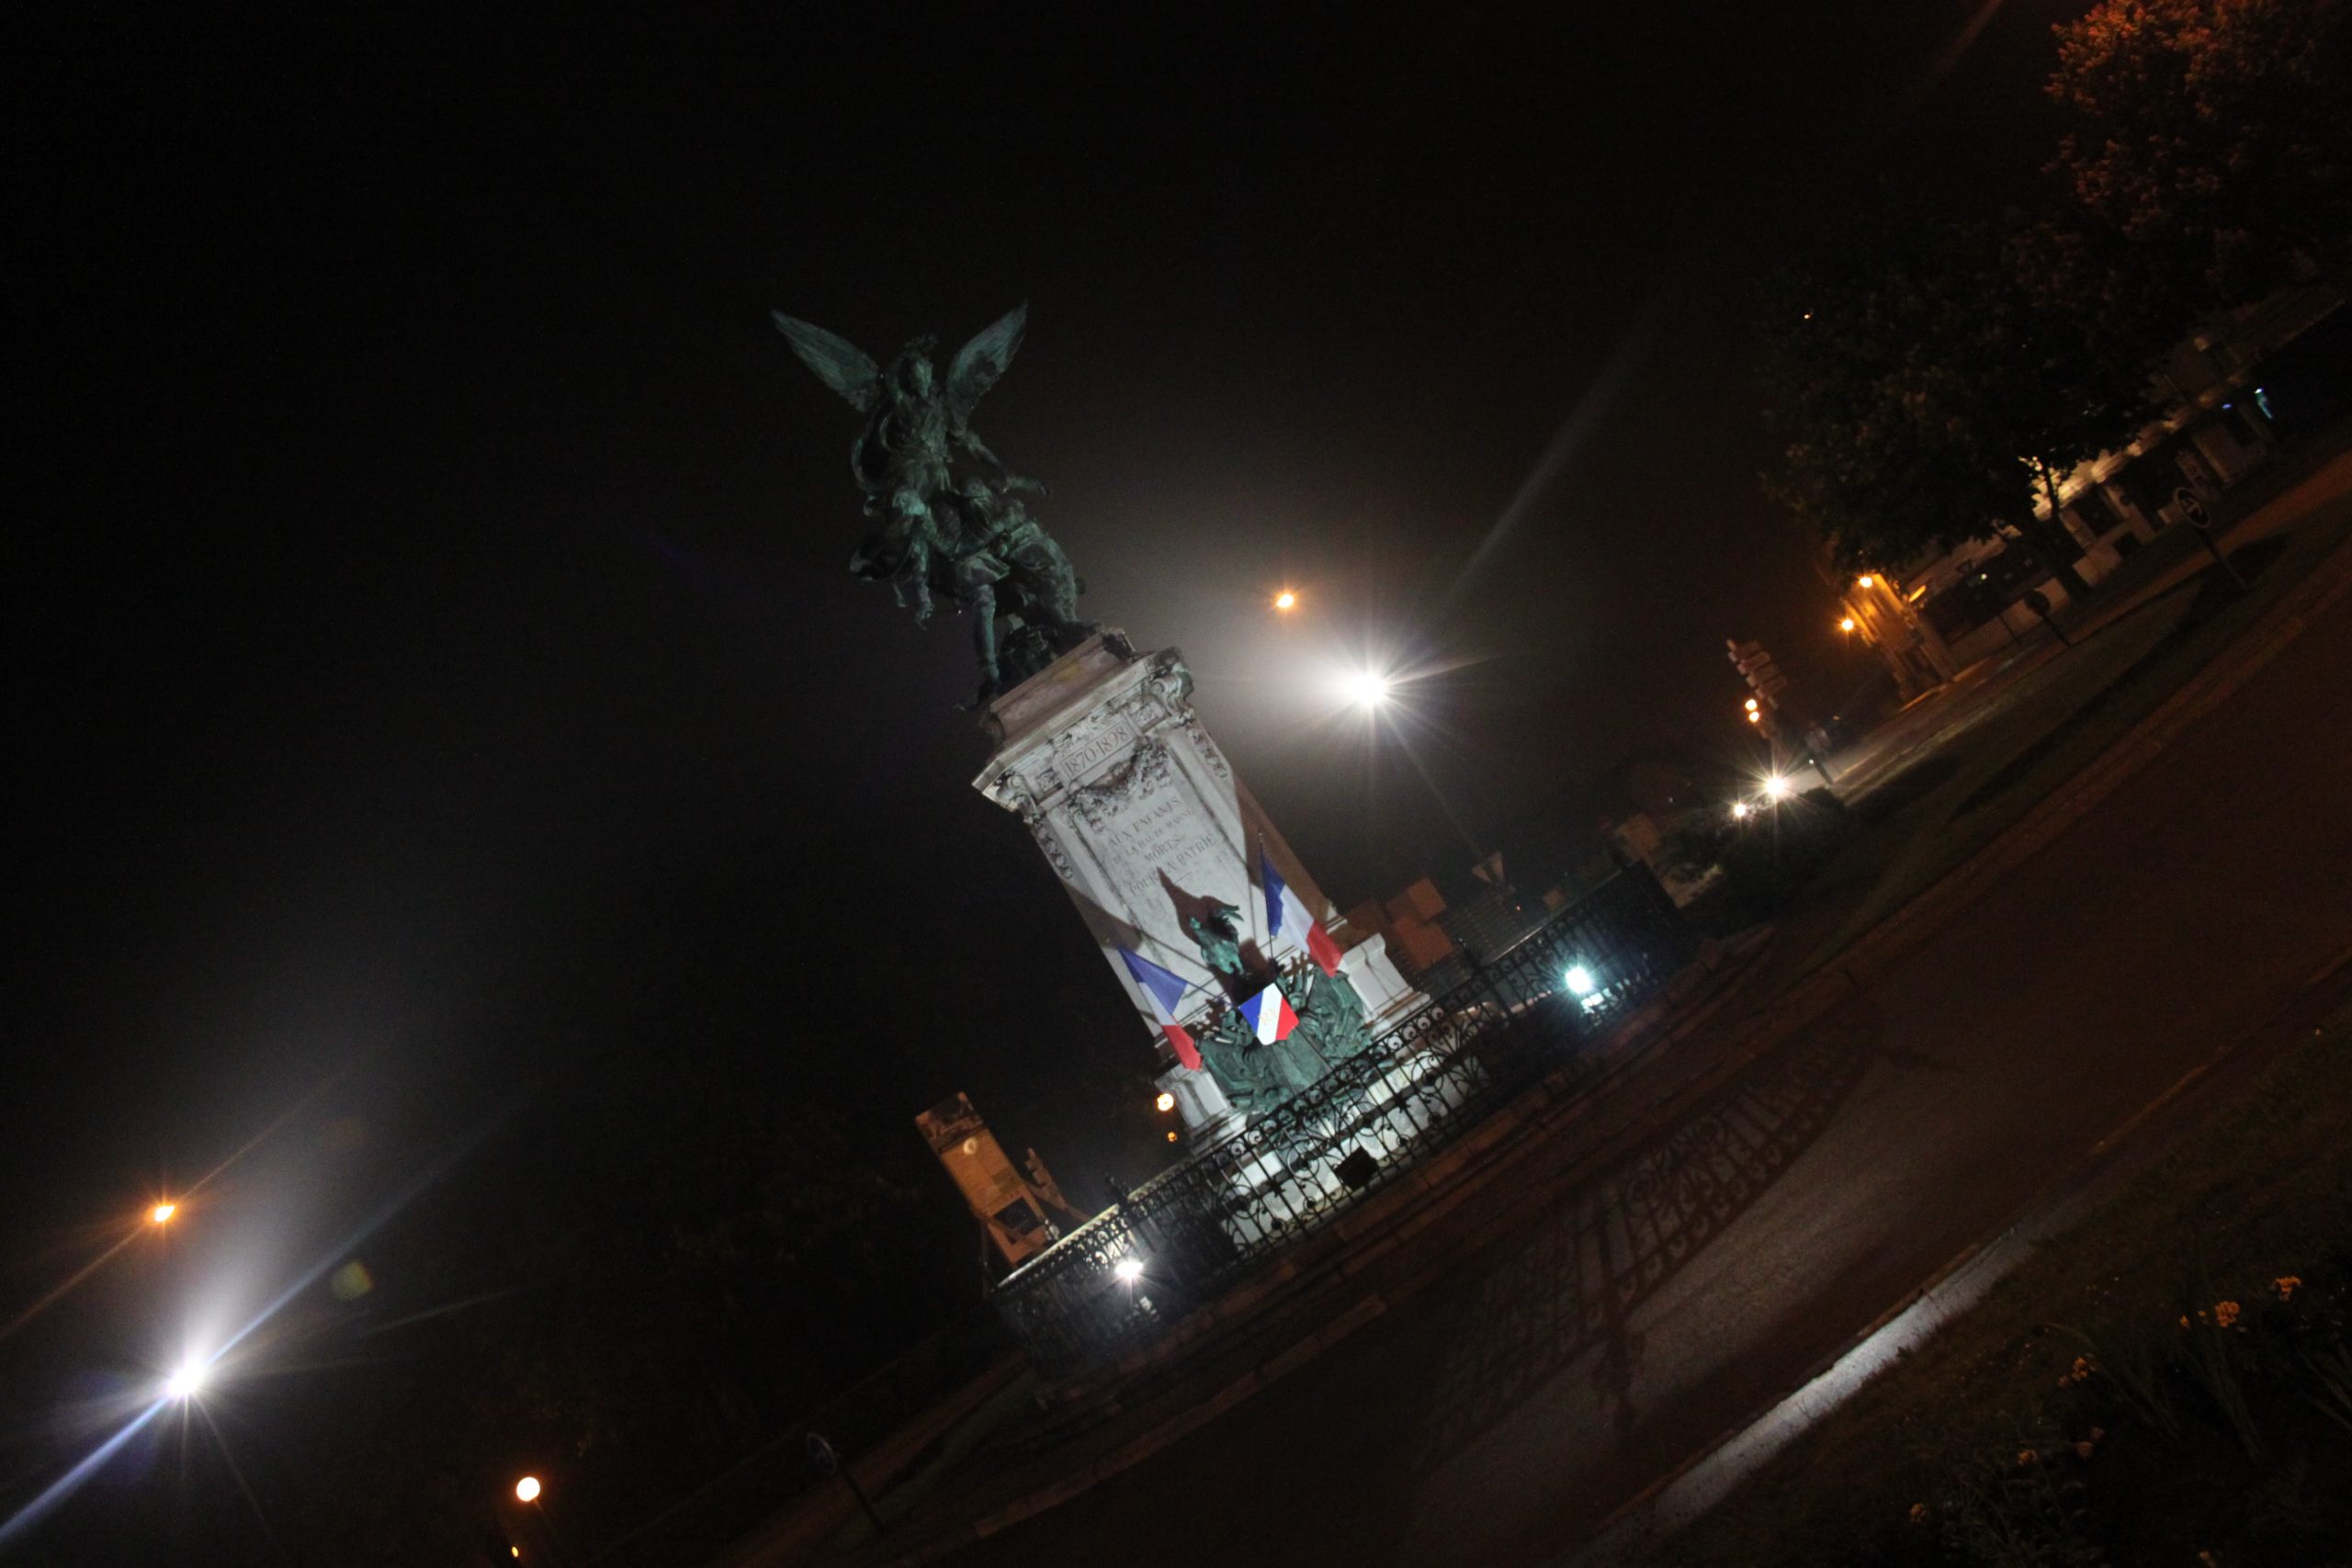
French Photos
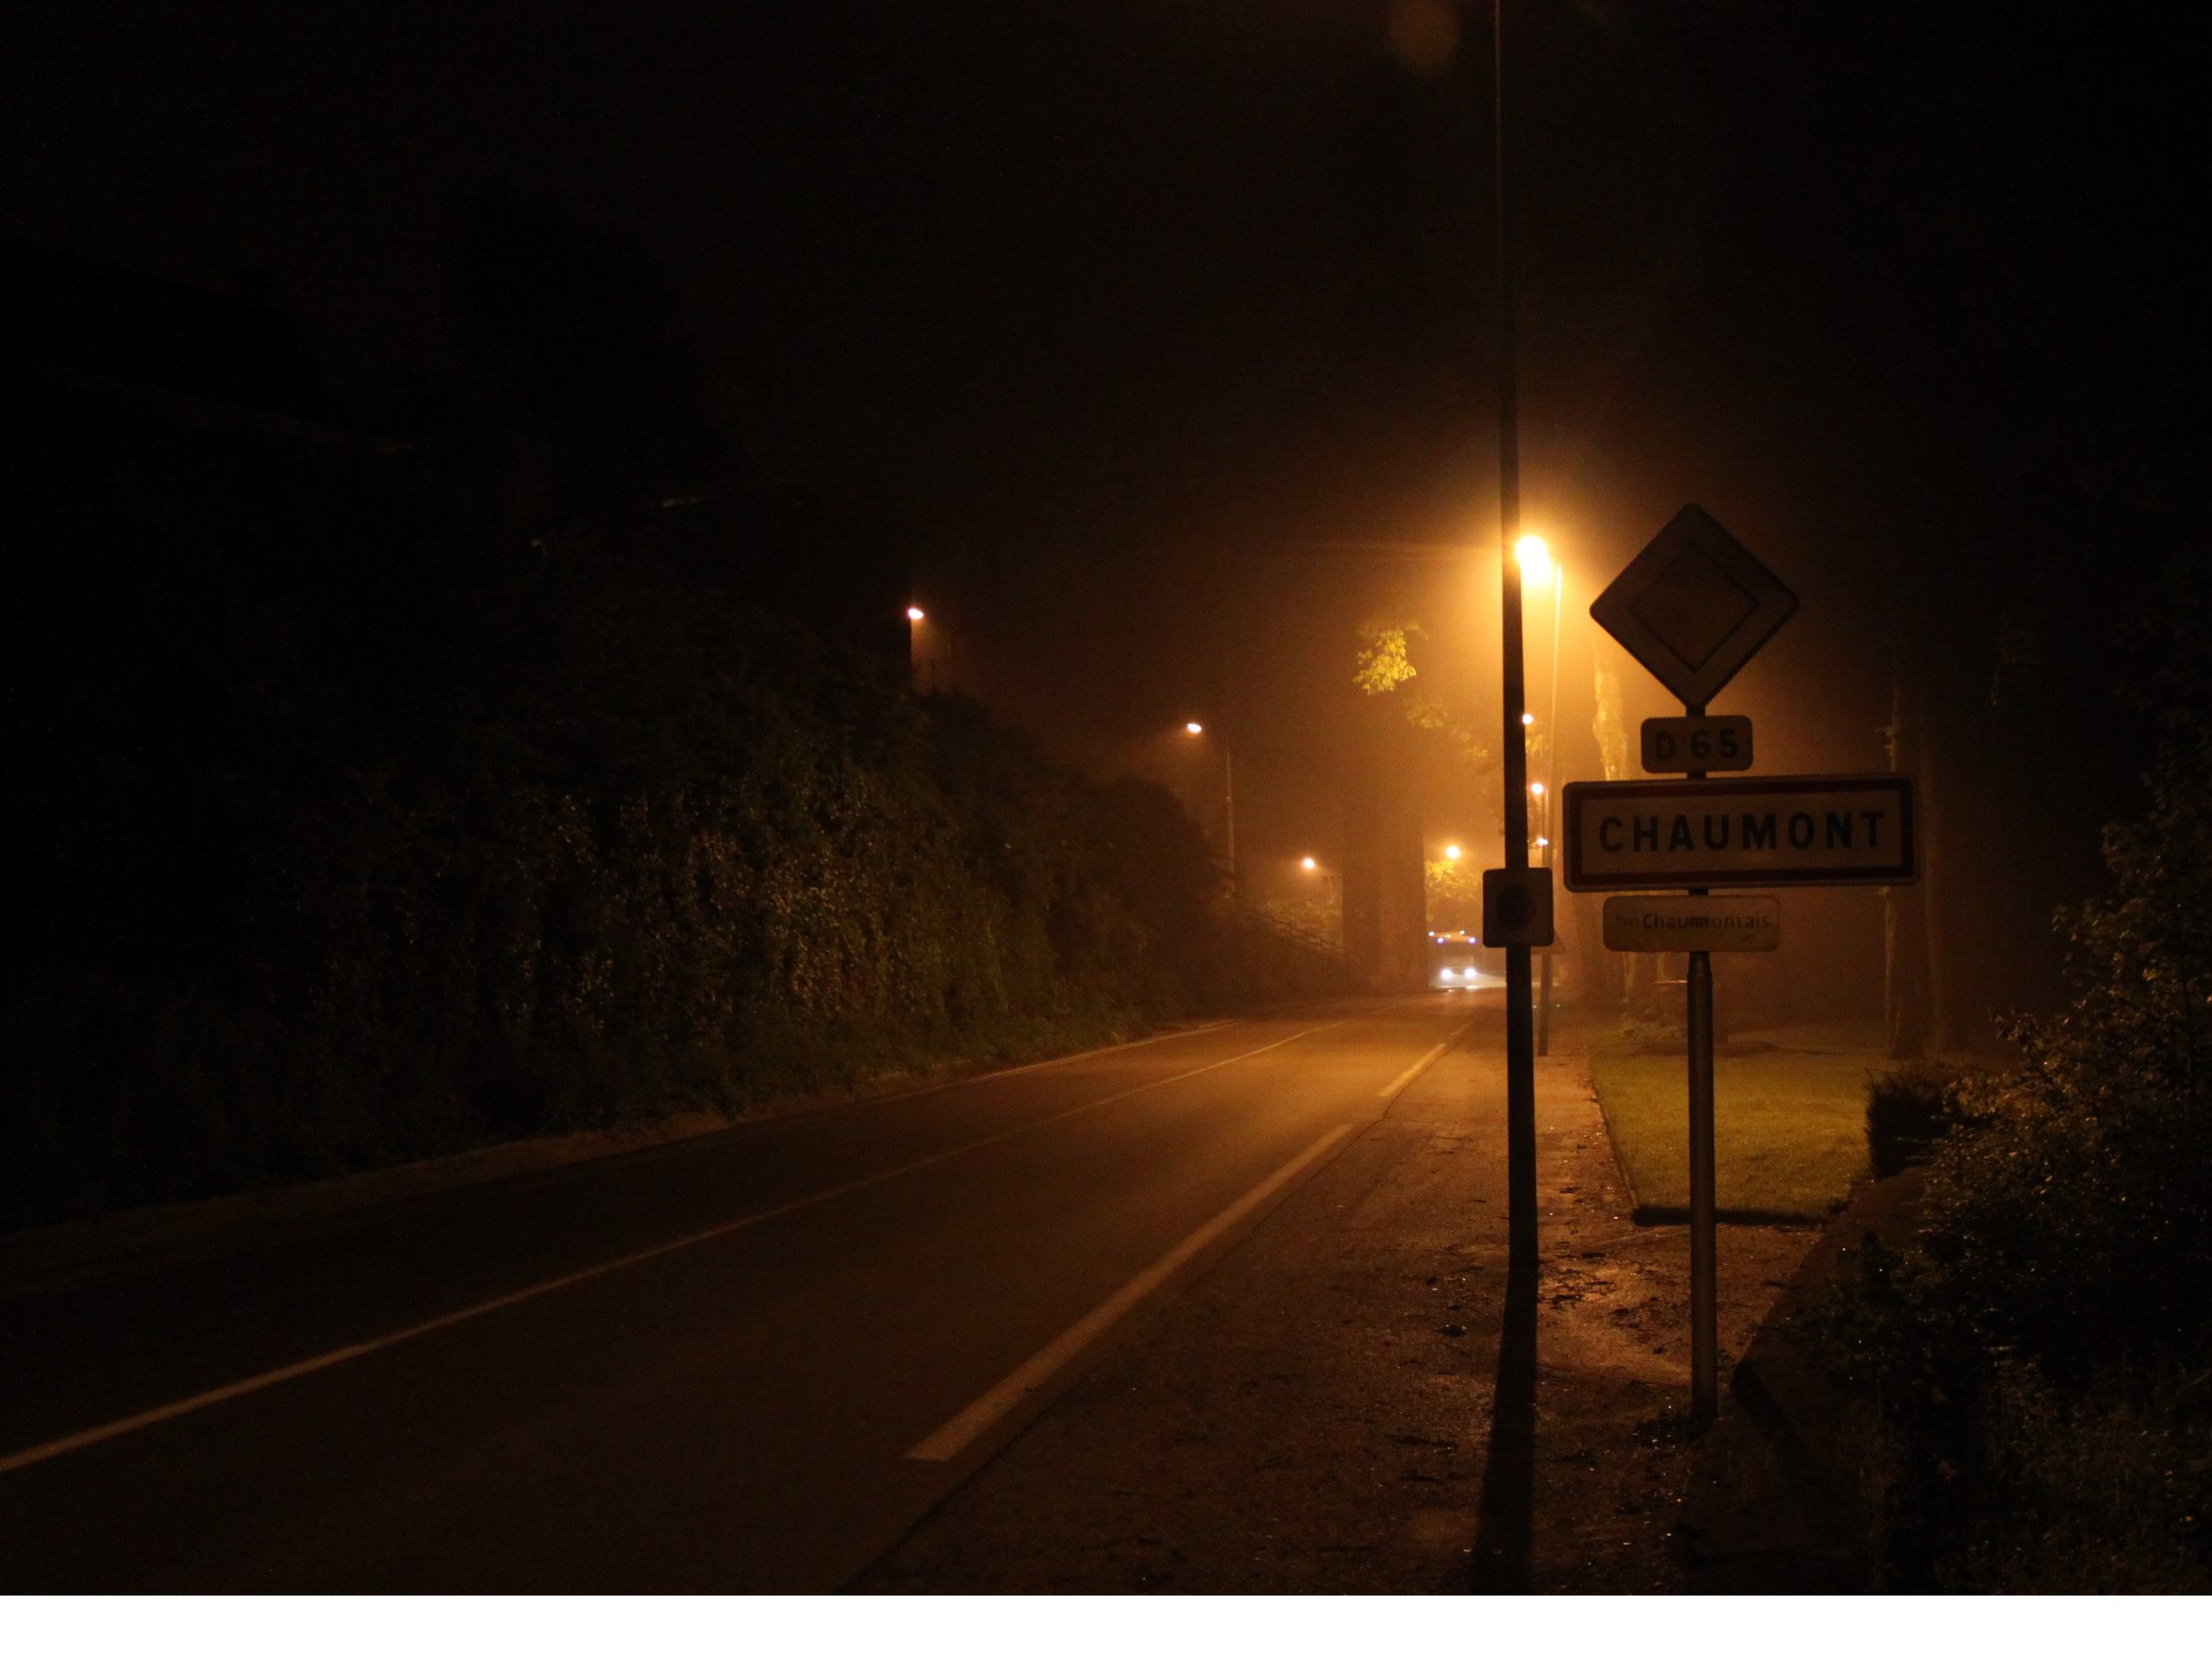
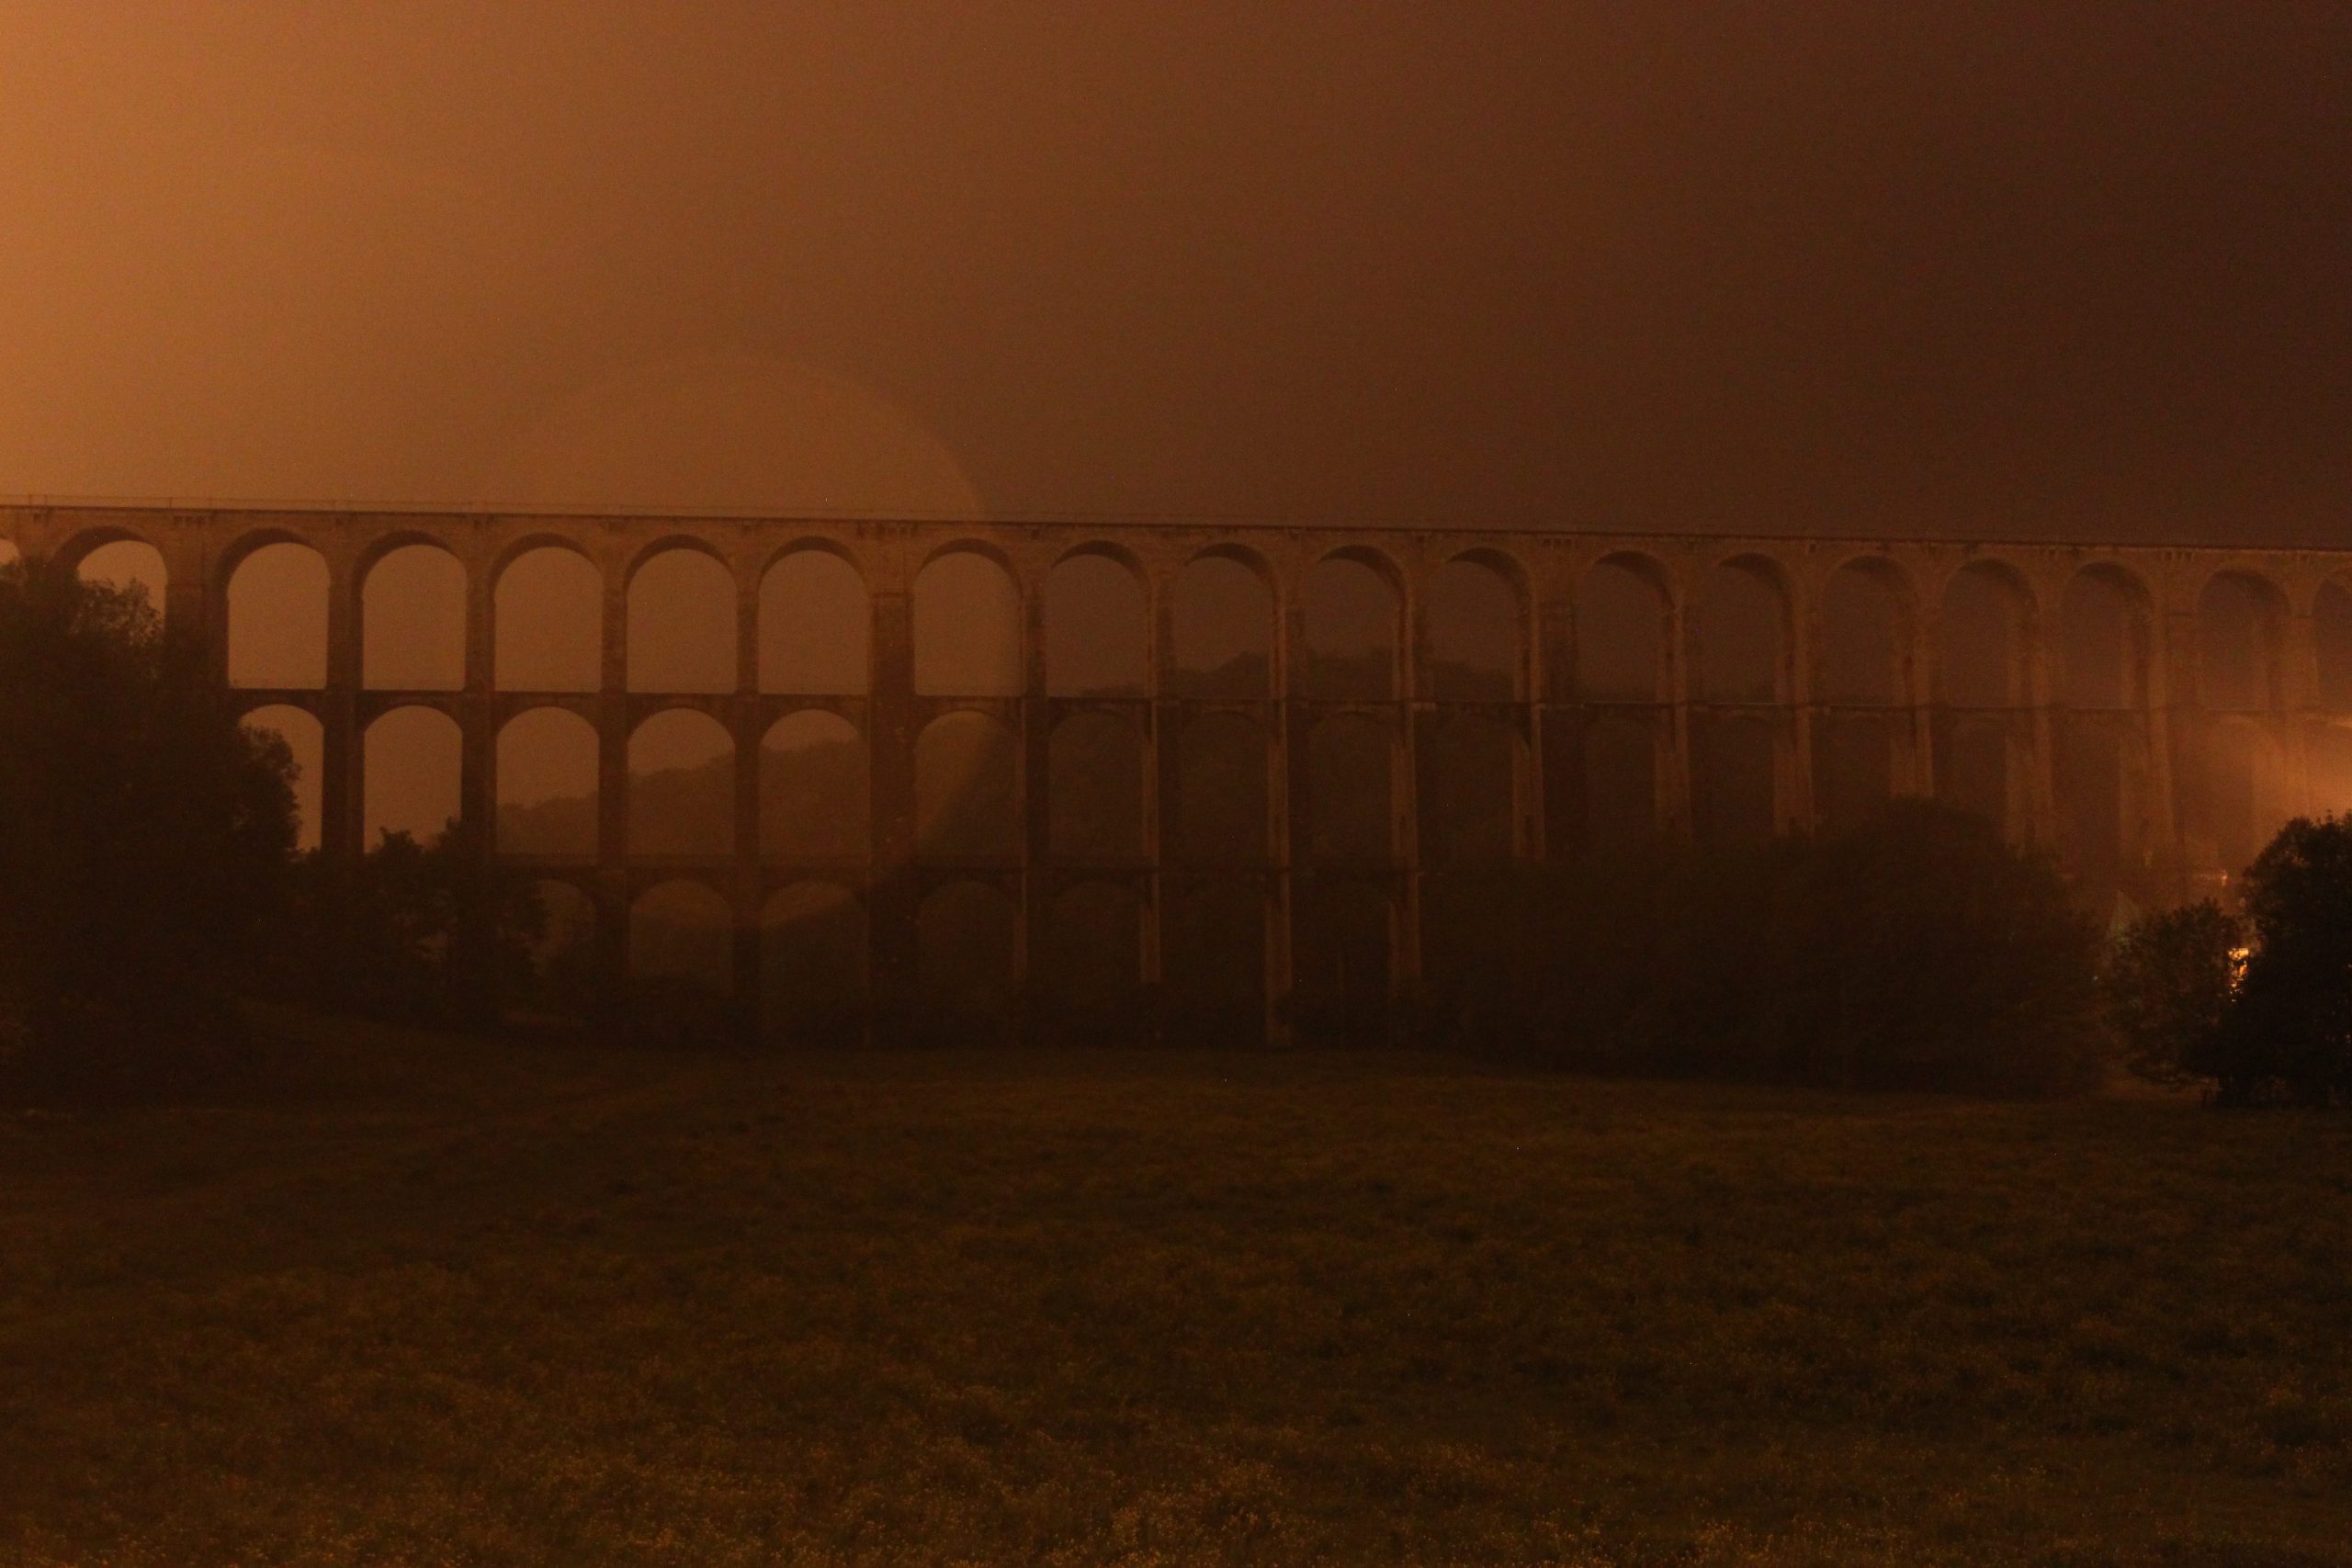
The last three photos in the gallery were taken on a work trip to Chaumont in France. I took a walk after our evening meal and drinks to try and find a decent picture of the Viaduct. It was really damp and humid so the viaduct picture didn’t come out too well and I was a little disappointed, on the way back to my hotel I walked past the Chaumont sign and thought I could do a decent hand held shot, this one was the better of the few I took, but it’s still not great. The third photo is of a memorial to children who died at the end of the 19th century and I did these using the tripod as a monopod. I was trying not to look too inconspicuous as I was a foreigner anyway and didn’t know what the areas were like that I was milling about in. There are always loads of good things to take pictures of though, wherever you go. I always take my camera to places like this now just in case.!!
To summarise this supposedly shorter post then:
- Take your camera everywhere to get good shots you’d otherwise regret missing.
- Try playing about with zoom effects, focus effects, they’re quite effective and very different.
- Download startrails and play with it, you can use it to do animations too!
- When waiting an hour and a quarter for your camera to do multiple exposures, take a chair too!
- When using your camera or lenses somewhere likely to experience temperature changes, keep on eye on it.
- When waving a torch around on a bit of string you look like a berk, just get on and do it.
- Have loads of fun!!
In the next post, I’ll briefly talk about the entry to the “Sky” category.
Take care!
Be First to Comment