In part 3 you saw the body taking shape with the cardboard covering and some bits of MDF for the strength around the arm holes. September is gone now and it’s the 2nd October so it’s time to flesh out the legs a bit. Don’t forget that the comic con is only on the 19th and 20th November so time is galloping on. I know that the concept will be ok but need to dress them so that they look a little more solid as per the movie robot.
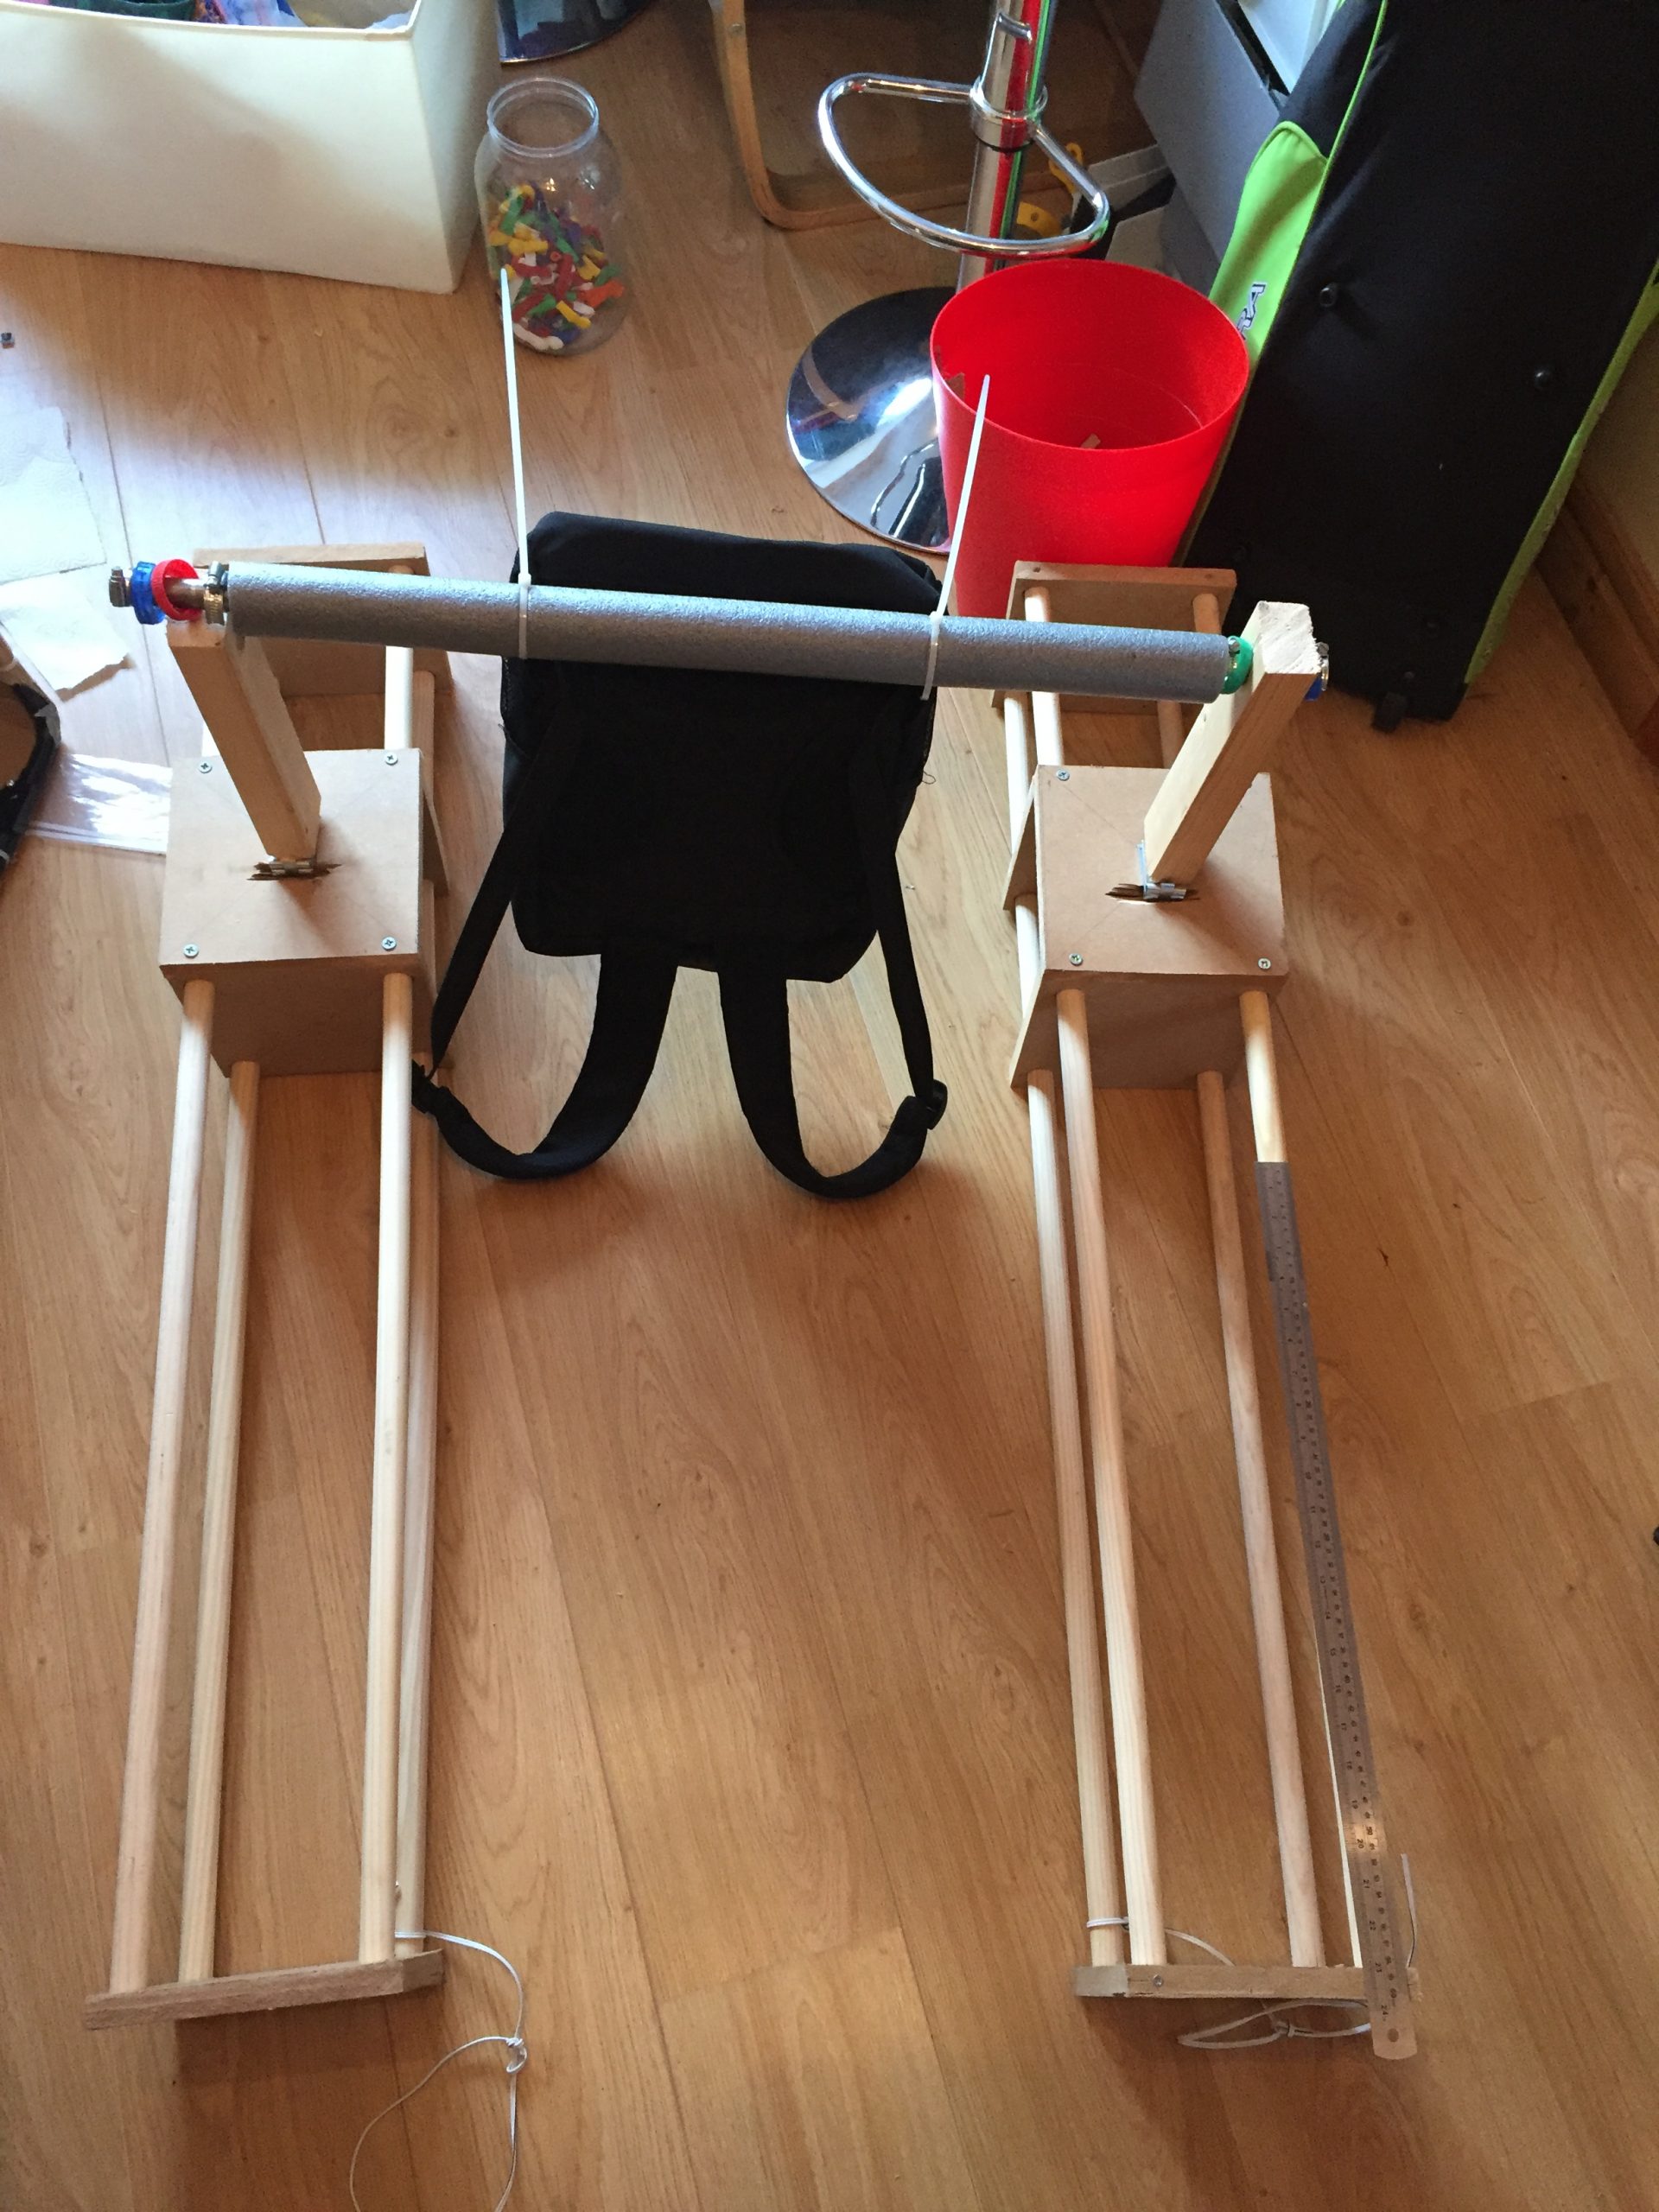
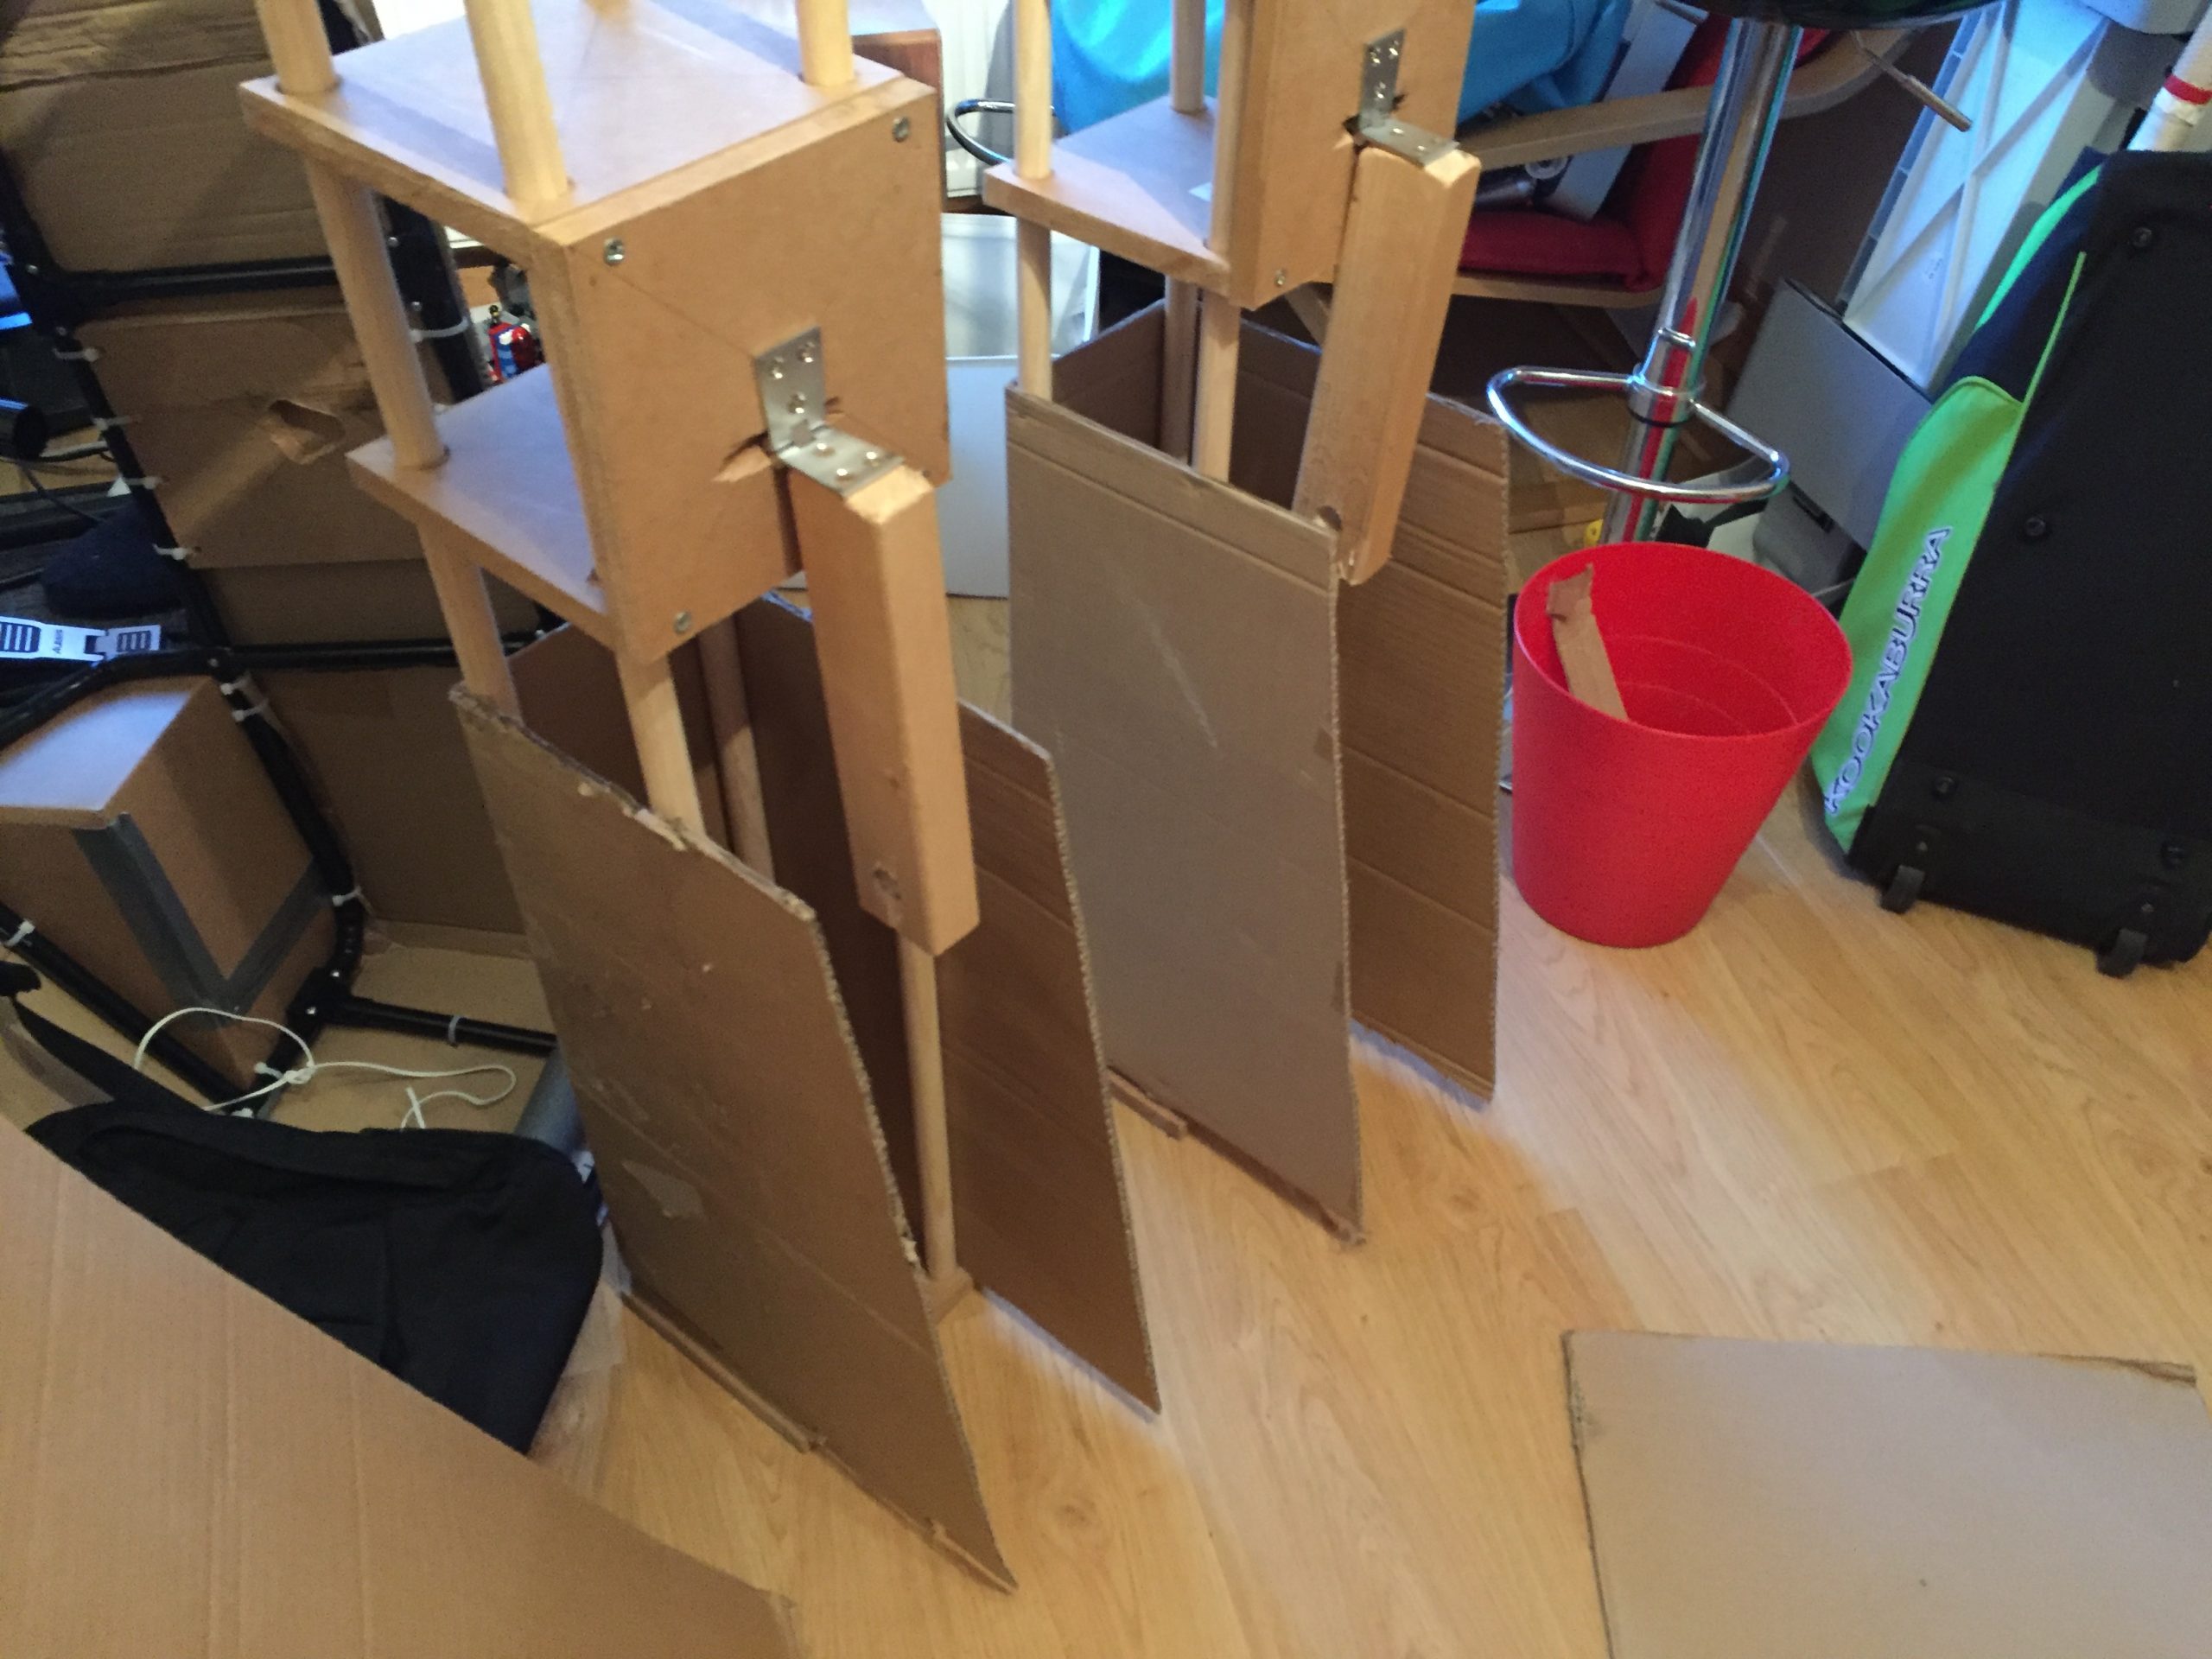
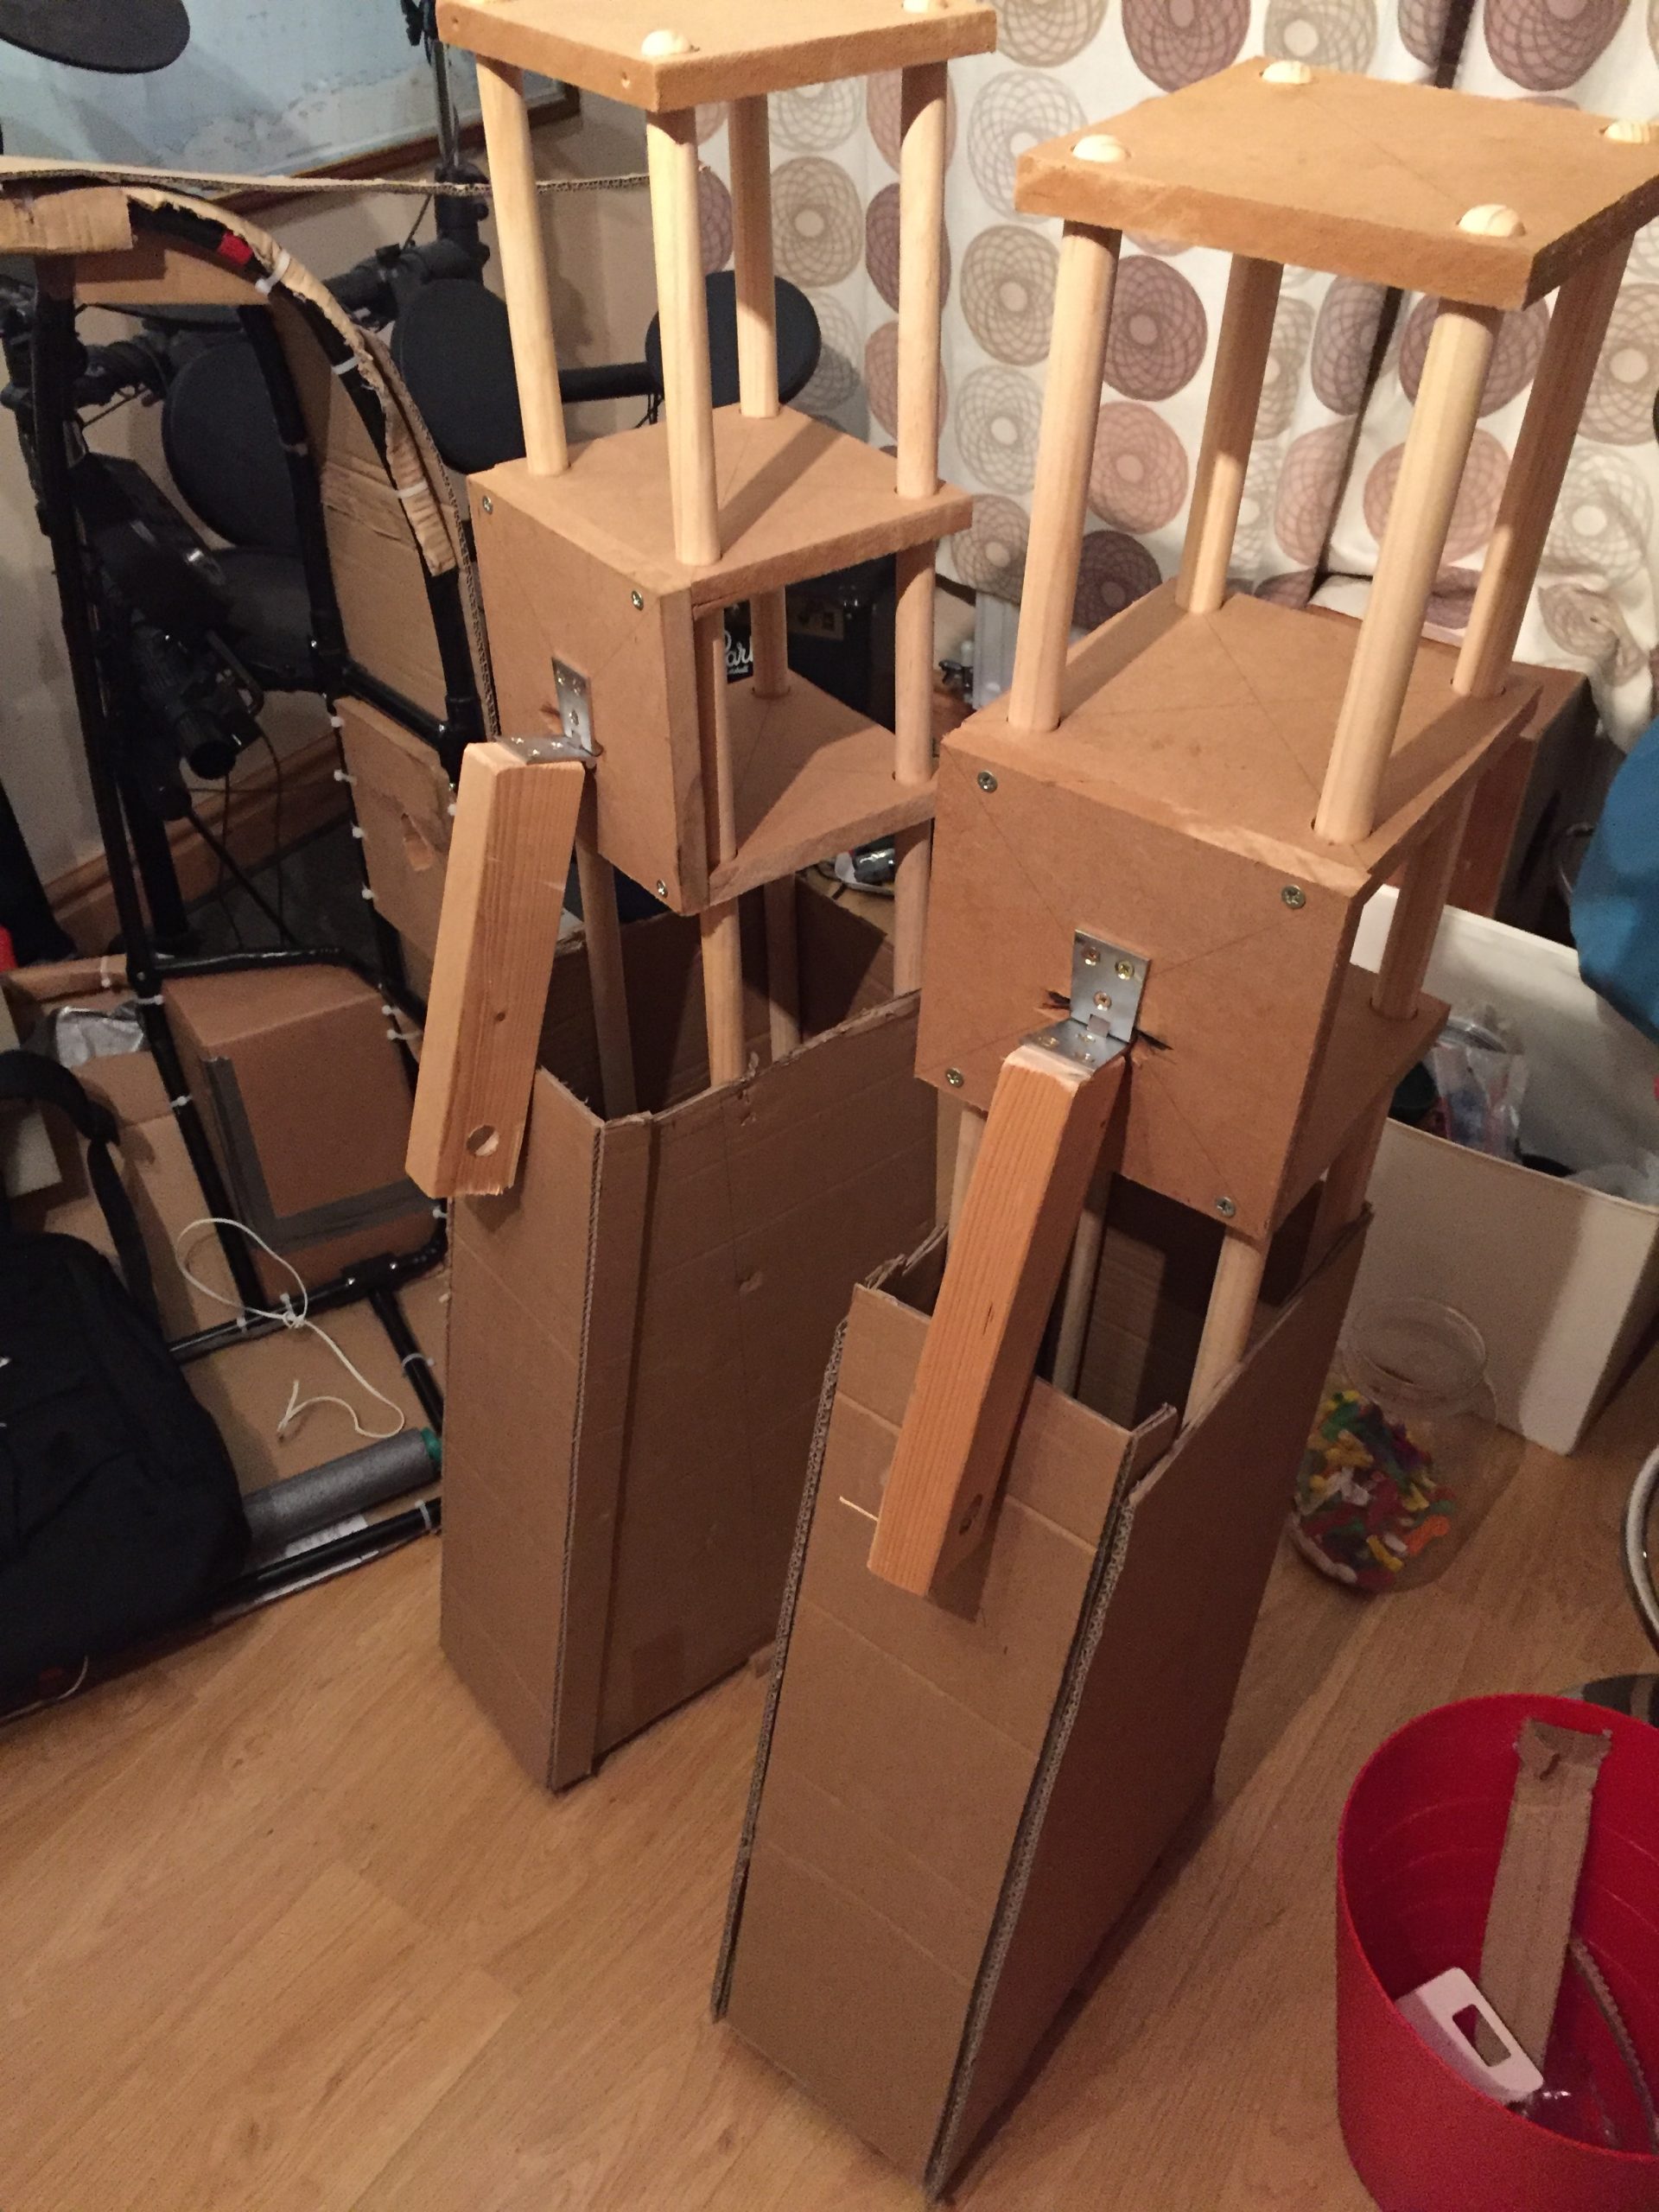
Below you can see the naked legs joined with the metal bar. I measured around the broom sticks and then cut out a single piece for the sides and backs for each leg. Another piece of cardboard on the front of this all fixed in place with hot-glue would make it a little more leg like. The Card was fixed to itself with the hot glue but fixed to the broom sticks using a staple gun. Again I used some off cuts to create the raised details on the sides of the legs. These would be covered with paper mache and then painted with some details. You can also see in the picture with the body balanced atop the legs that the front of the legs are too big.

Those shins being too large would prove to protrude forward too much and then overhang the front toe a little too much. The toes were designed by using some thin card and a pritt stick to create a shape that I could then copy them on to the thicker cardboard. With the design of the front toe the first model was too blocky and lacked the shape I wanted to see.
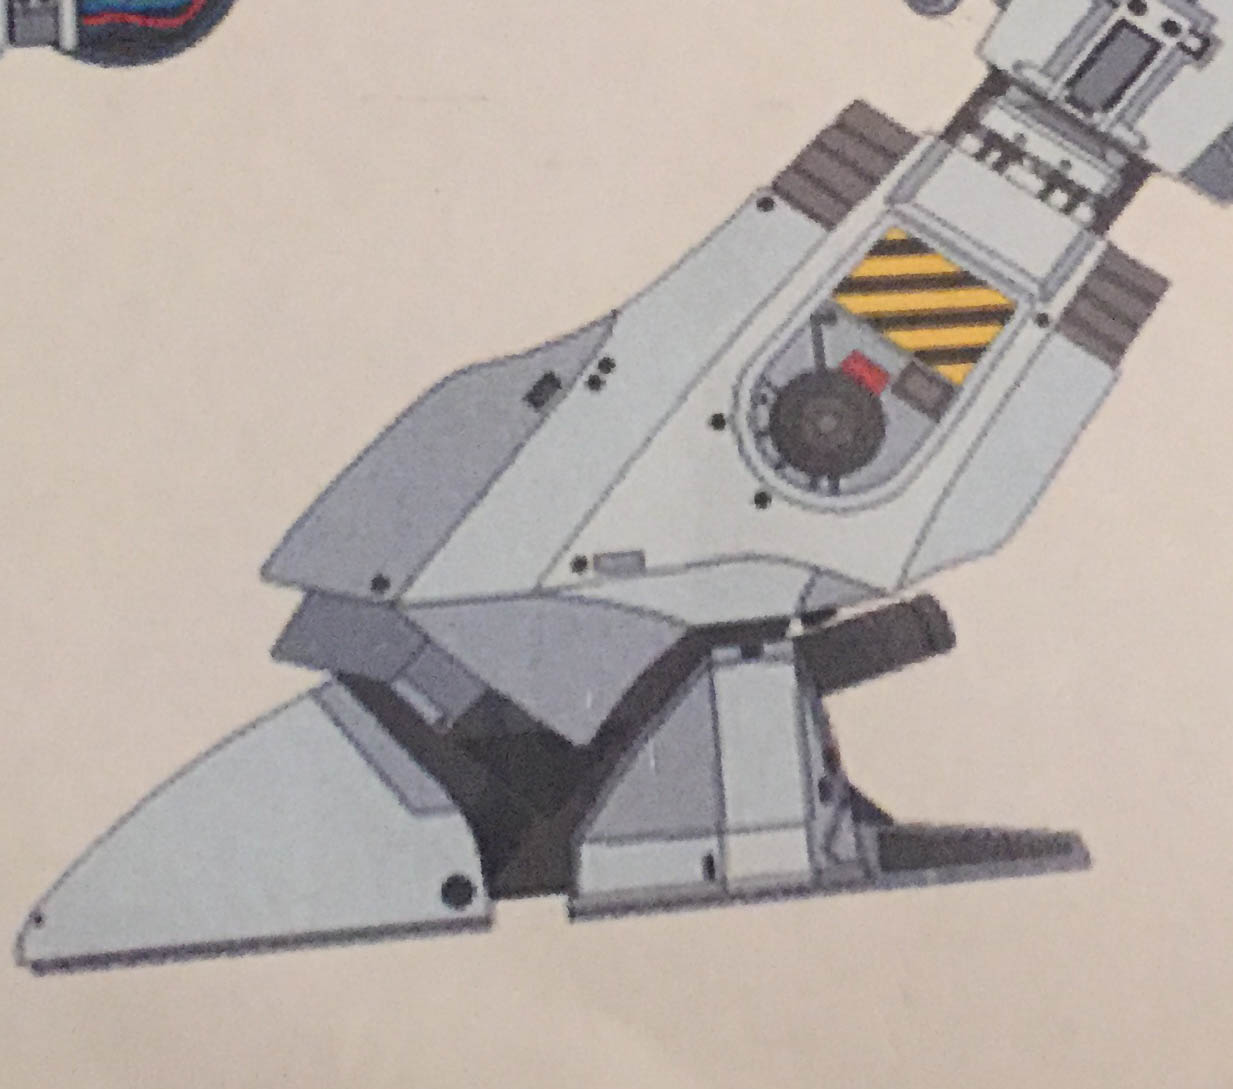
The toe was redesigned a few more times and tried under the leg as you can see below. In the photo with two different sized shins you can see the difference and this would allow me to add some shin detail that would fit the image a little better.
I was happier with the smaller shins and proceeded to create the smaller details on the bottom of the shin that would still go over the toe but look adequate. Once the yellow thin card designs were as I wanted them I transferred them onto thicker corrugated cardboard and I was happy with the result that you can see in the final photo of this batch.
The next job to do on the toes was to fill them with expanding foam but I wanted to do this at the same time as using foam on the other pieces such as the flexi pipe on the elbows and the shins. We’ll come back to this later… But now it’s on to the gun pods.

Guns & Bins
The size of the gun pods had been approximated by studying the video stills and I spent a little while looking for little paper waste baskets or bins in shops such as B&M or the Range. I only wanted cheap plastic bins that I could cover but the shape of bins didn’t fit with the shape of the gun pods on ED-209’s arms. It would come down to making them from yet more cardboard, fortunately I still had plenty left…
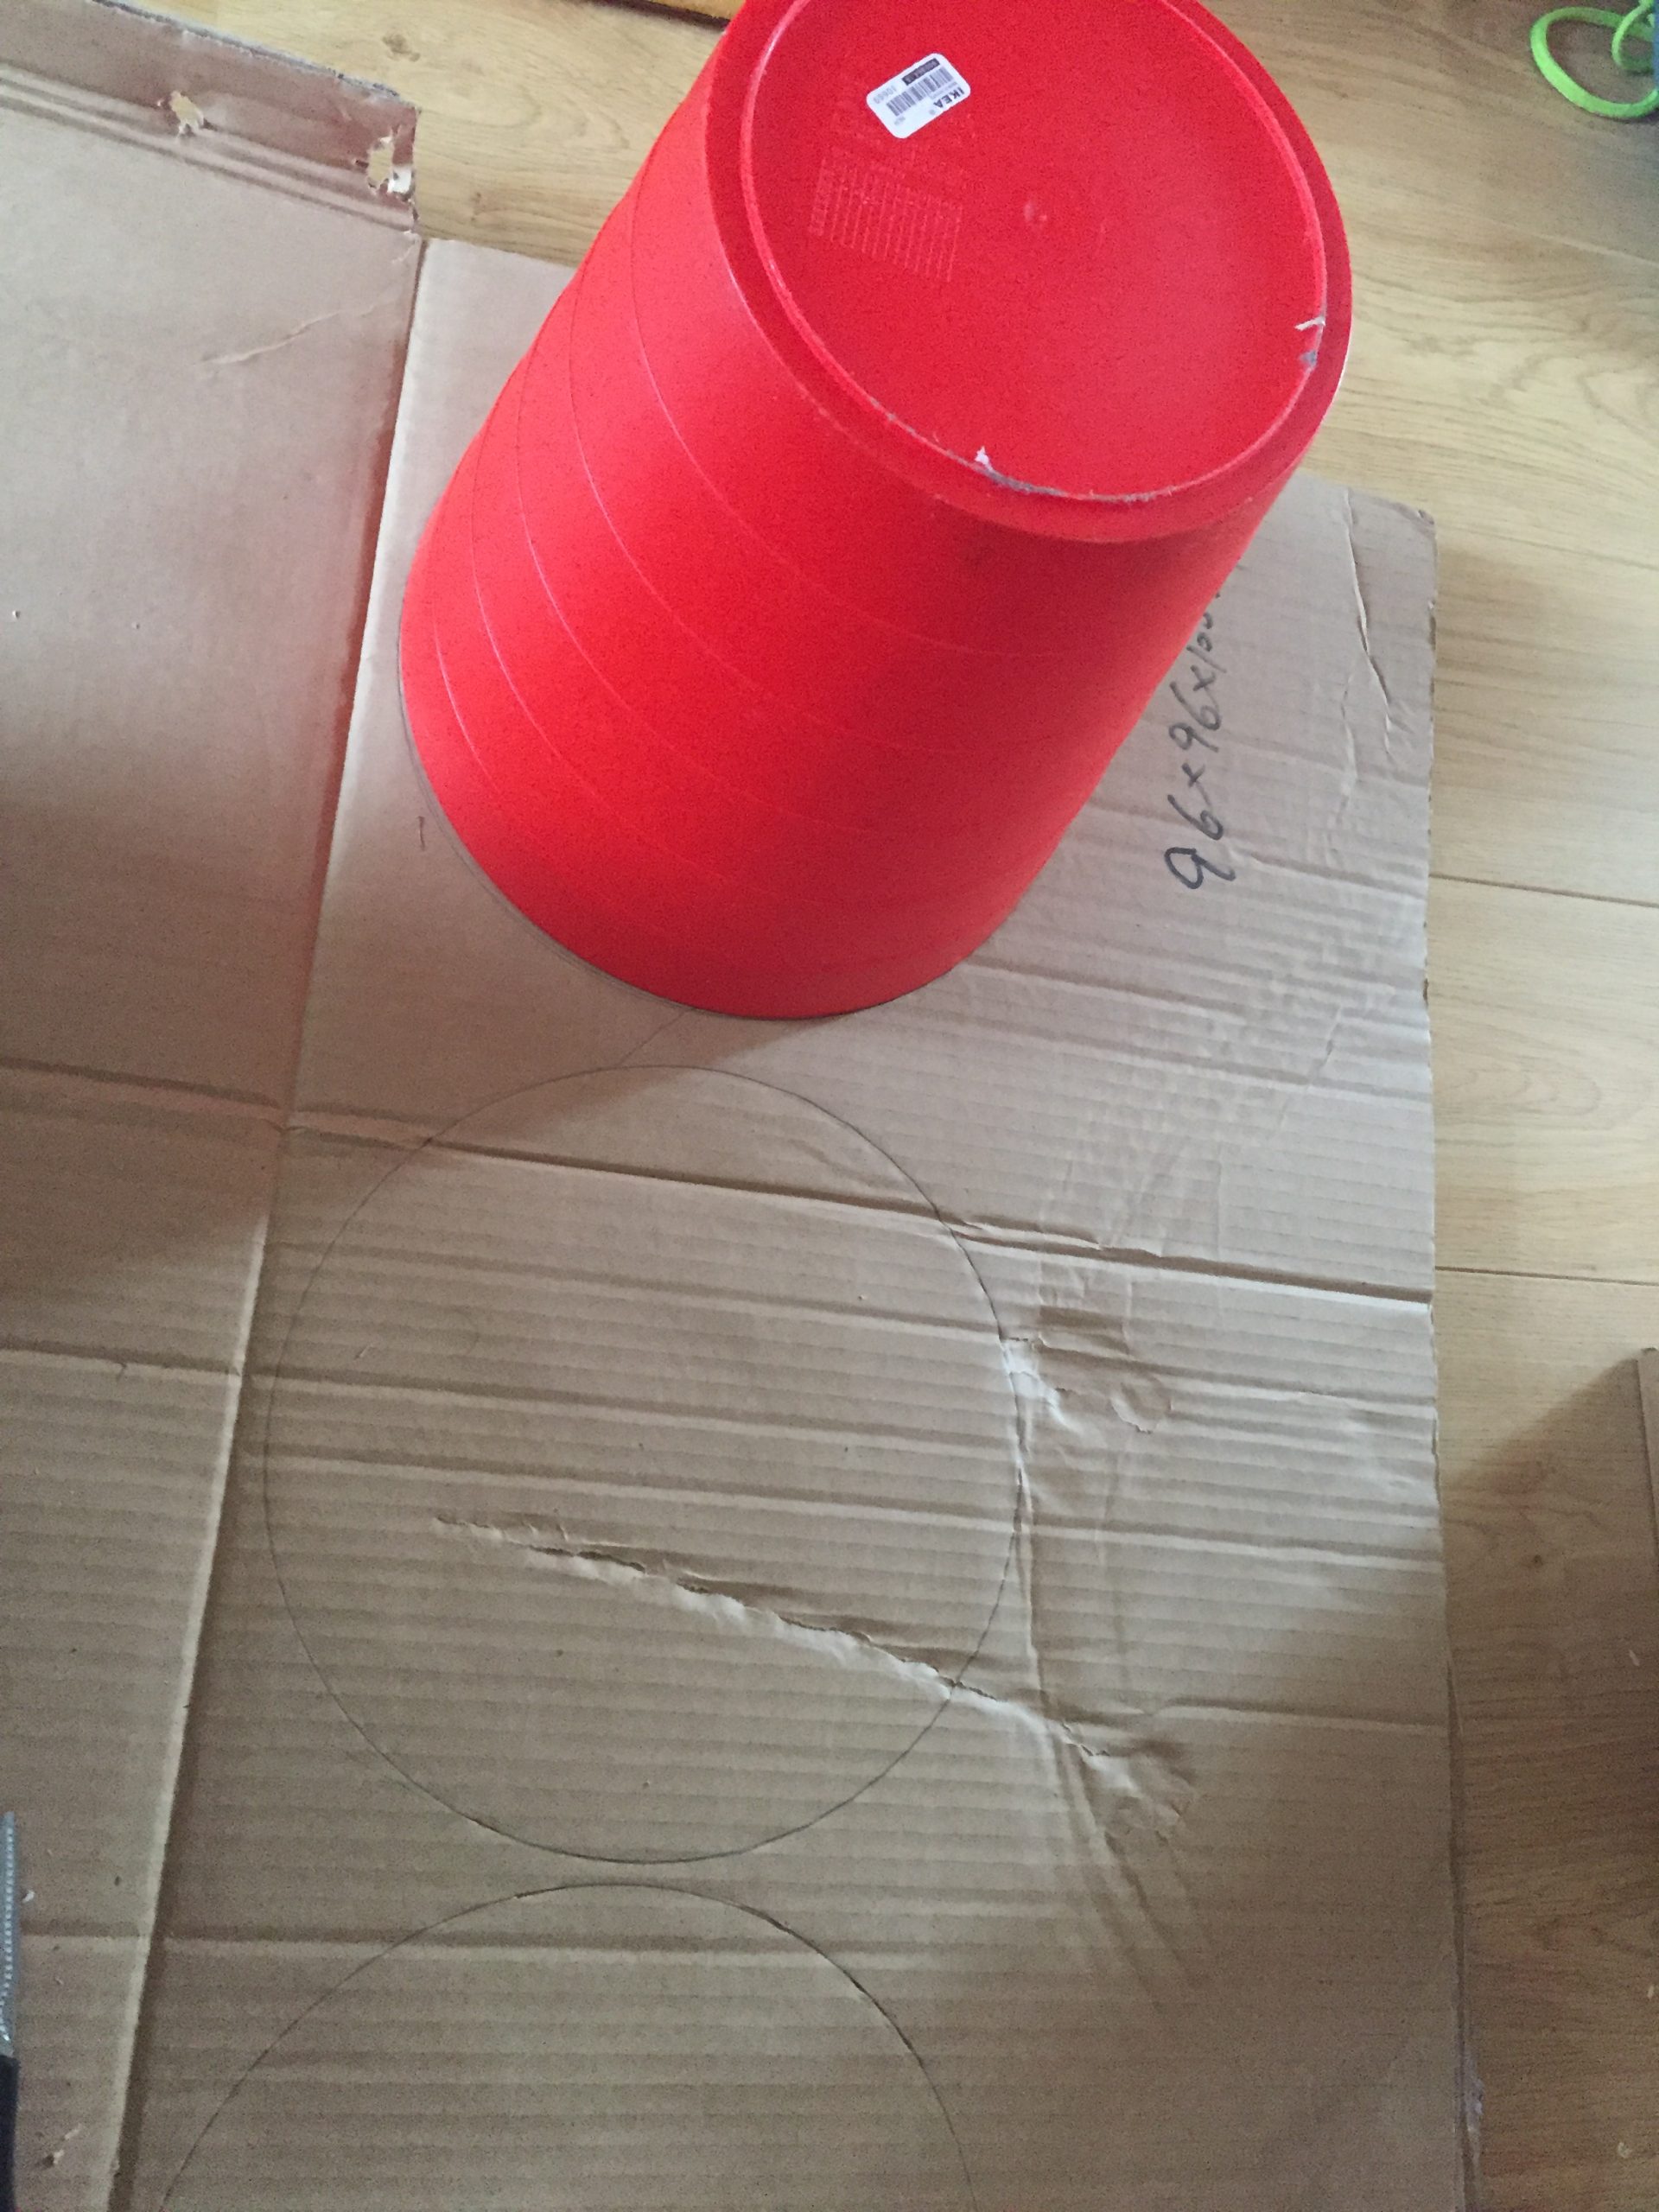
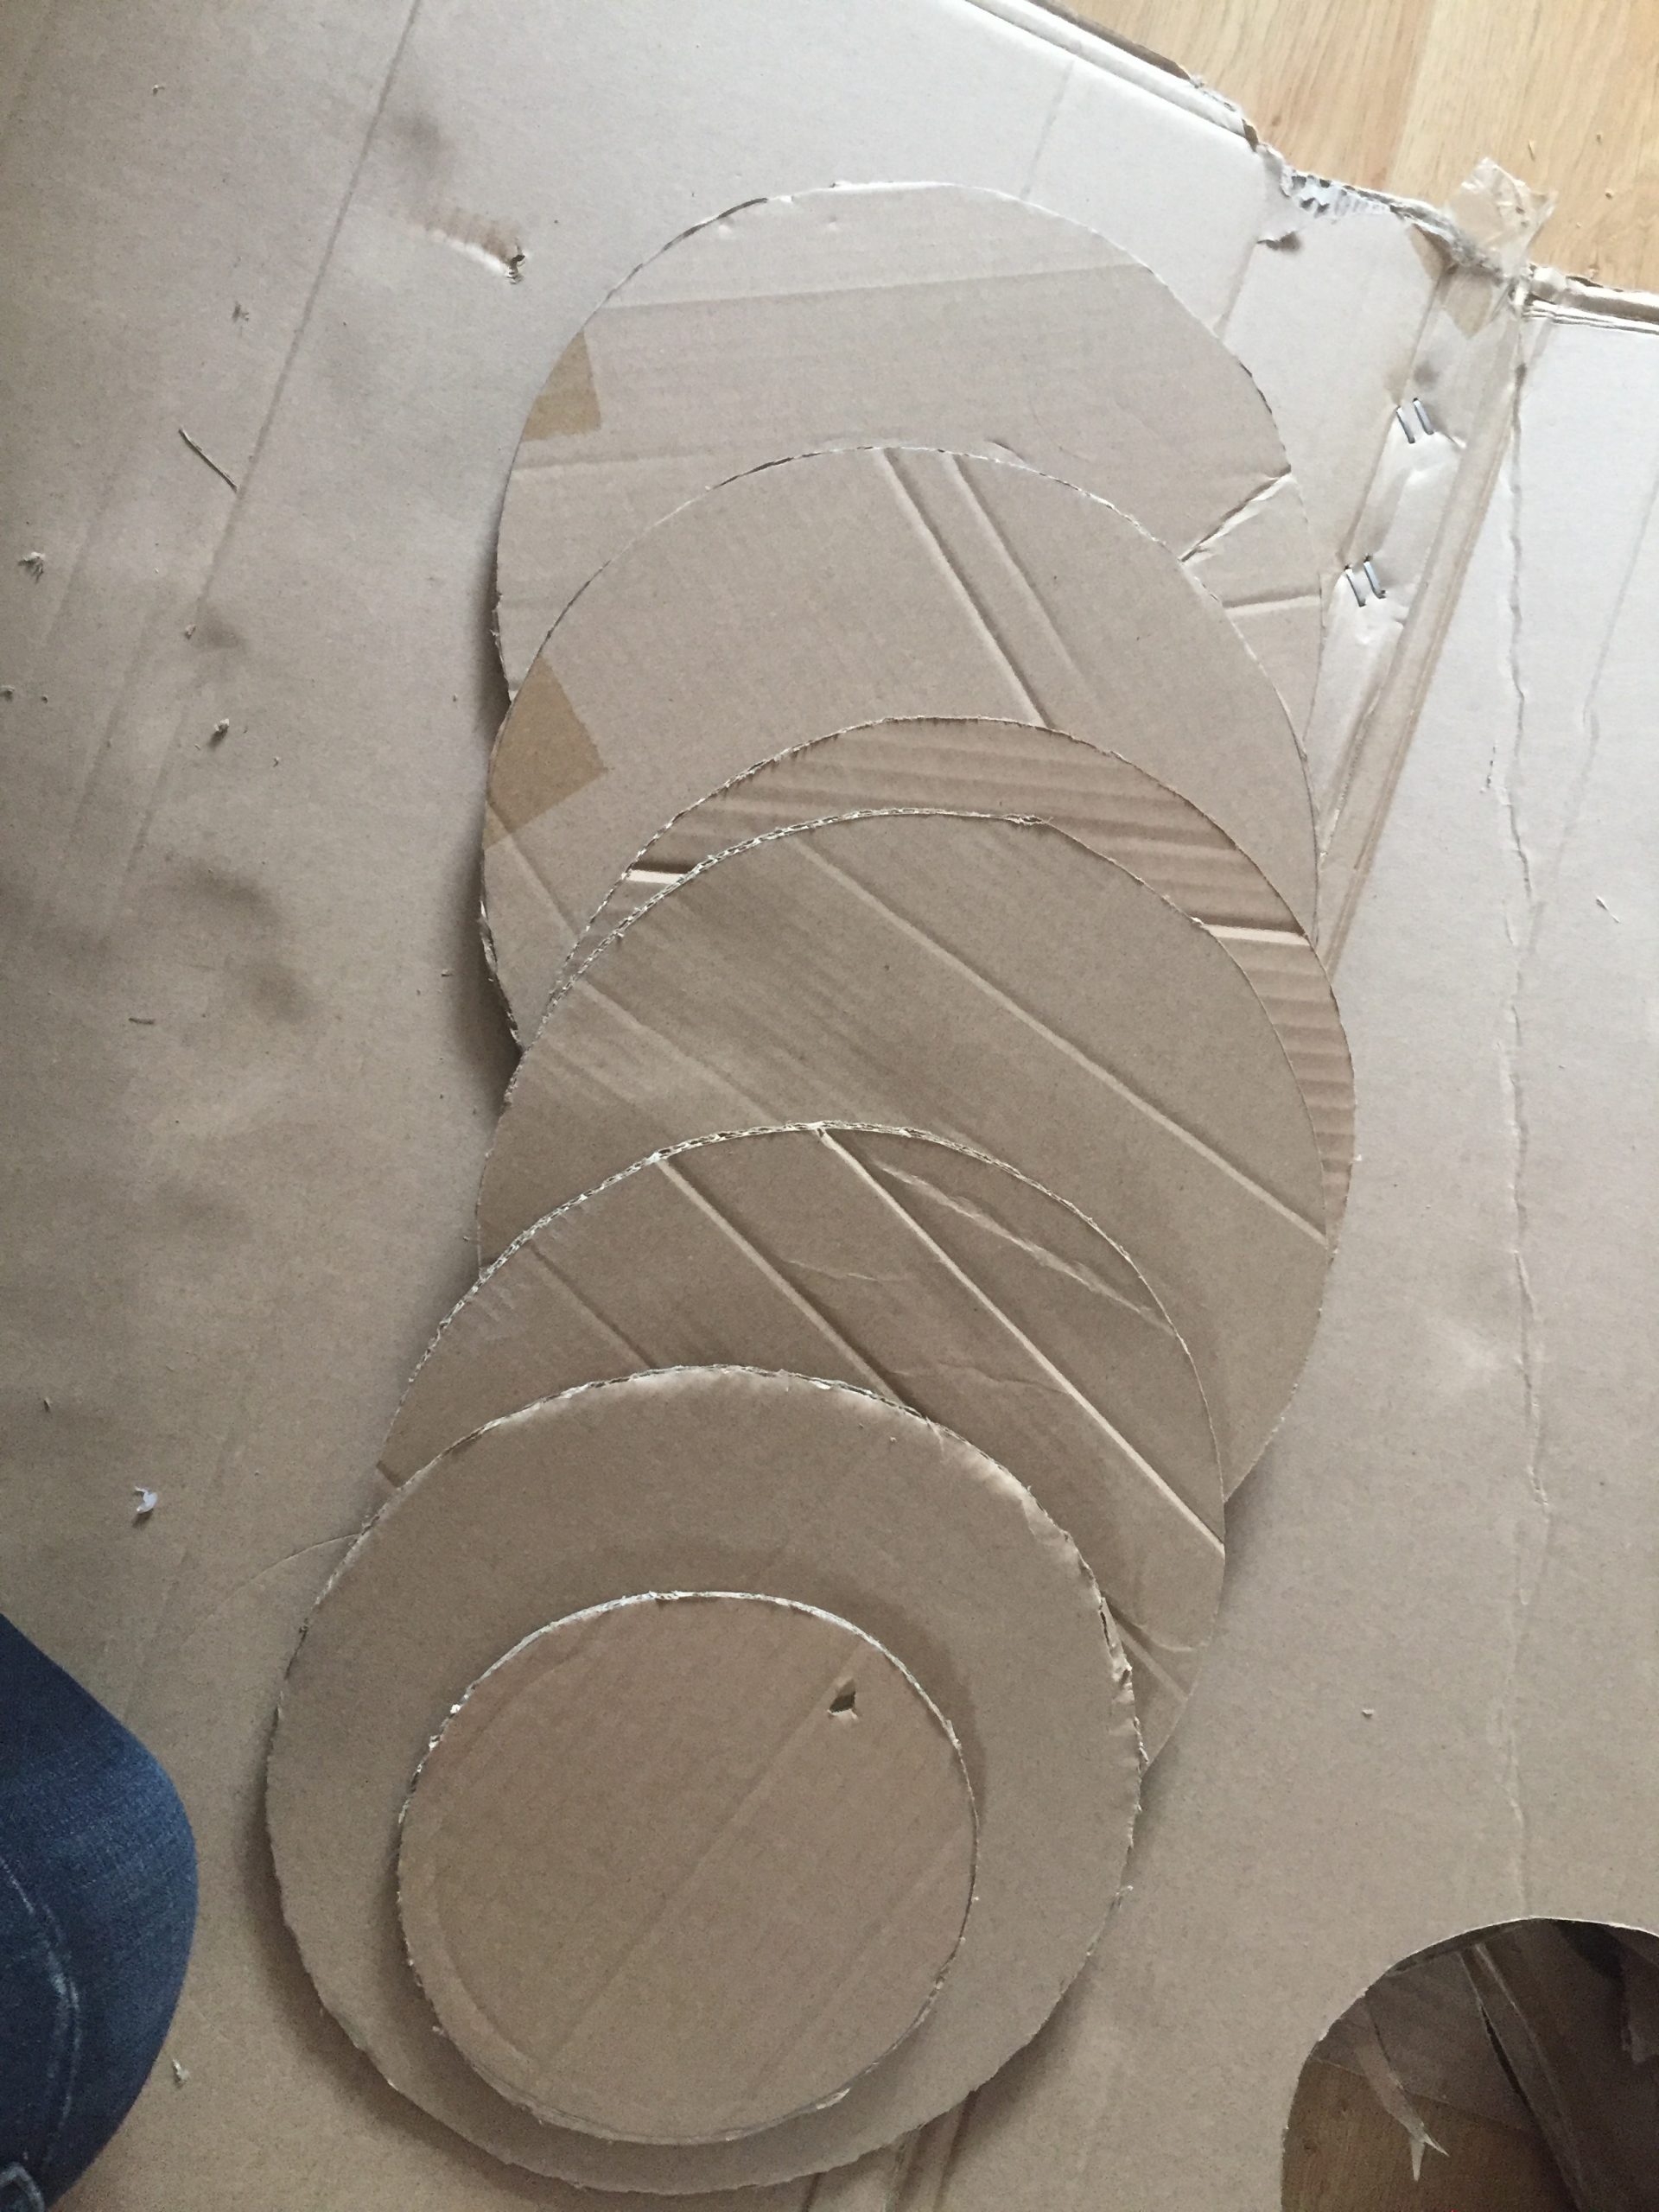
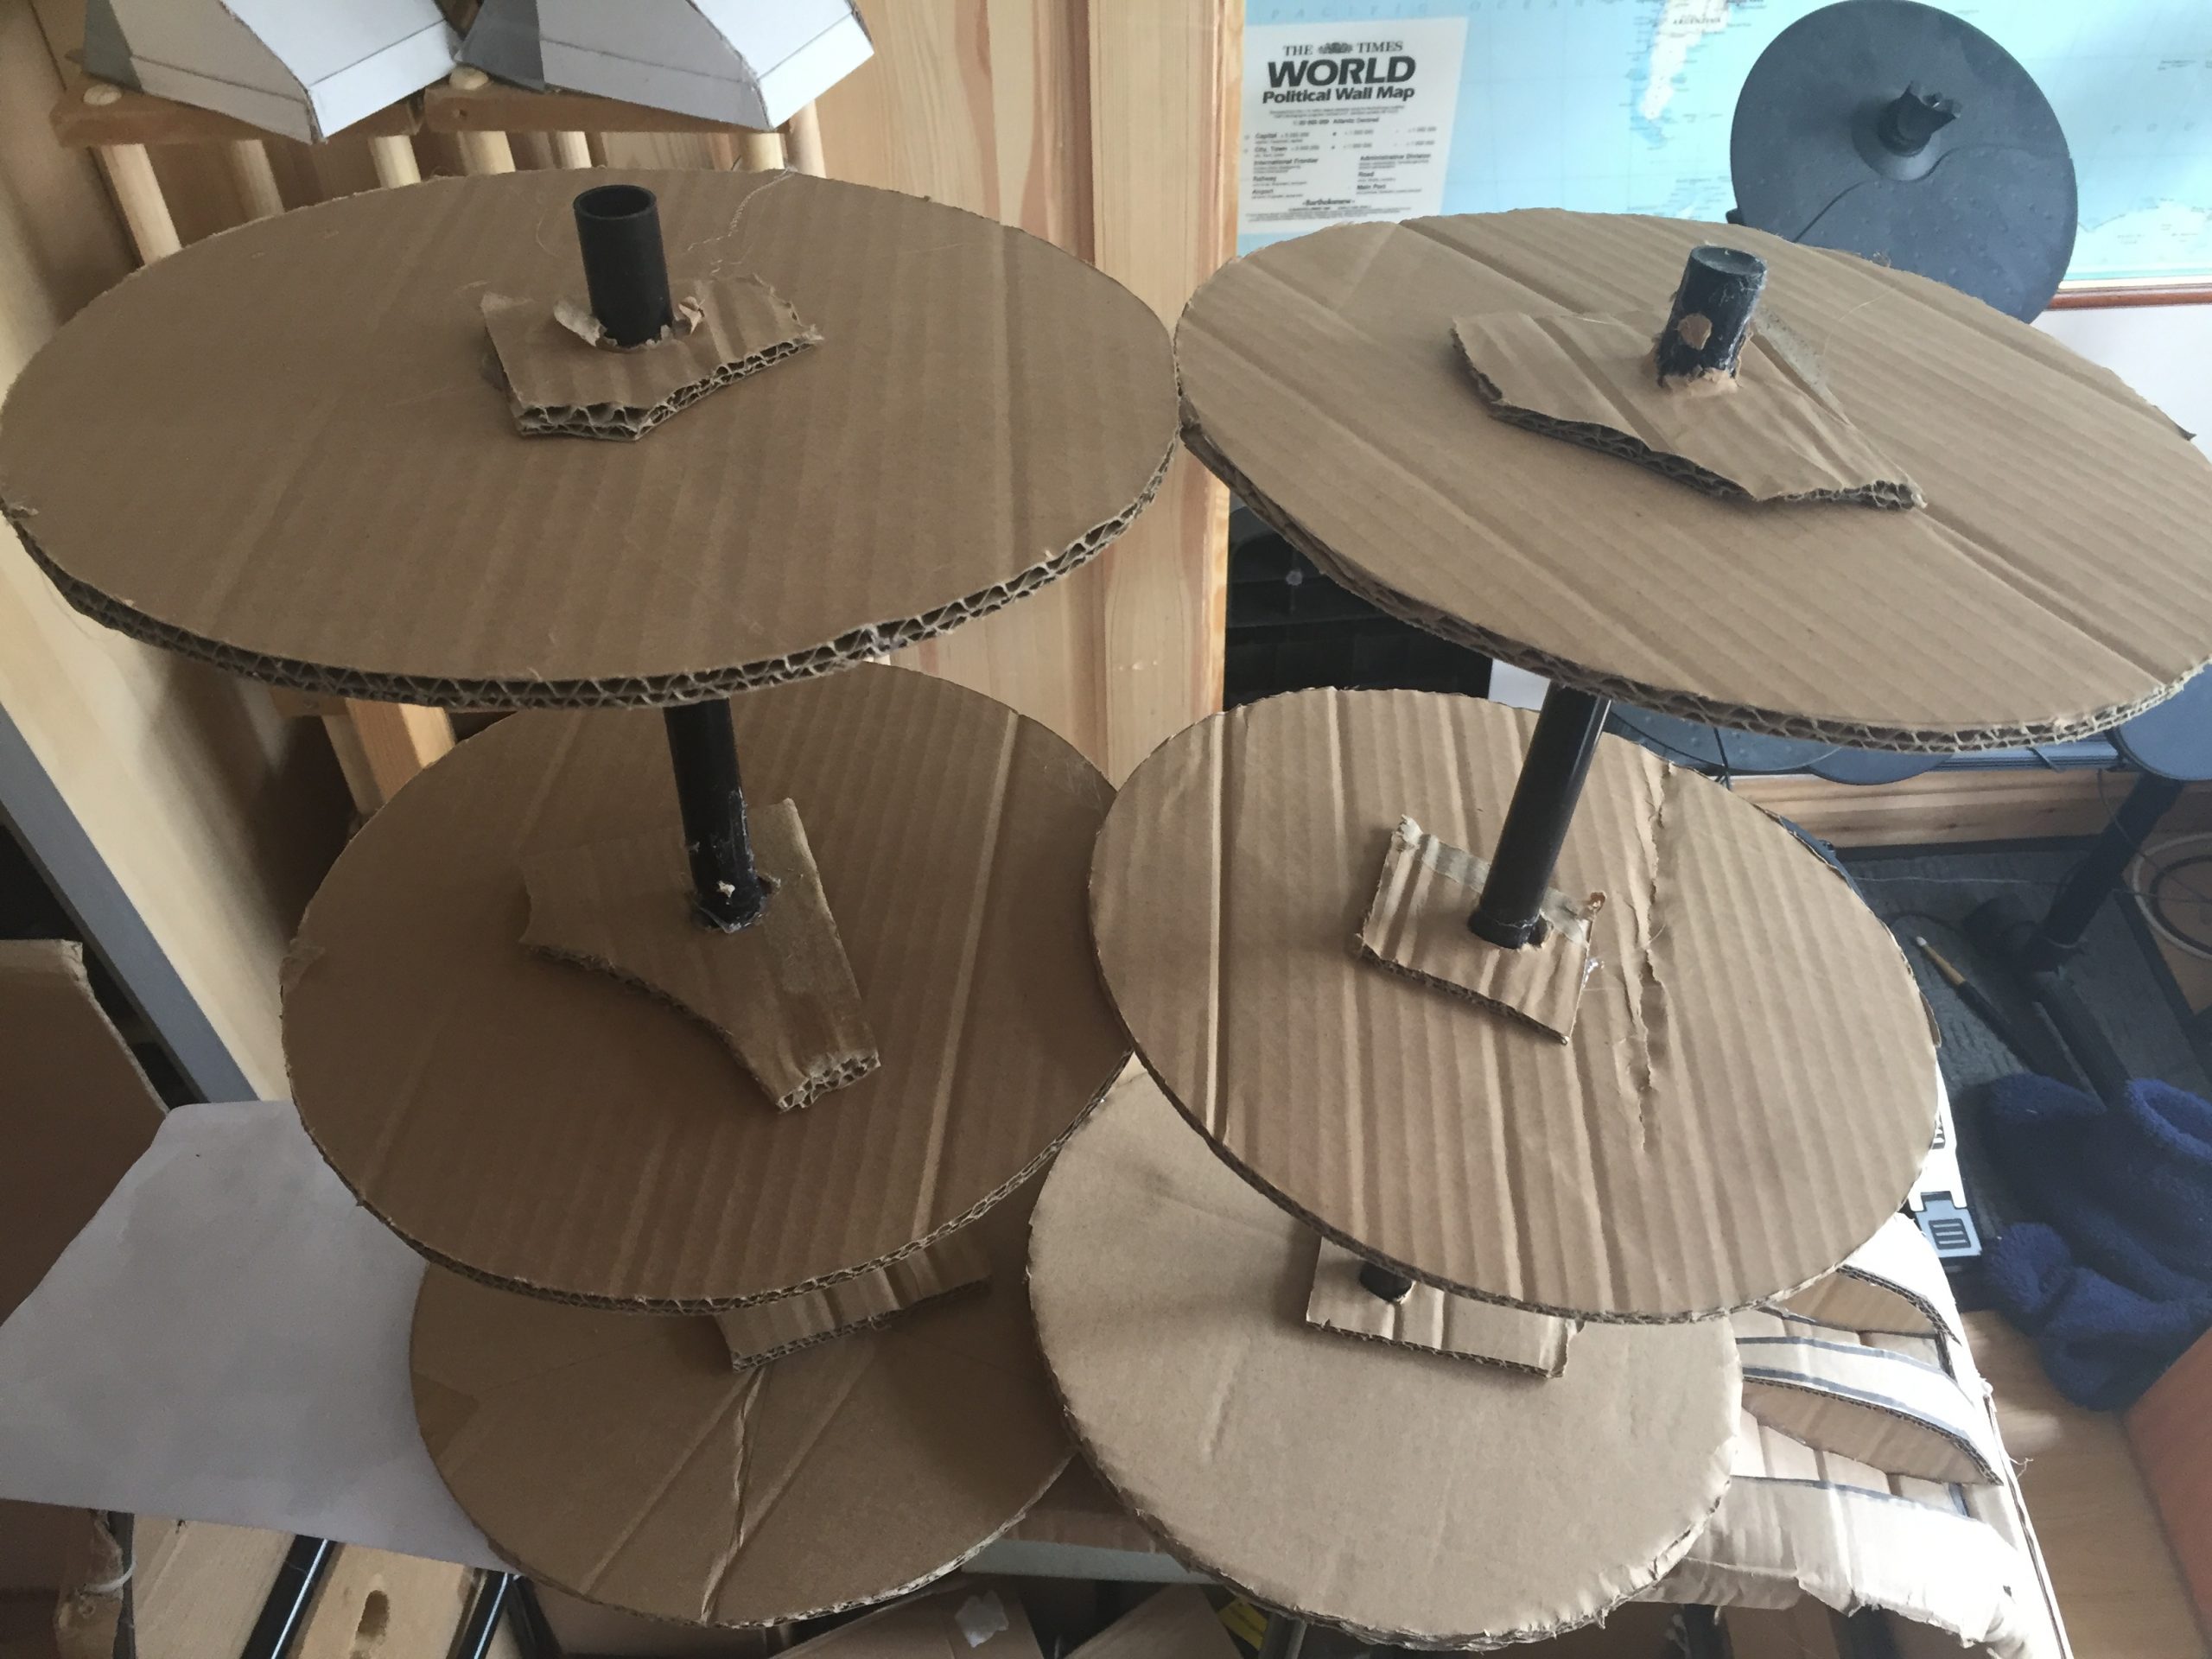
I used the waste bin in the room to draw around as it was a good size for the job. I’d cut three large discs for each gun and one smaller disc for the fronts that would have the gun barrels mounted on them. I cut them all out using scissors or a stanley knife and then poked a skewer through the centres of all discs before cutting 22mm holes through each, using a hole saw. Once these were all prepared it was time to mount them onto a short length of 20mm plastic conduit that I could later fix to the elbow joints. The discs were a bit wobbly so I cut some smaller bits of card and hot glued one on either side of each disk to add a bit of strength.
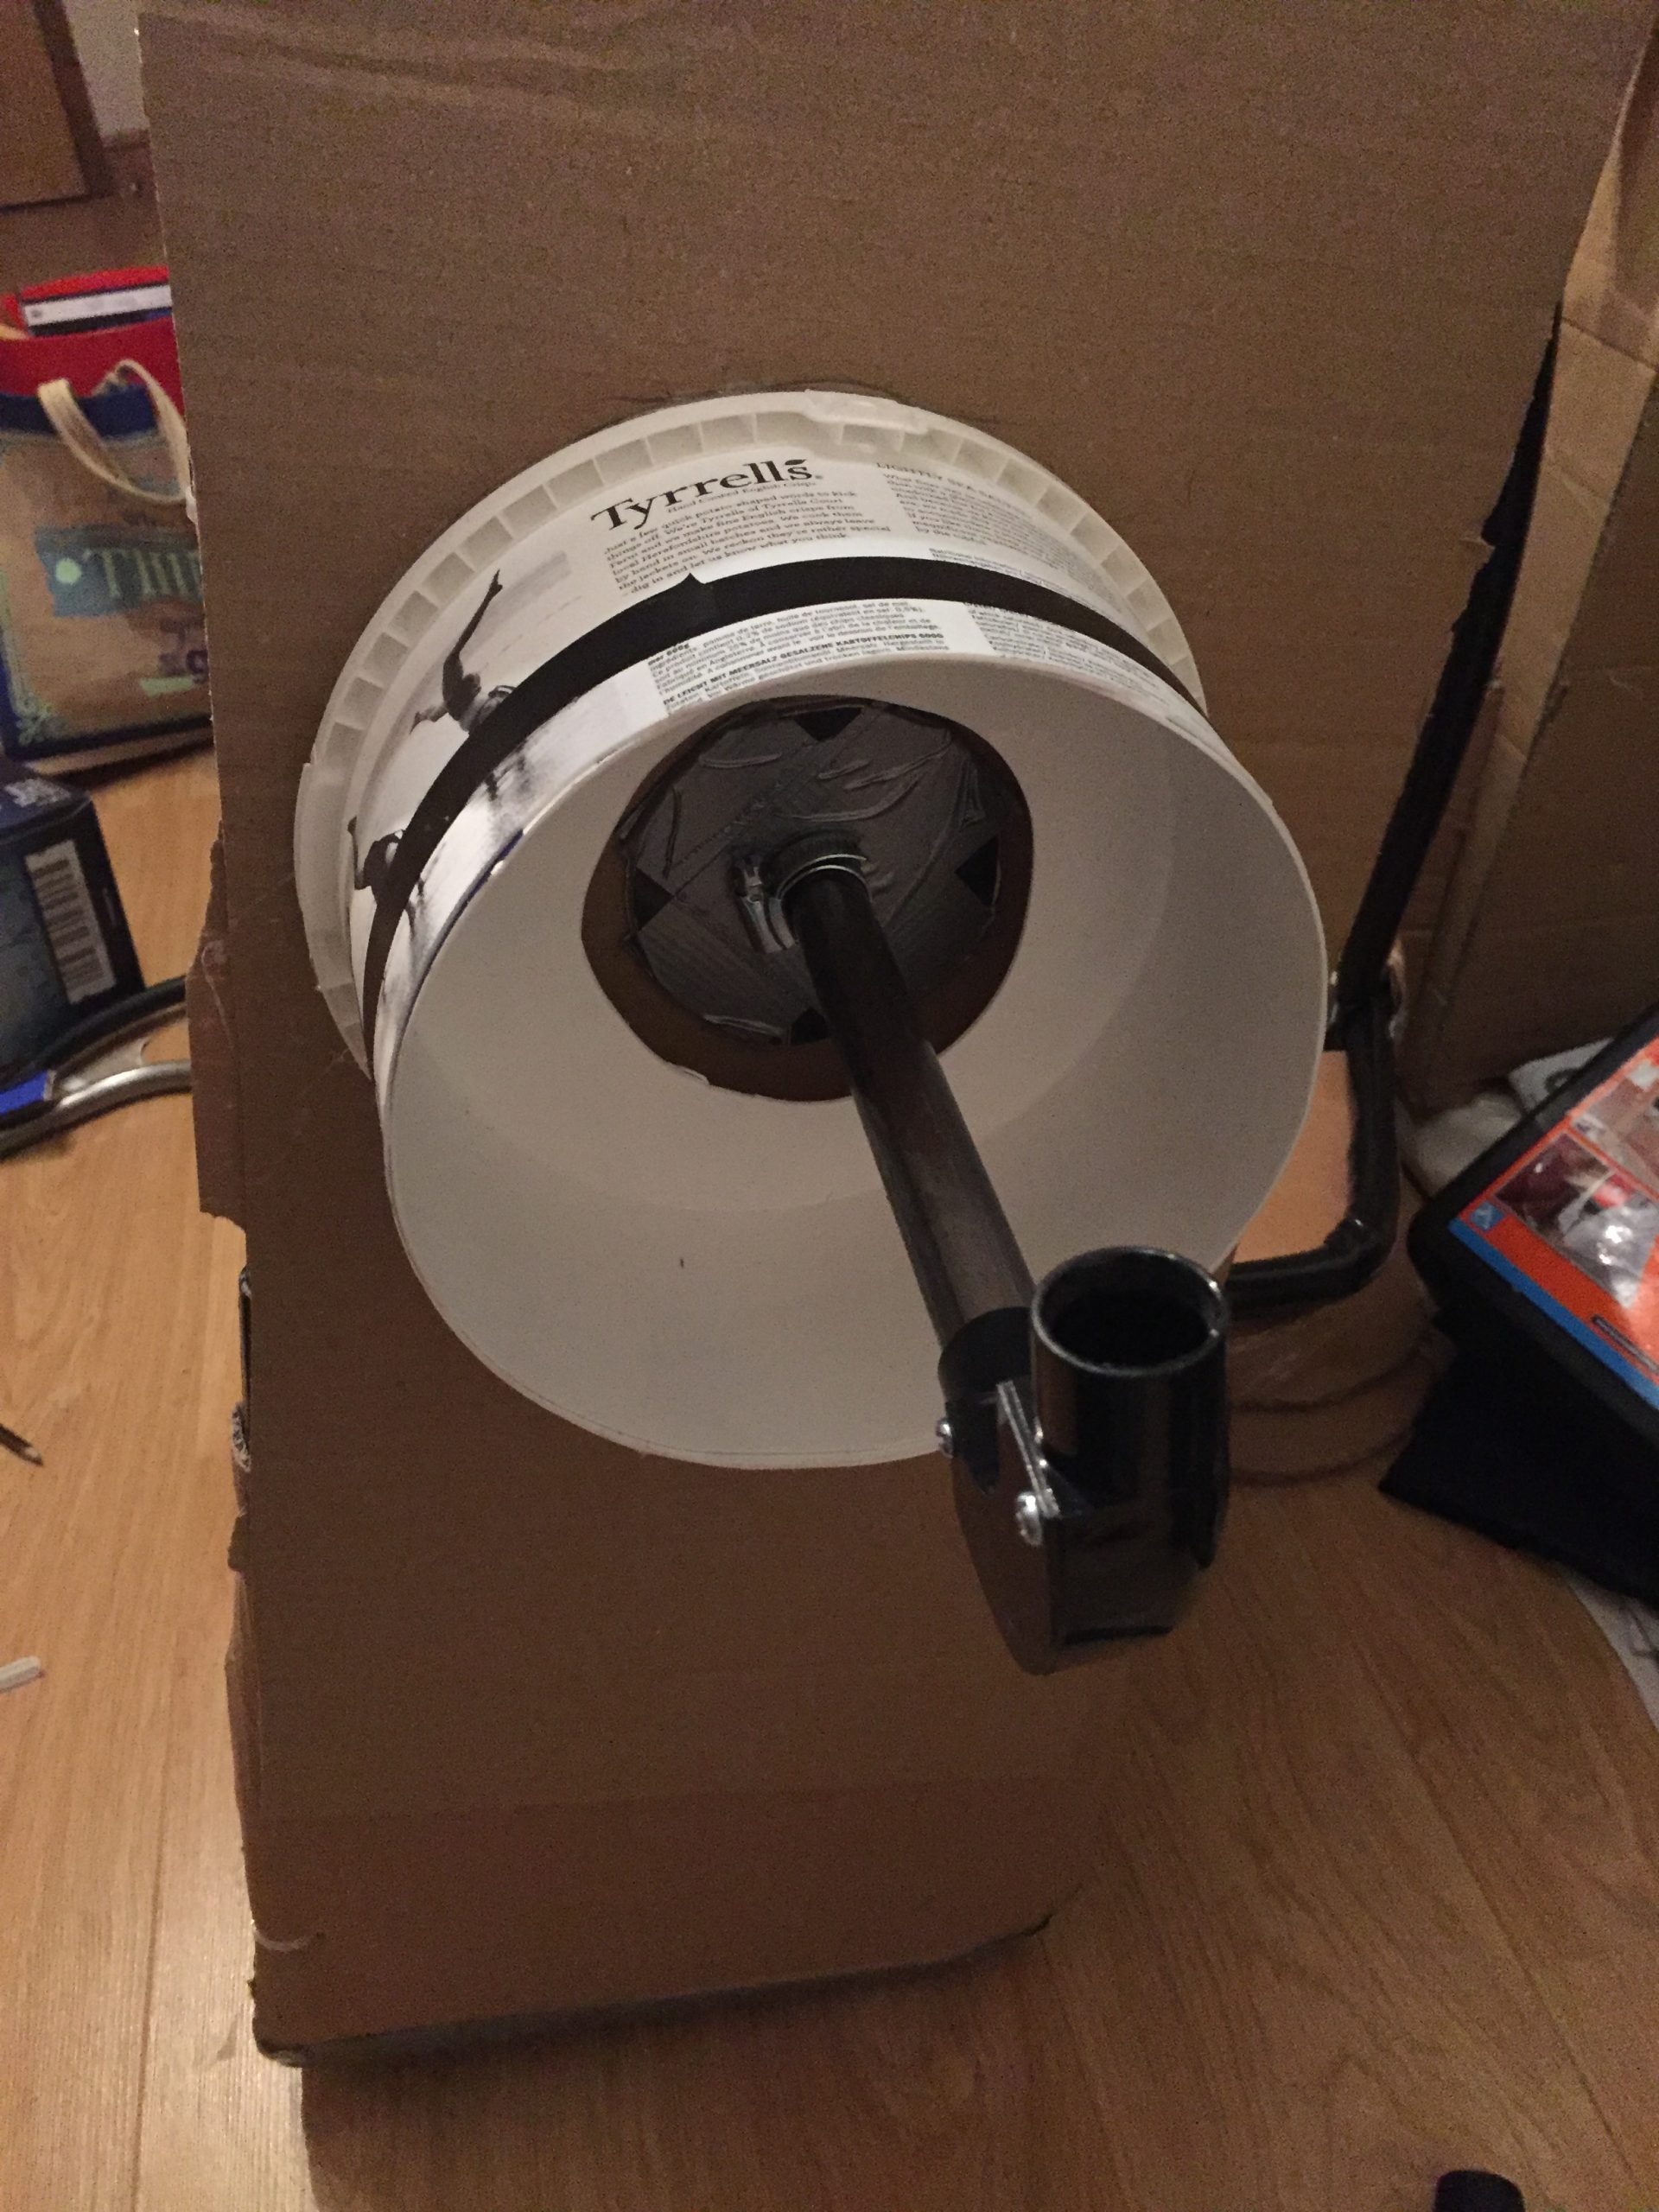
With the discs mounted on the pipe it was time to give them their outer surface.Again, corrugated cardboard was used and I rolled it up tightly to make it super flexible and mouldable to the contour of the discs. Hot glue was used again to glue the edges of each diss, in sections and press down onto the roll of card. An hour or so later the gun pod structures were fairly solid. Some reinforcement around the edges was required to make them more robust. The three circles in their skin were then tried onto the conduit elbow that went through the body wall and was controlled as a handle inside.
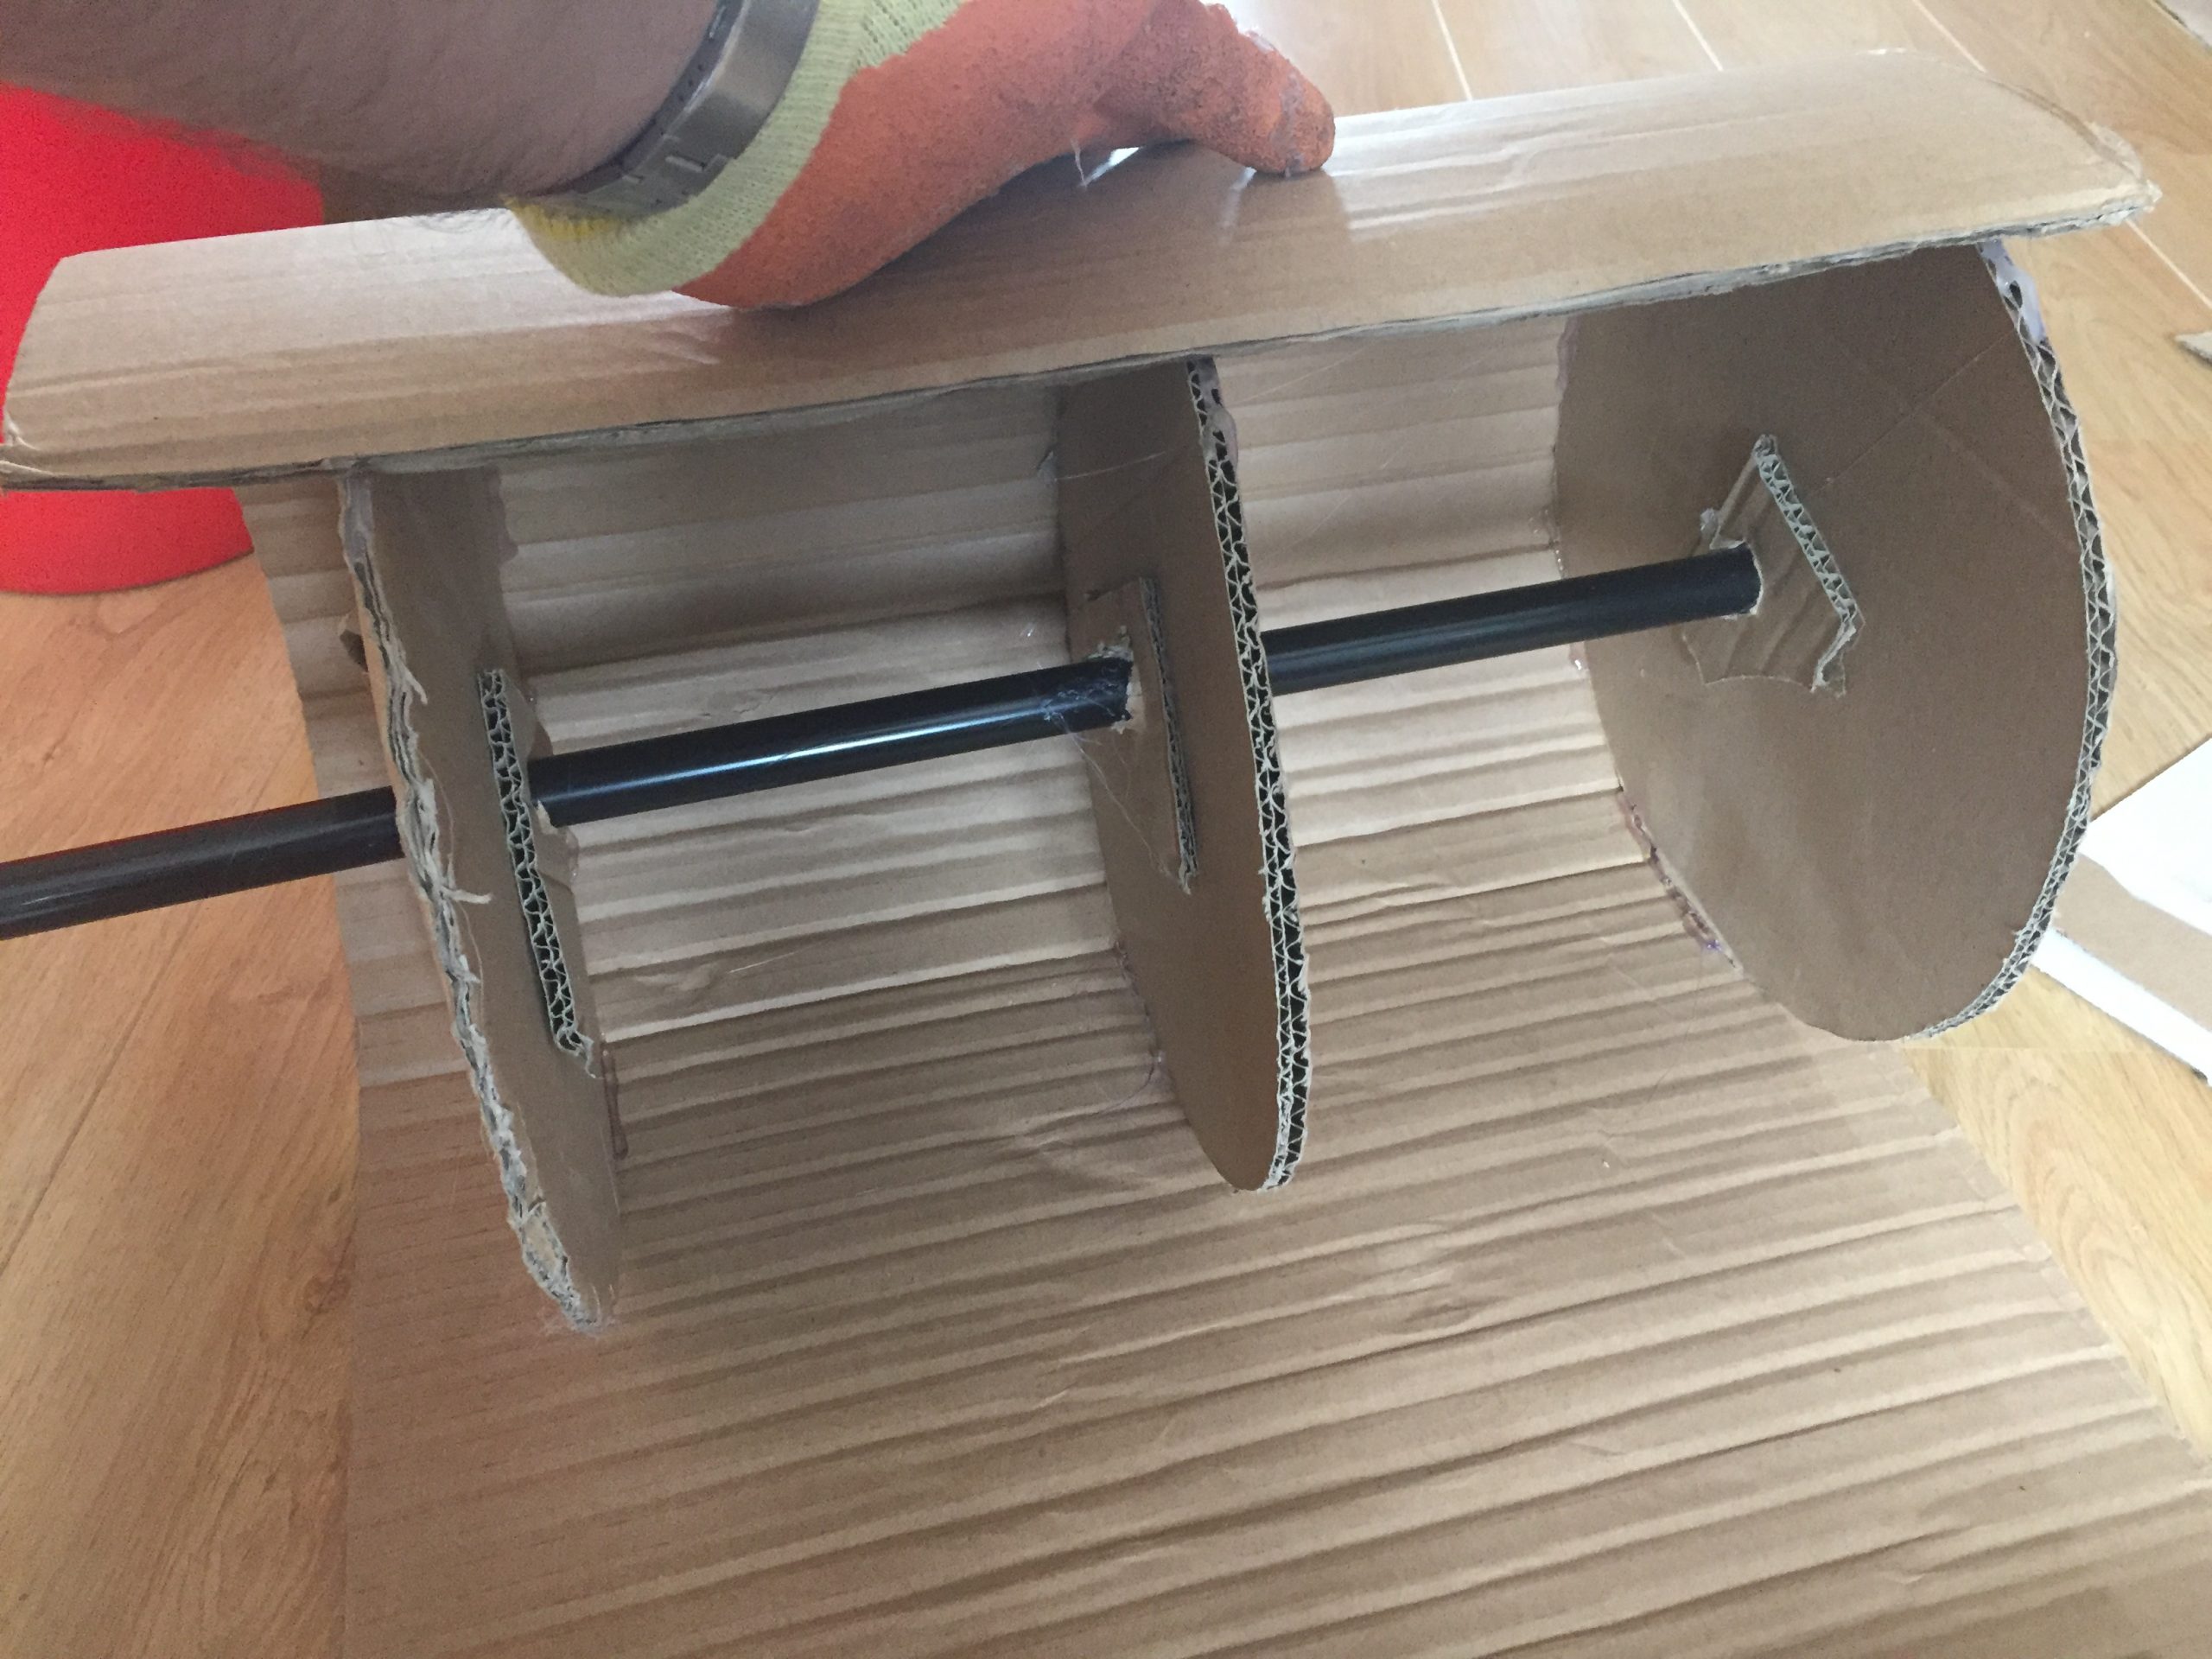
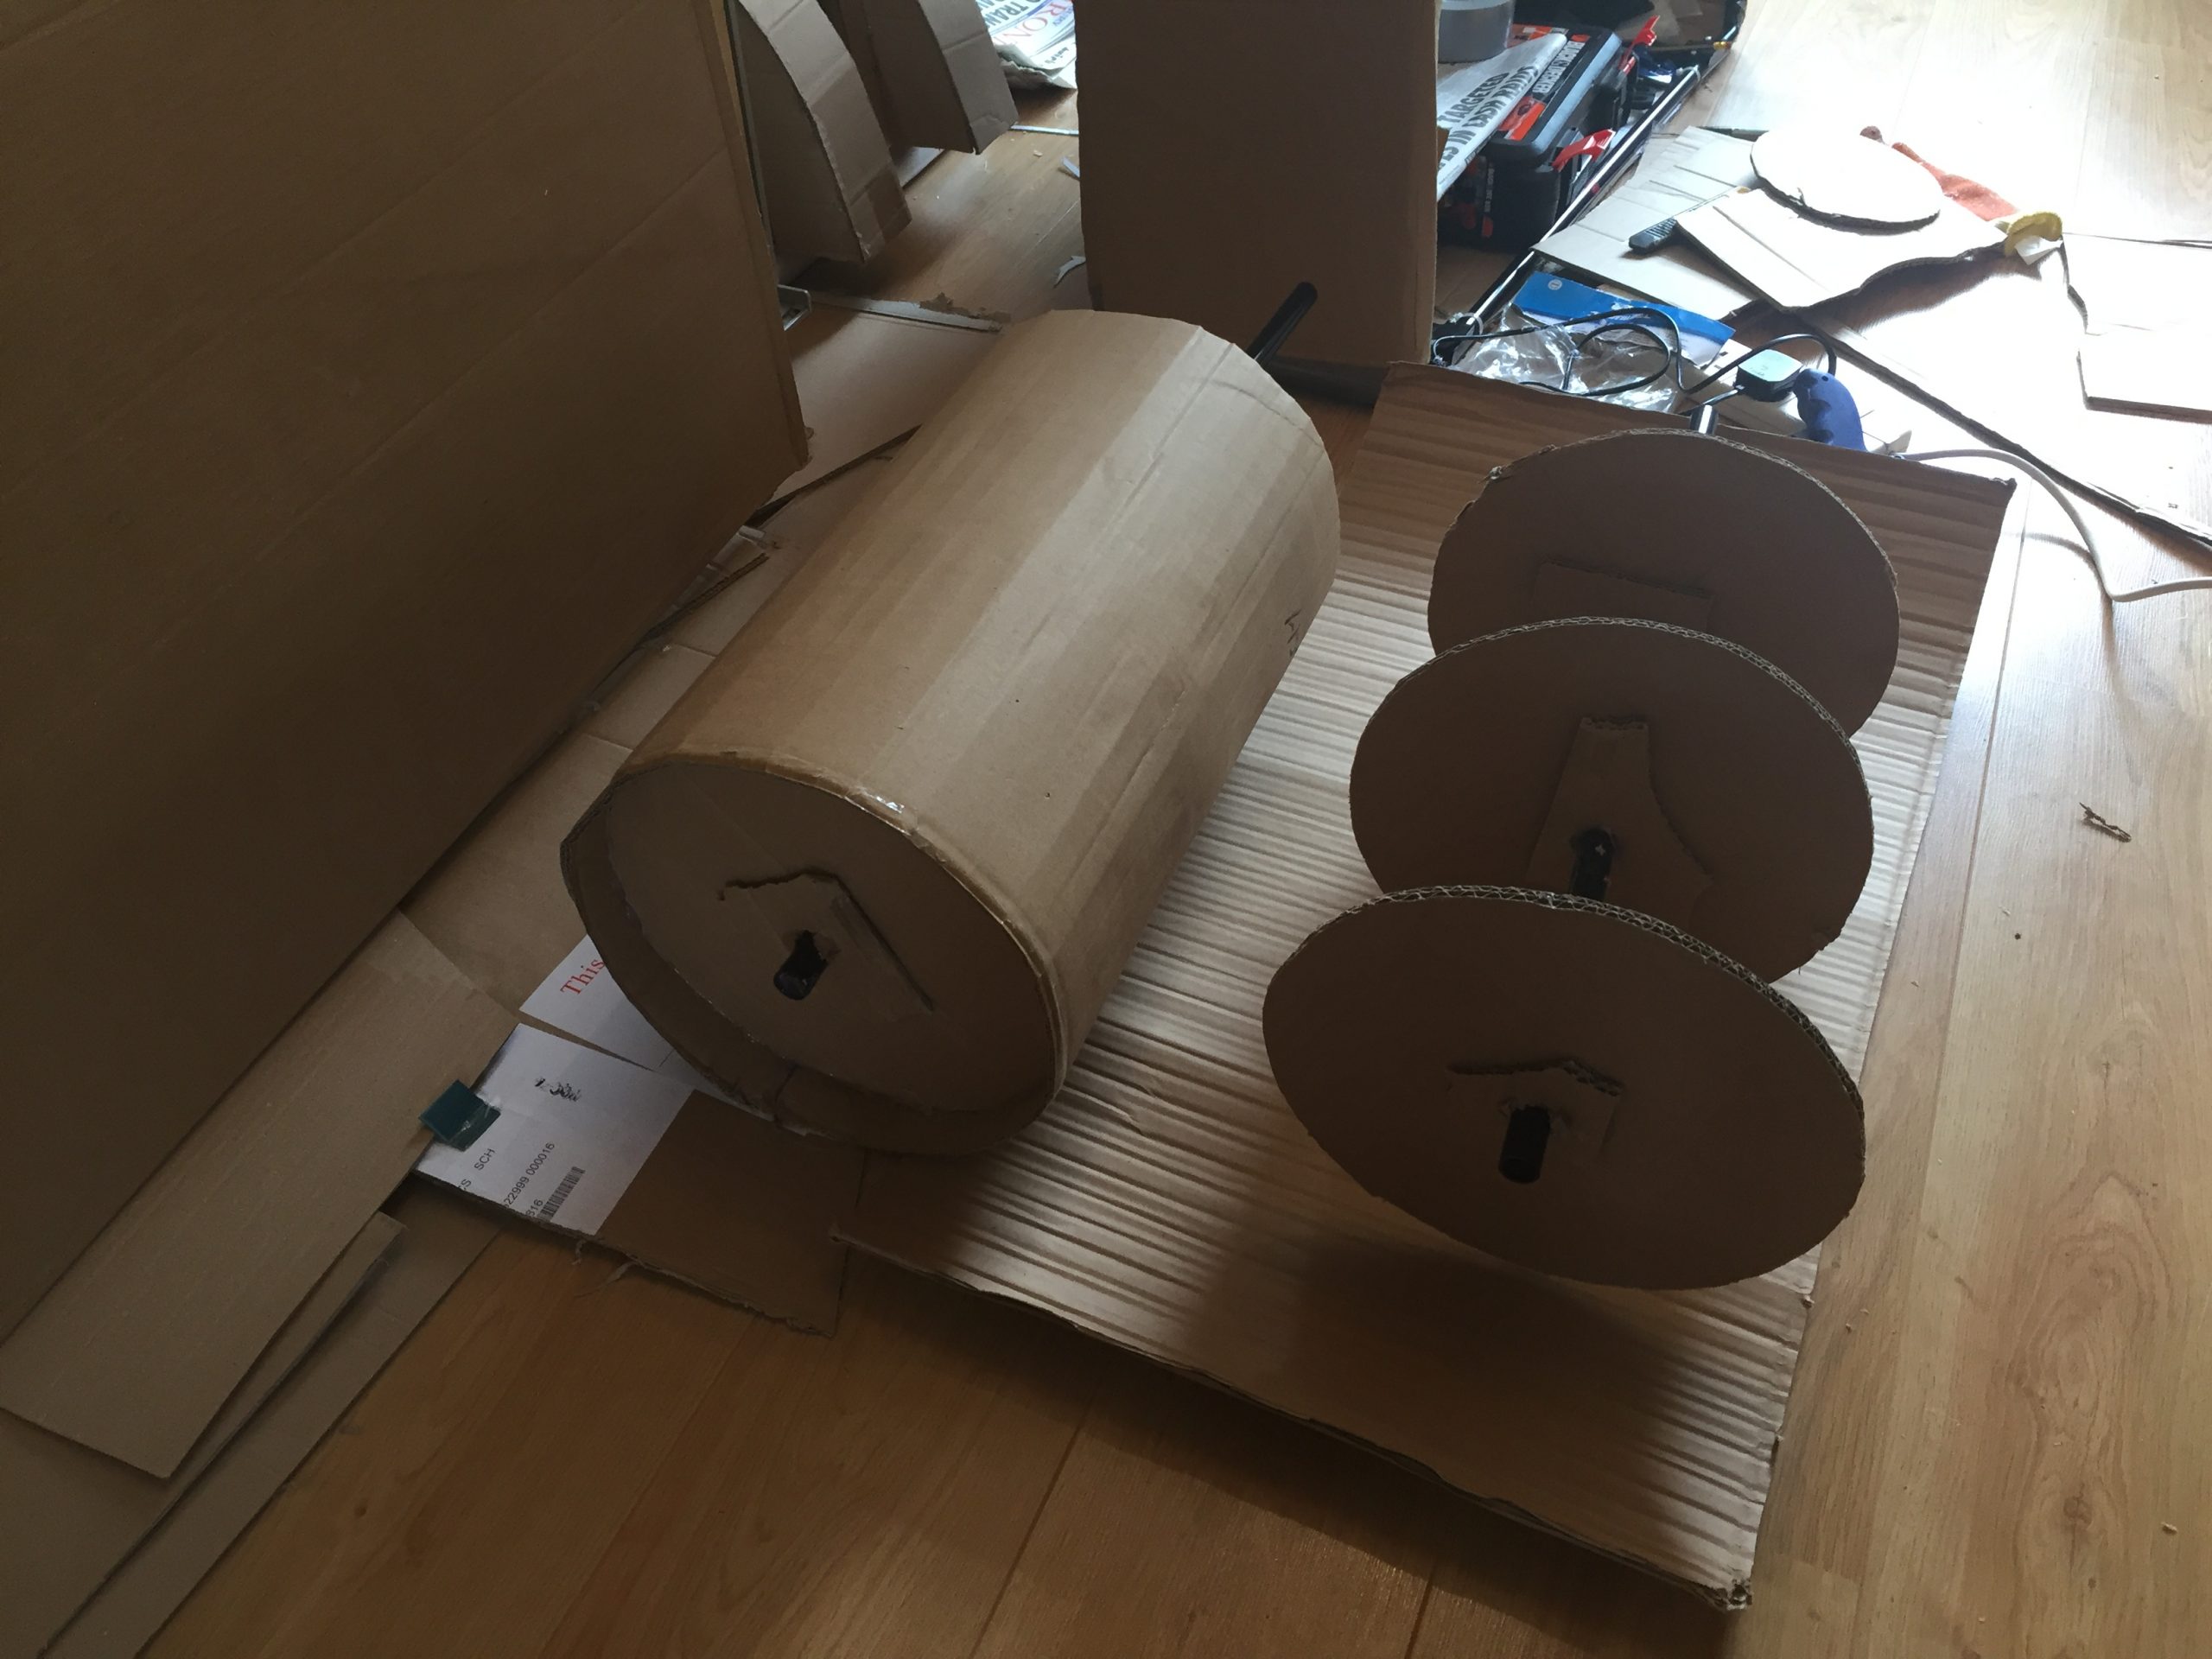
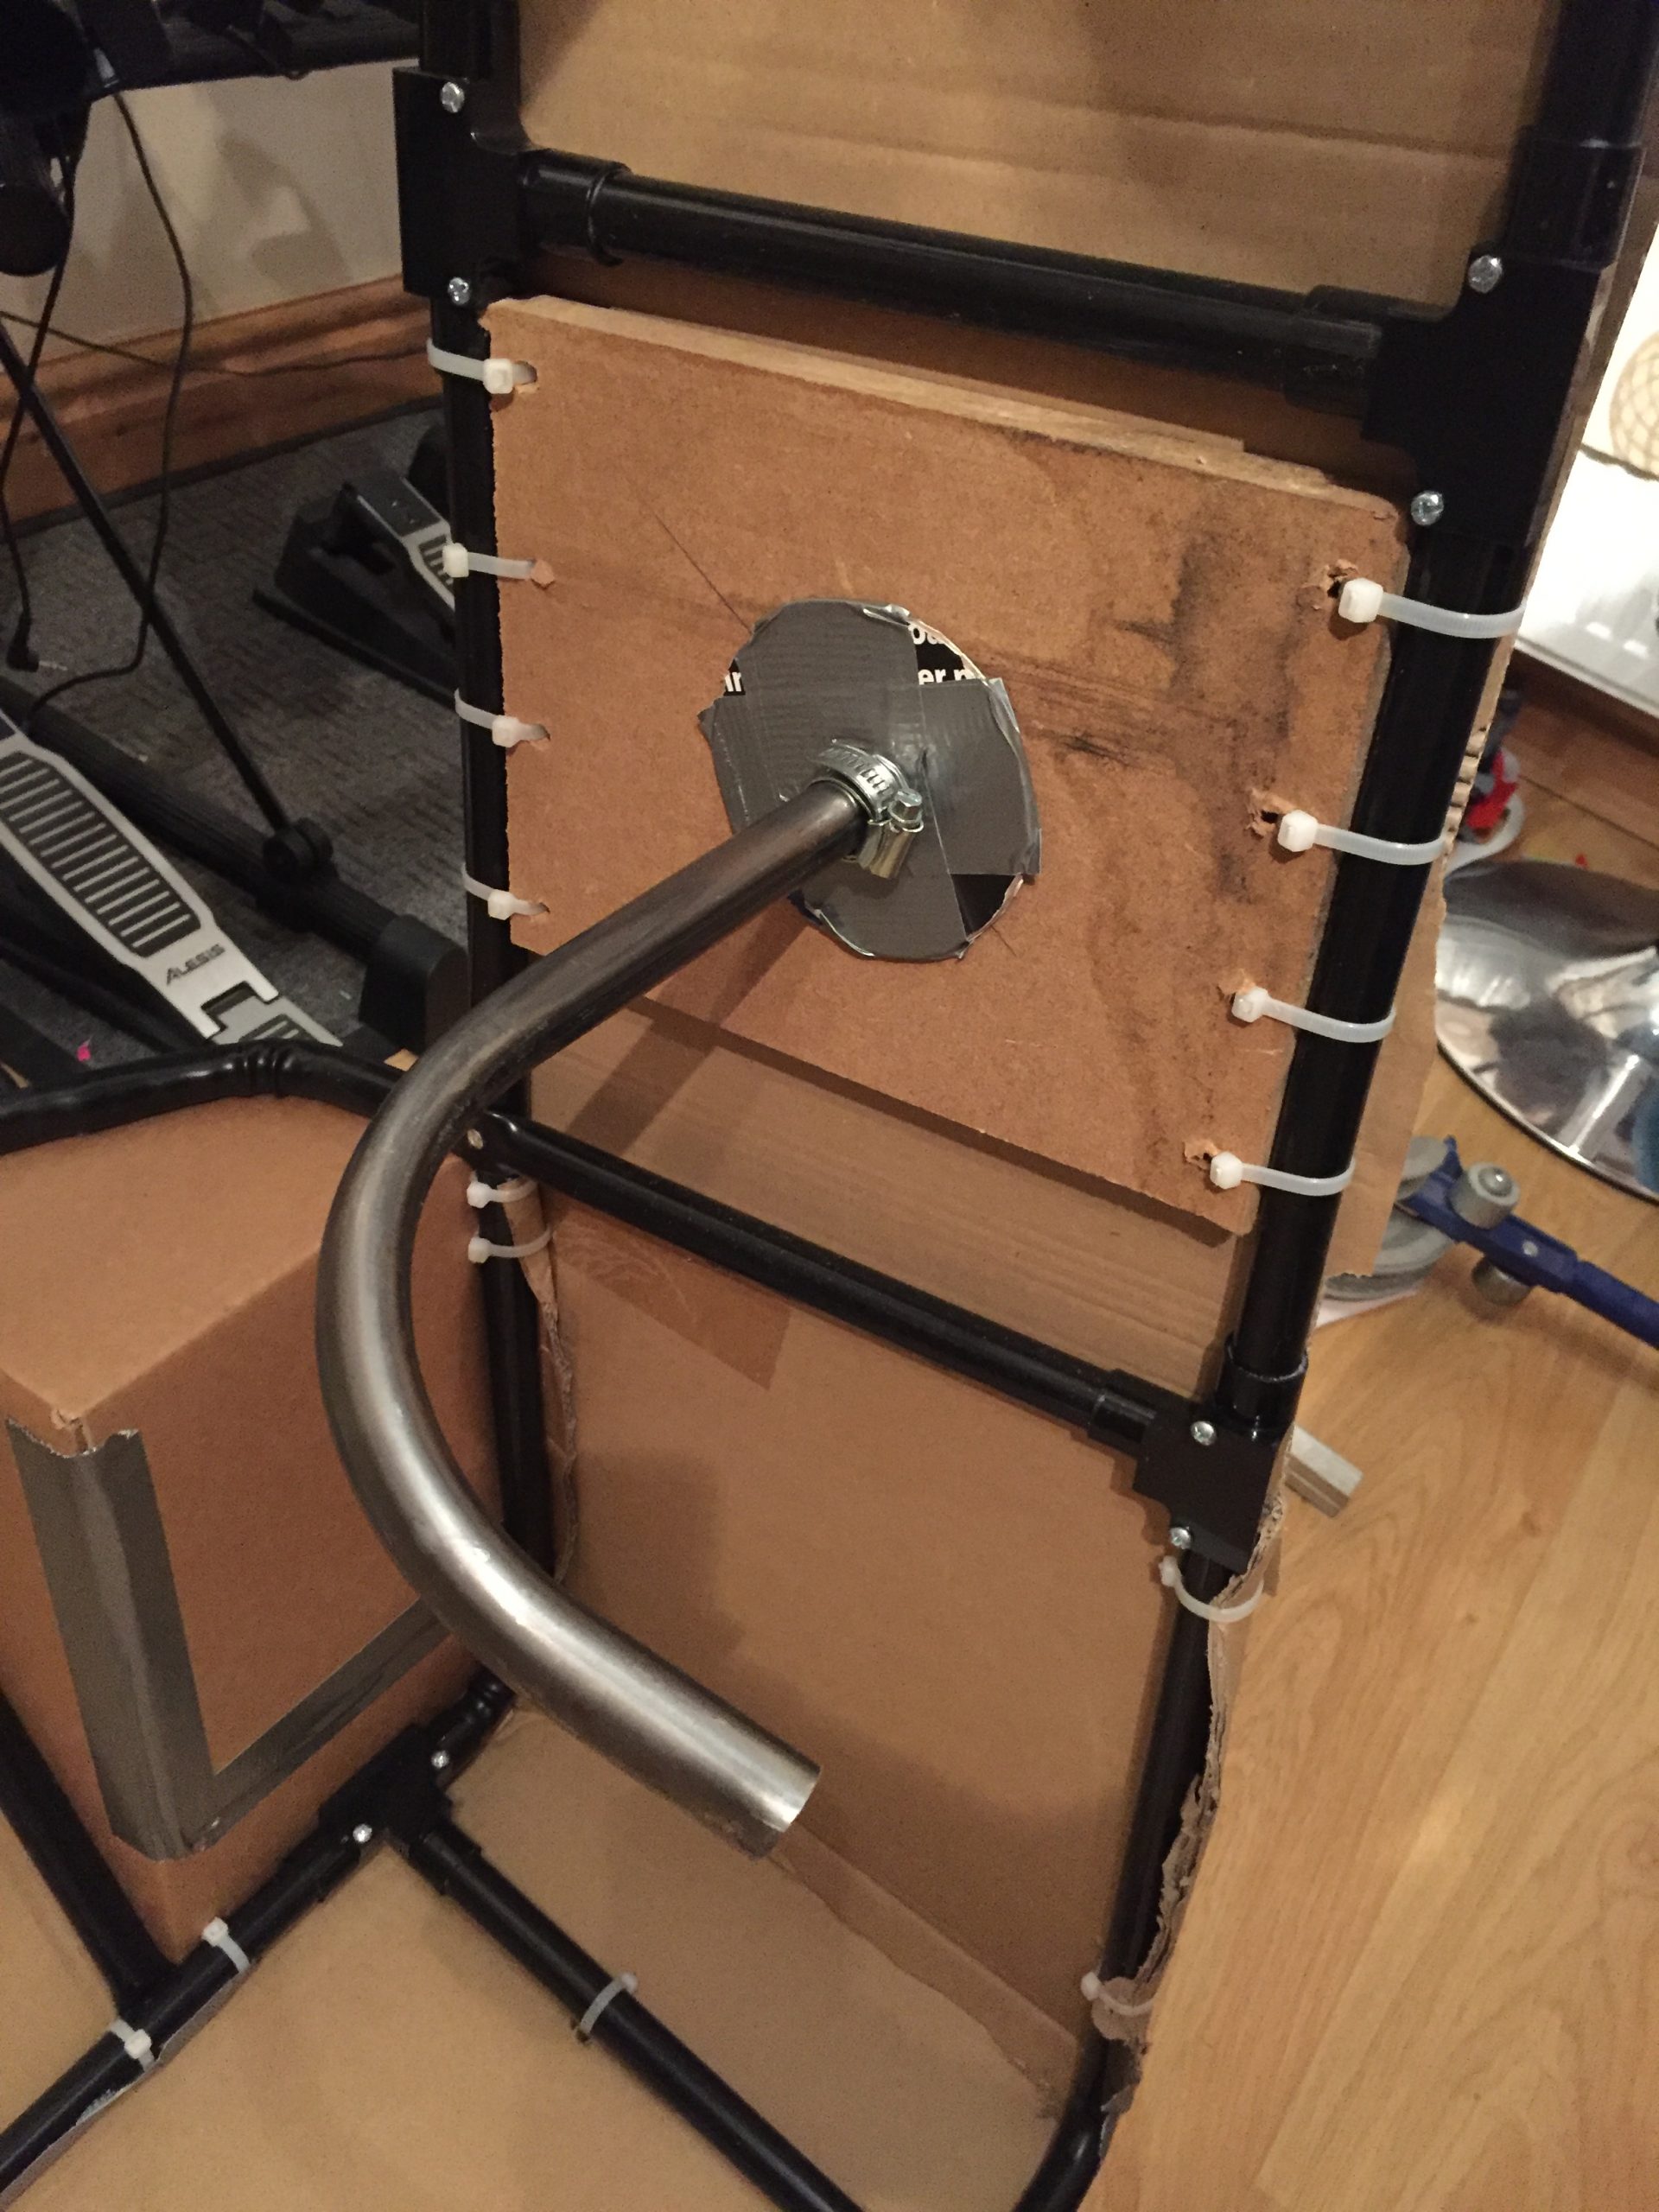
It was at this point that I noticed the plastic conduit inside the body that supported the weight of the gun pods was a bit flexible and would not have been able to put up with the extra load and the movements. Some more ideas would be required but I thought of the remainder of metal 20mm pipe that I then cut into two and was able to bend them into a handle shape. Bending 20mm steel conduit is much trickier than the plastic and I’m lucky that my neighbour Mike has a conduit bender. I know how to use it too, as I started as an apprentice electrician when I left school and remember the science behind limits of bends and the formers required to produce nice bends.
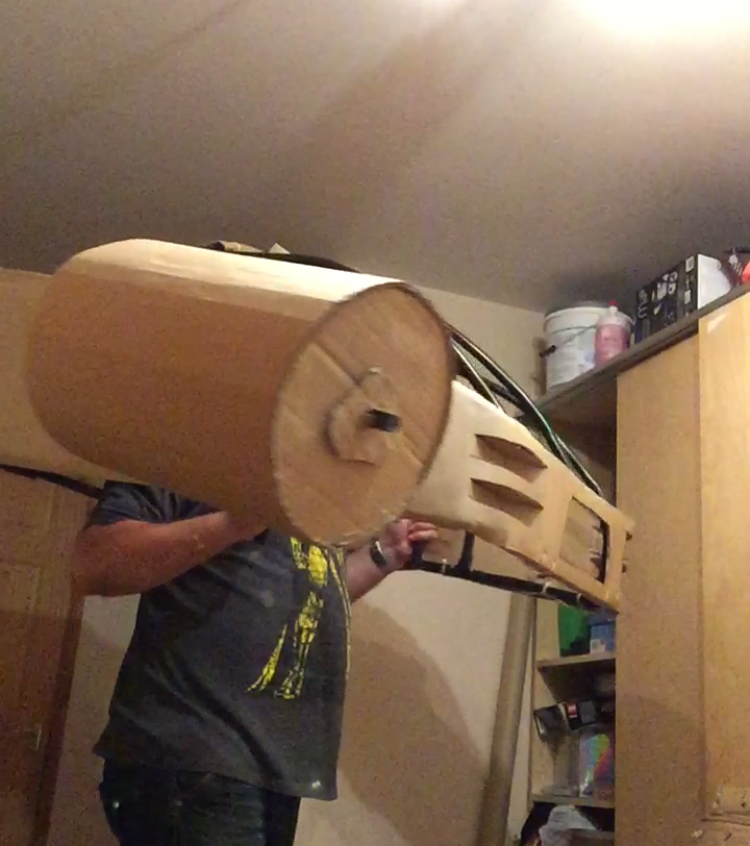
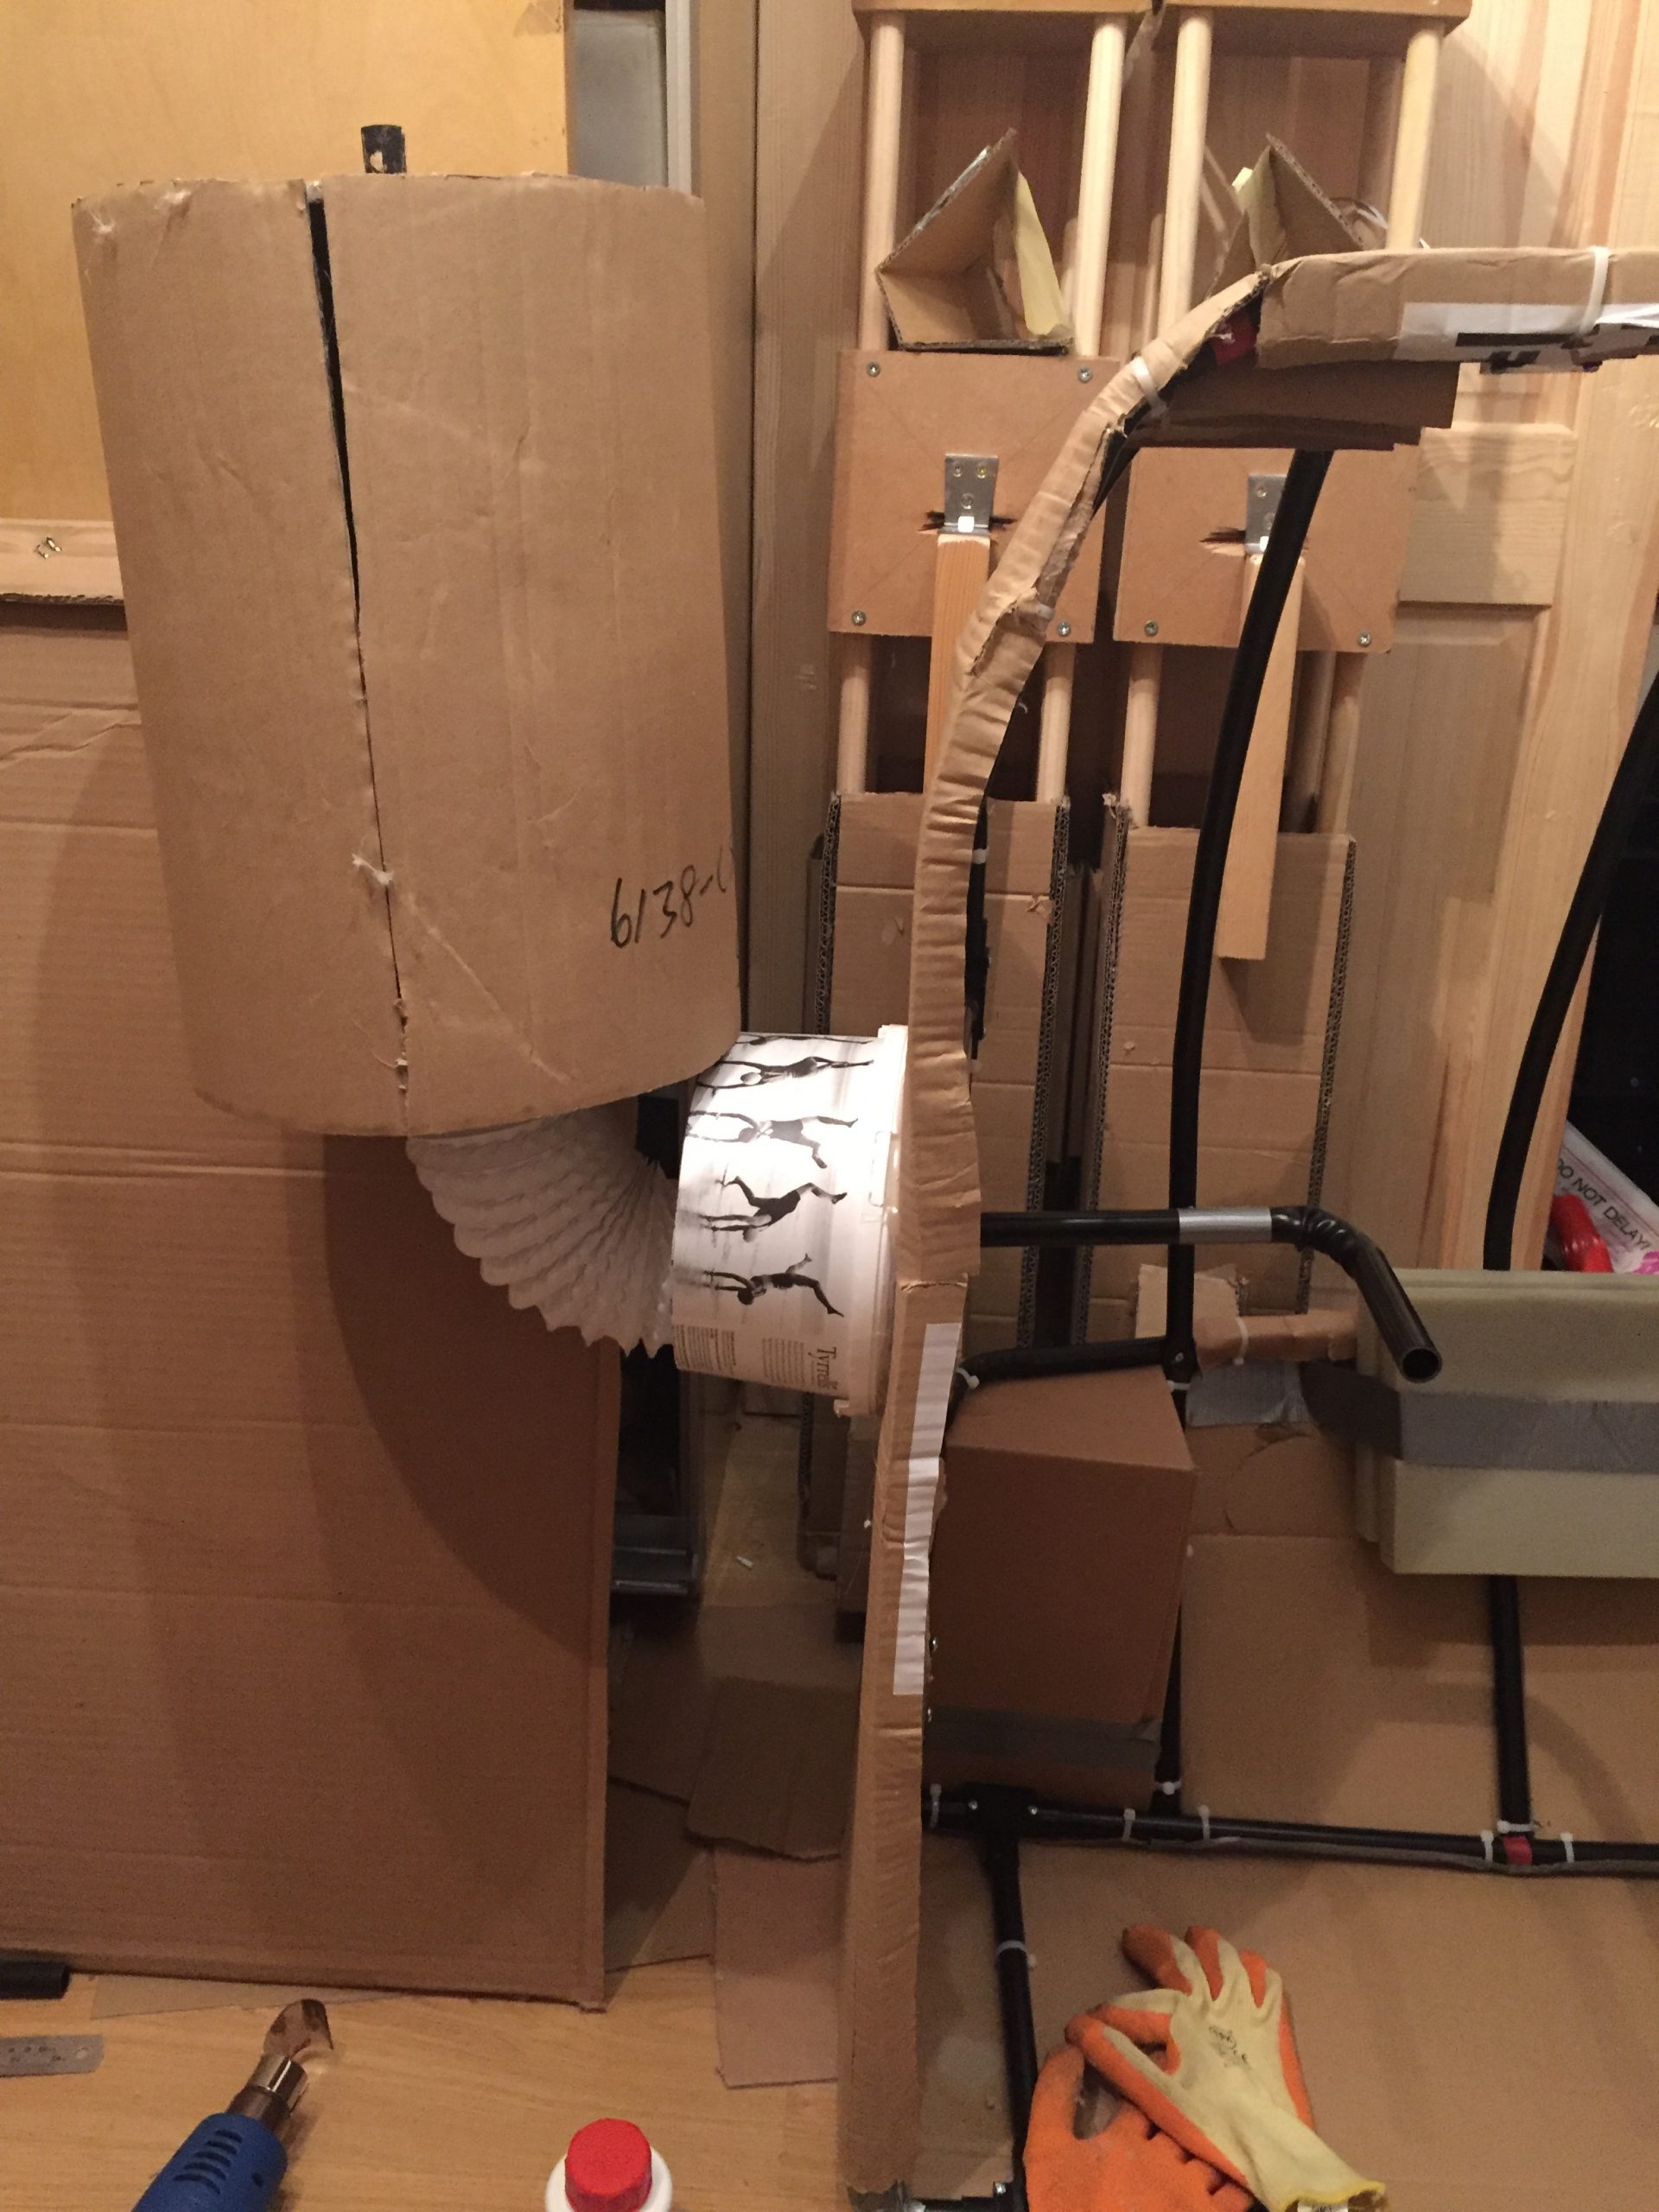
You can also see in the above photos that I had hot glued some plastic buckets to the side of the body after cutting the bottom off it, turning it around and gluing it inside the top part. I used some 100mm flexible duct too as the elbow joint cover, this would be fixed to the gun pod and would fix to the arm to keep it in the right shape.
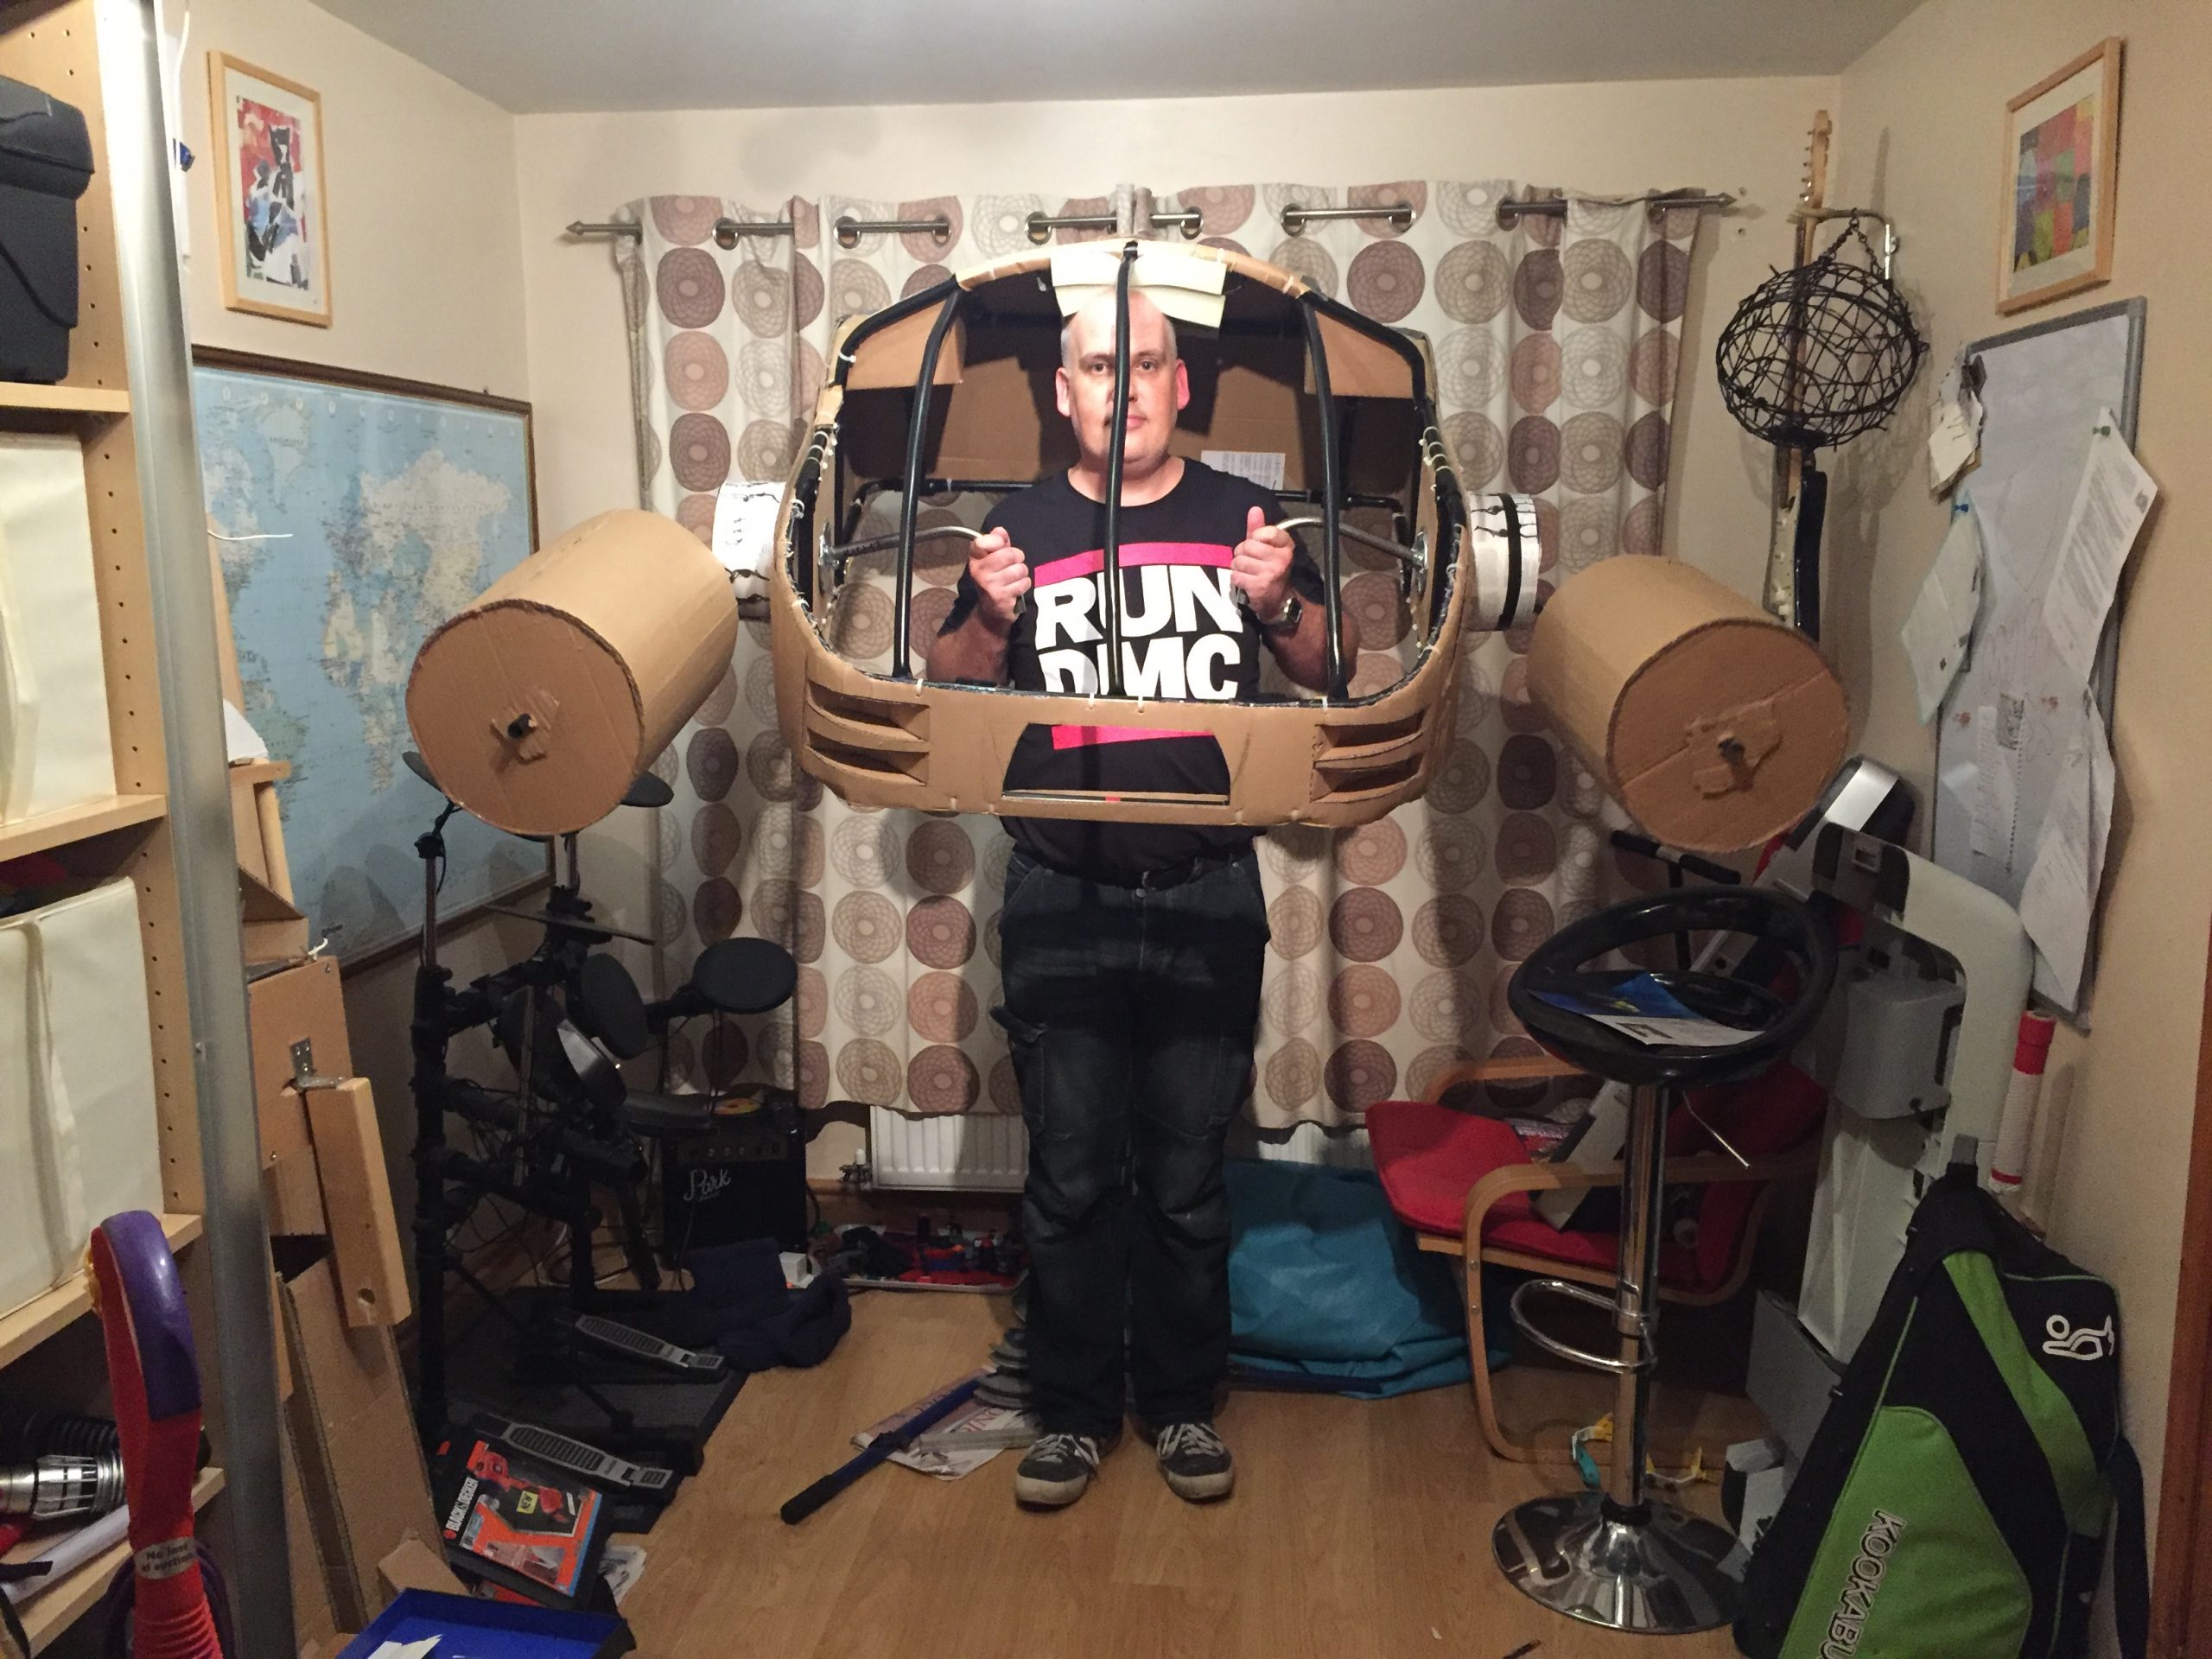
A video showing the gun pod on a plastic controlling arm is shown here, I’ve just noticed too that in this I’m still balancing the whole thing on my noggin:
From the notes here you can see how I developed the idea of the buckets on the side of the body (24) and the way that the gun pods would be constructed (25). Some other random thoughts had occurred to me at this point. 26 shows that I was contemplating some extra bodywork underneath the current frame to hide me driving it and it would also allow a more secure set of anchors for some straps to go over my shoulders and stop me rubbing off the remainder of my hair by supporting the weight. Note 27 shows that I was now contemplating how I could hold the toes on the same plane so that they’d hit the ground simultaneously and be flexible enough that they wouldn’t be smashed to bits every time I walked. Ice Cream plastic tub was the idea at this point but I’d lie awake thinking about this problem for a couple of nights. Note 29 shows the parts of the costume I wanted to fill with foam and 30 is my initial thoughts as to how to make the wings that sit over the top of the elbows.
The last three photos show the metal pipe coming out of the body into the plastic inspection elbow that would ultimately hold the gun pod pipe. Inside the body you can see the pipe holding on the wall with a pipe clip separated from the mdf by a duct tape covered piece of cardboard that formed a washer. The last piccy shows a proud fella holding his robot arms up to see the height and width of the beasty.
The next part will show the installation of the black material on the “windscreen”, the fitting of the underneath body appendages as well as some more changes to the legs and wings.
If you have any comments feel free to leave them and I’ll do my best to answer any questions.
[…] ED-209 Cosplay – Part 4: Knees & Toes […]