Light Painting Tutorial for Caterpillar Photographic Society.
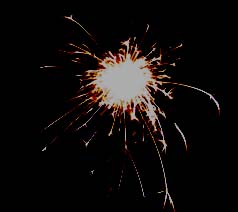
Spangly Sparklers!
Imagine it’s night time in the middle of Winter, it’s not difficult at the moment is it? All of the photos and information on this page will be assuming it’s night time or you are in a very dark room.
We’ve all seen sparklers on bonfire night and how if they are moved quickly you can almost see a shape develop. I’m guessing you’ve seen a letter drawn or a heart.
What happens though, if you take a photo with a really quick shutter speed? Well, in theory you should get a snapshot of the sparkler in one position and no trail of light behind it. The highest my shutter speed will go to is 1/4000th of a second which will capture a spot of light and not much in the way of background etc.
If you were to set your shutter speed to 1 or 3 seconds (1″ or 3″) you would capture the movement of the sparkler through the air and also some light from the surrounding area. The longer your shutter speed the more length of the trail you’d capture.

LED Astray
Now imagine it’s February and you’ve used all of your sparklers maiming children at the end of last year. What will you use? Torches, LED keyrings, Laser Pointers, Inspection Lamps, Bicycle Lights, Mobile Phones, matches, cigarette lighters or anything else that produces an interesting light from within.
The principle is exactly the same as the sparkler one mentioned above, you open your camera shutter for a period of time and then move the light source around in front of it.
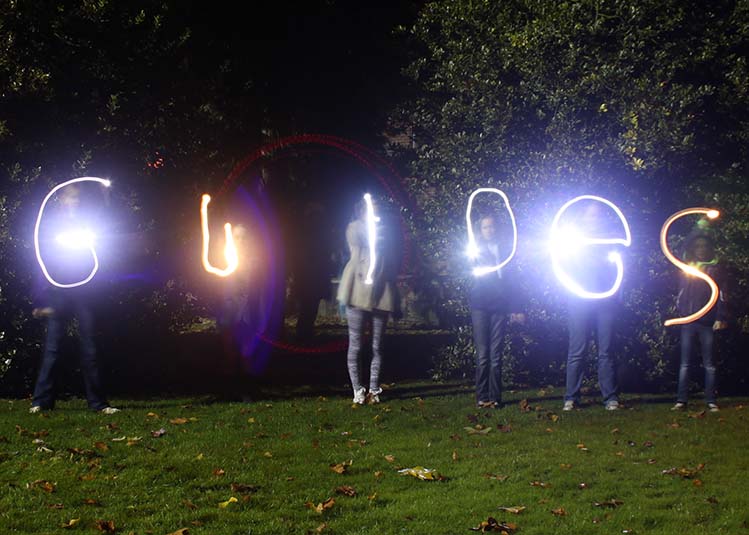
Whatever is illuminated by the light will also appear on the photograph. For instance if you open shutter for a long time and then shine a torch in your face for a second or so, the photograph will have a disembodied head floating in it.
With the light sources mentioned above you can carry out some very interesting photos with patterns or strange effects. Here is a photo from Graham, one of our Society members who used a small LED lamp to illuminate and travel around some playing cards.
In this photo I set my camera to a 30 sec shutter speed so that it would give me time to walk away and come back again. Essentially I had a LED cycle light tied onto a piece of string and I spun it in a circle at arms length in front of me while I walked, continuously spinning it. This gives the spiral effect that you see, if I’d stood stll and spun it you would see a single circle.

Background Check.
In the above photo you can see that the sky is illuminated by the lights of Telford & Shrewsbury, the face of the trig point is also lit gently by the led torch as I passed by. If the shutter was opened for too short a time you will only see the light spiral and this would be against a black background Far better to have a context for it to fit into and by capturing the background it adds depth and slight surrealism to the photo.
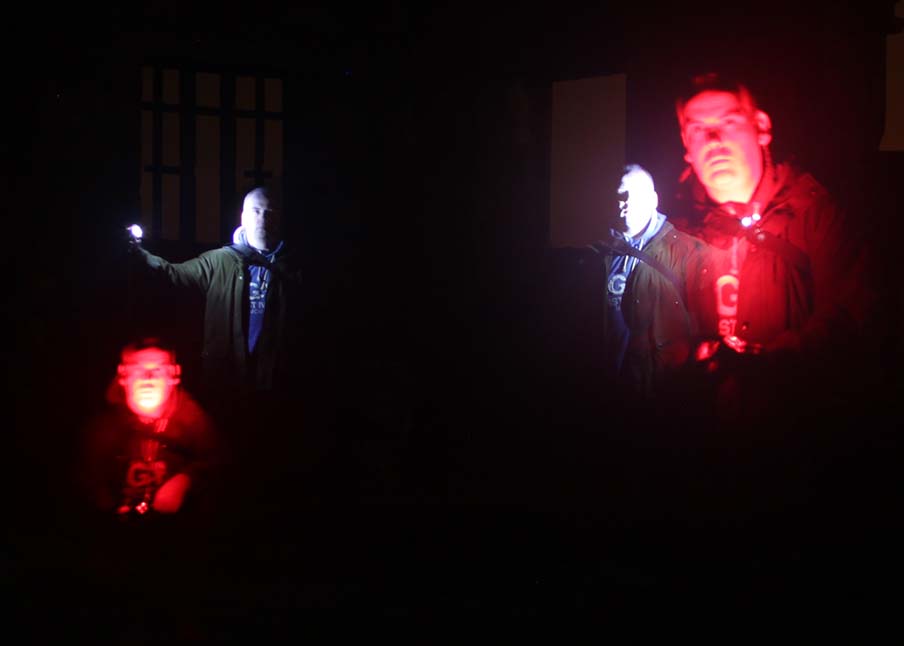
If I had wanted to light the Trig Point a little more I could have done the light trail and then gone to shine a torch at the object to illuminate it. Be careful the light does not cast across you as you will appear in the photo (unless you want to do this of course). The same can be done of objects that are dark and perhaps would not appear in the photo unless you light it by using the torches etc. as mentioned. You can also use a camera flash, sometimes with coloured gels (transparent Cadbury’s Roses wrappers) to illuminate something as bright or as dimly as you wish.
The longer you keep the shutter open for, the more light will spill in from the shot.Town Centre shots left open for too long will be a big mass of light. Also, be careful with your lights when moving around, although you should always pay attention to your surroundings and where your camera is. I’ve struggled more than once to find my camera in the dark when I’ve just been spinning a light around my head..
This next photo is of my car and as you can see from the buildings in the background there was quite a lot of ambient light around. I set my camera up and used a BIG torch to illuminate the wheel, I used this to then Auto-focus the camera and once done I knocked it to manual focus and turned the BIG torch off.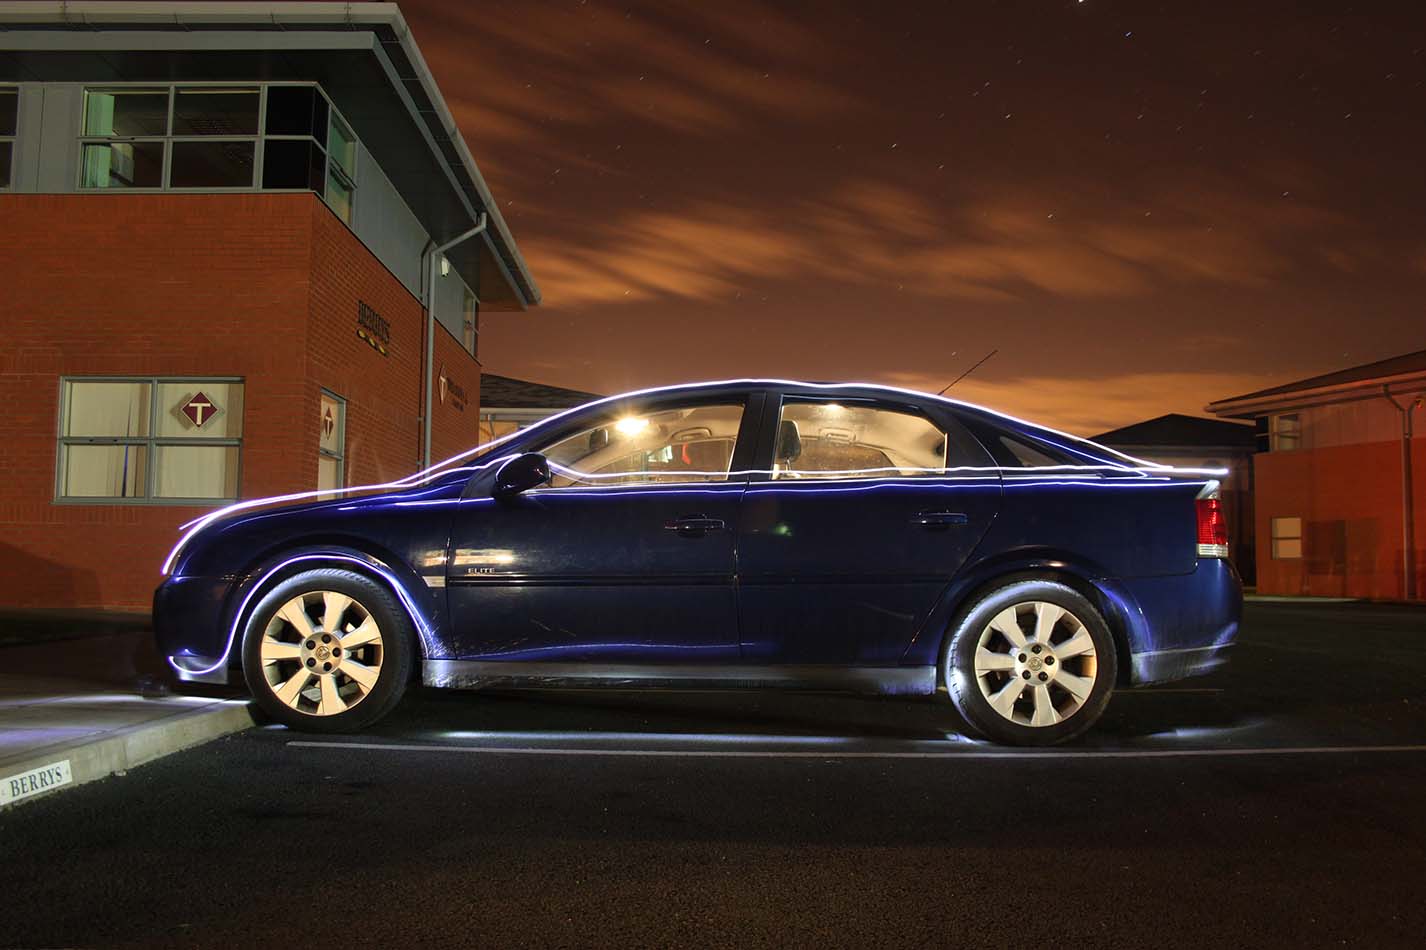 Once I was ready for my picture I opened the shutter with my remote cabled shutter release and then “drew” around the car with an LED key ring light. You can see the outline over the wings and roof where I rested my hand on the paintwork and then moved it along.
I also lit the wheels by shining the light on them for a few seconds and you can also see that there is some light on the floor under the car. This is the process you use to Light Paint an object. I never realised until after but the interior lights were also on in the car when I took this shot and it is quite clear from the way the inside is also lit up.
Rough Guide To Camera Settings
For all of these photos you should try and use a low ISO (ISO 200 – ISO 800) if possible to stop noise appearing in them. As I’ve said already, use Manual Focus or it won’t focus when you press the remote shutter. The apertures that are recommended by most people for this type of nonsense is f8 to f11. A tripod is also an essential item unless you have somewhere to balance your camera.
Fun Fire
Now for the FUN stuff!
As some of you are aware already I have been playing with fire, literally, over the last few months. This was to do some light painting photography after seeing a great tutorial which got me raring to go out and try this stuff.
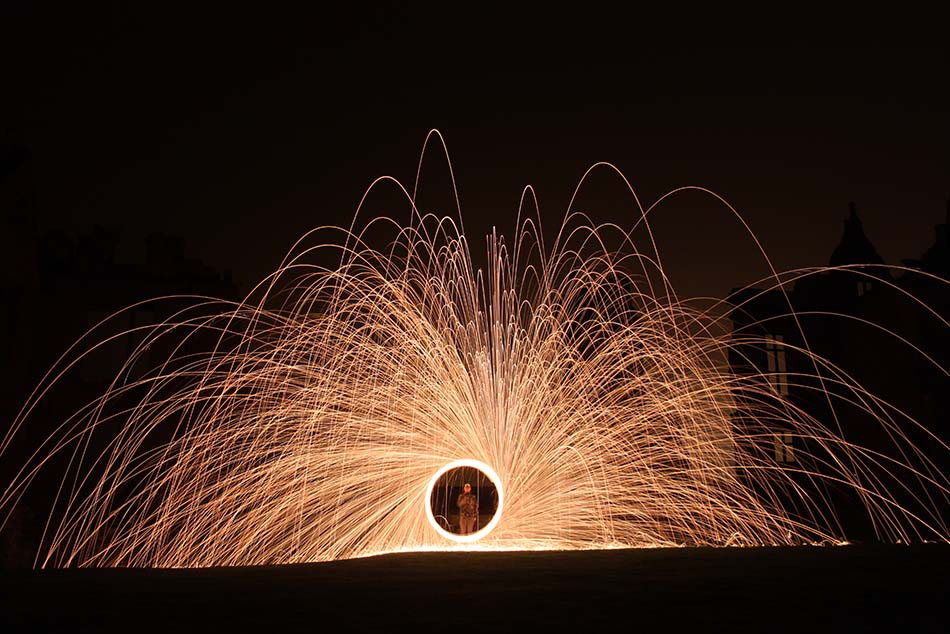
Basically, the idea is to set fire to something and then spin it around, in place of an LED torch. The material used is Wire Wool, or steel wool. This isn’t anything special, just the finest grade of wire wool that might be used to do surface preparation for painting. This is stuffed into a kitchen whisk (as a type of cage) then set alight using a 9v PP3 (rectangular) battery. When it is spun through the air, the whisk being tied to a length of cable or rope, the oxygen feeds the flames and then molten sparks of wire wool fly off to produce a great photo and hopefully not a forest fire.
The below is a photo of me dong this wire wool burning, it’s me in the centre there with a hoody and a hat on as well as long sleeves to prevent me from getting burnt. Doesn’t always work though…
PhotoExtremist Tutorial Video.
Rather than me go out and do this before the night of 4th Feb here is a shortcut.
Have a look at this tutorial and see what you think;
As Evan Sharboneau says in the video you must be very careful not to do this anywhere that there is an abundance of dry material. i.e. in a Forest or corn field during a dry spell and I’d also rule out libraries, they burn exceptionally well! Make sure there is no-one nearby and that no animals or other peoples property will get damaged too!
Doing this activity in the dark is a bit dangerous, not just because of the fire and stuff, but moving around without being able to see can cause you some problems. If you have a torch with a red cover on it this will stop your night vision being impaired and allow you to find your lens cover you just dropped.
Summary then;
- Safety first- I know we get bored of this info but take extra care in the dark and when throwing fire around.A hoody, goggles, long sleeves, gloves and a damp piece of ground make an ideal setting.
- Use a tripod and a remote shutter release to prevent camera shake.
- If you want to focus in the dark, put a torch on the ground where you’ll stand and focus on that before moving to manual focus.
- Don’t get hot sparks on your camera, other property or down your neck, it hurts.
- Have fun, come up with weird ideas and then try them out. If it doesn’t work, figure out why and then try again!
- Don’t keep your PP3 battery in the same bag as the wire wool, this can only end up in an insurance claim.
- There are loads of different things you can do, give them all a go.
See you on the 4th February in the Quarry to set fire to some wire wool! Bring your camera, tripod, remote shutter release and a big warm coat!!
After that we’ll retire to the pub to discuss what we’ve seen and ideas for the February assignment / competition of “Light Painting”
[…] Here is a link to Bob’s blog for a tutorial on how to do basic light painting and wire wool fire light painting. […]
[…] the previous two weeks there had been a tutorial on my blog of how to do this and how to take some photos of it too! The team had done their homework […]