This weekend saw me put into action a plan I’ve had for a month or two. It’s a bit morbid but bear with me you might even enjoy some of the post.
In March this year my Dad, Bob Sr, died from complications caused by years of drinking, smoking and COPD. He died in hospital and since then our family has been tidying up his bedroom in the bungalow he lived in with Mum. She is still there in her bedroom, bed-bound and ravaged by Multiple Sclerosis, being fed through a “Peg” as she can no longer have food or drink.
Well, you get the picture. (Pun intended)
Dad’s room was repainted by professionals to rid it of the nicotine yellow coating that had been building up over the last 15 years. As it was virtually empty and now painted with a light coloured paint I had the idea to use the room to make a camera obscura.
Camera Obscura have fascinated me since I first saw the effect in the Ditherington Flaxmill Maltings a few years back. It’s a wondrous effect and a marvel of science where the contents of the world outside are projected into a box or a room in this case, through a small hole.
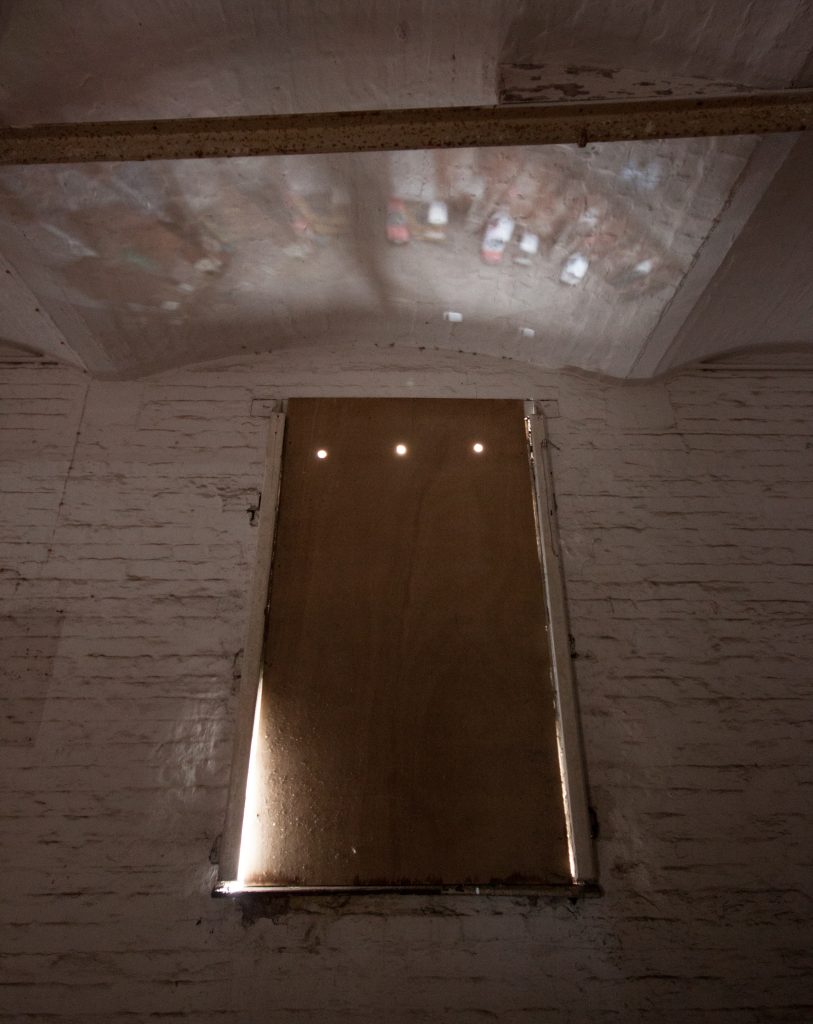
The idea was to block up the window in Dad’s room and see whether the projection from outside was strong enough to take some photographs of.
I created a cardboard aperture with a hole cut out of it about 10cm in diameter and stuck it on the window with duct tape. Then I wet the glass with a damp paintbrush and stuck tin foil to the wet glass. The tin foil blocks out the light from outside better than a piece of cloth or thin plastic bag.
Once I’d sealed off the majority of the light leaks, I stood in the dark for a minute or two to let me eyes acclimatise. Then I could clearly make out cars outside driving by, they were upside down and flipped left to right but the picture began to get clearer and clearer. It was tricky to see everything but I’d set up my Canon 5D Mk IV on a tripod with a shutter release cable, so that it could pick up the light coming in on it’s sensor in a more effective way than my eyes could.
The picture that appeared was overly fuzzy and blurry but quite bright. I’d read in my research into this phenomenon that if the aperture was made smaller, the sharpness of the image would increase but the amount of light coming in would be reduced.

This is the same in a normal camera, if you close down the image by a stop , the effective light into the lens halves. If you have the lens of a camera set to f/11 aperture, more of the image is going to be in focus too, i.e. a greater depth of field. It just meant that I stuck a smaller aperture over the other, roughly about 5 cm in size, and had to keep my camera shutter open for twice as long.
It is amazing to see this effect, and to this day it still takes my breath away. What I love even more though is showing this to people and seeing how their brains try to make sense of what is happening. Some people get it, some people enjoy the experience but don’t want to know how it works and others want to learn more about it themselves and even go off and try it for themselves. That’s what I love happening.
The new aperture helped me to get a better defined image and you can see in this image below that it makes more sense when I vertically flip the image digitally. You can see from this image below that I am stood outside the house whilst I’d left the camera doing one second shots using an aperture of f/2.8 and an ISO of 6400. You’ll note that the colour comes in too, the yellow traffic cone to my left, the blue of my car and the sky too. Interestingly also is that the image wraps around the corner of the room. The floor (on top in below image) shows the sky whilst the carpark outside is projected onto the ceiling of the room. This occurs due to light travelling in straight lines.
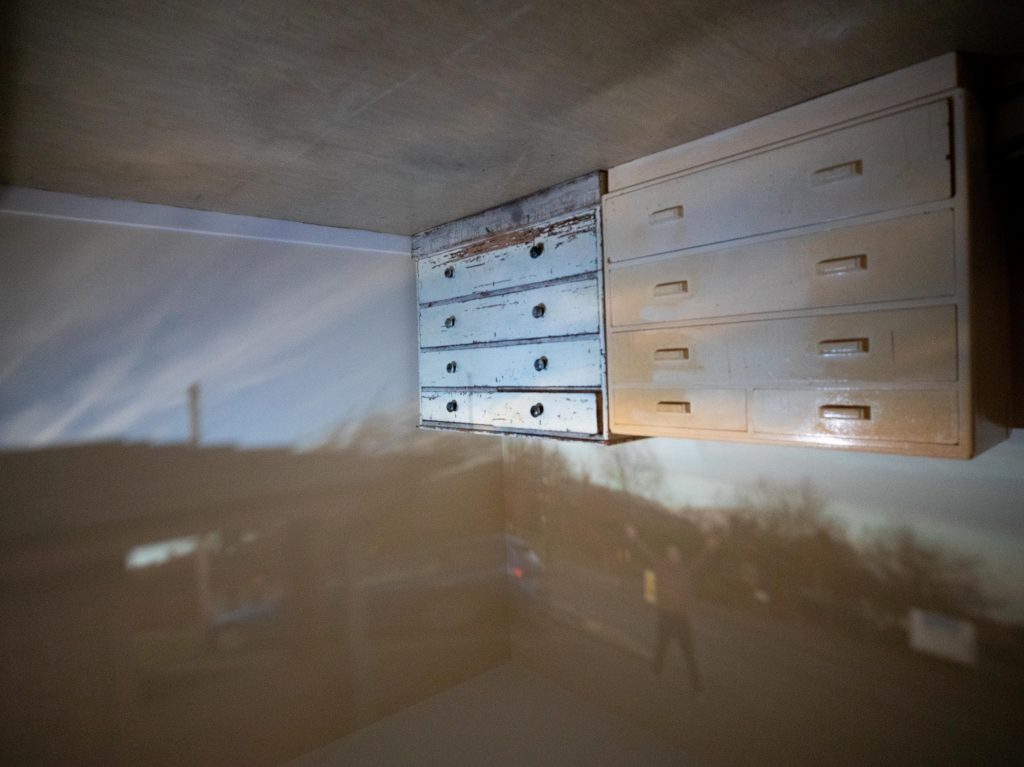
Light travels in straight lines unless passing through another medium such as glass, water or a pris etc. When we see something, we don’t actually see it, we see the light reflecting off it and hitting the back of our eye. If a lampost is really tall outside my Dad’s window, then the top of it reflects light in every direction but some of it will go through the small hole on the window and travel straight down to the floor of the room. Likewise, light reflecting from the white painted parking spaces on the ground outside, reflects light upwards in through the same aperture and onto the ceiling of the room inside. Such a wonderfully simple premise but still fascinating.
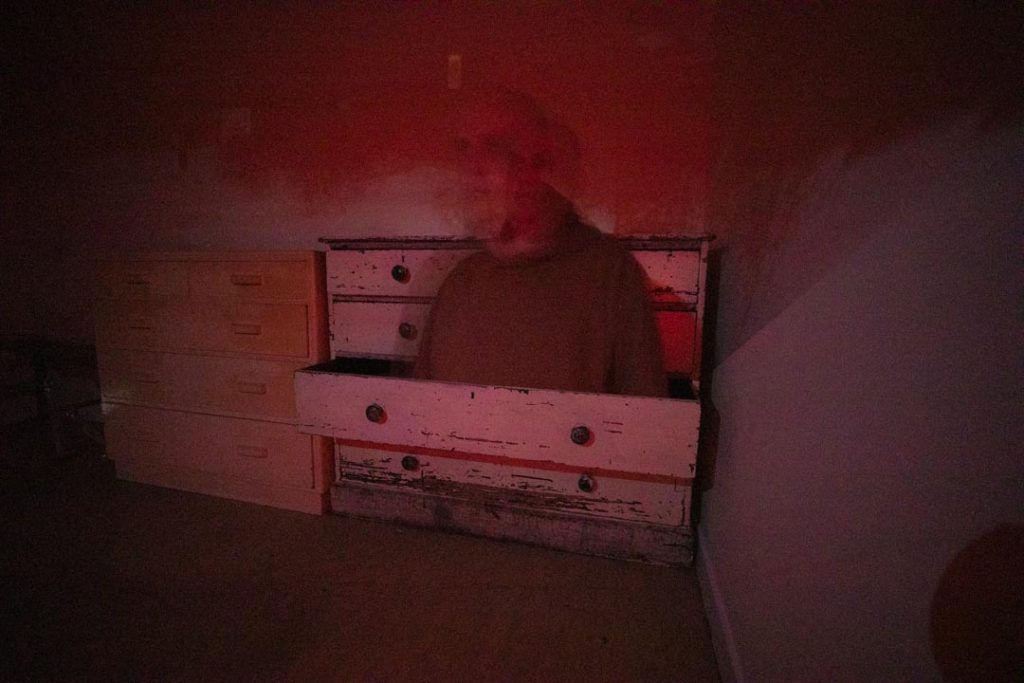
I started playing with some different compositions and then wanted to include myself in the images to make it a more personal affair. I sat against the chest of drawers that still bears the yellow stains of my Dad’s nicotine addiction, and stayed motionless with my camera capturing the scene in front of it. I realised that if I stay still for the whole time of the open shutter then it would be more solid , but if I moved into frame and then stayed still for a few seconds and then left again it would portray a ghostly figure.
With Dad’s death this year, and the room being bathed with the view he had daily, I felt as though my presence in the picture was acting as his proxy. I’m pretty certain that if he were still here, he’d understand exactly the science behind it and still mock me for wasting time experimenting with it when I could have been down the pub.

I also chose to do another couple of shots once it had got darker in which I opened a drawer, then did a shot with me kneeling in front of it, then another without me. Then I merged them in photoshop later to produce a weird image of me emerging from a drawer. It’s uite spooky and my wife doesn’t like it too much.
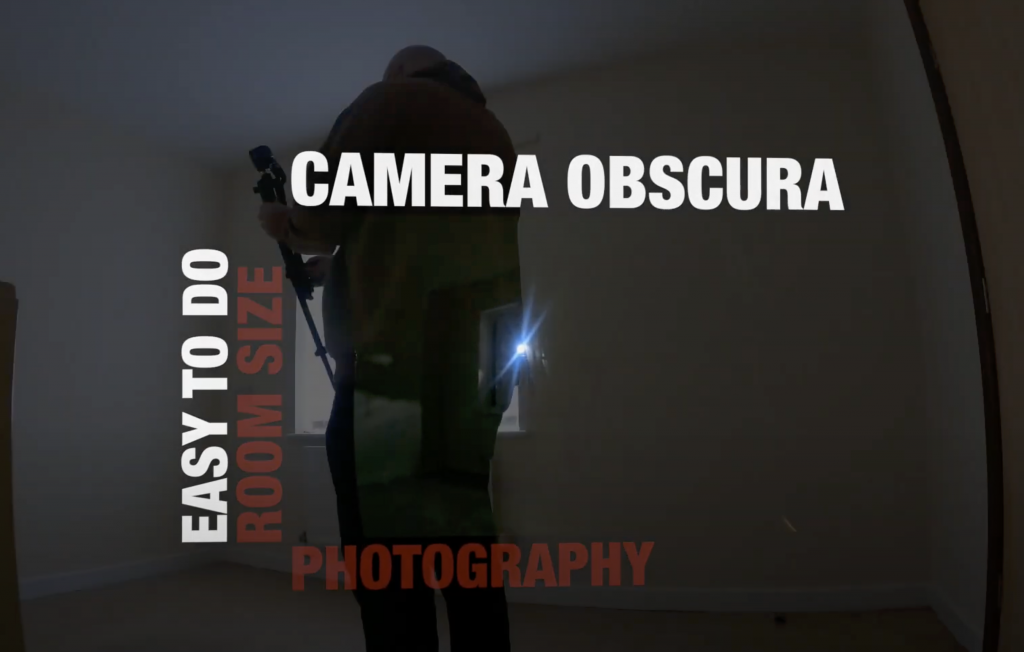
Whilst doing this experiment I also did some video work and captured a couple of timelapses to explain how this all worked. I did this mainly for my own beneift but put it on youtube too at his link: https://www.youtube.com/watch?v=flwBfrrIGHc
It is an interesting experiment, especially with other people who can’t grasp the science behind it. Trying to explain the reasons it works is a lot of fun and using diagrams helps too.
It was a strange place to do this experiment too, as it was in my late father’s room, using some of his furniture that bore the marks of his habits and led to texture being displayed in the images.
Give it a go next time you have a lightly coloured painted room at your disposal and I promise you that you’ll not be disappointed.
Be First to Comment