This Monday was the last of our workshops in colour processing and dark room usage. From next week onwards we’ll be switching into the Black & White group, and the current B&W group will get the privilege of switching from a red-light darkroom to a complete pitch black dark room. Ha ha, I’m glad I did it this way around, at least I’ll be able to feel more confident when I can actually see what I’m doing…
As I’d only managed to get a few prints off my first three films so far, I was hoping that my fourth film would be completely full of usable and worthwhile photos, well it was full but a couple of them I was really happy with, whilst others not so much.
I’d also anticipated that I needed to print off as many as possible to get the advice and help whilst it was available so I booked the Monday and Tuesday off work to attend the Uni both days so I could hammer it. And hammer it I did.
First Contact
First job was to take Film #4, a Kodak Portra 400 36 Exp film that I’d had developed at Jessops the Saturday previous and get a usable contact sheet from it. From there I could select a few photos to concentrate on and get some prints created.
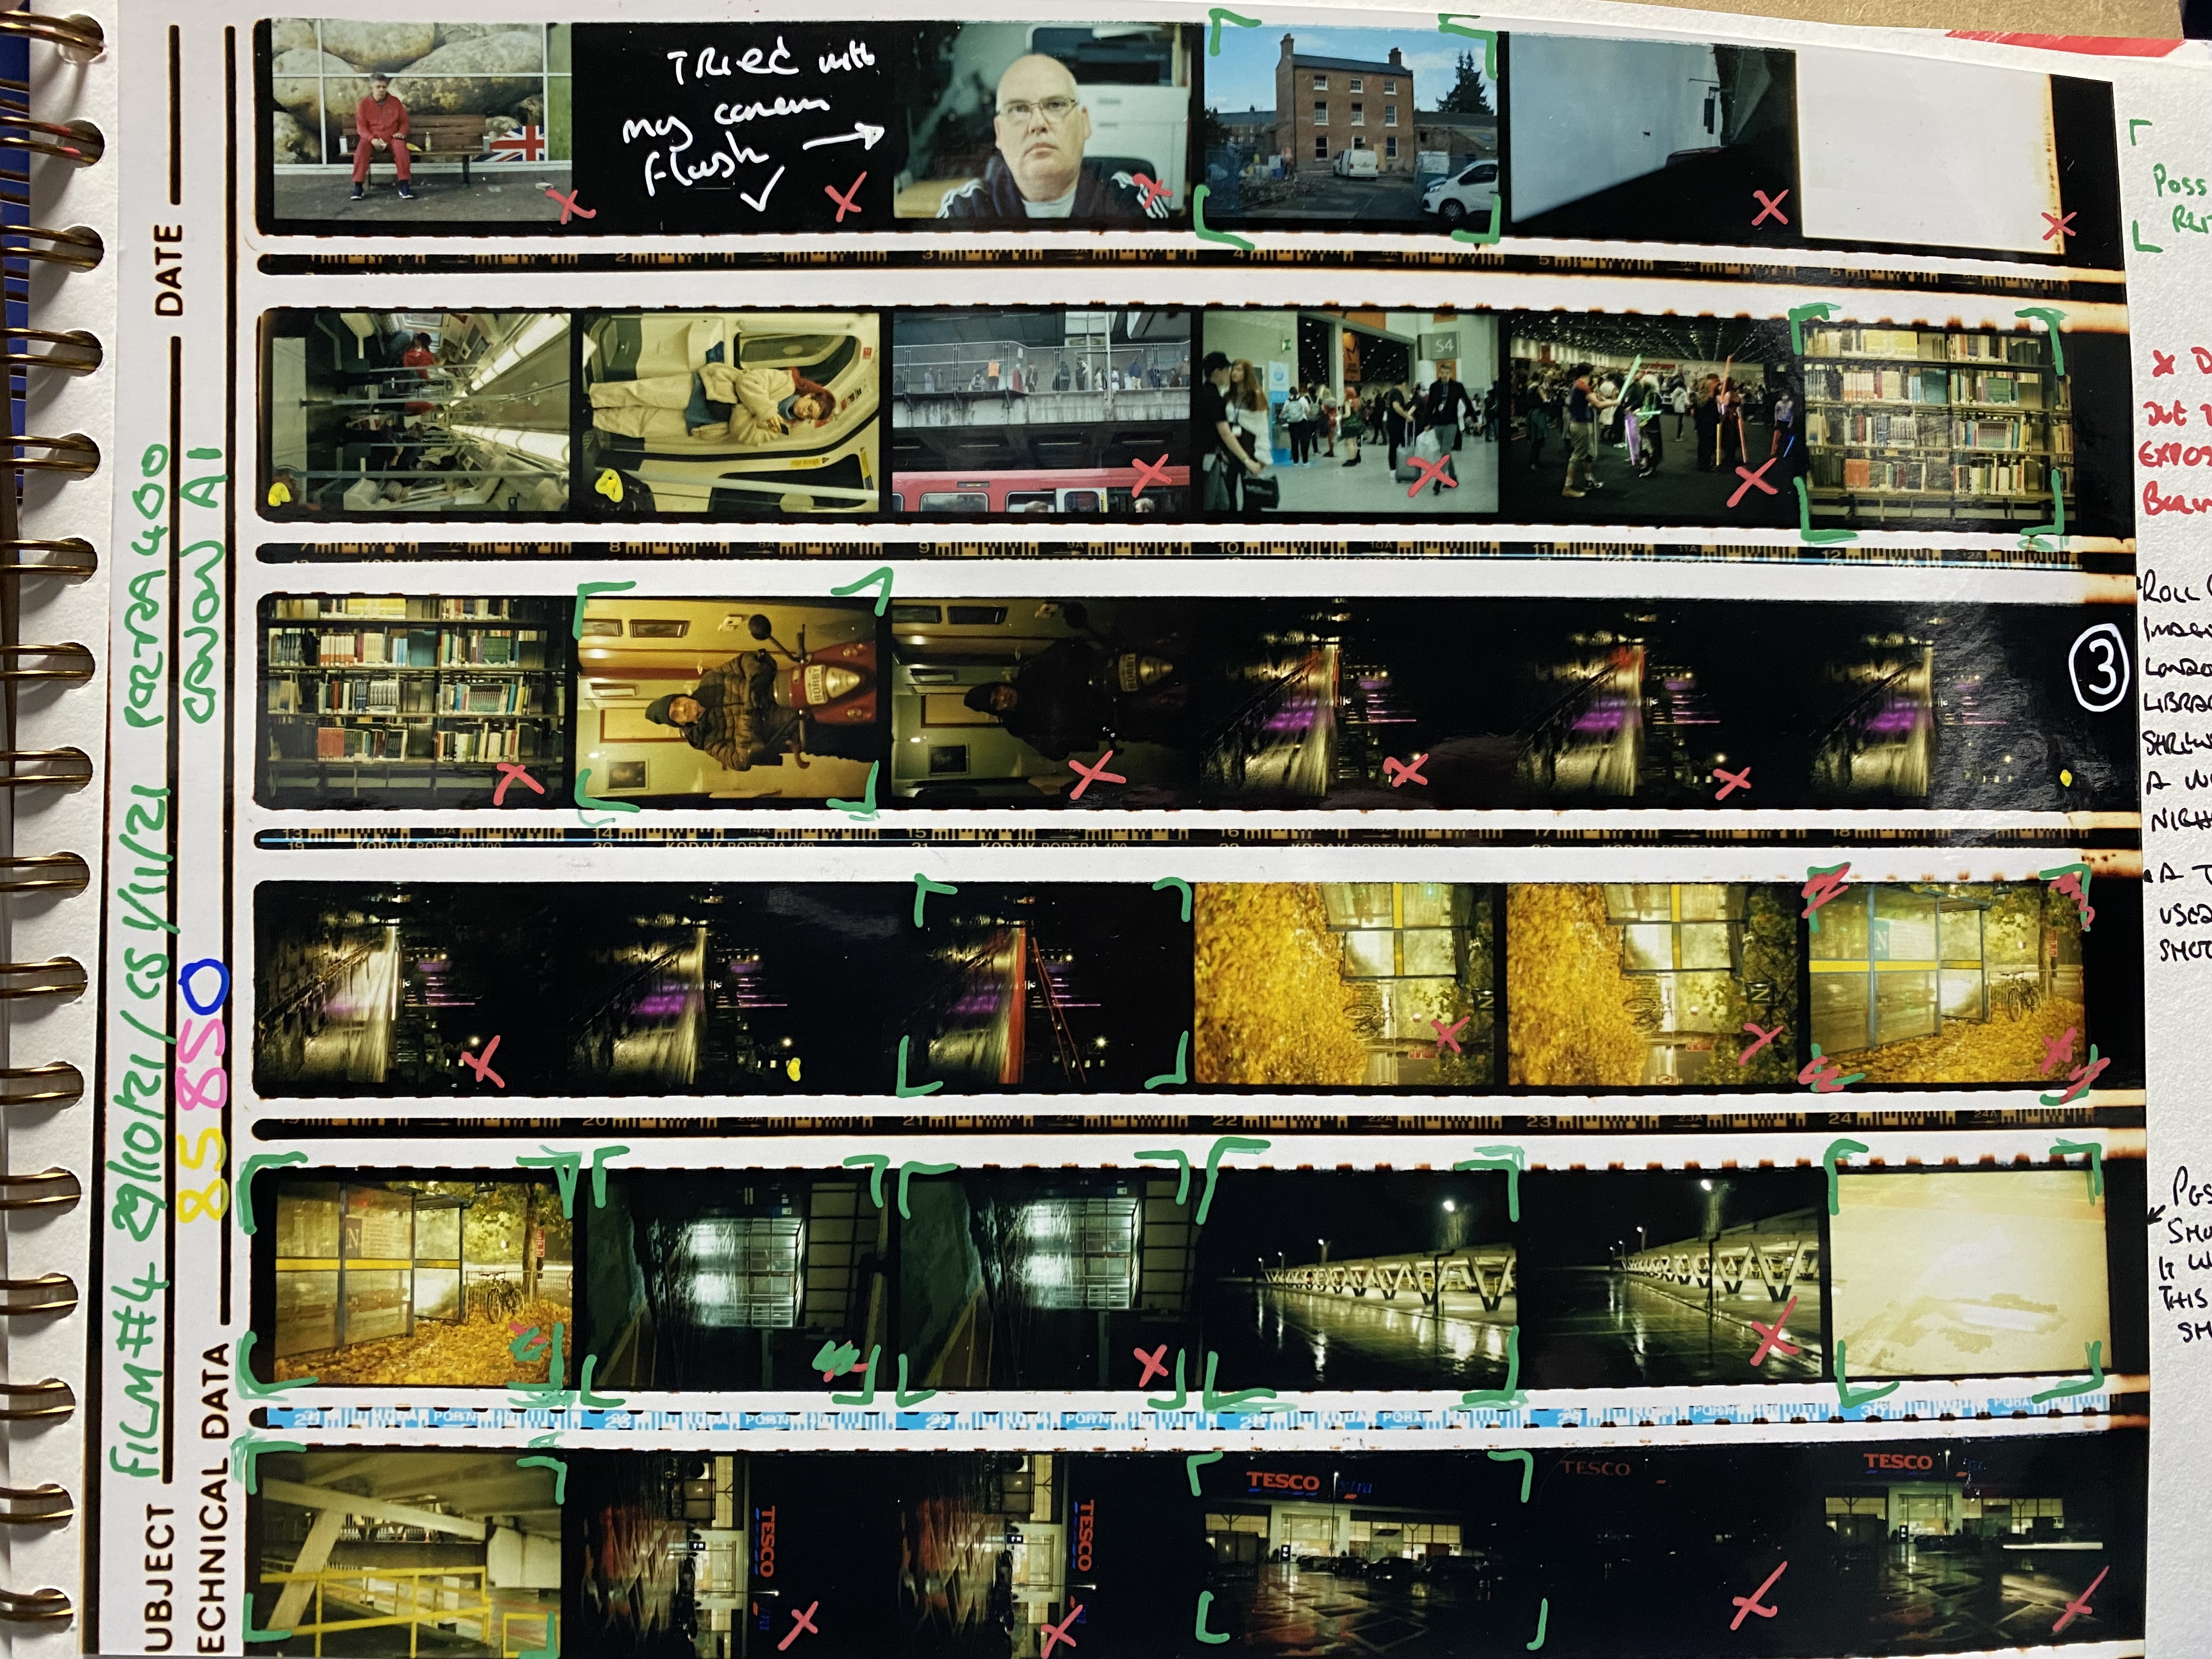
The majority of the 36 exposures were made up with a night time jolly around the town centre of Shrewsbury during a rainy evening, the week before. There were also a couple of other shots from London Comicon and other parts of the town.
Rain & Reflections
The first shot I chose to print off was one of the Premier Inn on Smithfield Road, Shrewsbury, with the purple and multi coloured lights reflecting off the glossy road surface. I set up my camera on a tripod on the footpath opposite and focussed as best as I could through the viewfinder.
It was pouring with rain, pitch black and I was trying to hold an umbrella whilst changing the settings on the 35mm Canon A1 to align with what the metering was telling me on my Canon 5D Mk IV. As it turned out this method of using the metering in the digicam with the ISO set to 400 was extremely effective and I had some nice shots from this location.
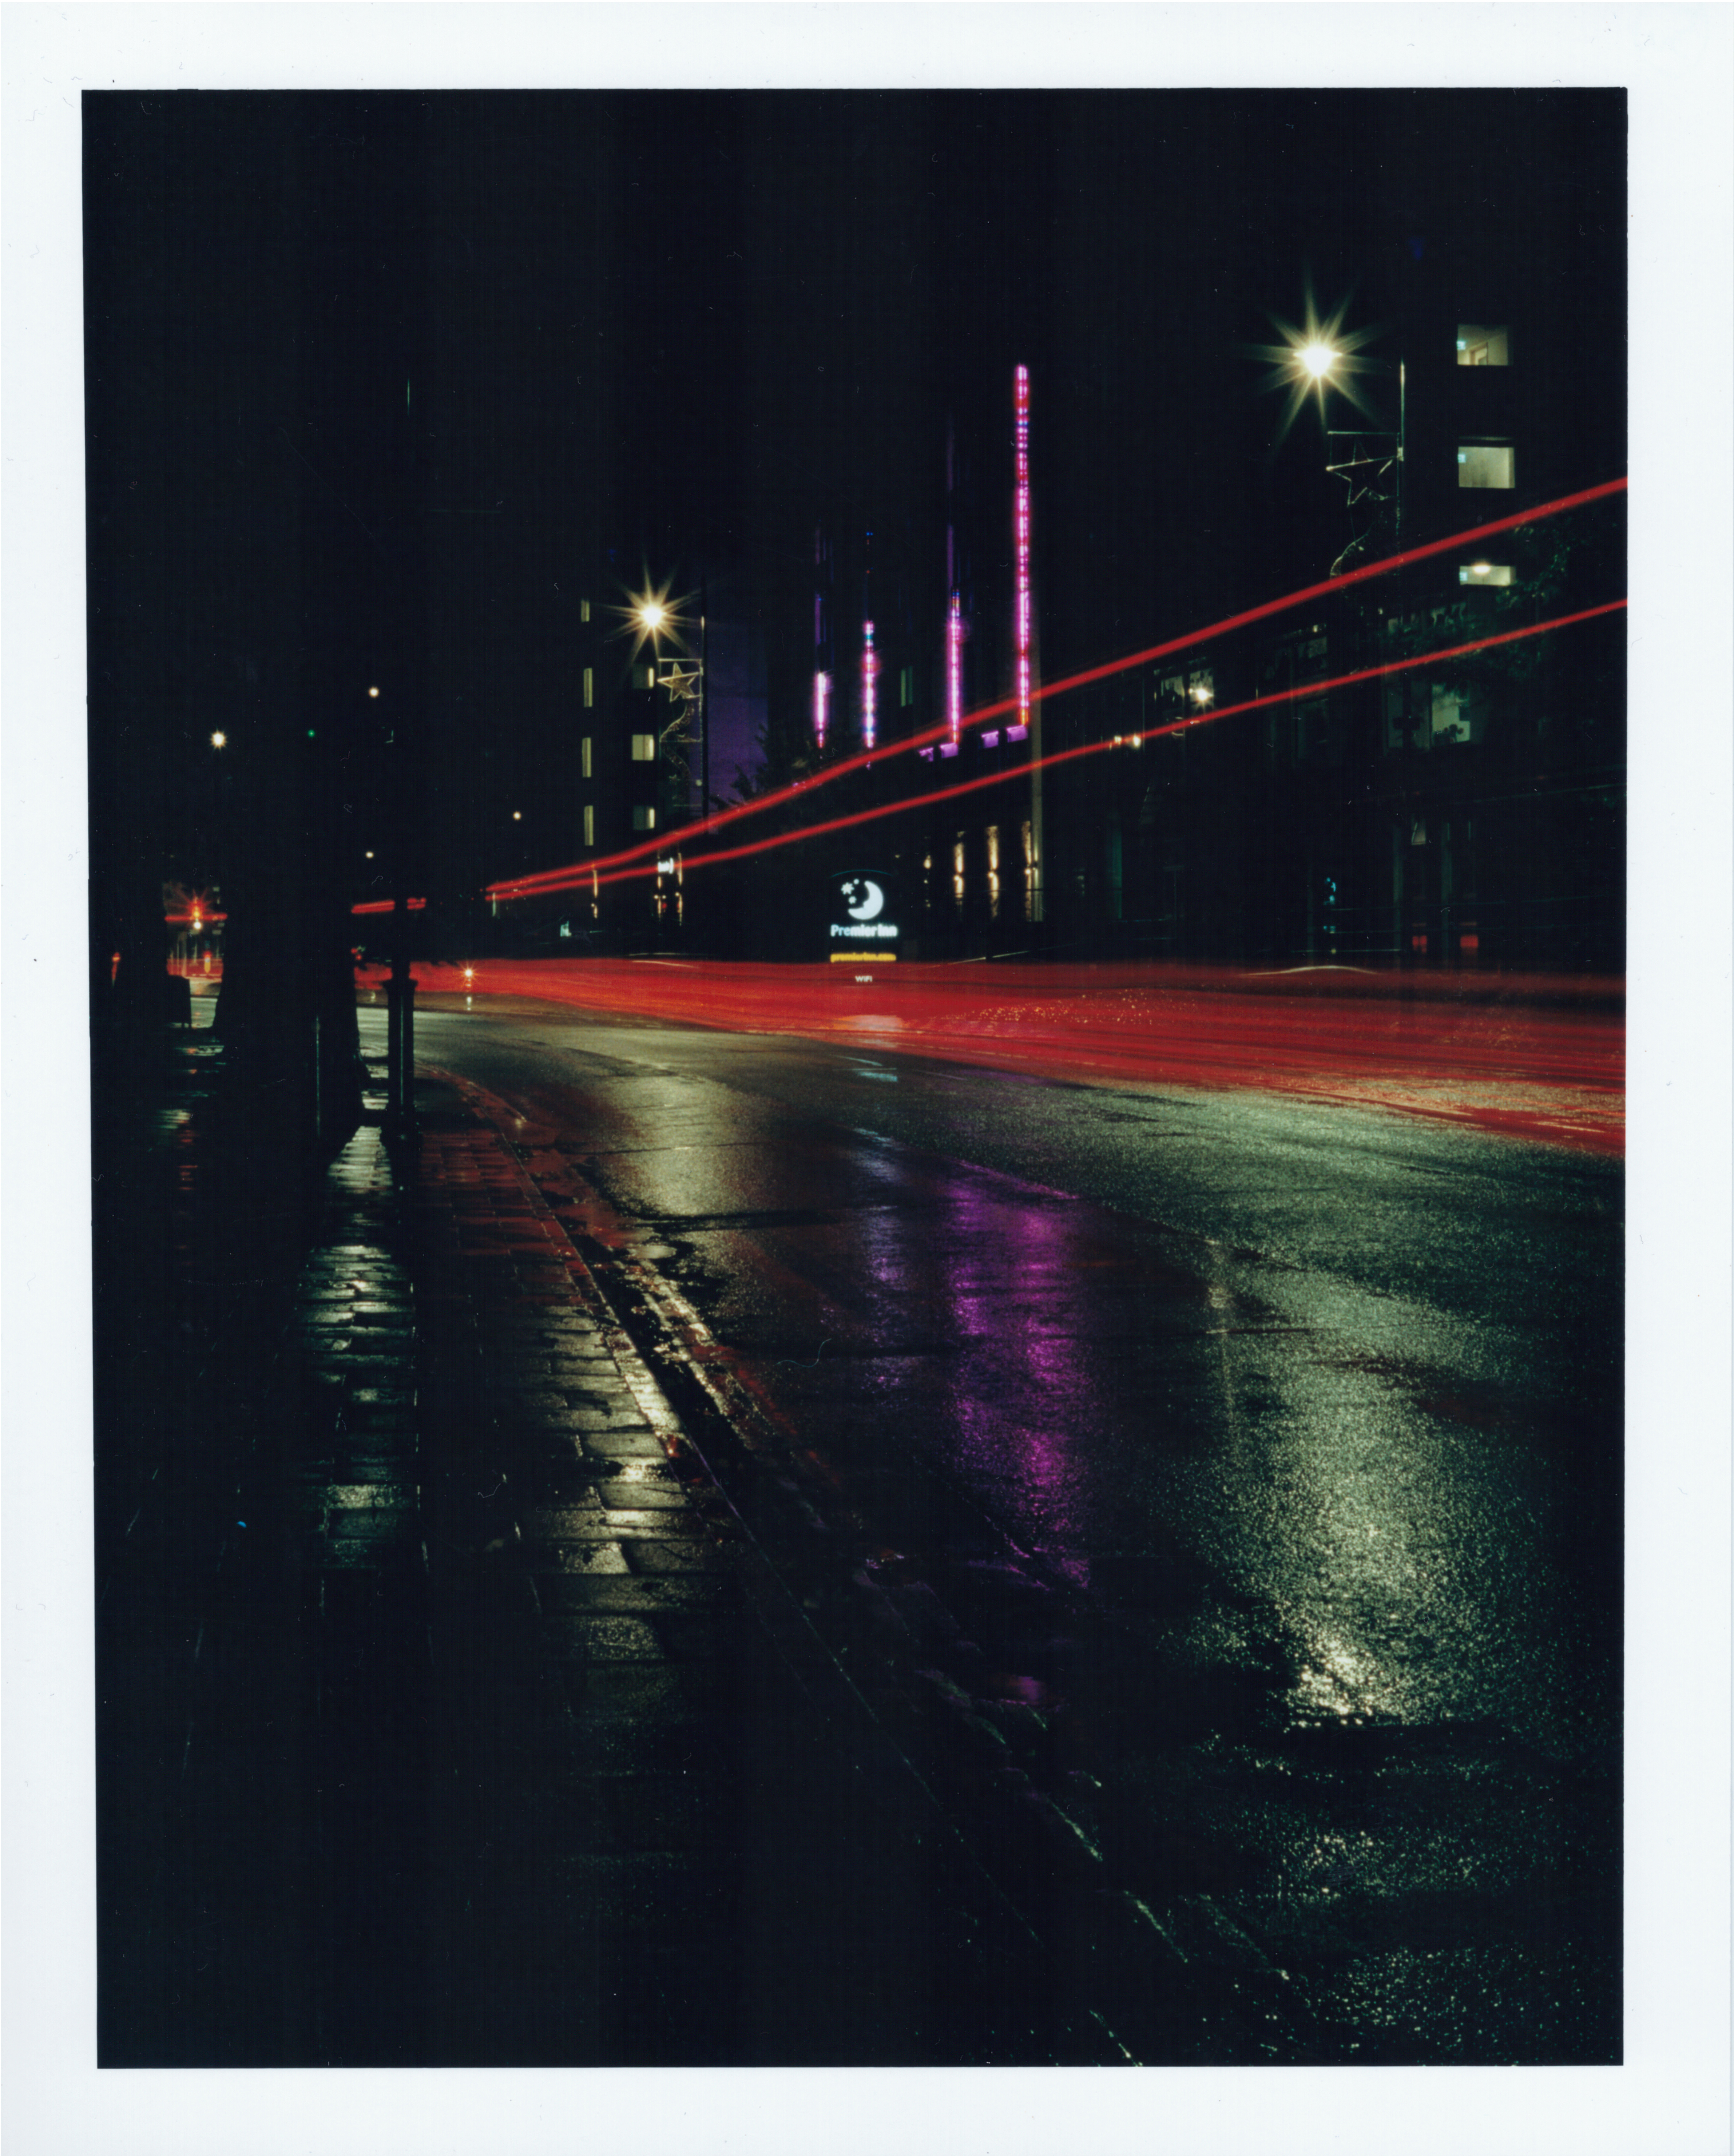
Even after adjusting the exposure it was still a dark picture and the pavement did come out a little lighter than it appears here in this poor 600dpi scan from my Xerox 6515 MFD.
Trying to change the aperture on my Canon A1 and then alter shutter speed accordingly was difficult in the dark and wet as I couldn’t see the dials or markings on the lens without the use of my Apple Watch as a torch of sorts. I really appreciate the LCD screen on my 5D as well as the top illuminated settings screen now that I have struggled like this…
An initial look at this image by Jack and Matt saw them suggesting that it reminded them both of something by Rut Blees Luxemburg, who is well known for night shots with water and reflections, I will investigate her images further as the ones I’ve seen so far are fantastic. Not only that but I recognised one of them immediately as it was used as the album cover for “Original Pirate Material” by the Streets. It’s a photo called Towering Inferno of a London tower block and looks amazing.
Canal Tavern
The second image I chose to concentrate on was that of the “Canal Tavern” pub in Shrewsbury, which has sat derelict for a number of years after closing down a long time past. I’ve fond memories of this old pub as my Dad, being a postie, would often spend many hours in there having a pint of bitter or a Strongbow cider, either before work, after work, or sometimes even in his breaks… It has some happy memories for me and it’s nice to see it being refurbed instead of demolished and built over.
Again Matt had a suggestion that this reminded him of Peter Mitchell’s work, not to be confused with Pete “Maverick” Mitchell from Top Gun. Mitchell has a vast collection of similar buildings in various states of dilapidation and neglect, along with some that are being worked on to bring them back into use. I found his photographic style to be documentary and yet engaging as it shows true life neighbourhoods with their rough areas plainly in view.

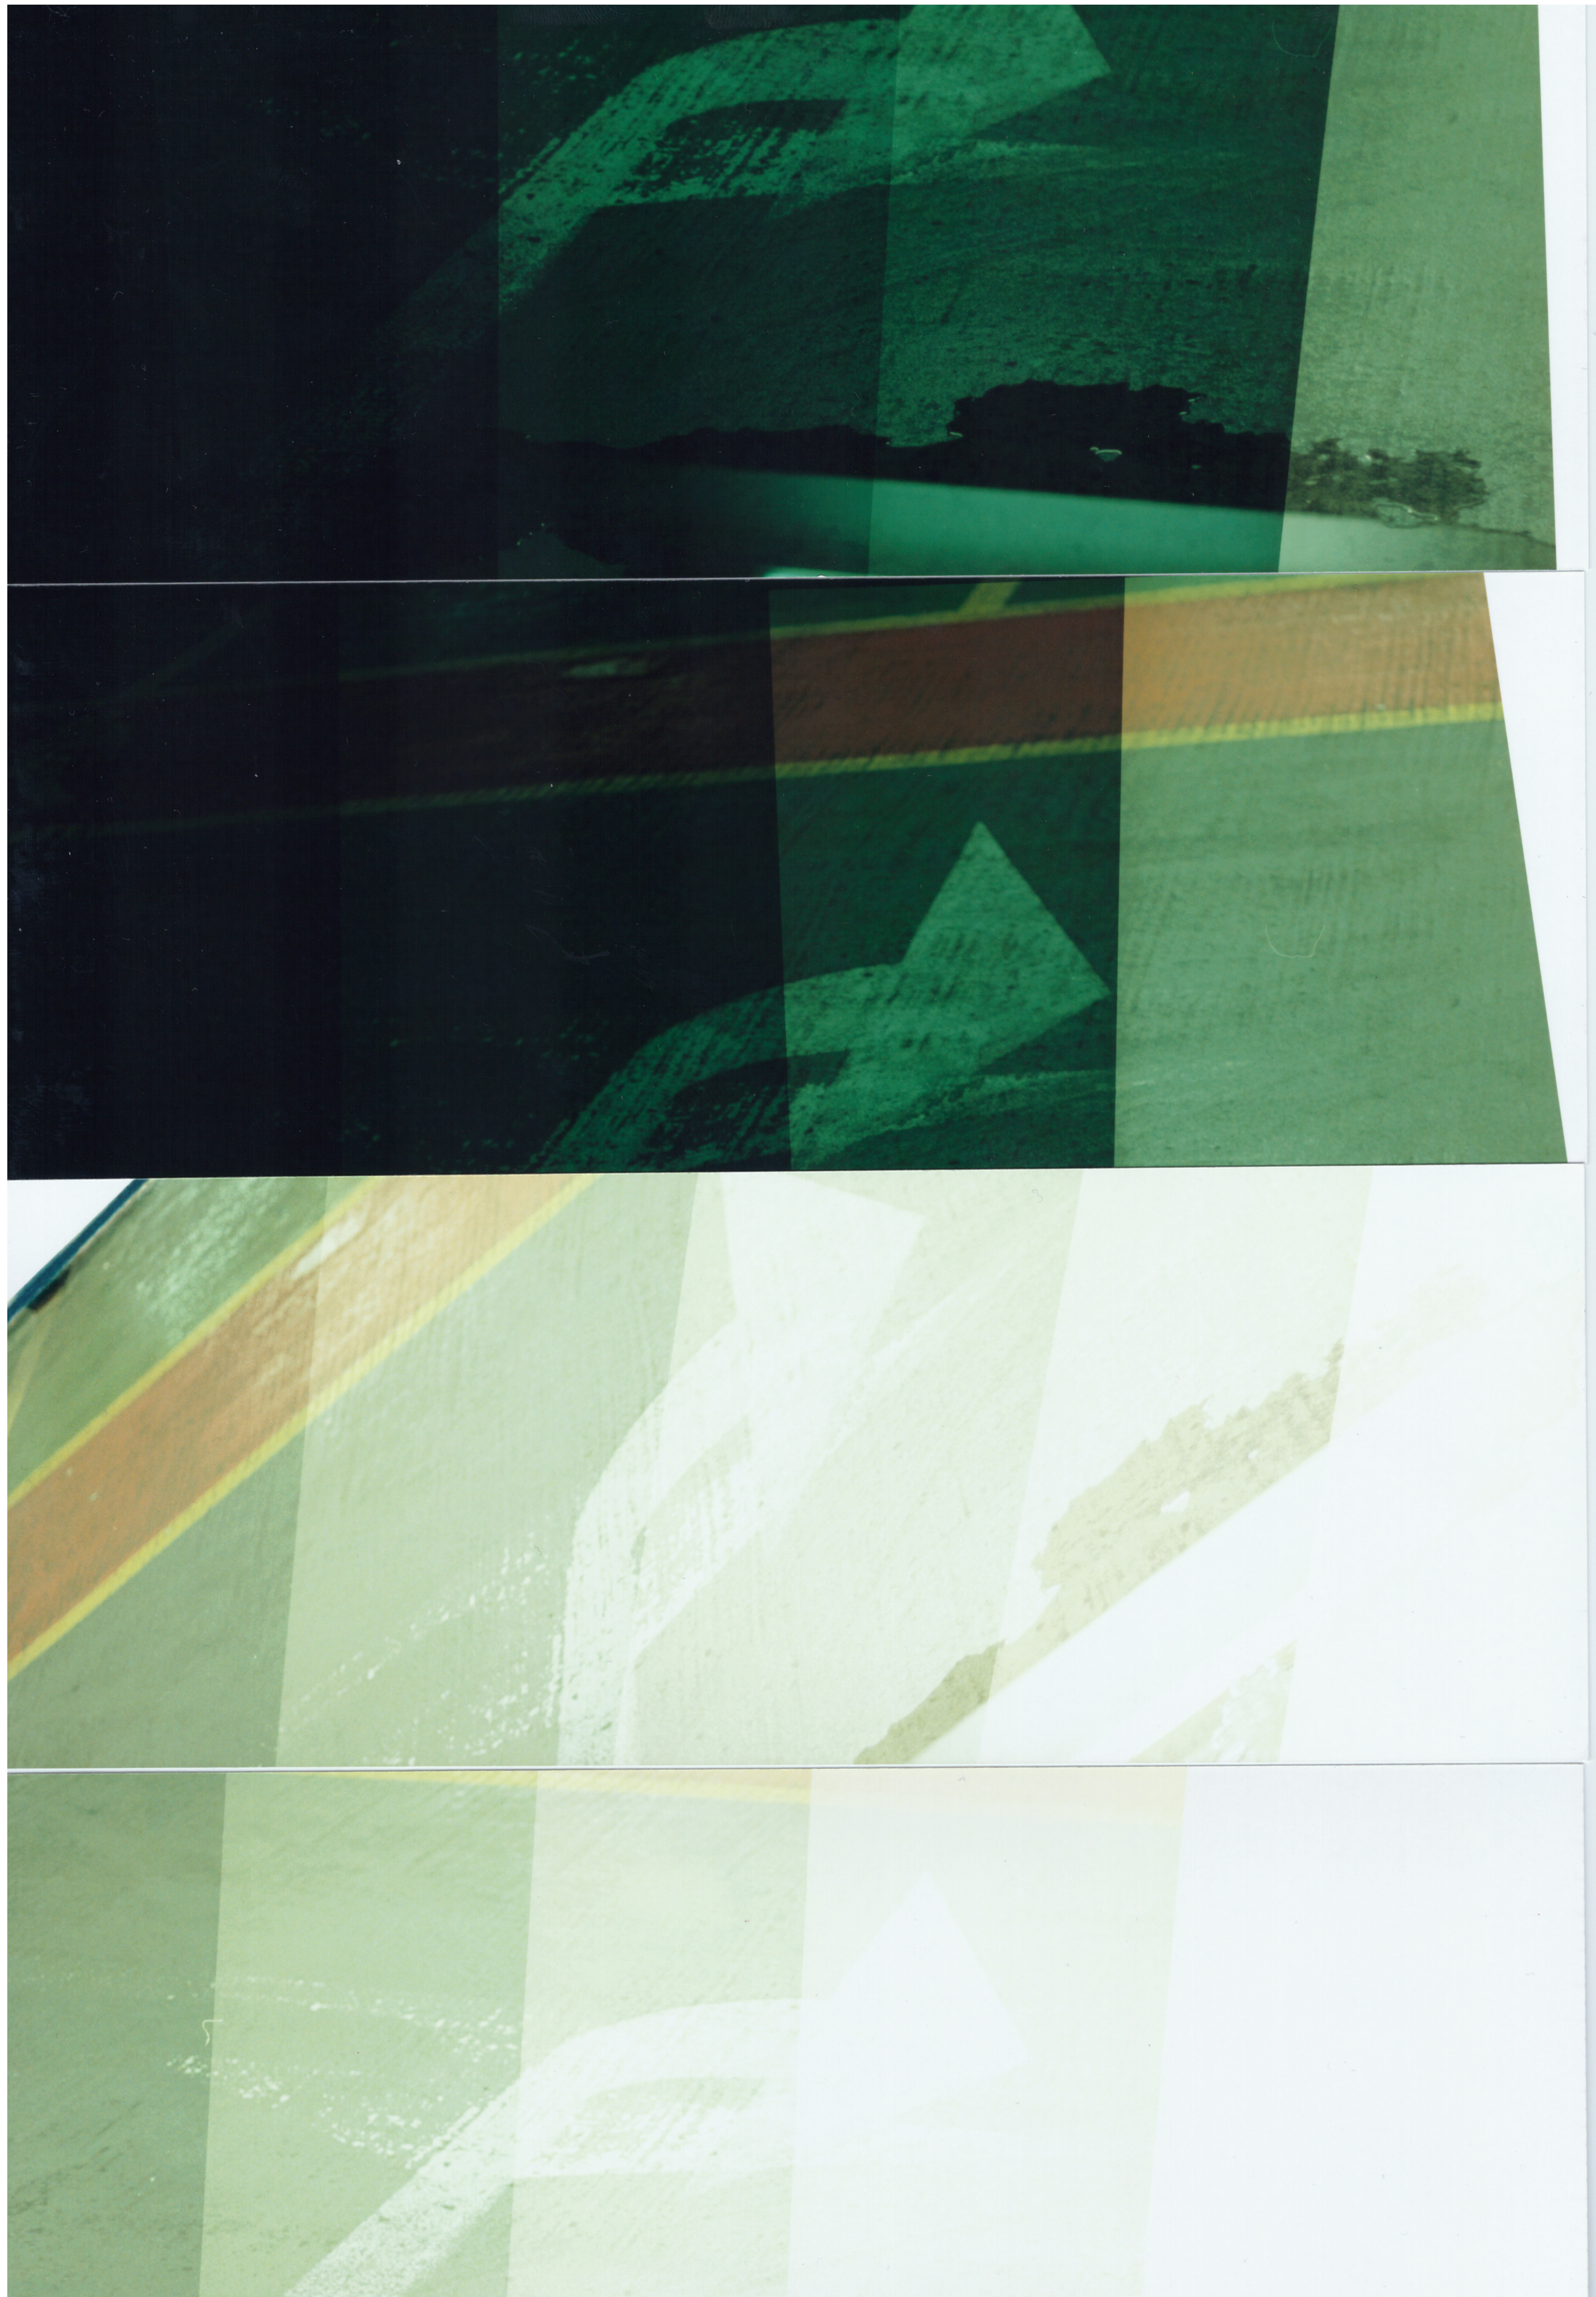
There were many test strips and full strips of this image as can be seen above the colours were challenging to get neutral, the white painted vans especially stood out as being too Cyany so I eventually had to drop the filters further than before to get it somewhere near.
All of the settings for each of the test strips and prints can be found at the foot of this post so I’m not constantly writing what they all were. The images above were scanned before being pasted into my sketchbook and annotated with notes and the settings.
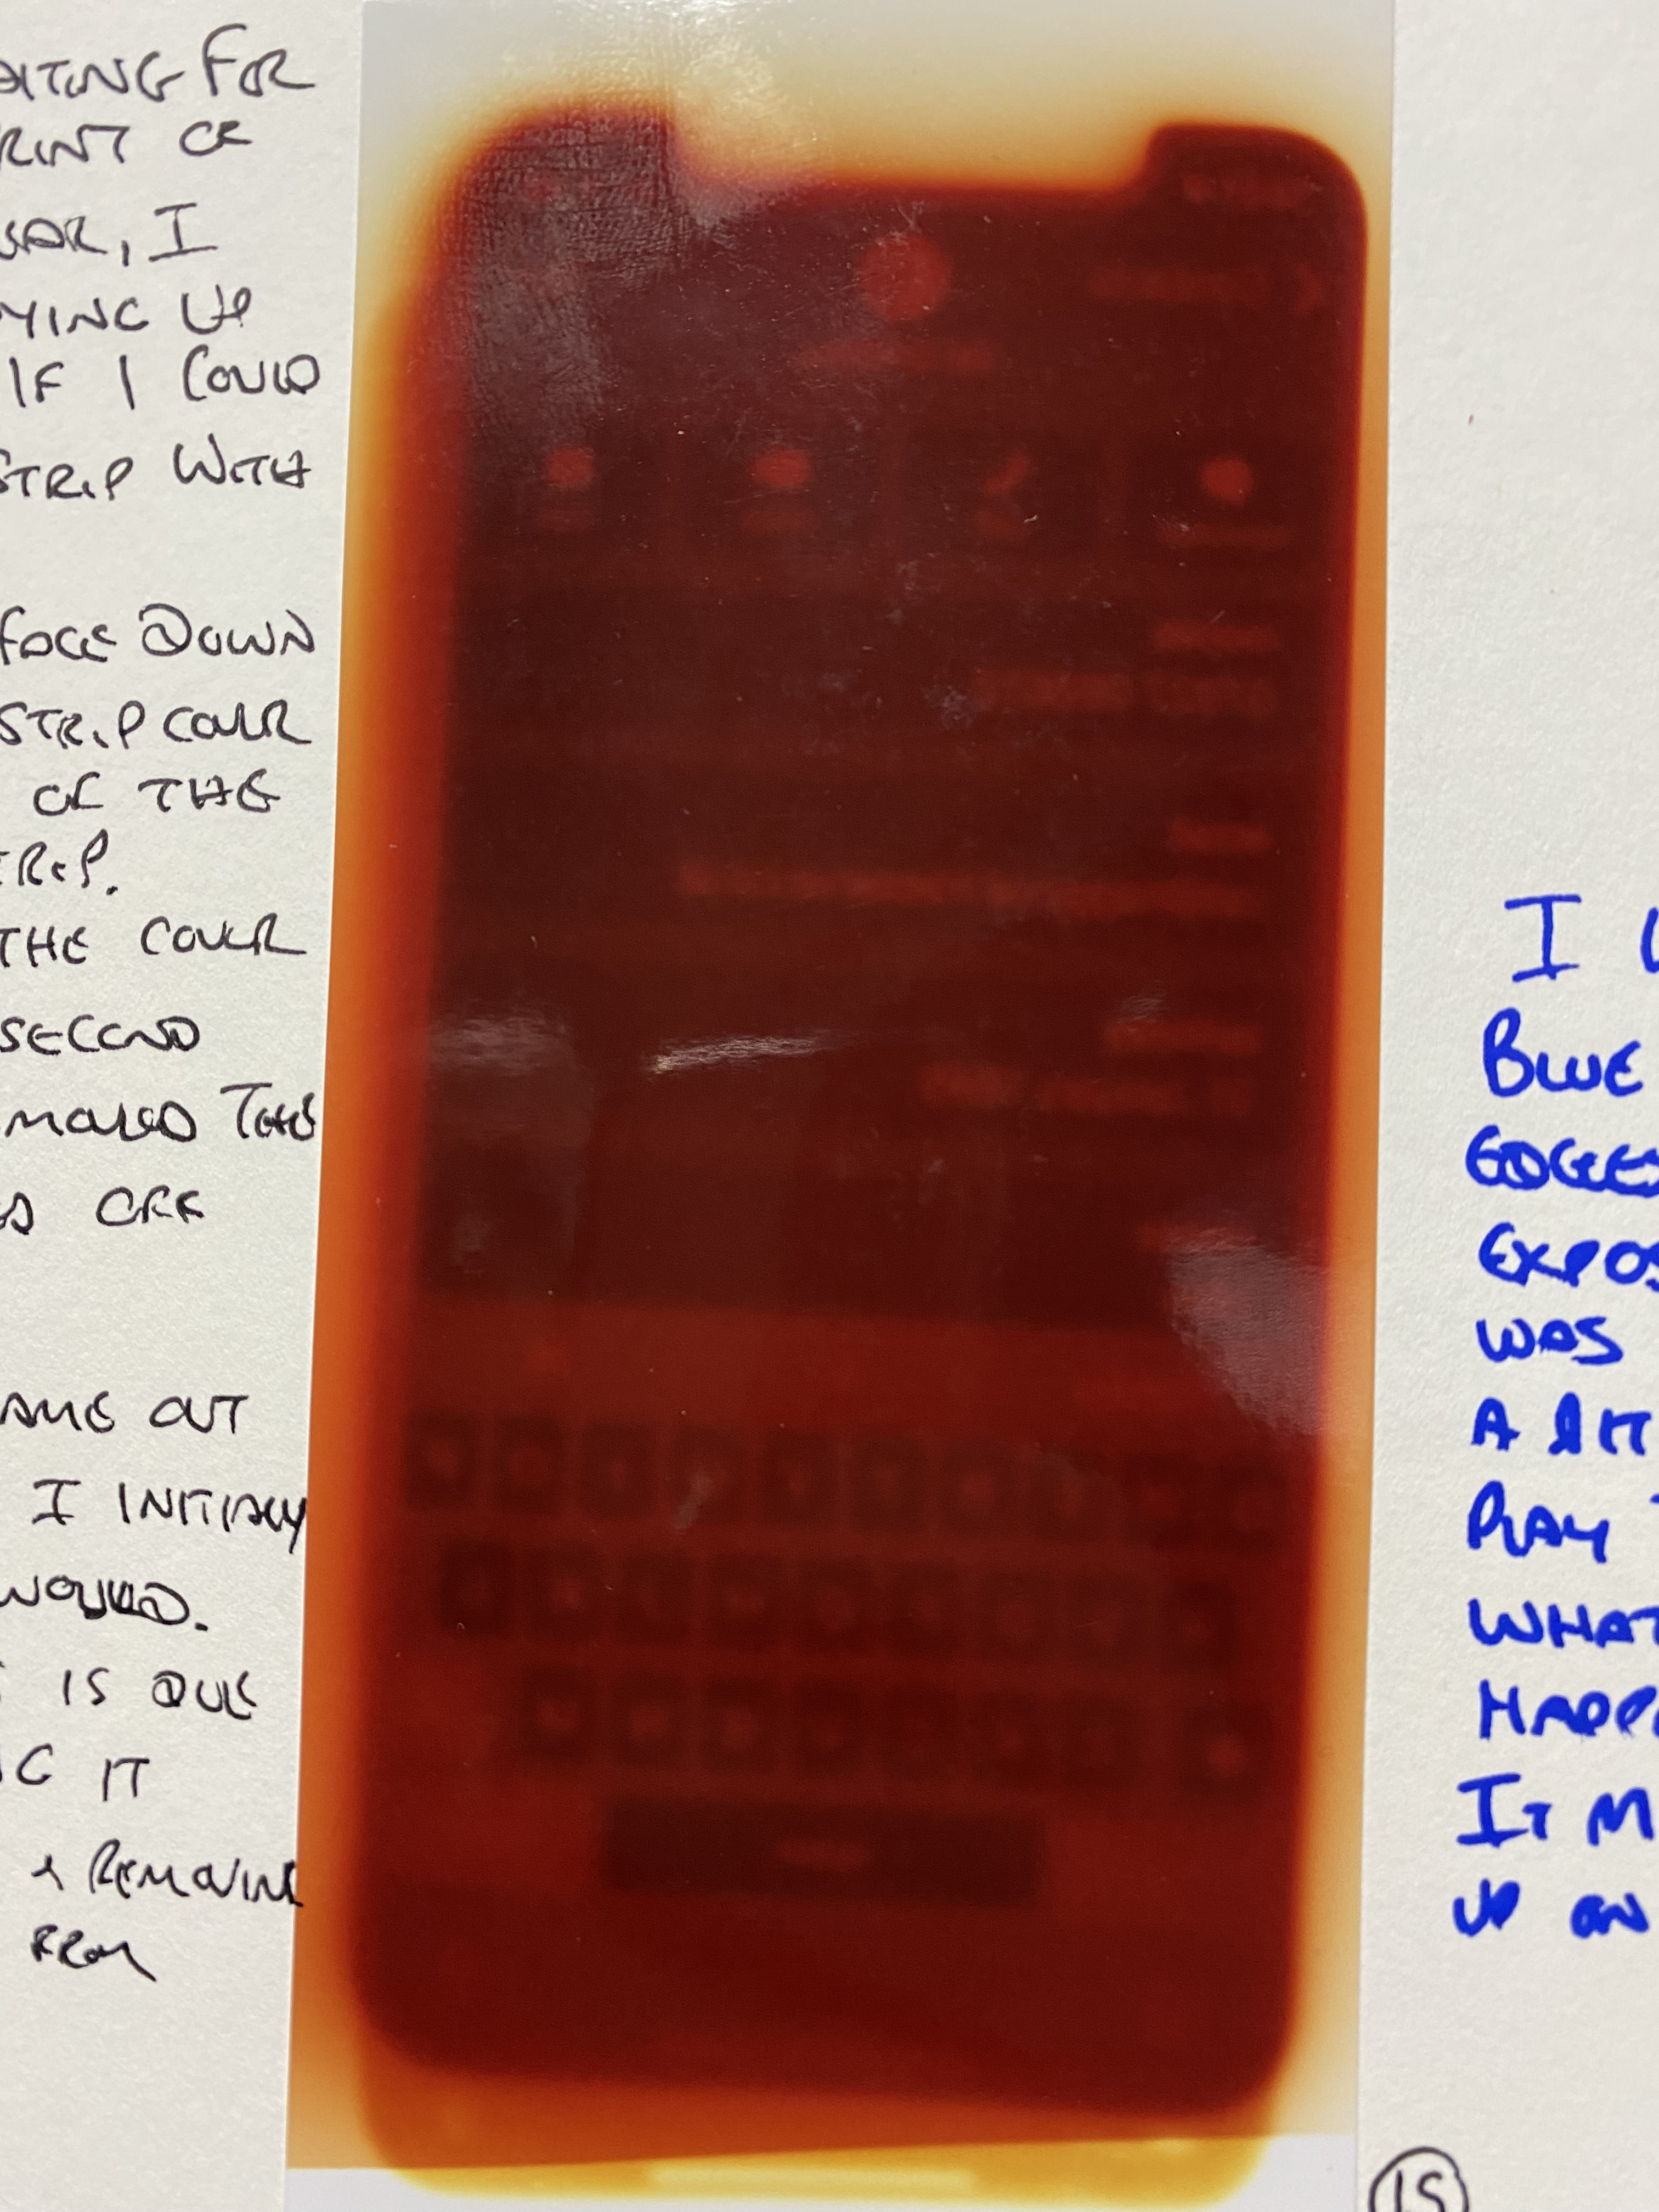
Experiment #1
Whilst awaiting my final print to emerge I tidied up the Darkroom and the Enlarger space a little, when I had an idea of something to try with my iPhone and a test strip cut from Fuji Crystal Archive, so I placed my phone face down, screen on, onto my strip cover and then whipped that out like a waiter doing the tablecloth trick. After a second, no more, I picked up the phone and put it in my pocket preventing further exposure. Stashing the exposed paper in my black bag, I took it for processing in the Colenta machine and out popped a brown screen shot in revers of my phone, not brilliant, but I’m pleased I got something from the experiment.
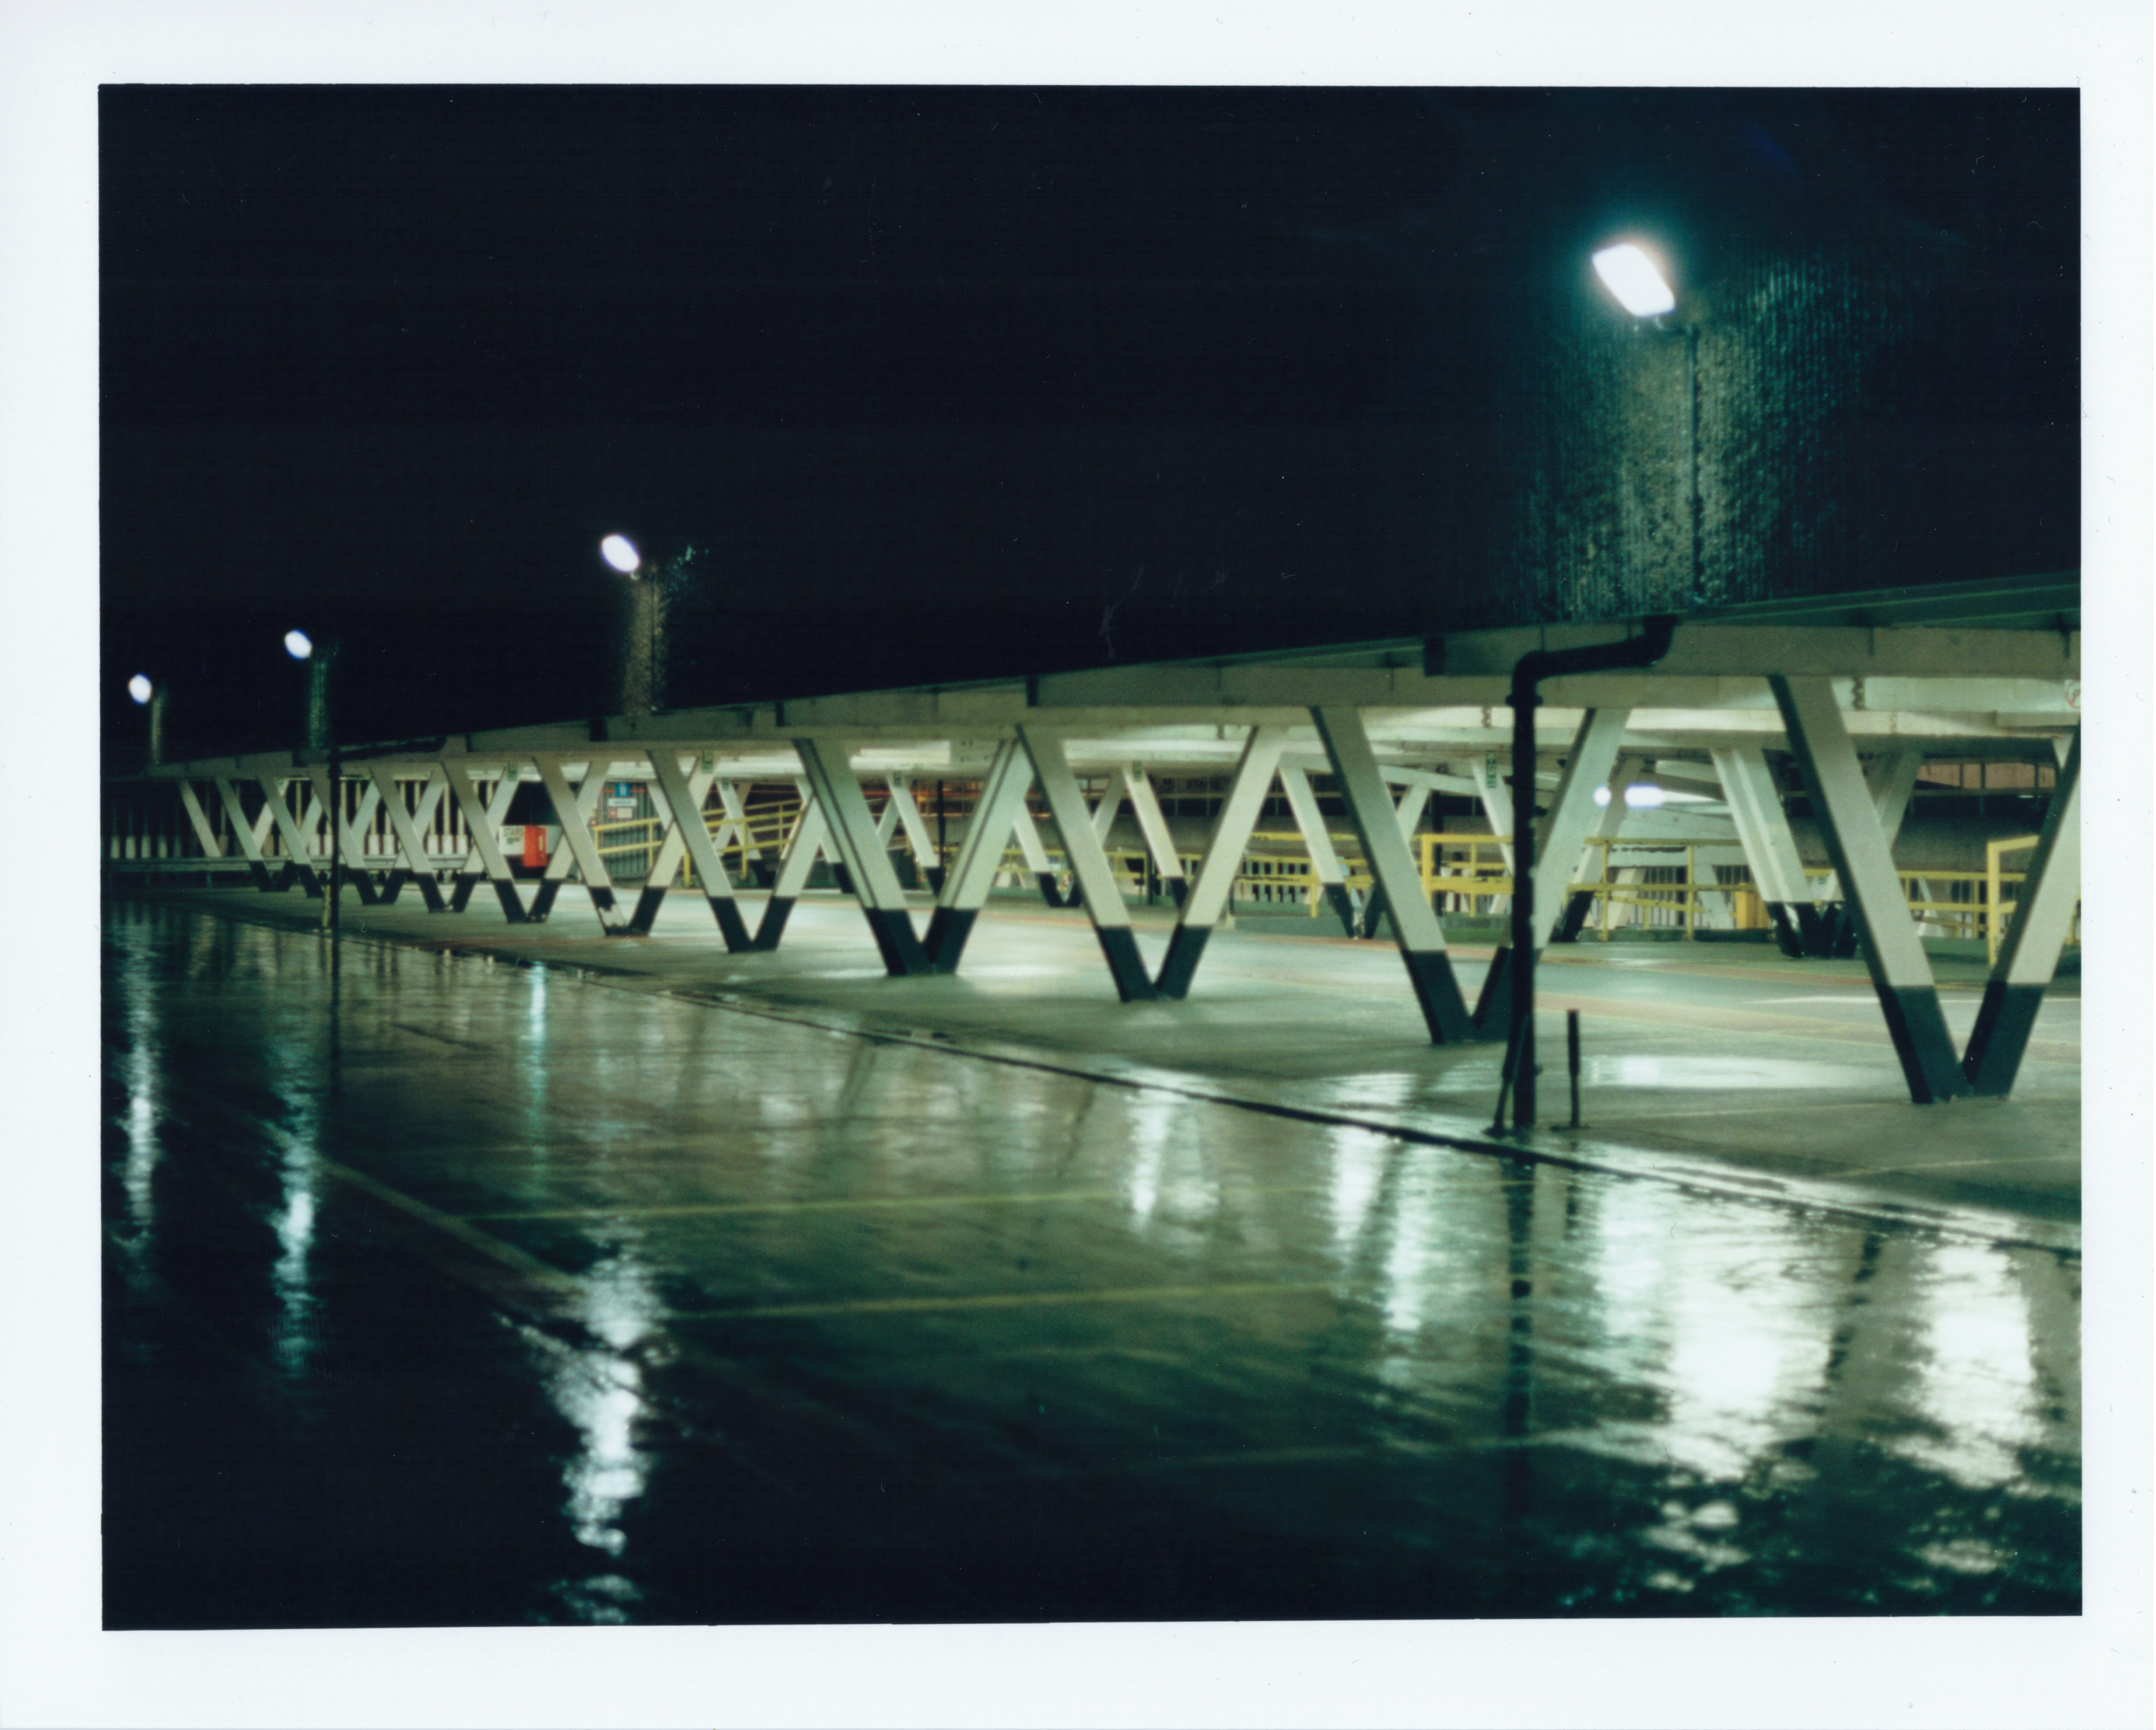
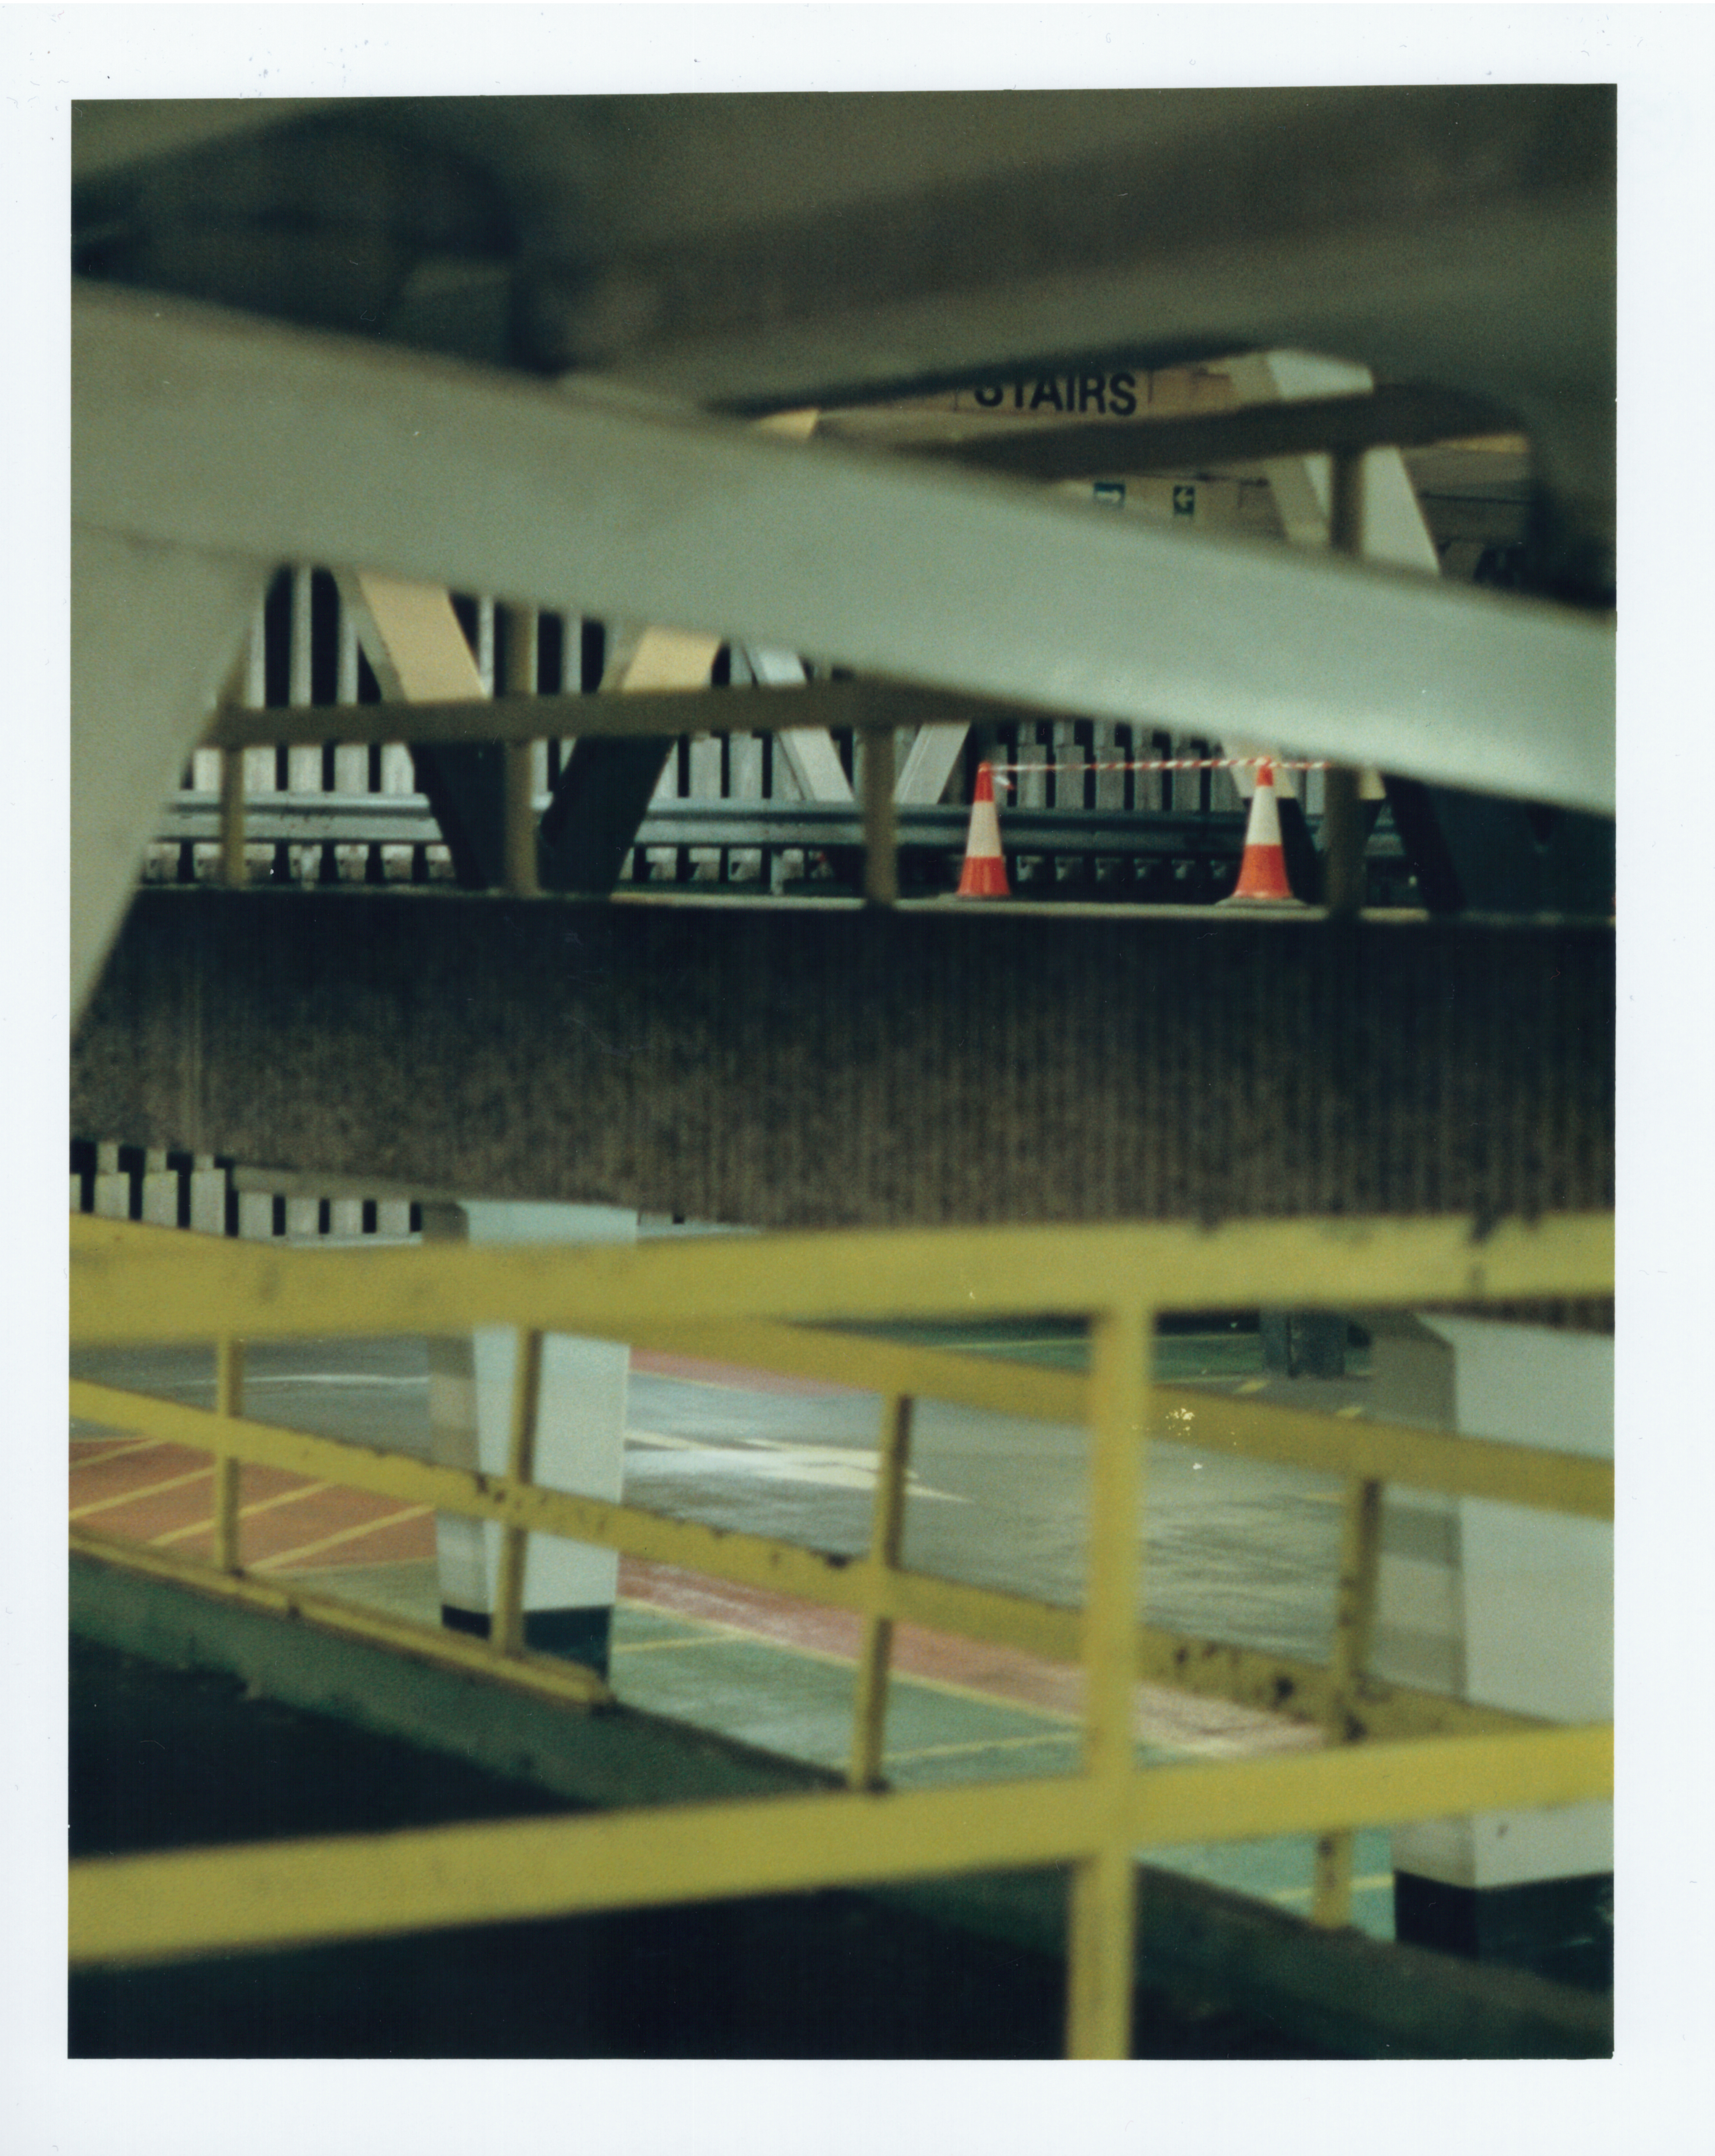
Multi-Story Multi -Storey
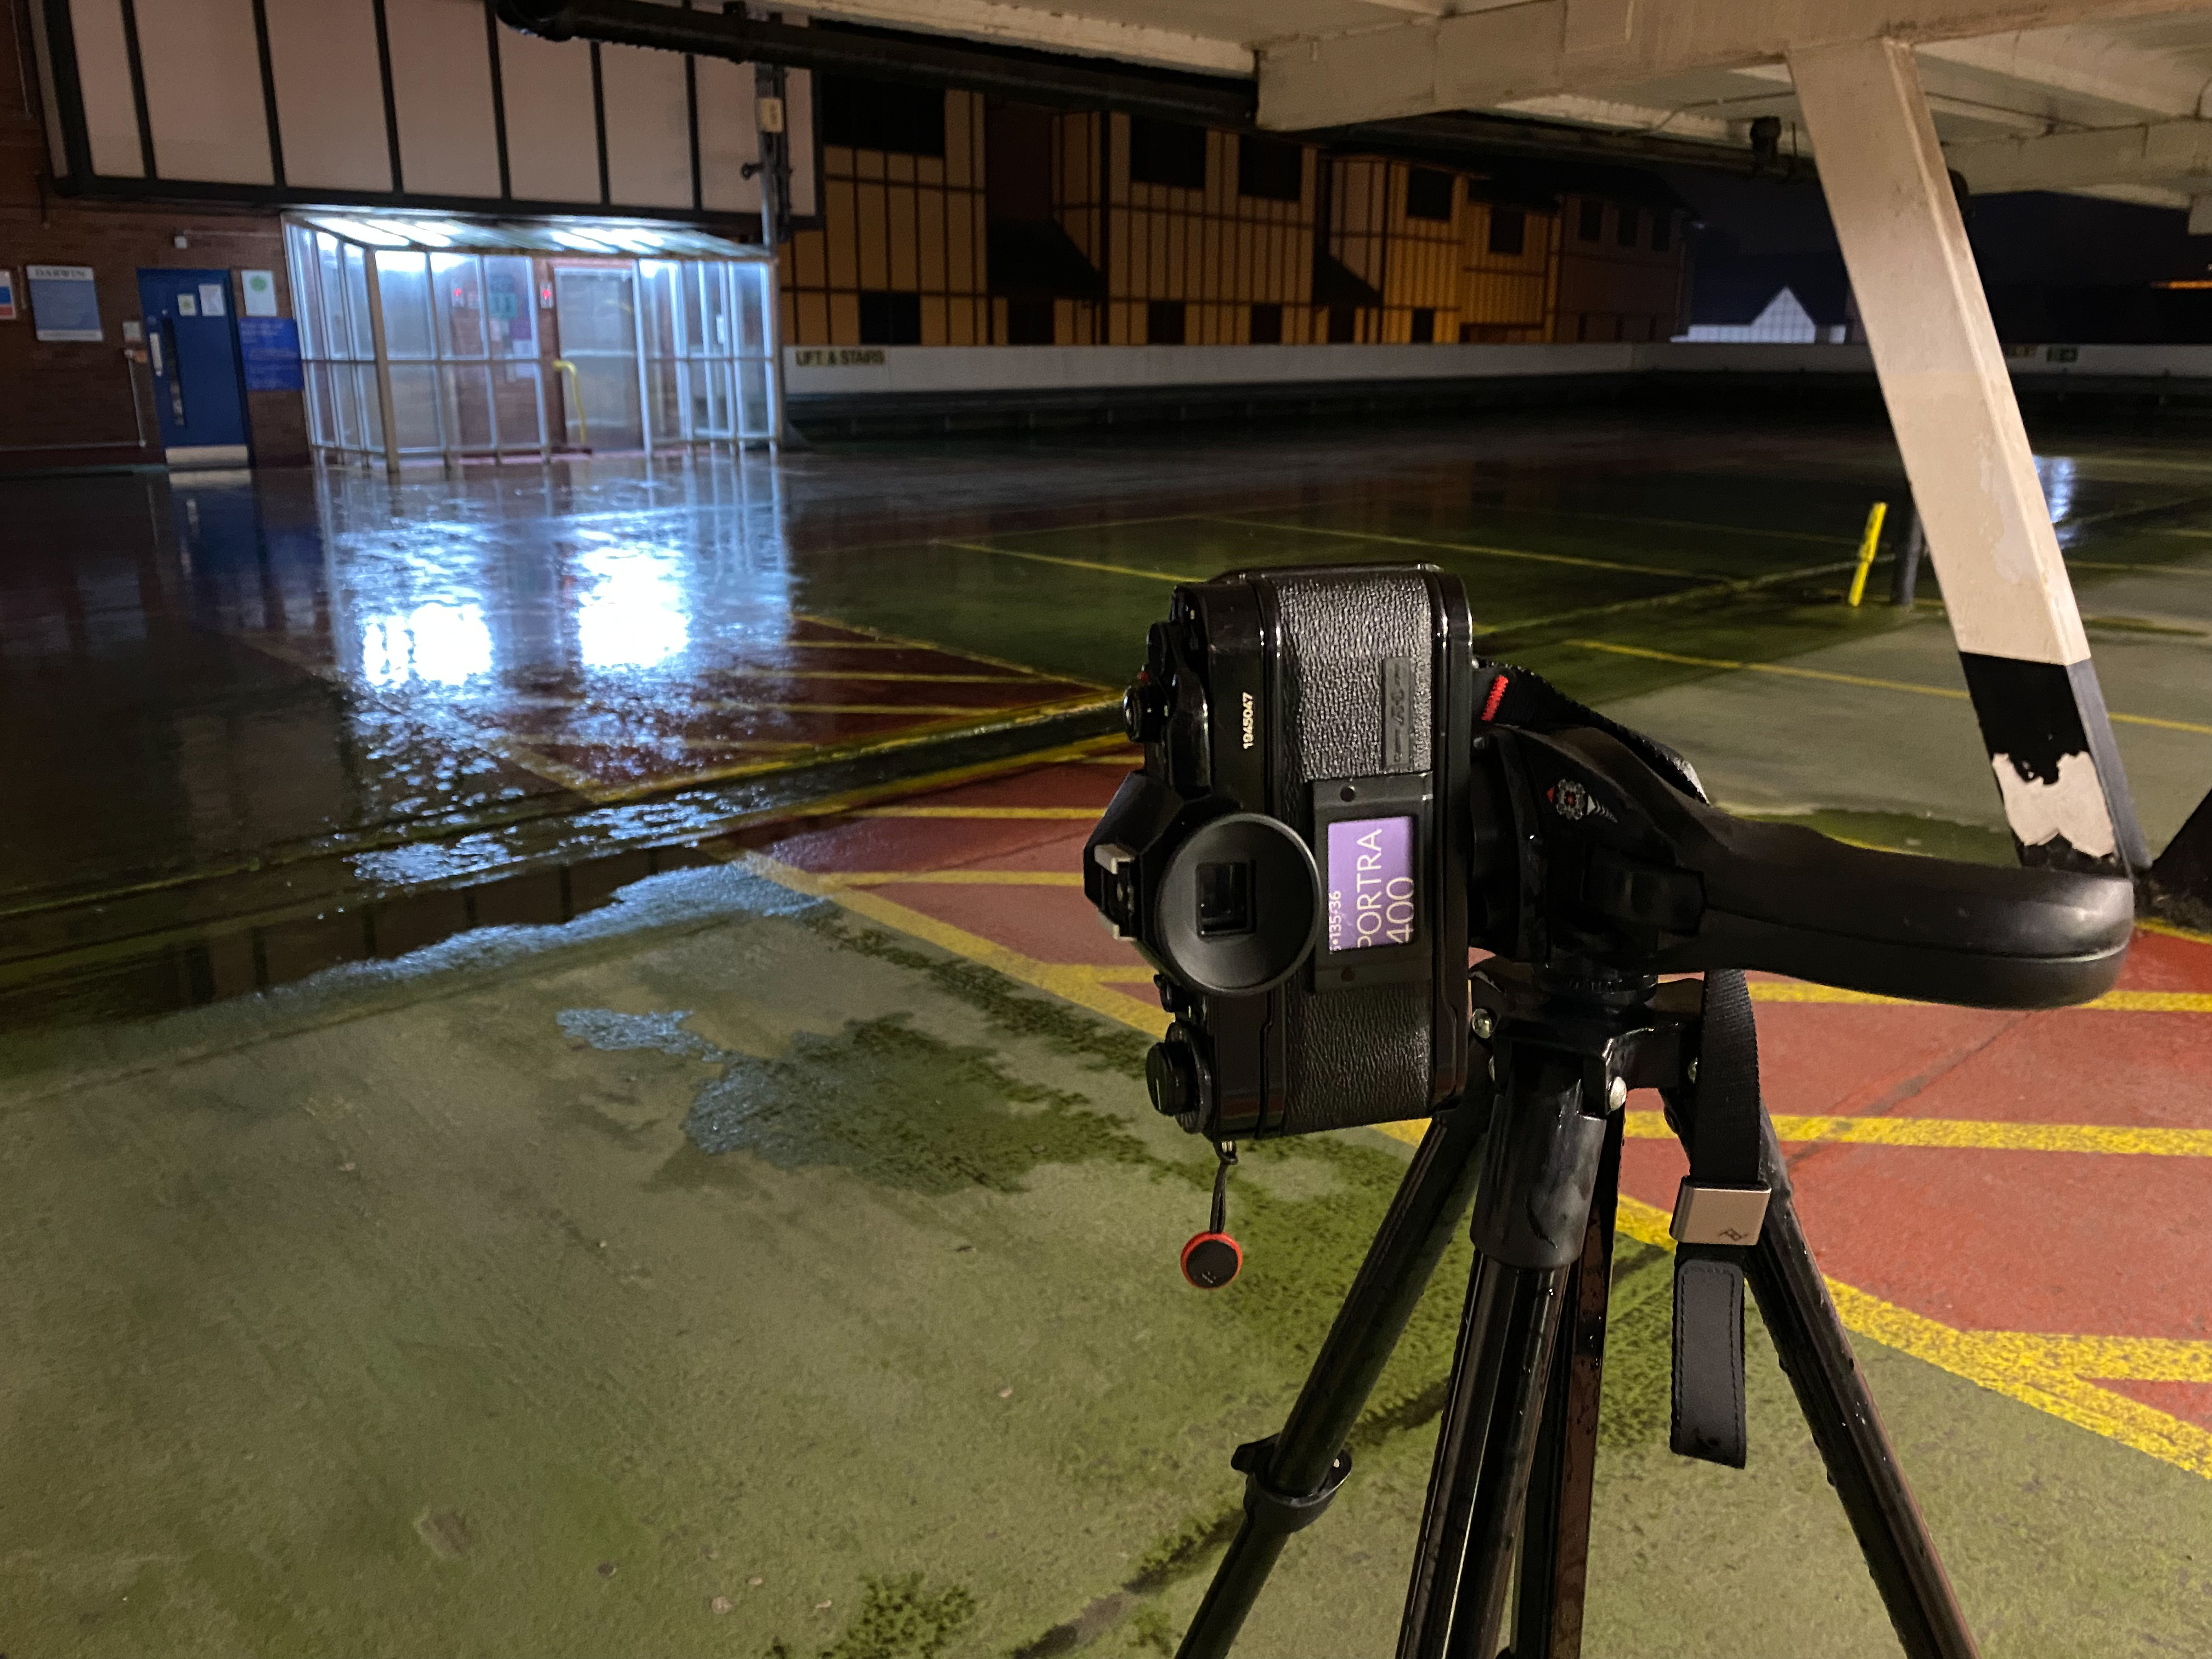
The next group of photos were rainy reflections of night time scenes in Shrewsbury’s Ravens Meadow Multi Storey Car Park which was a beacon of light in a dark town and was full of dripping water , puddles and interesting lights and colours.
A walk up to top deck of the car park was rewarded with a shot of geometric beauty of black and white V shaped supports and the reflection of the lights in the watery surface. Again, I set up the tripod with the Canon A1 on top and then metered using my digital, used the setting son my A1 and set up the shot. It came out better than I might have hoped and there were two usable photos here one with better leading lines than the other. The prints were pretty straightforward to get out from this negative and I was happy with it.
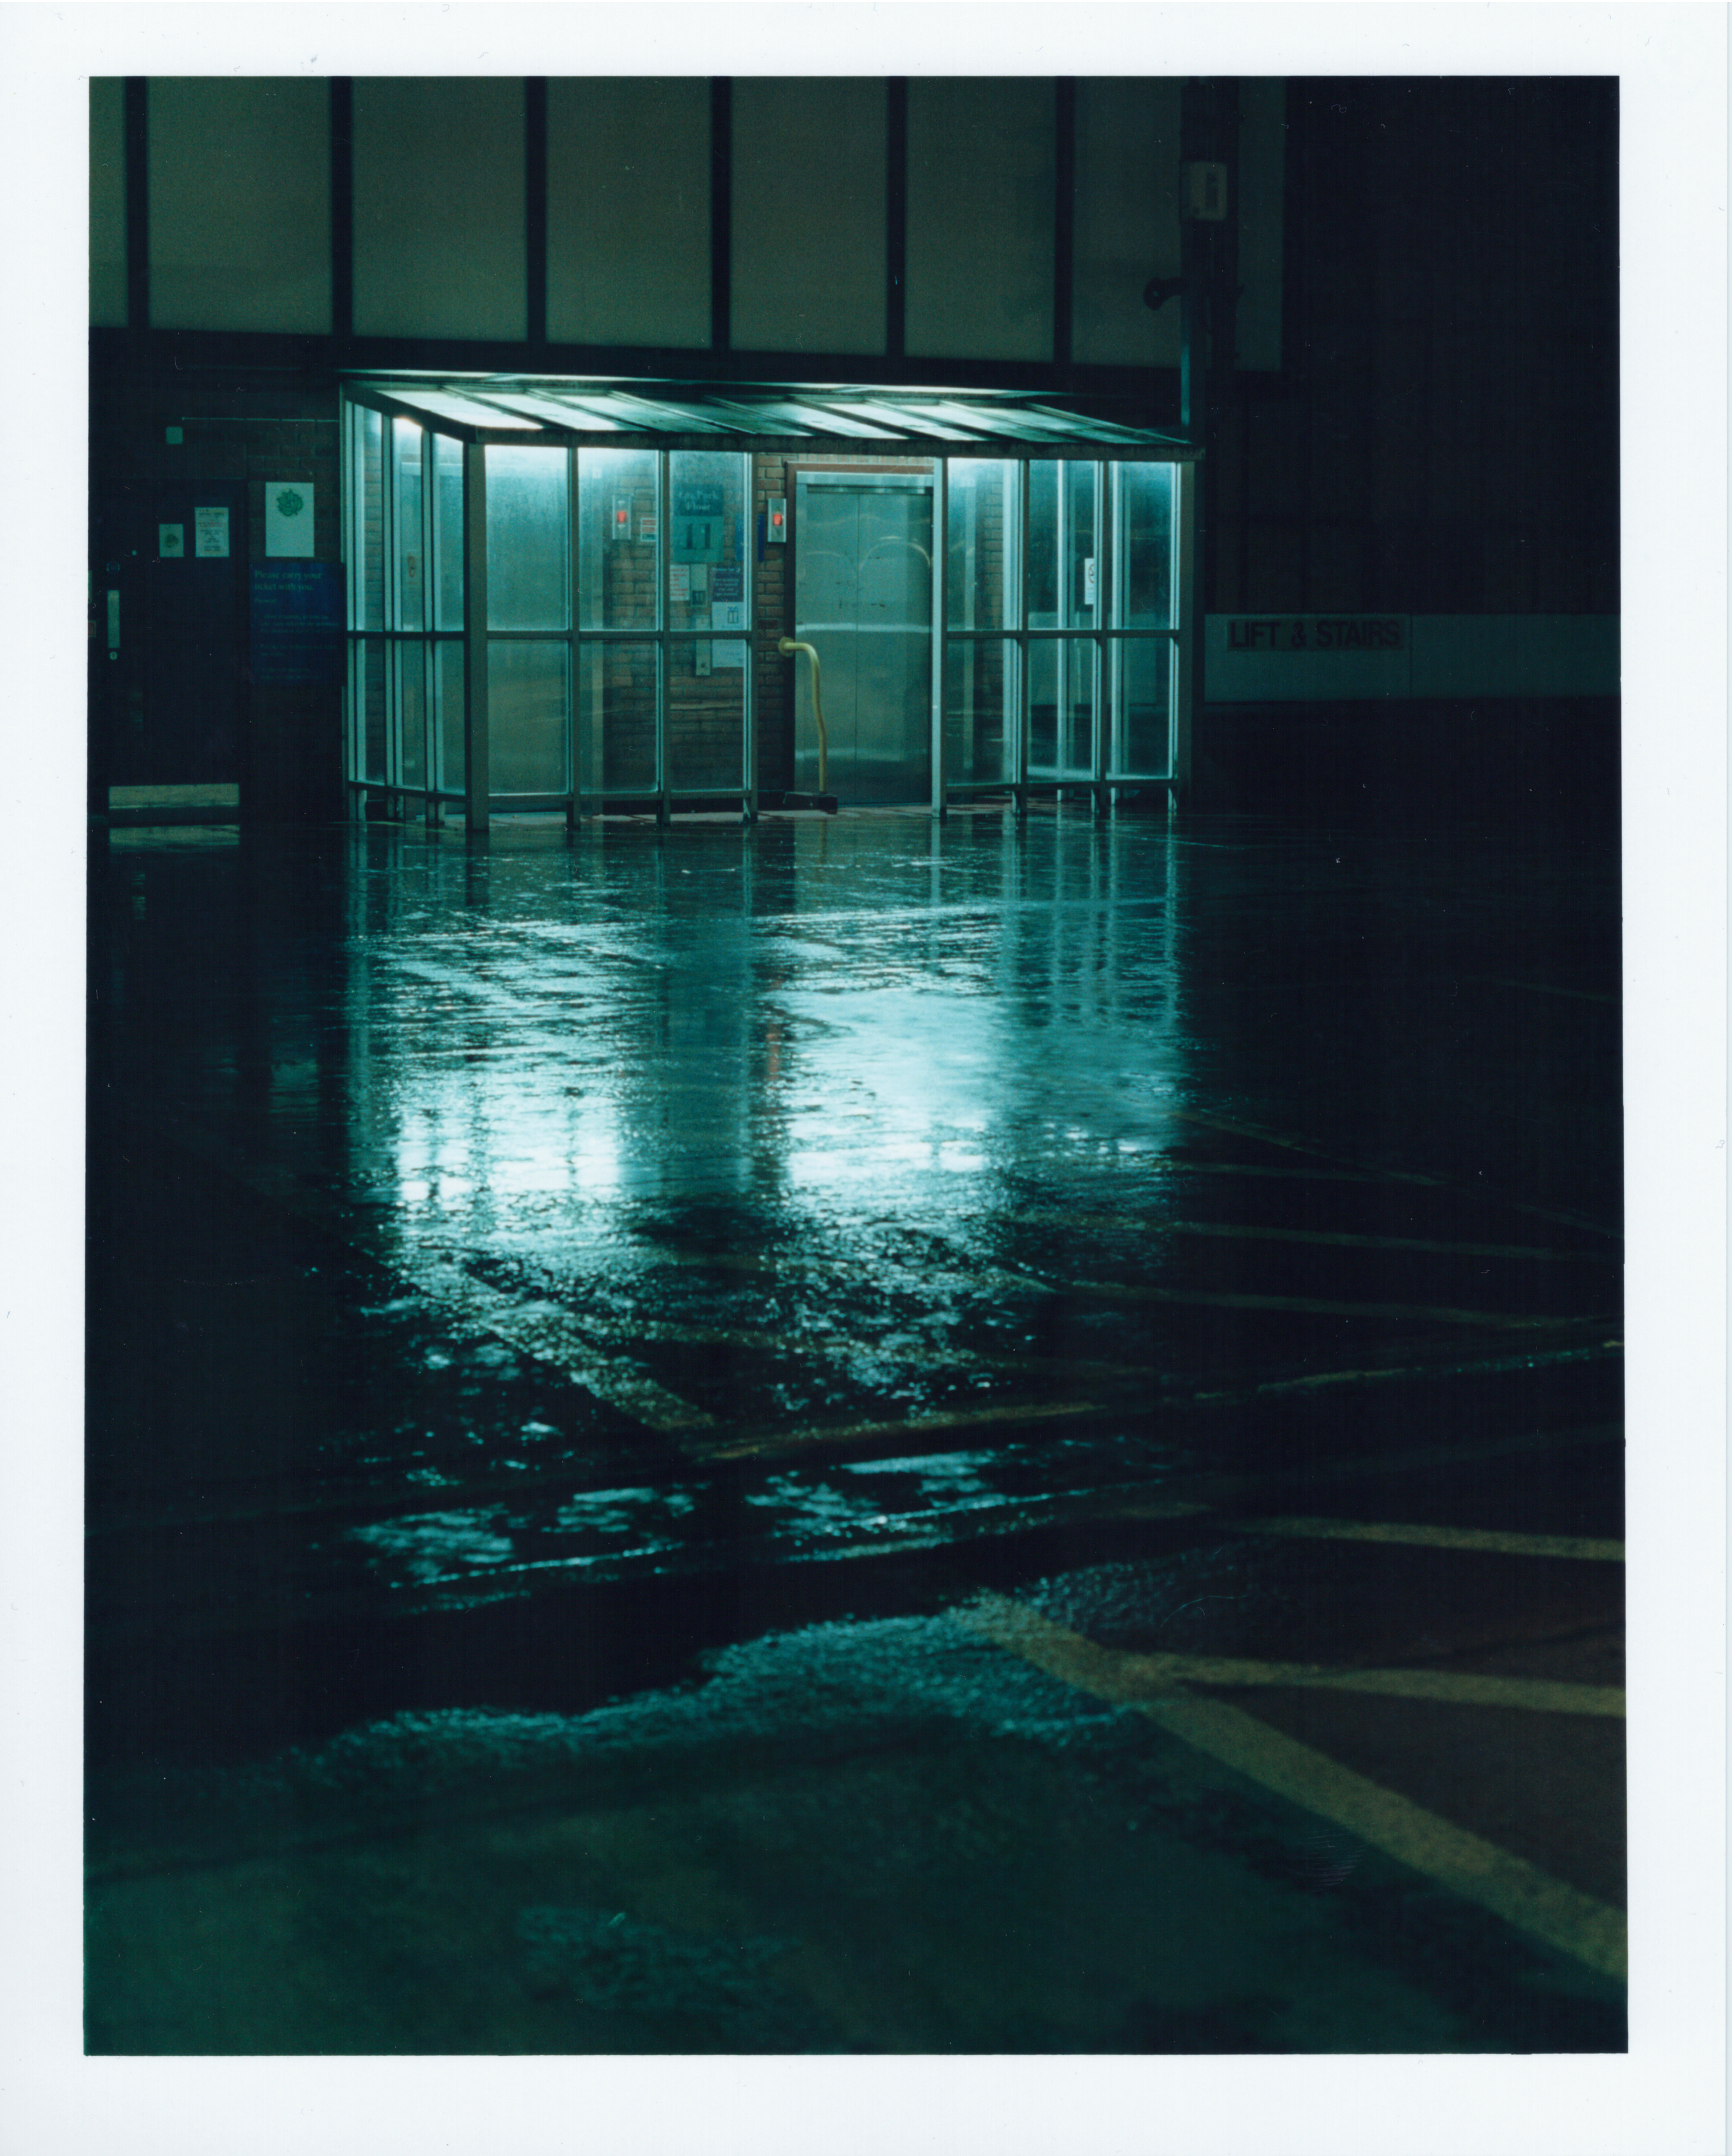
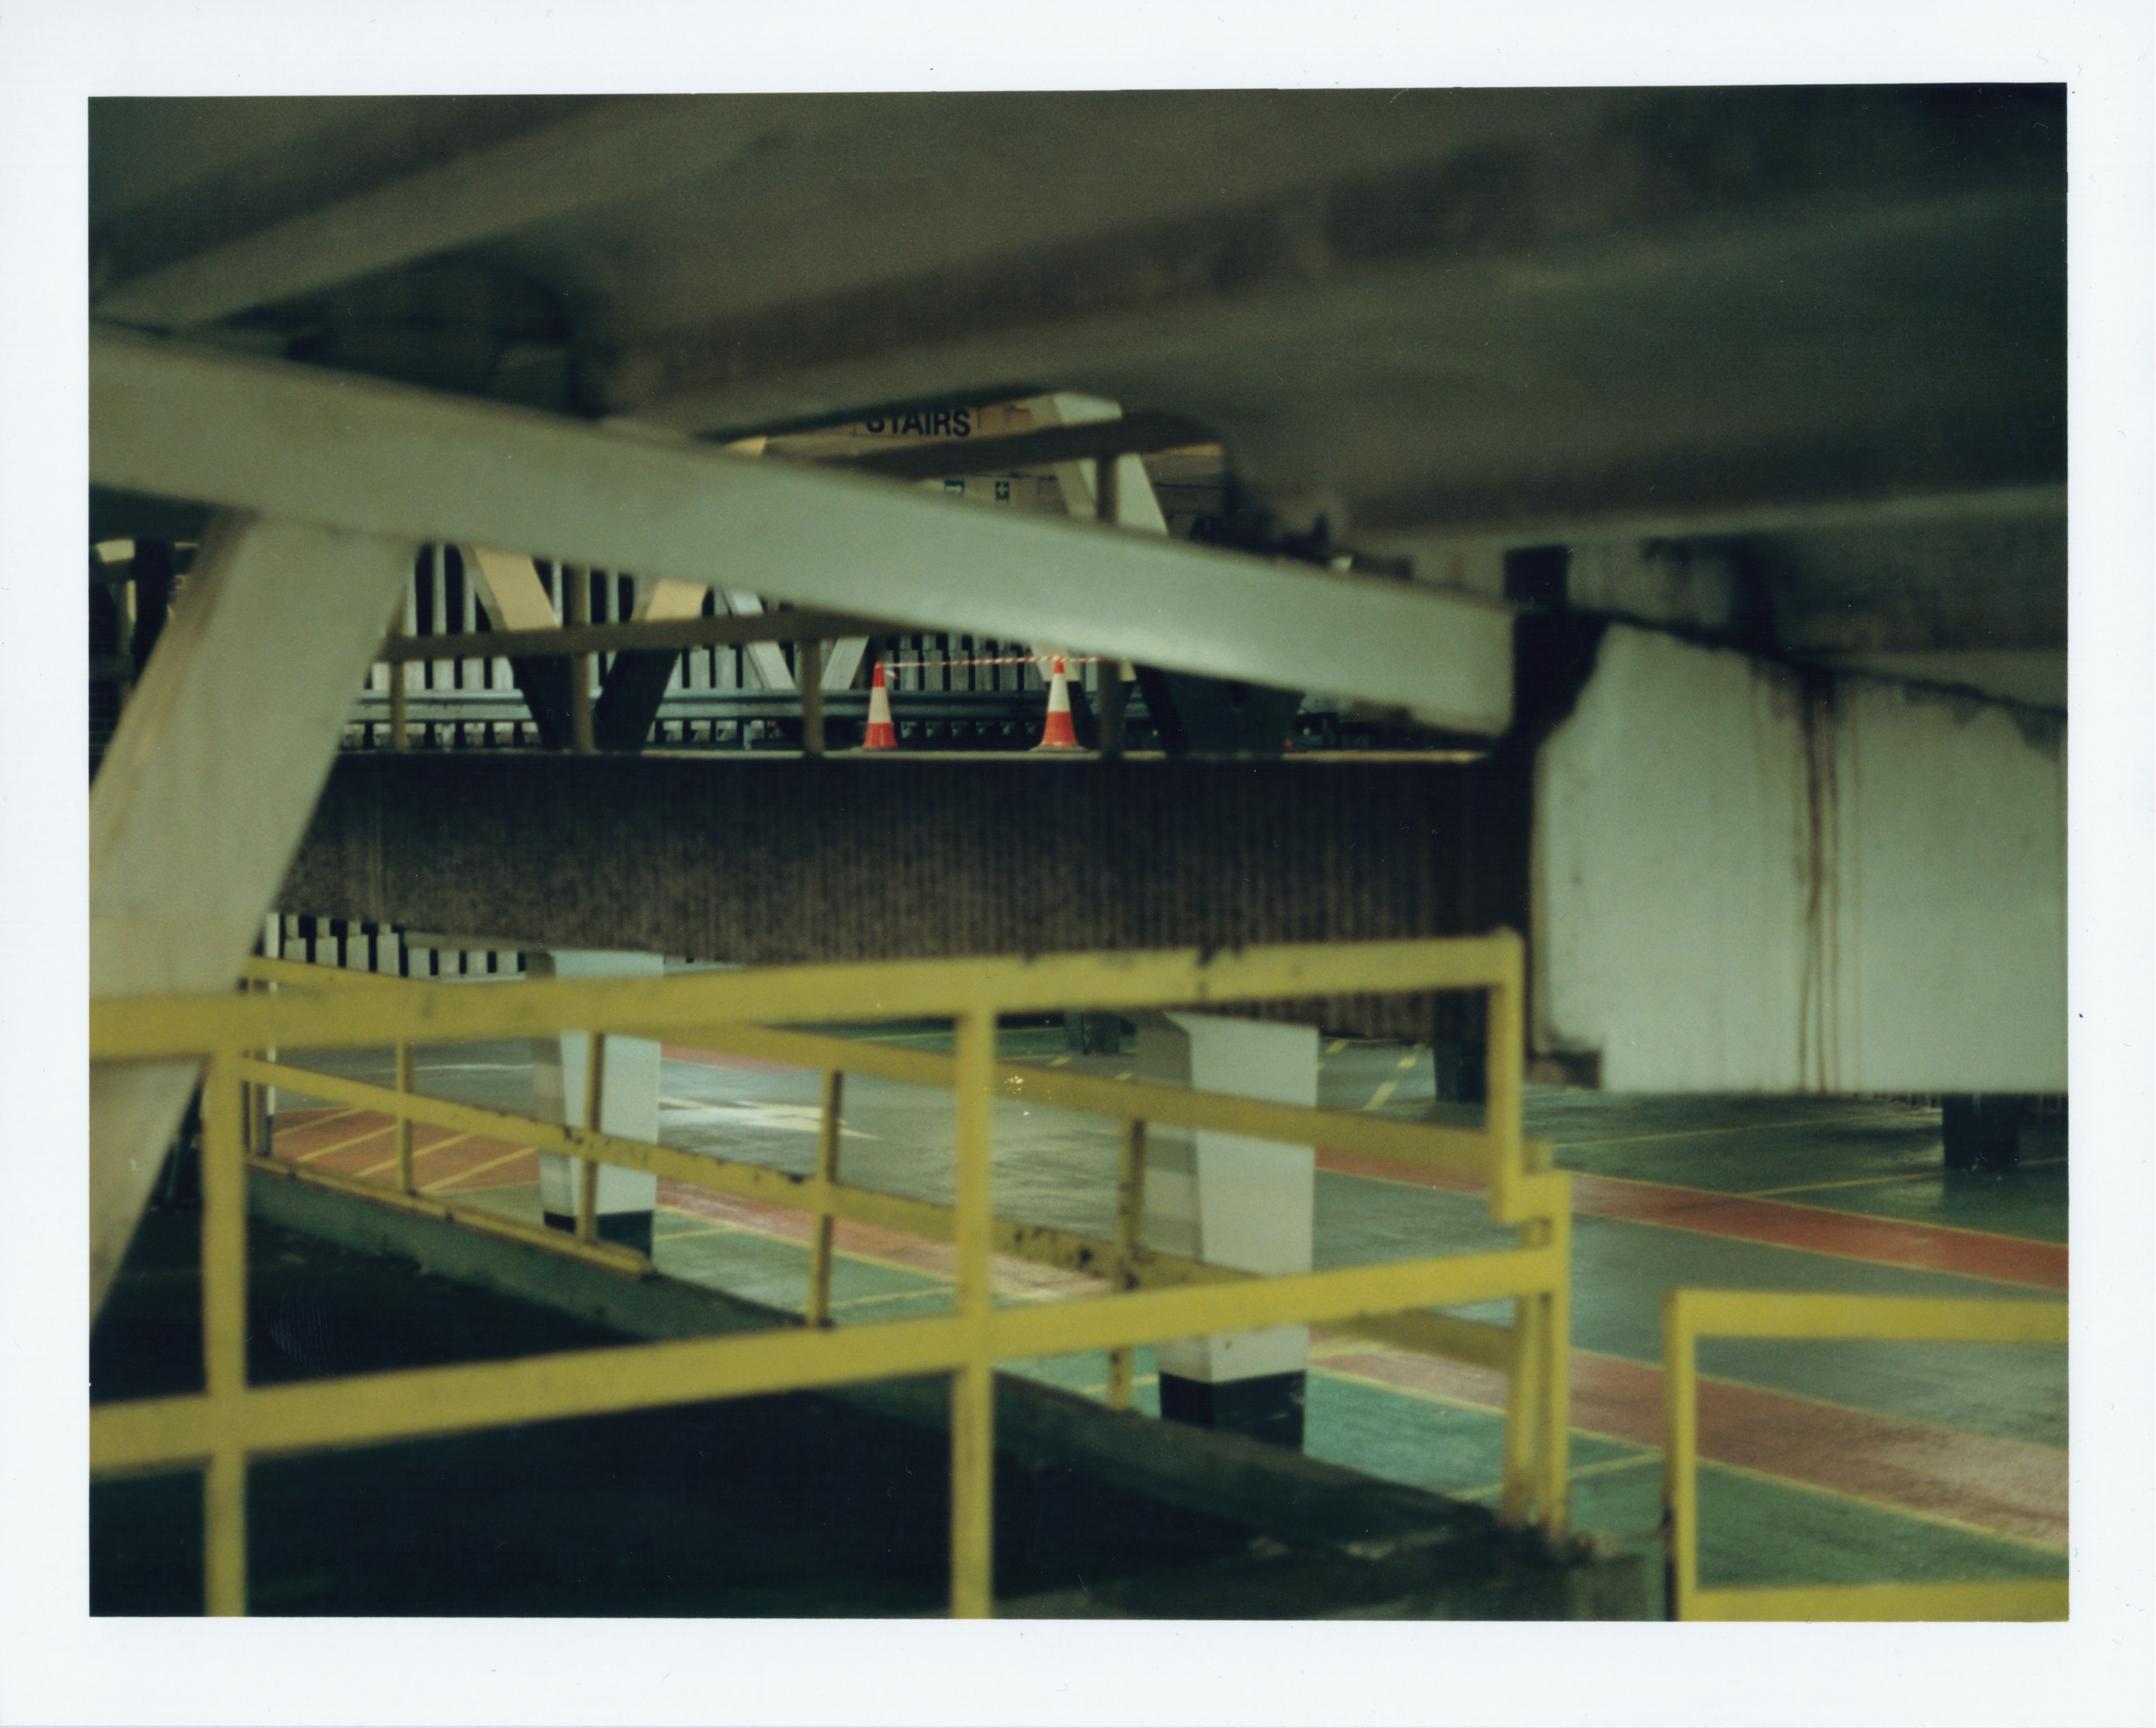
Give Us A Lift
Turning around I could see that there was a lift opening from the top floor, but it has a canopy around it for users to stay dry in inclement weather. The lights for this were extremely pleasing when bouncing off the wet, reflective floor surface so I set up the camera to do a similar shot, this time in portrait so that I had to twist my head and arm to see the settings on the camera for the shot.
With the settings at shutter speed of 2 seconds at F4 aperture, I set the camera to 2 second self timer so that I wouldn’t move the camera when operating the shutter release. I’ve since bought a shutter release cable for this task now, as it’s unpredictable to say what will be happening in the shot in 2 seconds time.
The image came out better than expected and I was very happy with the overall look of it, it looks very sinister and other worldly, almost as if it’s part of a nuclear base in a dystopian future.
With this one in the bag I continued to amble around the general area taking other photos, some you’ll see below. On the way out of the car park though I was stopped by security who asked what I was doing. Expecting this to turn into a YouTube Audit video I fully explained that I’d just begun a degree course at Wolverhampton Uni and the security guard said he had too. His name is Miles and he is a second year on the Fine Art degree course so we had a bit of a chat and some astonishment at how small a world it is before I got on my way and bid him a good night.
Leaf Me Alone
An earlier shot I’d taken was the next for the darkroom treatment, “Bike and Bus Shelter”. The image had caught my eye with the piles of recently fallen autumn leaves completely covering the pavement and a bicycle leaning against a fence of a bus stop. The bike had no saddle so I wondered what had happened to it, had the owner removed the saddle as it was to wet to cycle home and didn’t want the quick release seat stolen, or was it a case that someone with nefarious motives had removed the saddle leaving the cyclist with no option of a comfortable ride home?
Processing this in the darkroom was ok once I’d remembered to reset the aperture to f/8 from the f/2.8 I’d used to focus the enlarger. The shot had strange yet warm, yellow tinge due to the sodium lights in use around the bus station, I find the mercury lights are more of a colder blue hint.
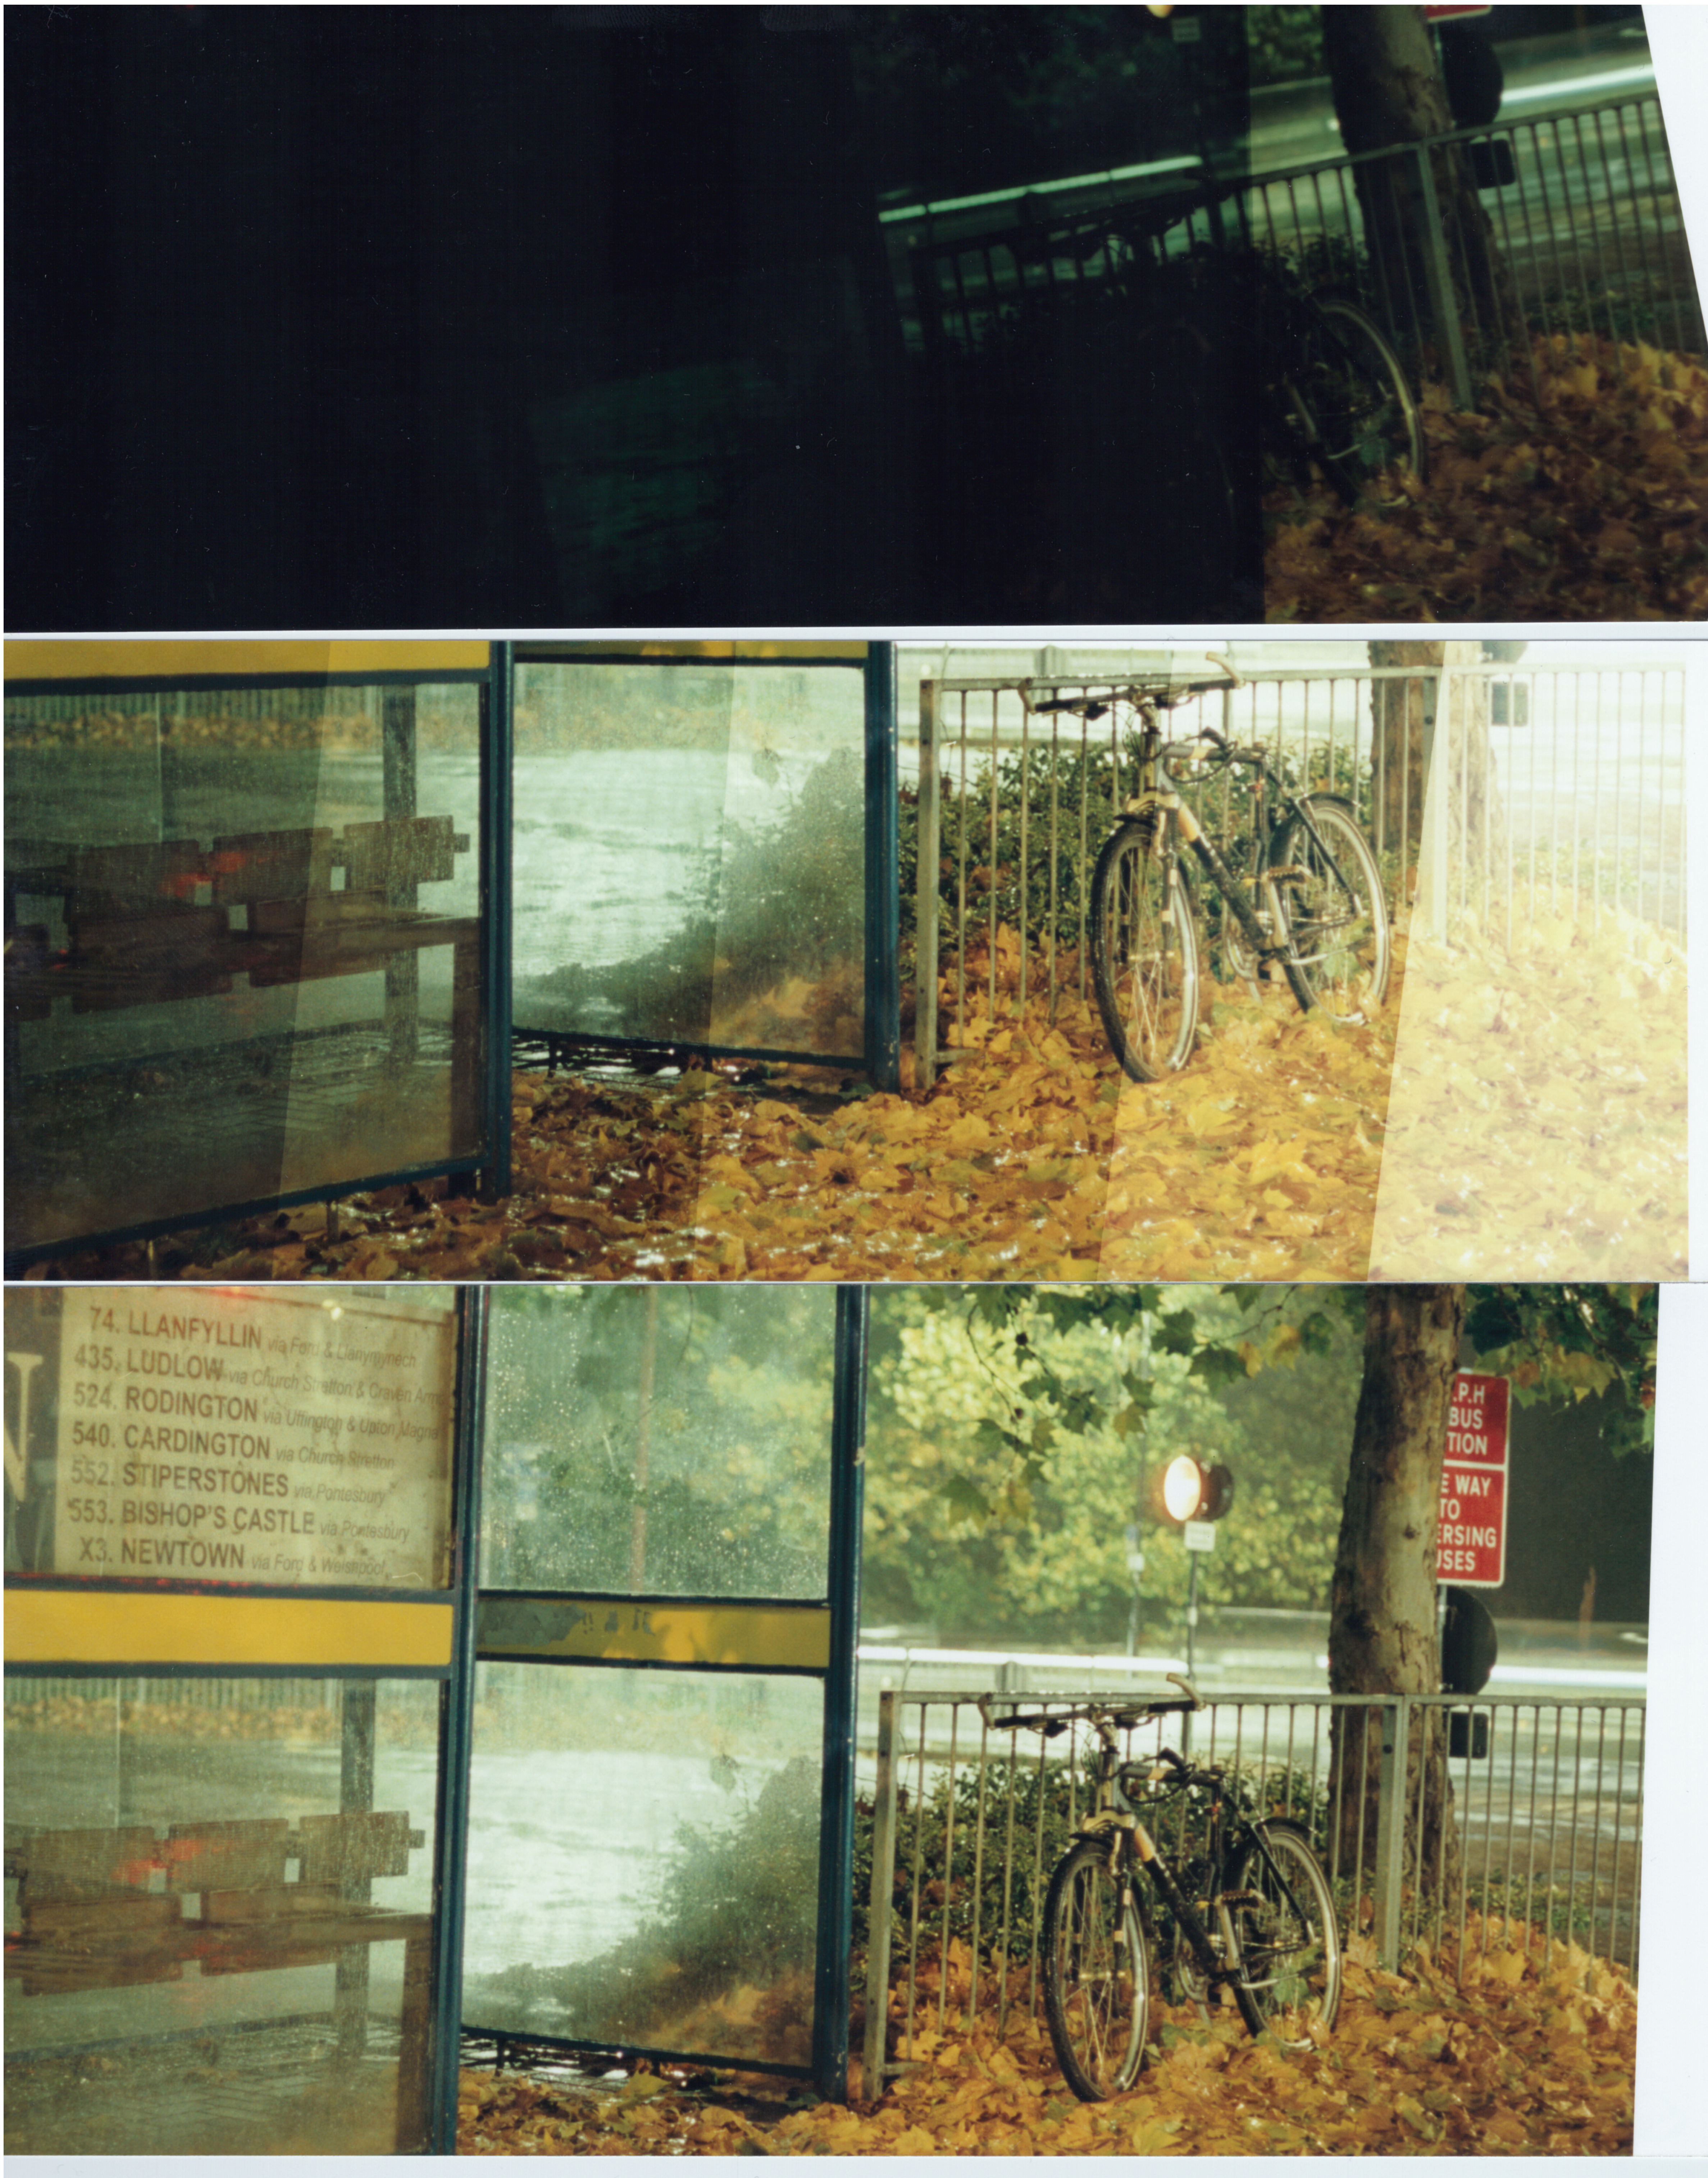
Once I’d done the third strip, a full strip at 6 secs and 85,85,0 f/8 I was looking at it and noticed that there is a No Entry sign in the background that’s illuminated and I thought I might be able to “dodge” this a little, a process of holding an item over the area of the print that you’d like to be less exposed. The opposite of this is “Burning” and in this process you cover the remainder of the image and expose the unmasked part a little longer under the enlarger. Each of these are available in Adobe Photoshop as tools and seeing how they can be used in actuality was something exciting.
Dan was in the studio so I asked him if it was worth trying and he said that I probably wouldn’t get more detail out of itas it was backlit, he also mentioned that it wasn’t quite dark enough because there was no black on the back of the round sign underneath the red sign. It was a good spot and I chose to expose a little longer for the final print, 7 secs.
At this point Dan also mentioned that he looks at prints upside down so he can check colours, tones and exposures without being overly distracted by the contents of the image. A good tip and one I’ve used in the days since. Thanks Dan!
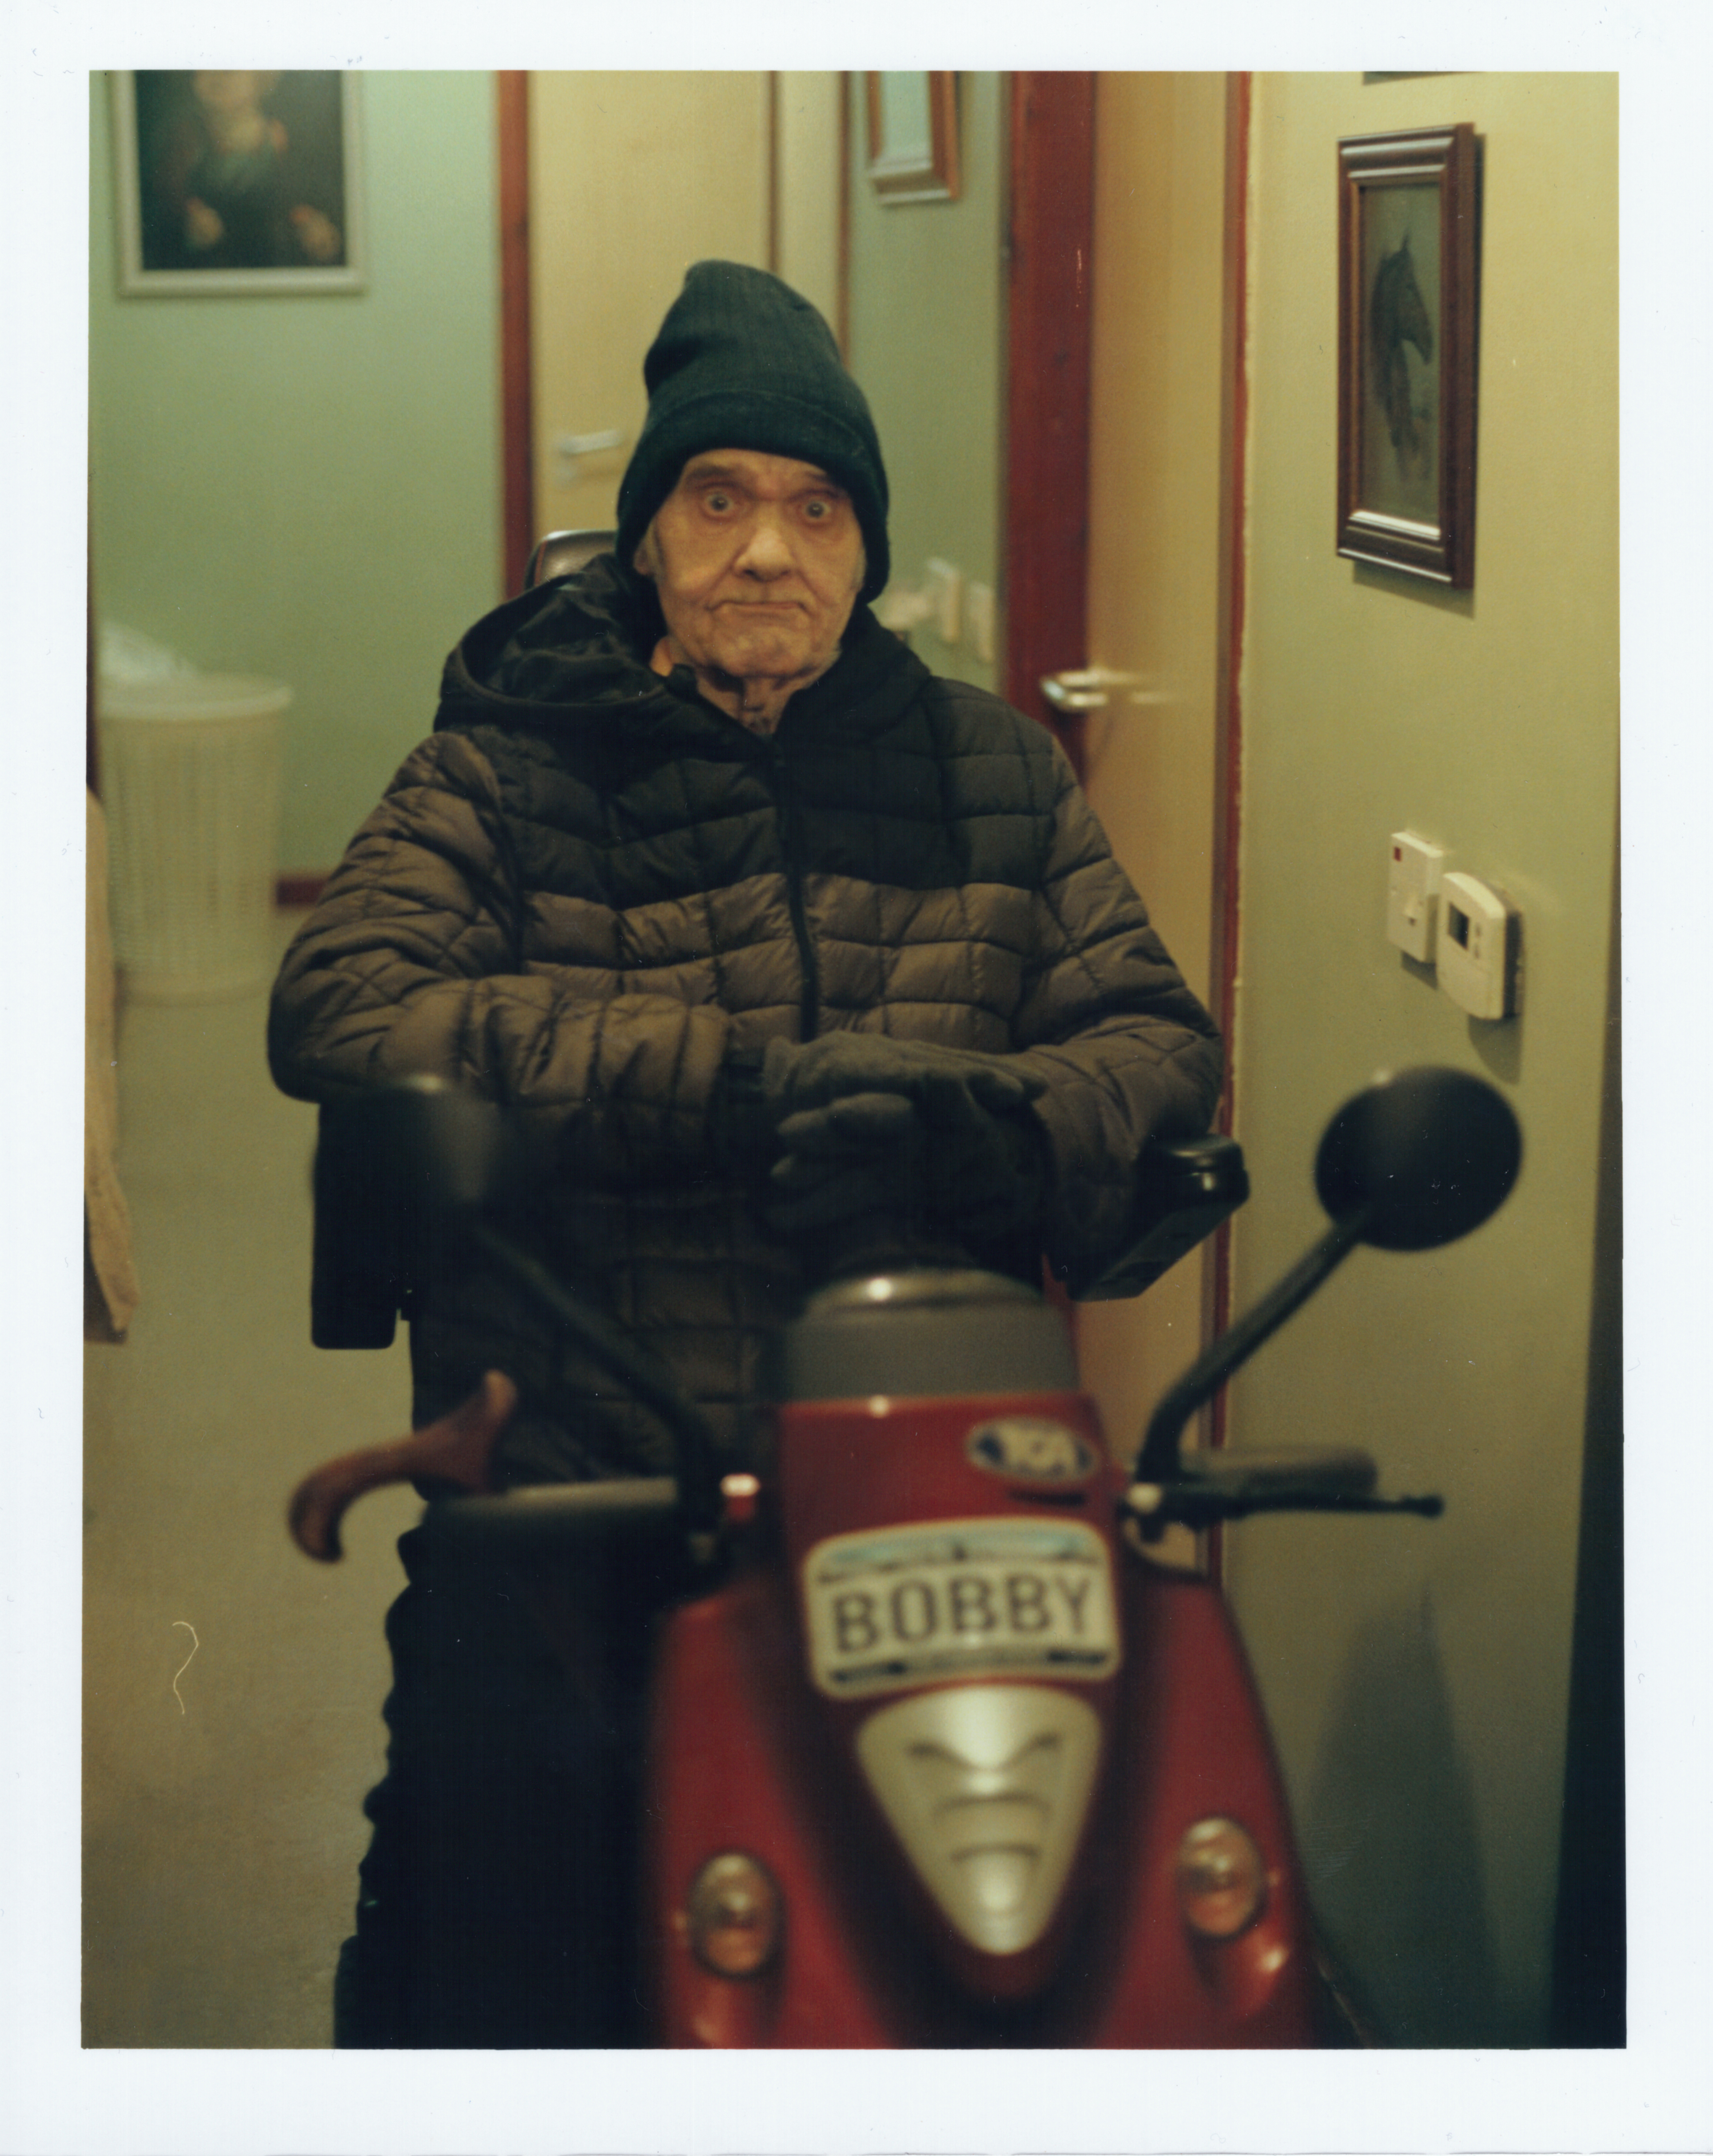
Like Father, Like Son
As a replacement, I exist in order to continue the blood line of the Griffiths family and I consider myself as a replacement for my Father. My 35mm film camera was with me one day around at my parents so I grabbed this image of him sitting waiting to go out to the Monkmoor Pub, his local. The lighting in the bungalow is atrocious and difficult to take a picture in, let alone get it balanced for neutral colours.

Annotated versions of these strips can be found in my sketch book but I had to reduce the yellow in the image so I was reducing the Yellow filter in the enlarger head and right before I did the last print I realised that reducing the Y to 75 was the opposite of what I was needing to do, I should have increased it to 90 to filter out more yellow and this then made the final print more representative of the true colours in the bungalow as can be seen below.
Also worth noting is the third of the test strips which looks like a double exposure, it was. I was exposing for six seconds and thought that if I switched the strip around after three seconds and then did another three then I could end up with a Playing Card effect of having a two headed subject. The exposure times were ok but the image wasn’t successful, but it was only an experiment whilst waiting for the processor to complete another task.
Taking the Tube
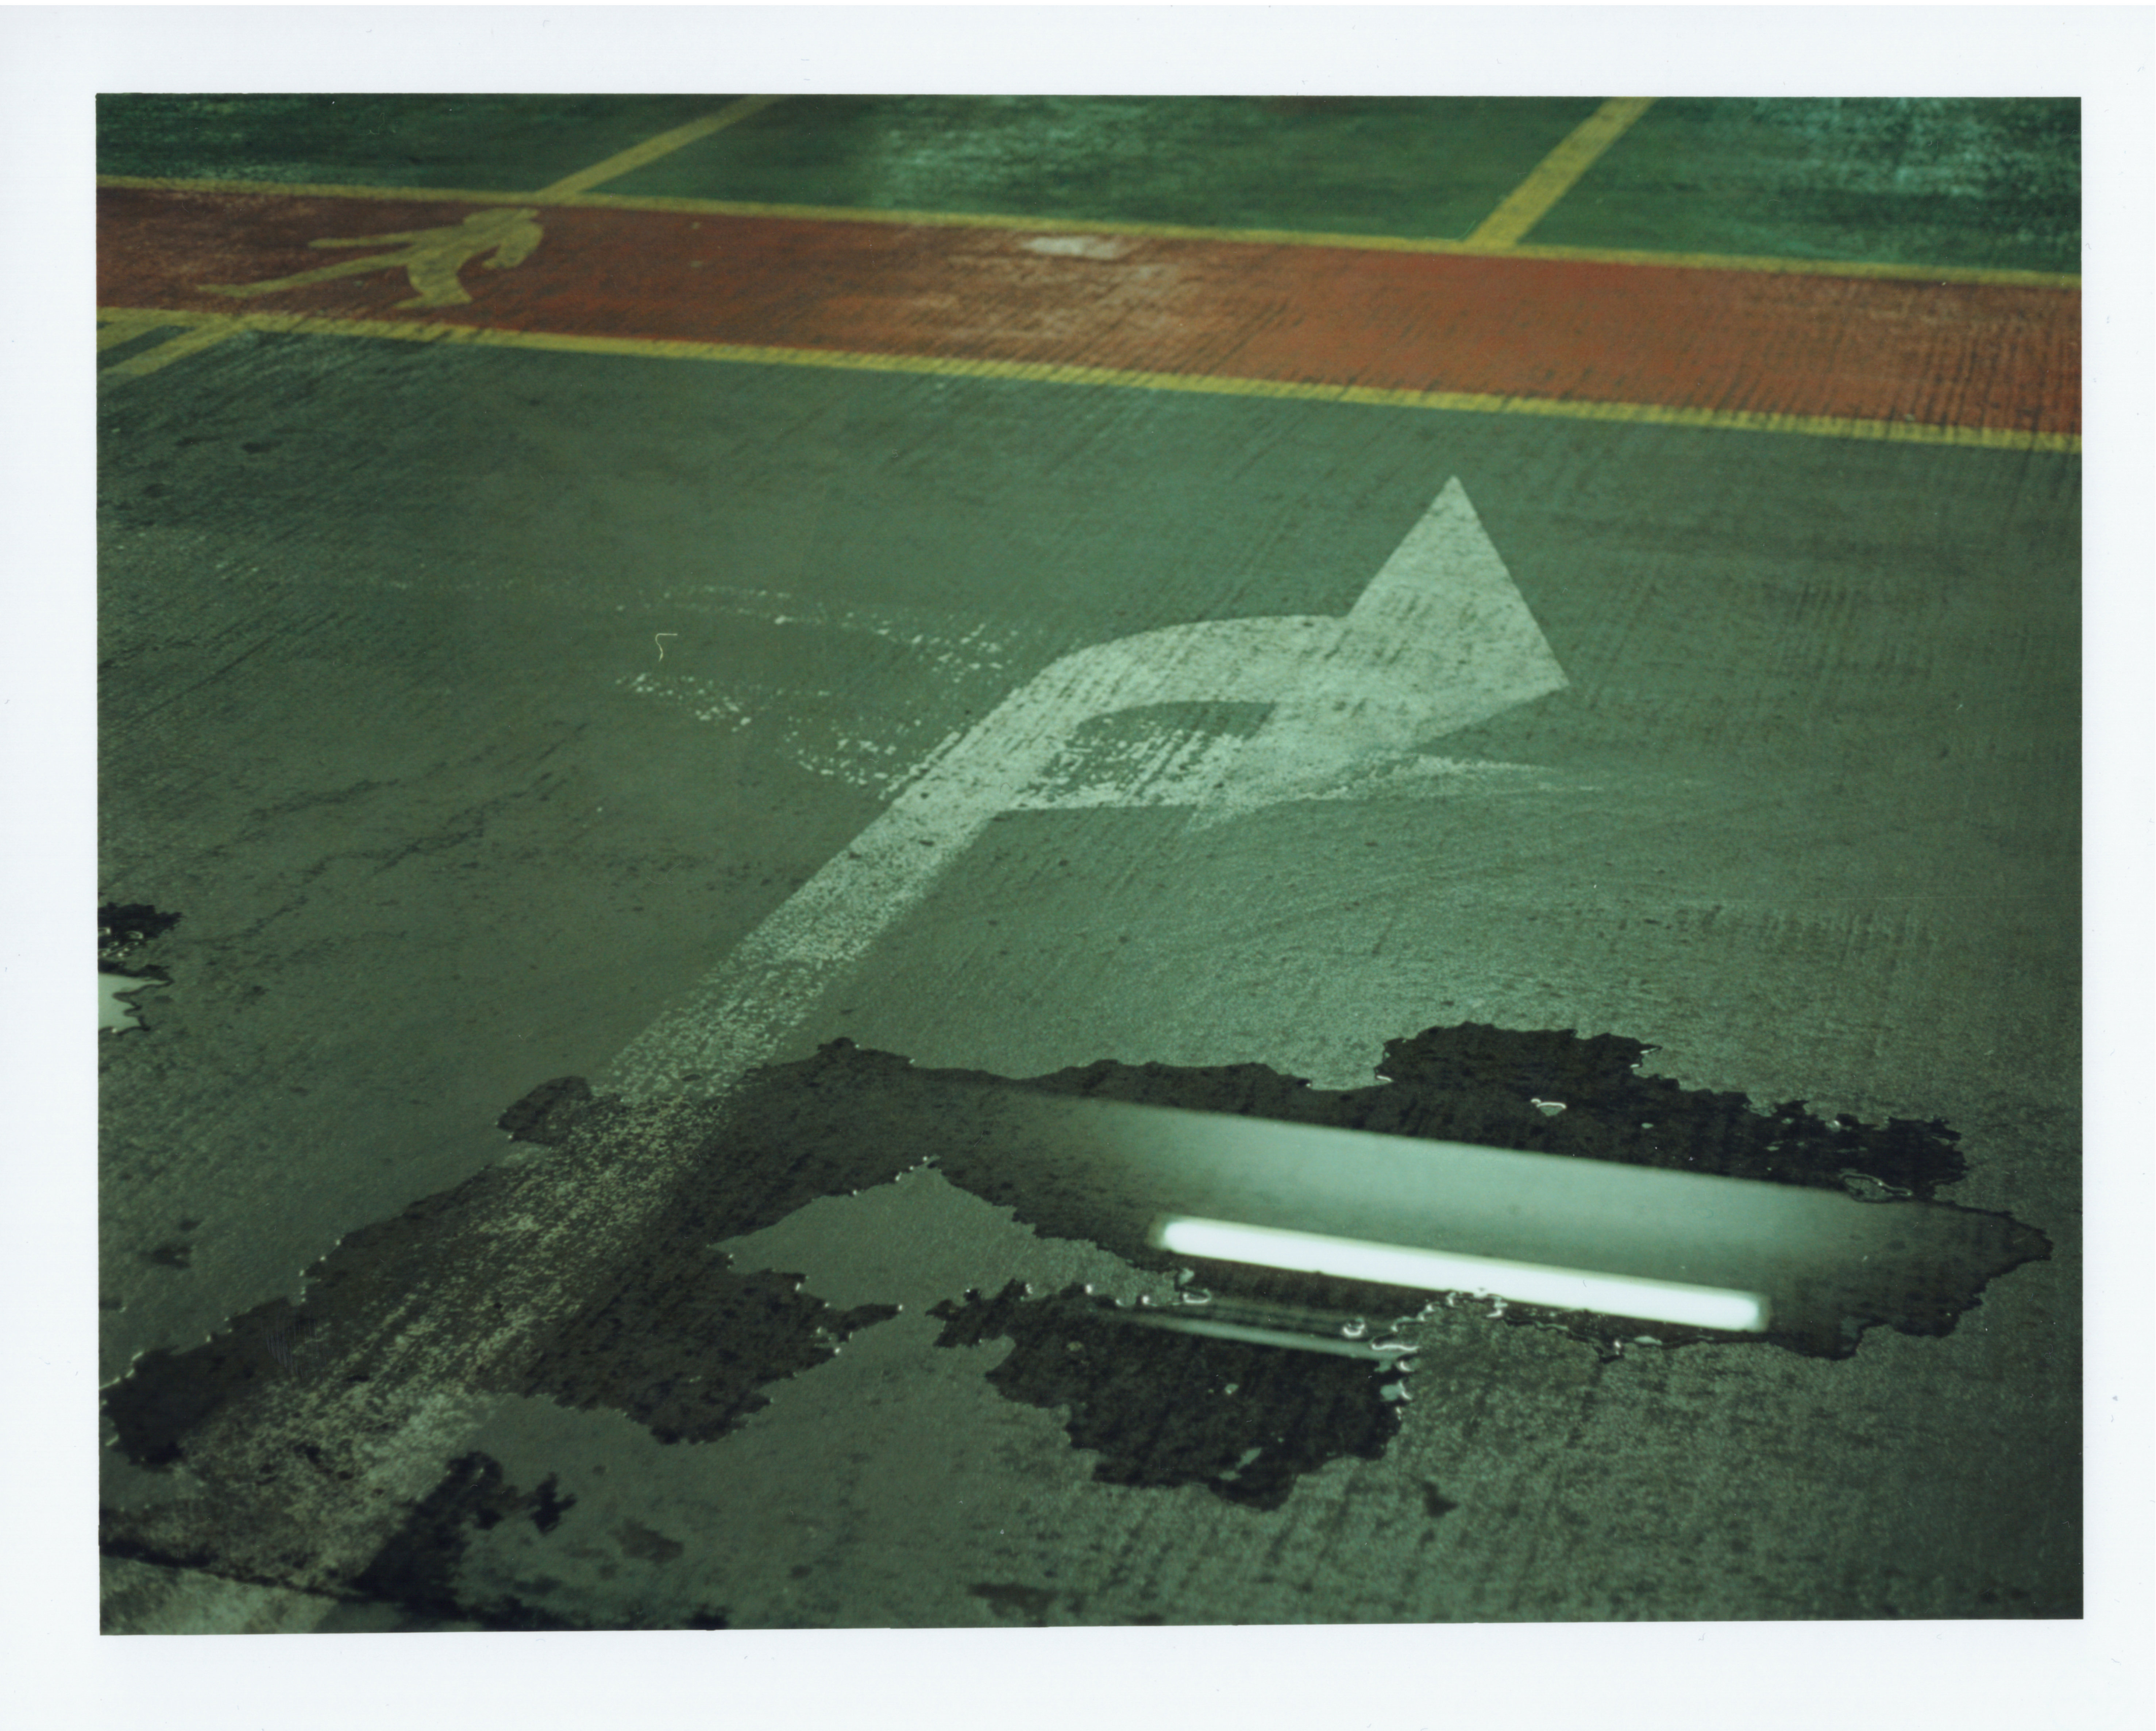
The next image to print was what I call “Arrow and Tube” and was a puddle in the multi storey car park with an arrow in close proximity that has obviously been changed around to alter direction. The puddle reflected a fluorescent tube in the ceiling of the car park level so I set up my camera to capture this after metering with my digital again. Setting the 2 sec timer, checking the focus and then starting the timer set off an image being captured.
It was getting close to 4’o’clock on the Monday and I needed to be off Molineux car park at 4 due to them playing a match on the Monday evening. I rushed through the initial test strips of this image as can be seen in my sketchbook images 31-33.
The top three strips were ones I did late on Monday with the first two being completely over exposed due to leaving the Aperture at f/2.8 after focusing the image. These were followed by another strip showing a series being completely underexposed which was confusing to me. I had to wrap up and get out so thought I’d pick it up first thing on the Tuesday.
On the Tuesday morning I restarted the process, setting the aperture to f/8 as a general starting point and got on with it. The result was the same levels of exposure that can be seen on the bottom strip of the image above. I then looked back at the contact sheet and saw that it was very faint and the image must have been overexposed in the camera so I was fighting a bit of a battle to rescue something from the negative. My options to expose correctly and compensate for the overexposed negative menat I had to increase the time under the enlargers lamp or alter the aperture to allow more light through.
To overcome it I altered the aperture to f/5.6 and then repeated the test strip which came out well at between 6 and 8 seconds so I tried a full strip at f/5.6 on 6.5 seconds and whilst it was ok, if a bit green it was made much worse by being out of focus. I used the focus finder and found an area of the image that was useful to focussing and then reprinted it. I did this one at 7 seconds and had removed some green cast by upping the yellow filter and dropping the Magenta by 5.
The print came out ok in the end and the reflection in the dark puddle was very eye catching. The colours in the top of the image were cool too and the arrow painted on the grey floor seemed to draw my eye into the image. Overall I was very happy with this image, especially as I’d recovered it from a very overexposed negative.
Utter Bollards
Returning to an earlier time in the course I pulled out my Bollards image negative and re-ran a test strip using the settings I’d previously used on that film. Production of the test strip with 2 seconds intervals and then a full strip seemed to go well and I moved then into the full print so I set it all up, using my knowledge on Easel configuration from the week before.
When I took my Print from the Colenta Processor I could see a fuzzy edge on the top right hand side. Investigating further I noticed that the projected image from the enlarger was not fully overlapping the rulers on the easel meaning that there was an undefined line. I had to reprint it after lifting the enlarger up a little and also increasing the exposure time to accommodate the distance change between the lens and the easel. The proper print came out and can be seen in my portfolio.
#Come Up To The Lab#
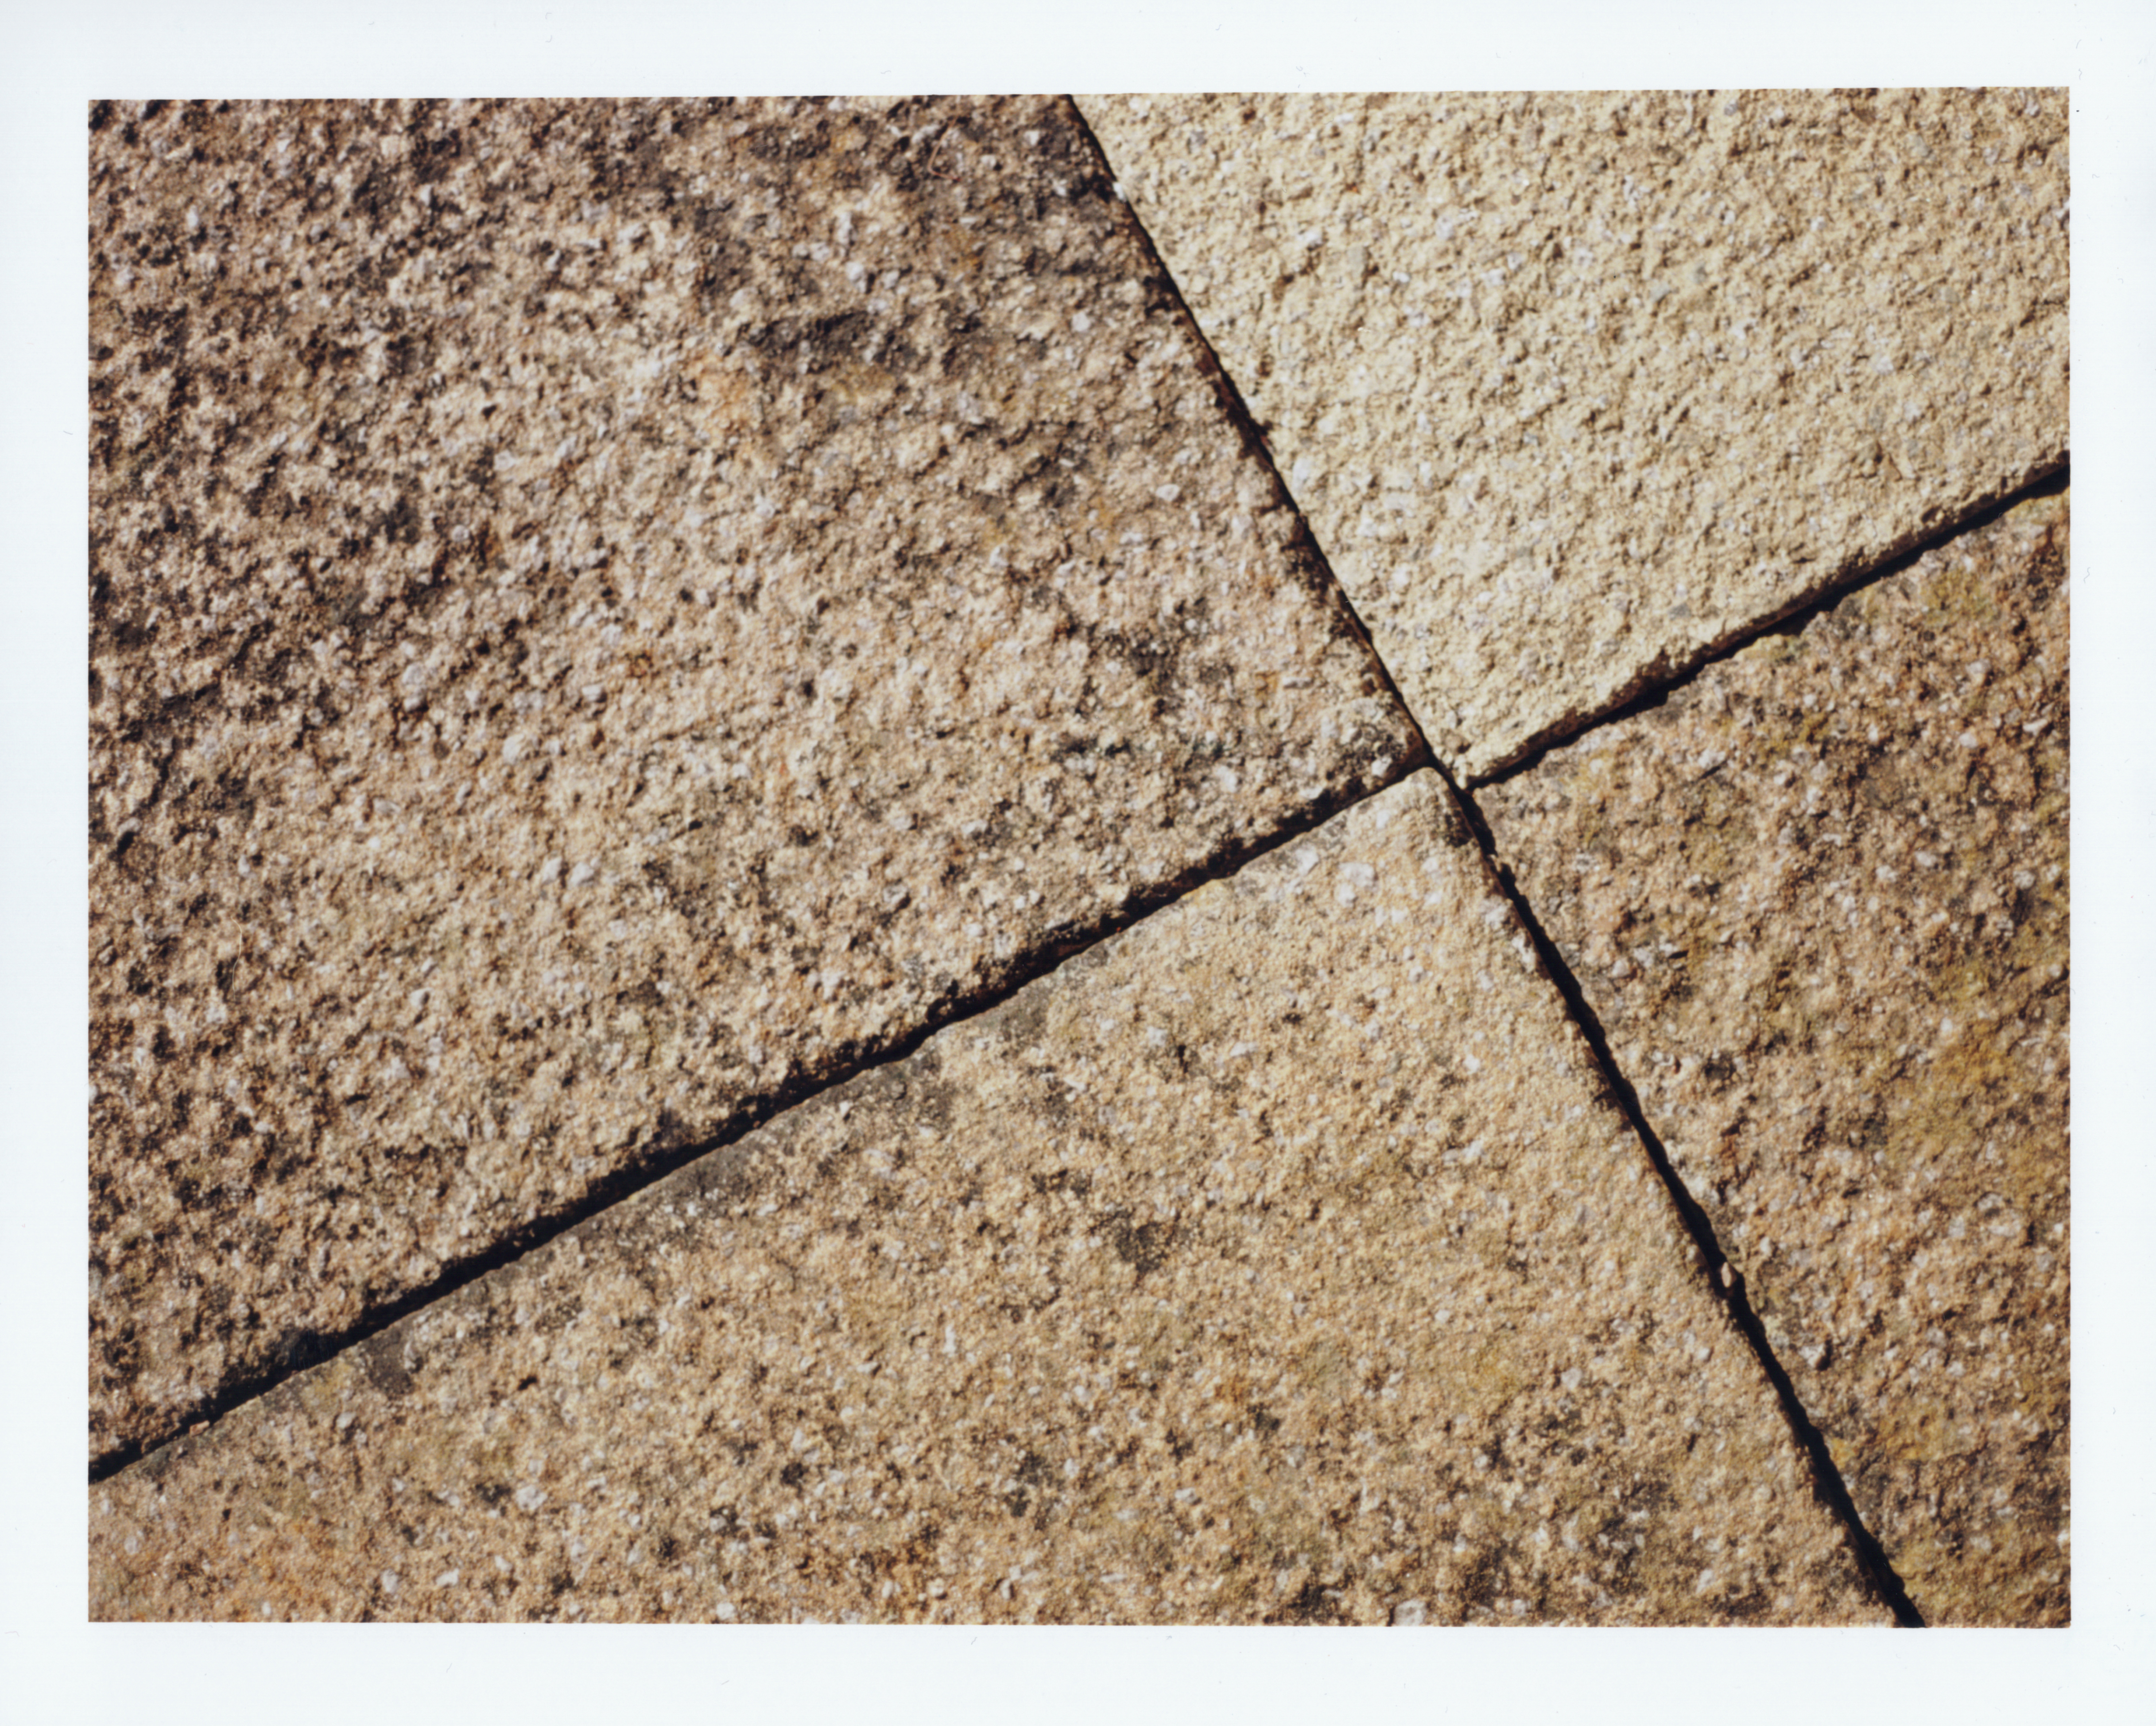
Starting off my Replacements idea was my patio slabs in the back garden at home, with one having been replaced and the others showing their age and history. It was time to try a print of one of these images to see if it made a good picture or not..
The test strip was ok first time out of the gate and it showed a good exposure between 6 and 8 seconds but the colours were not that obvious, especially considering the difference between a new slab and old slab in reality. In the full print below you can see it is the top right corner slab that was changed. When composing the image I attempted to make it a more intersting image so got the four way junction and the lines at an angle. I’m not quite sure it works as a standalone image but there is definitely the question about why this one slab is a different colour and patina.
Late Night Shopping
The night time shots already discussed in this post were triggered by a late trip to Tesco Extra supermarket in Shrewsbury, I’d noticed that the “e” was missing from the large sign and it was damp, with some great reflections on the tarmac beneath. As a result of this I finished up in town and travelled to Tesco to try and find an angle that was pleasing.
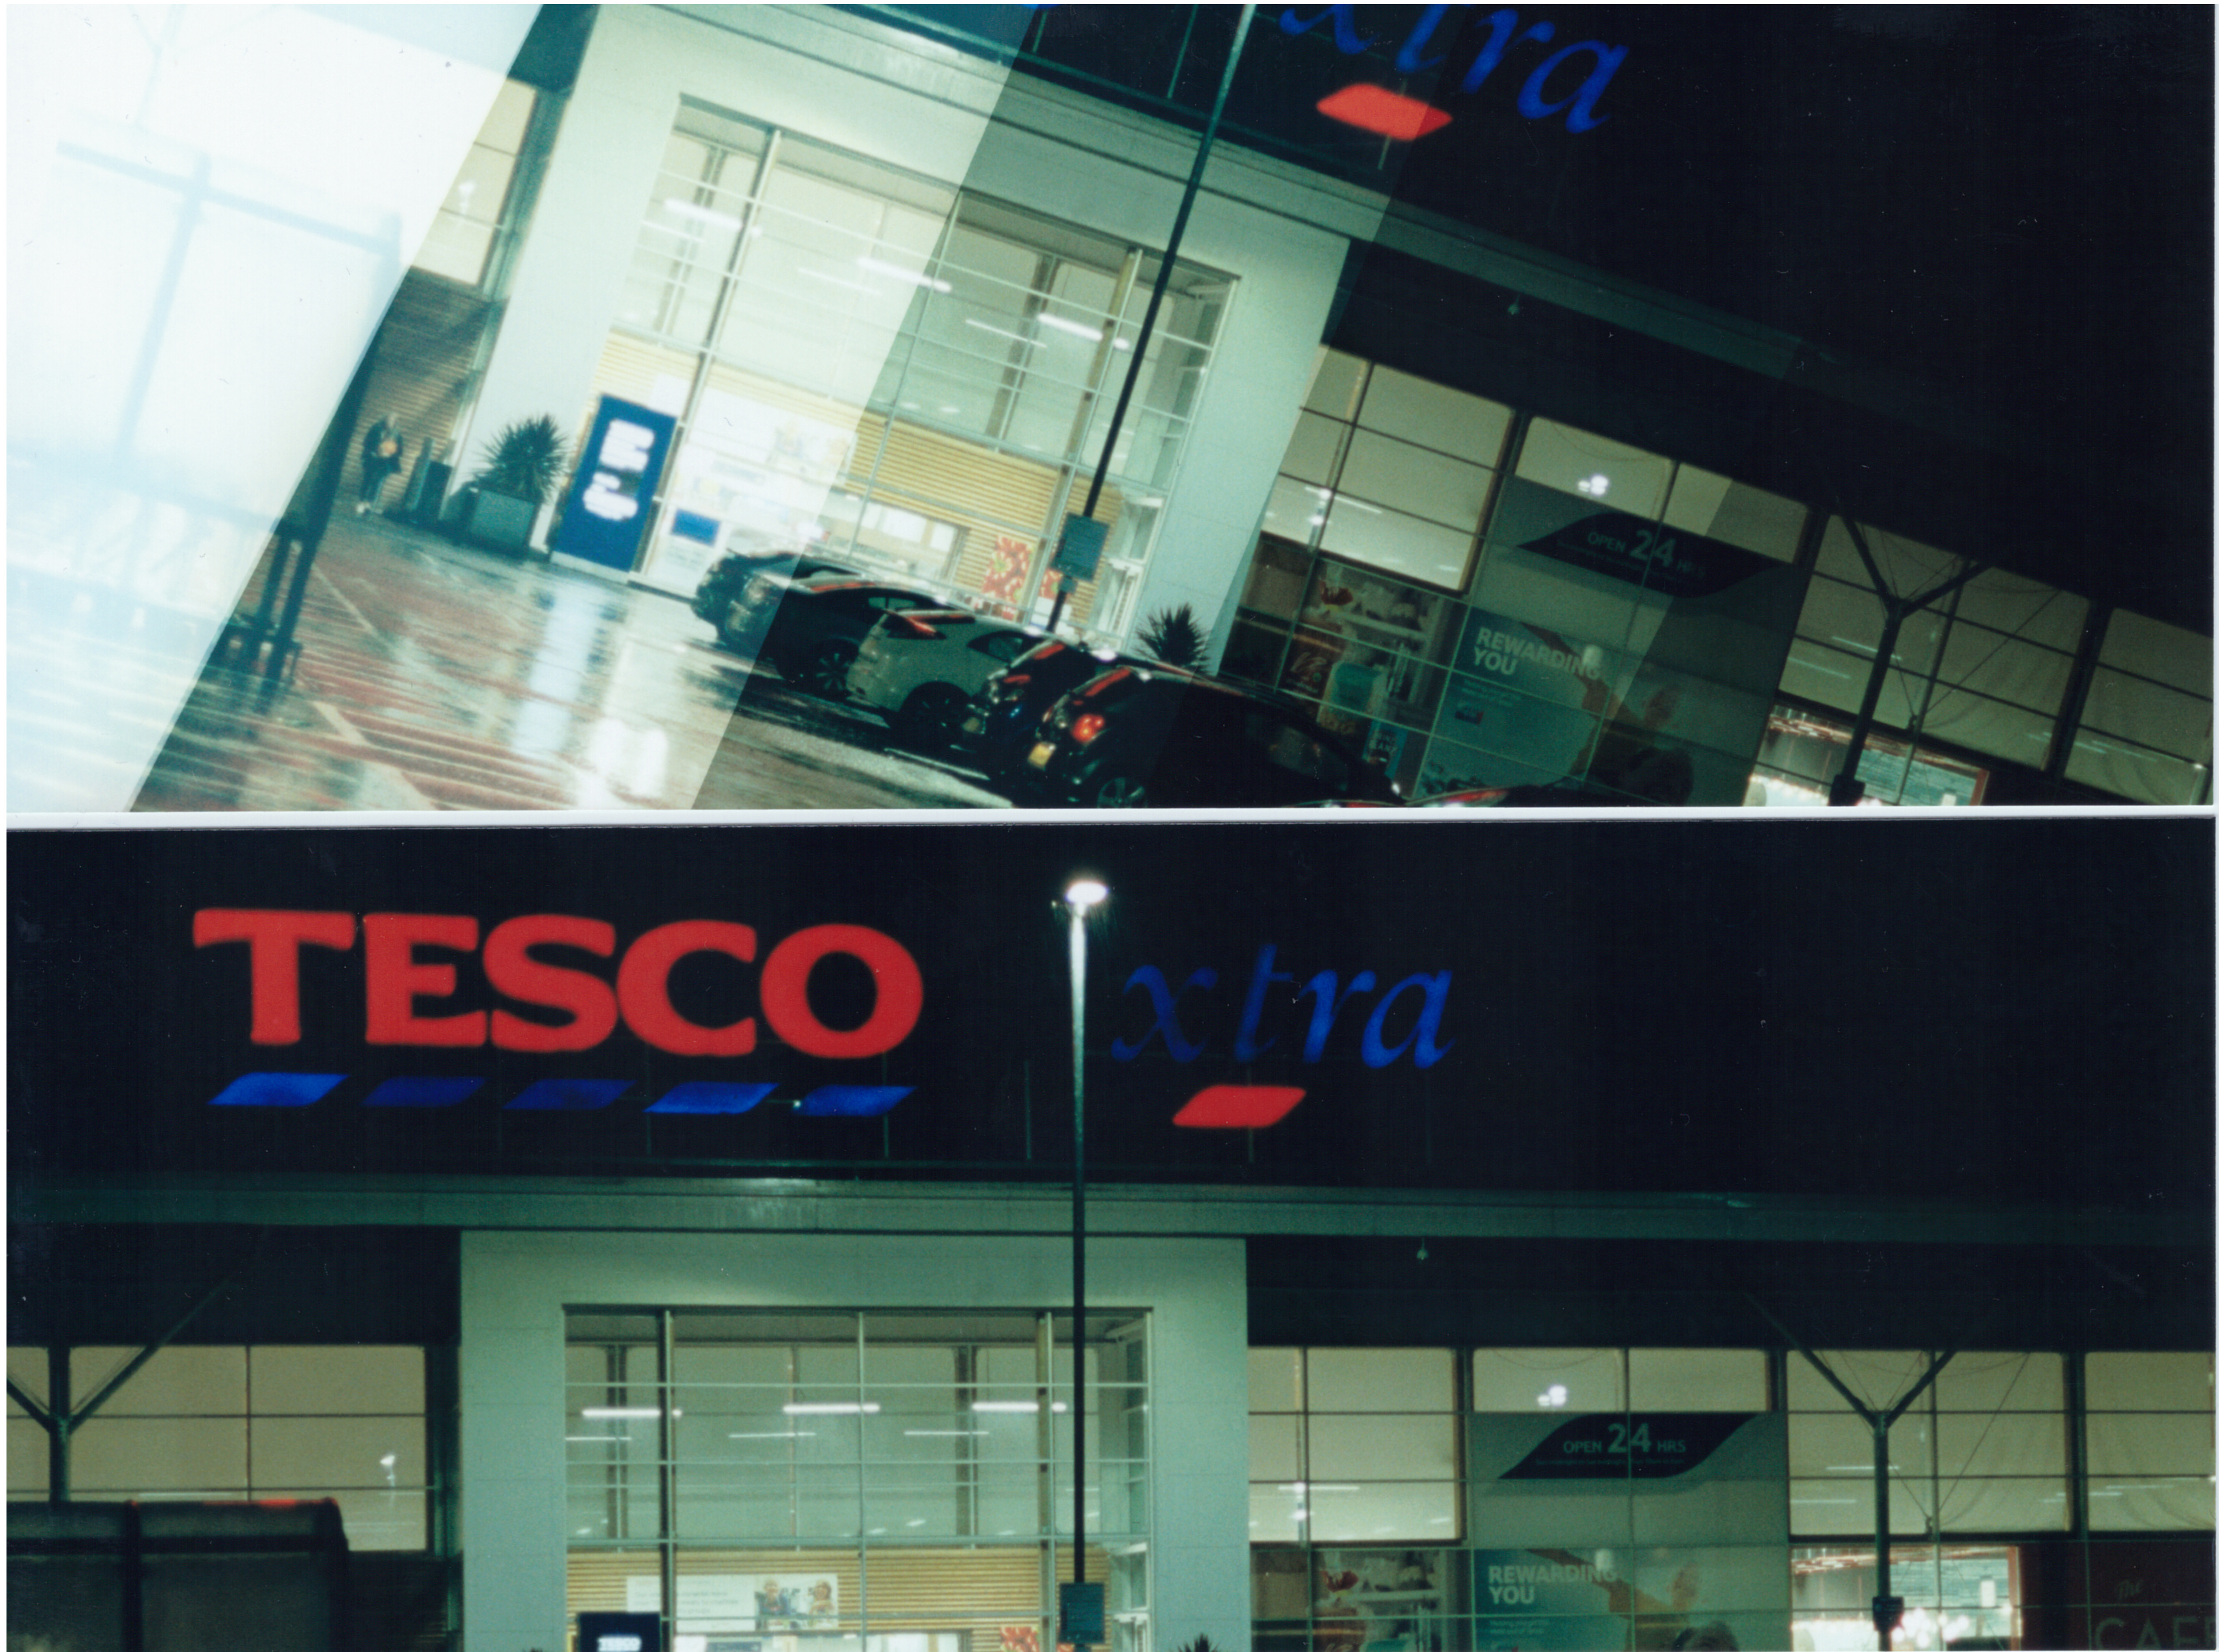
You can see that this was a dark image to capture as it was past 11pm on a rainy evening. The test strips showed that the optimal exposure was around 6 secs. I dropped the Yellow and Magenta by 5 to try and reduce the Cyan cast that was in evidence on the image. After a few attempts I figured out that the time under the enlarger lens was too long and burning too much detail out of the blacks in the lower half of the image, primarily around the cars. I dropped the time to 4 seconds and an aperture of f/8 before the image came out as I wanted it, with the red and blue lights being reflected in the watery surface.
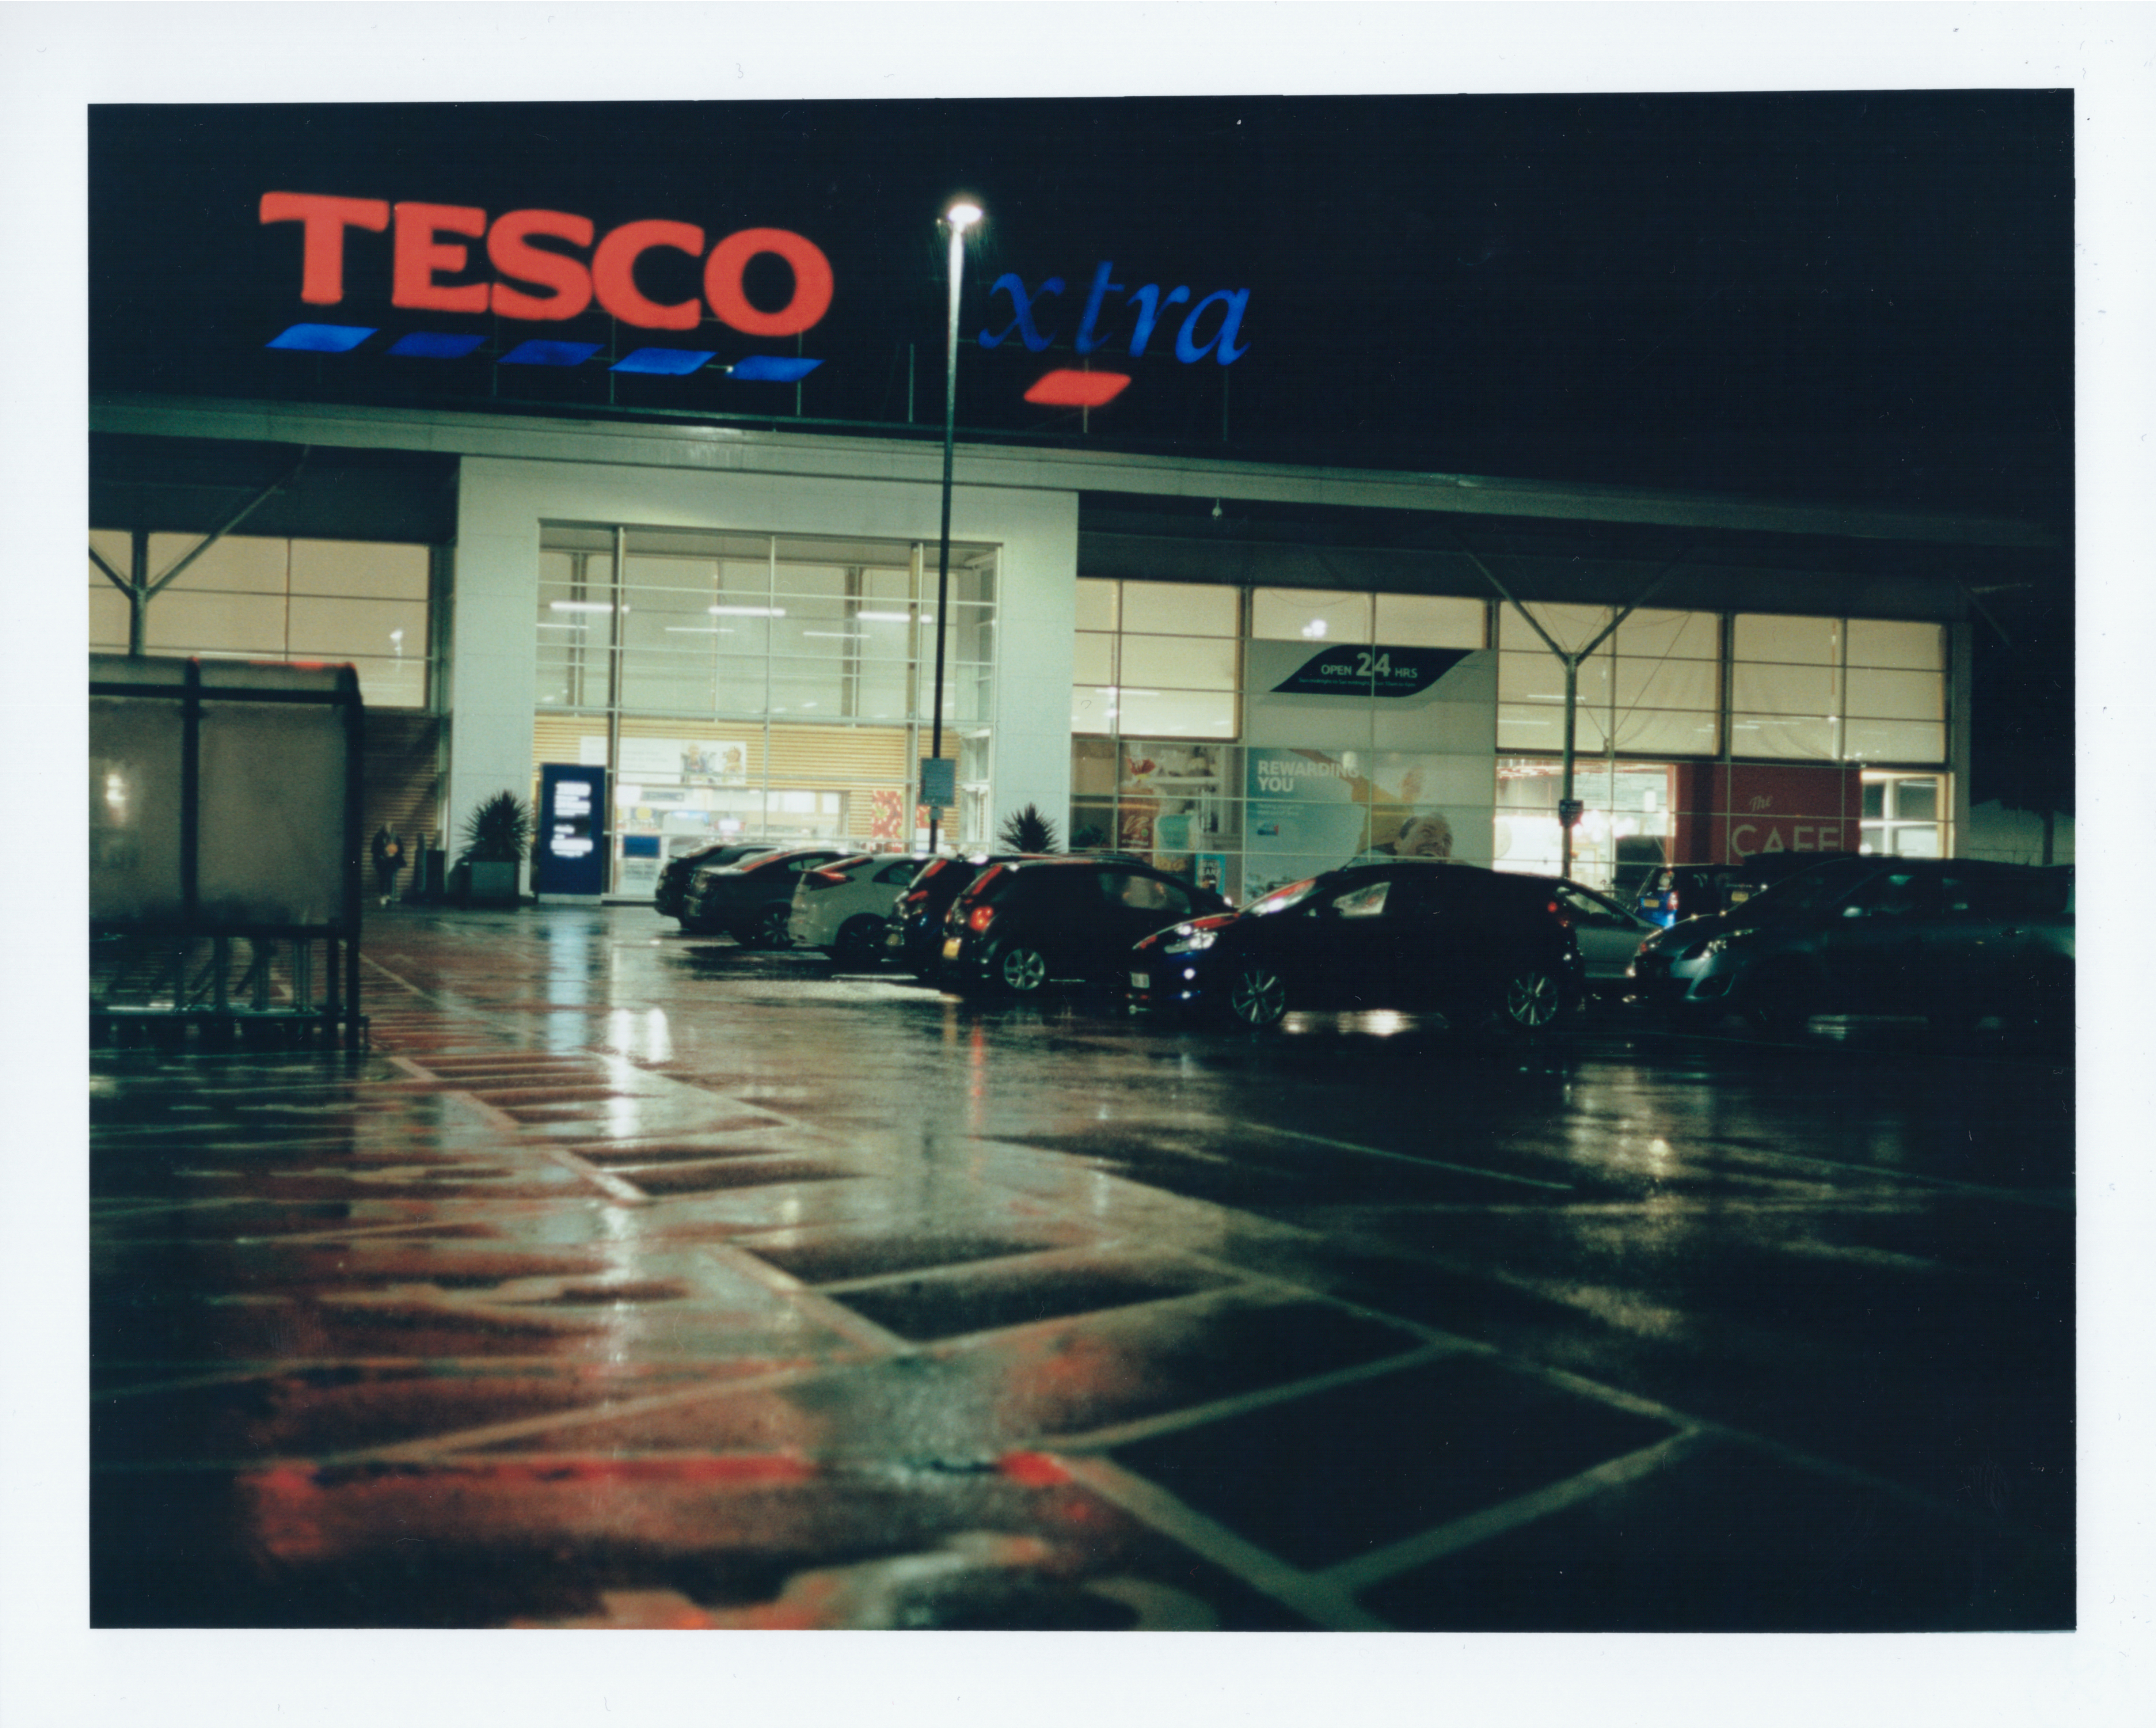
The image is still very dark in some of the cars in the right hand side and I don’t feel like it is a brilliant photo.
Cones & Co.
Pulling out the negatives I selected the next image to print, “Cones and Car Park” and started setting up a Test Strip and it seemed reasonably satisfactory if a little dark due to over exposing under the LPL C7700. The colours were also a little off and my reference of a White colour came from the cones in the centre of the image, I tuned everything to make these neutral but some of the other colours in the image seem off, but that is down to the mixture of fluorescent tubes and sodium and mercury lighting in the area.
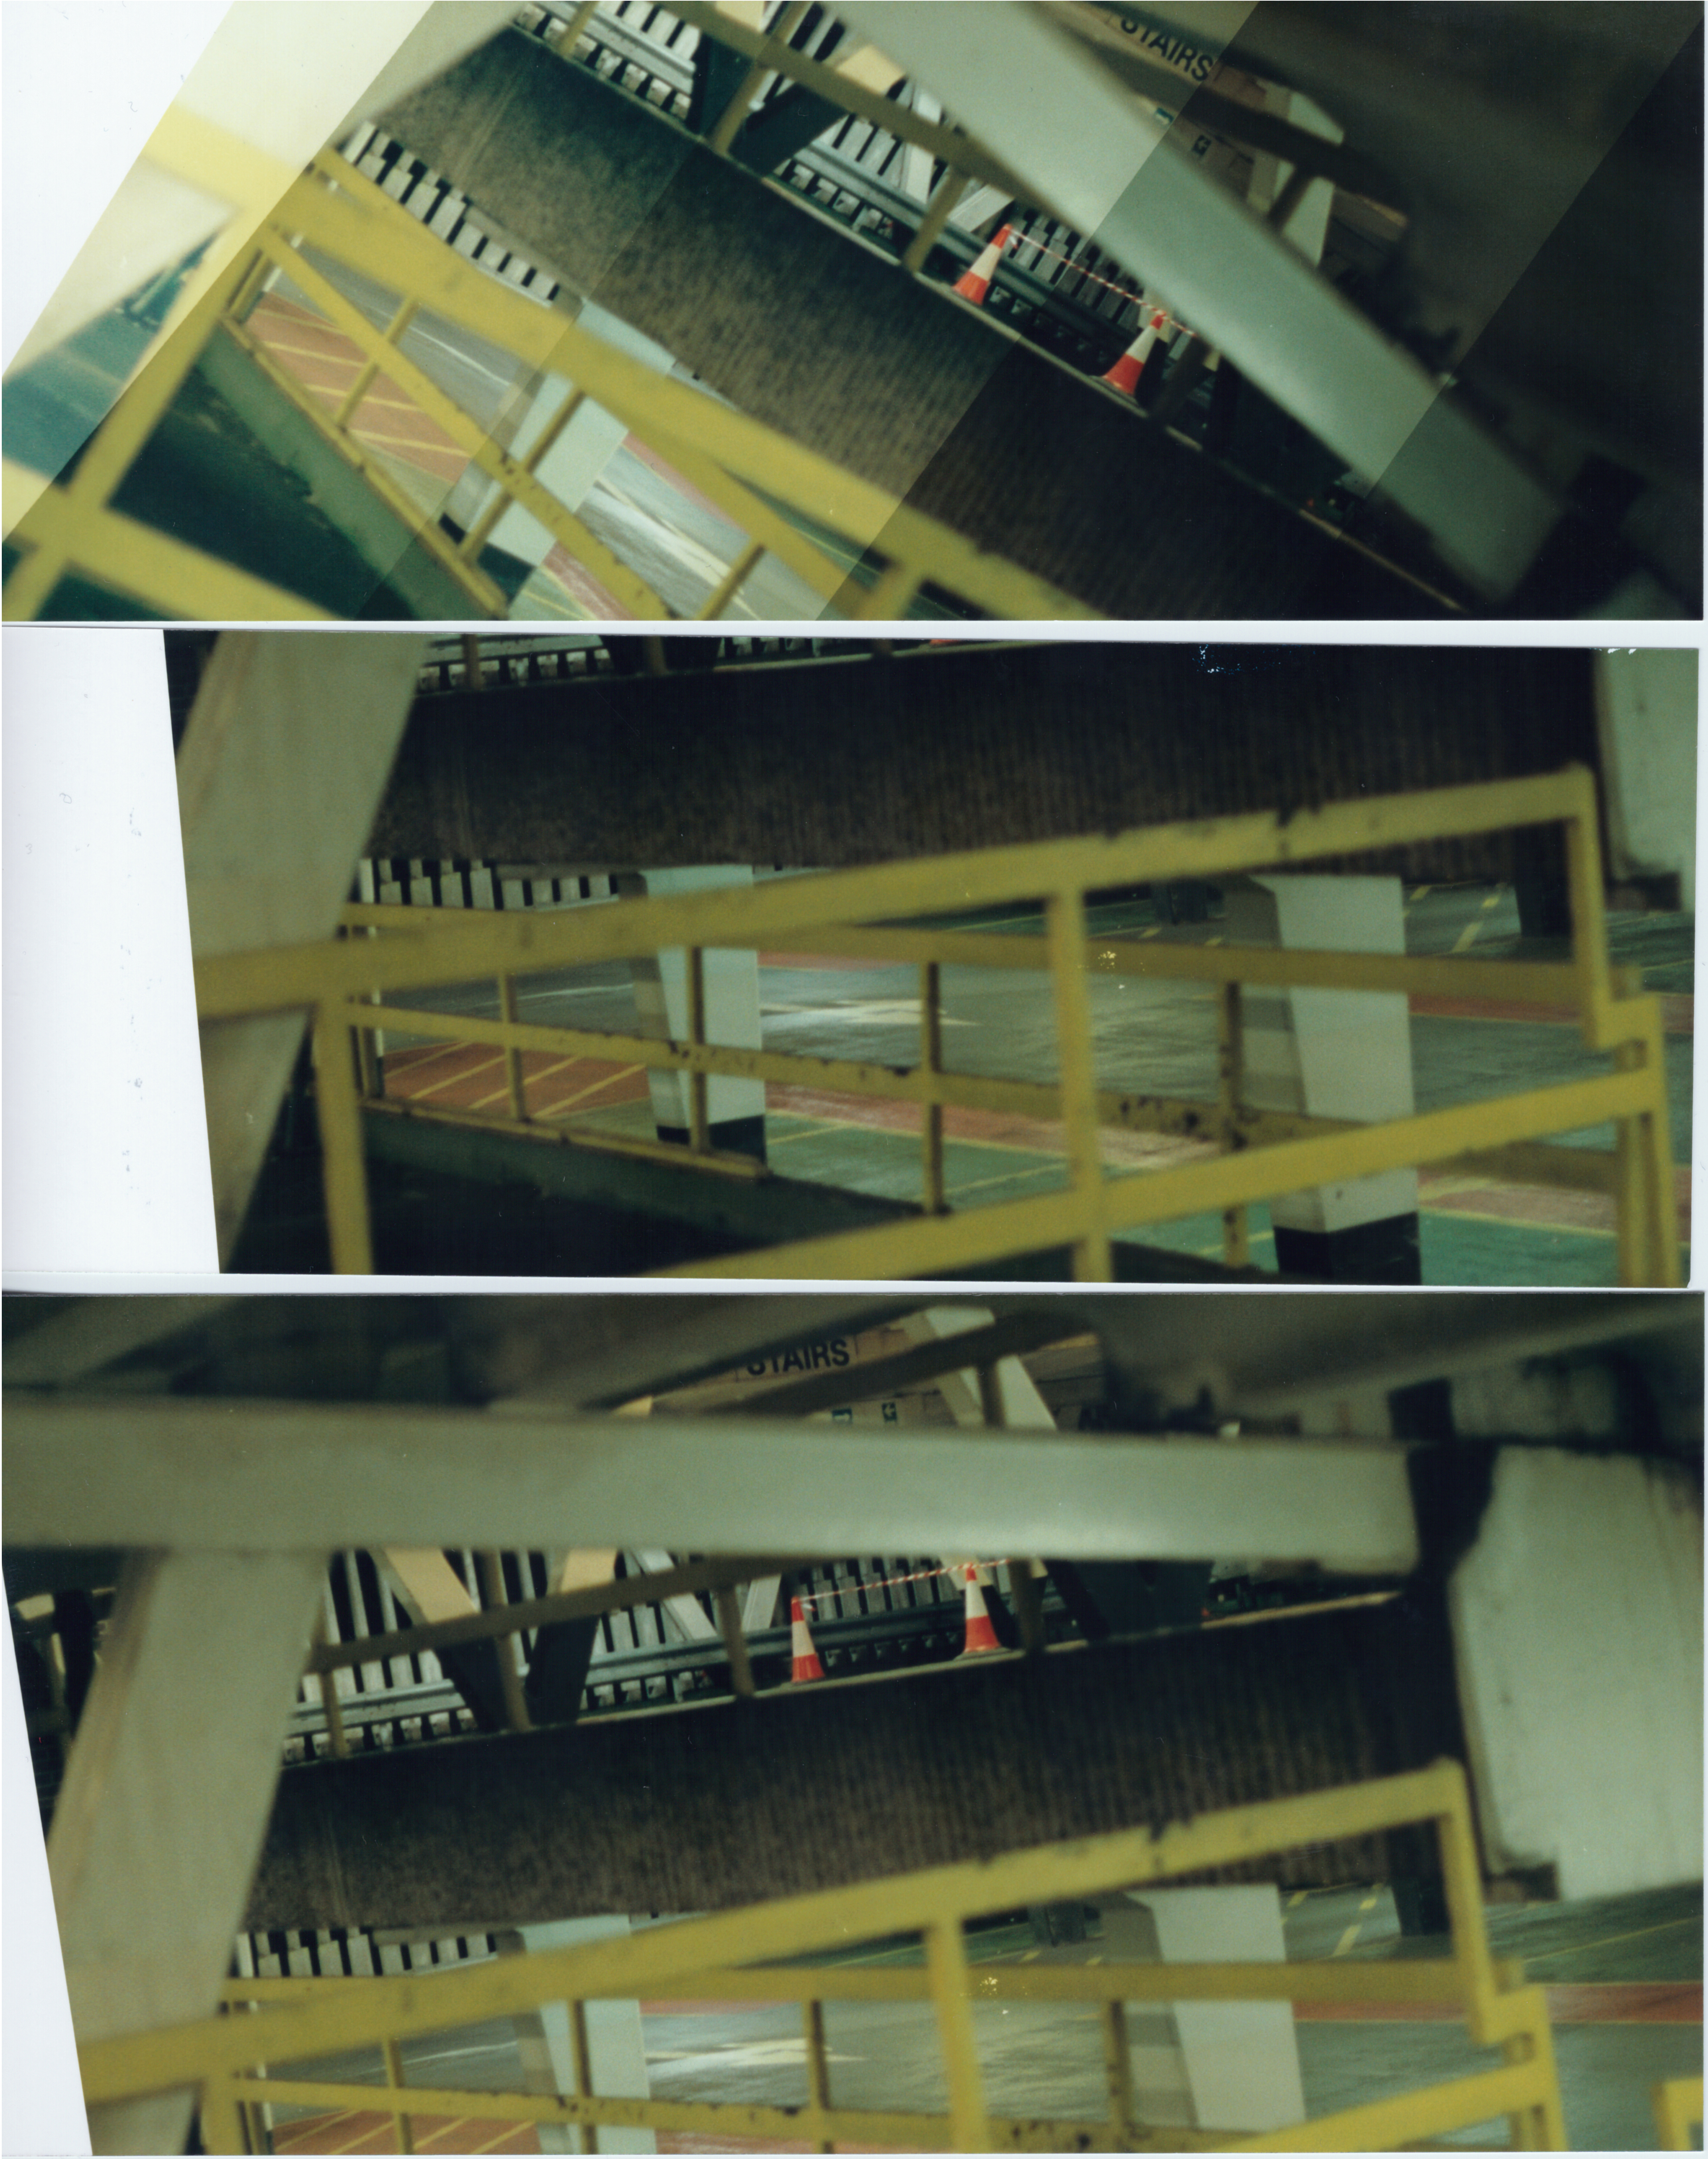
At the 5 seconds mark for the full strip above it was good for the white colour on the cone so I did a full print. It was then that I thought a cropped version might be worth a try too, this meant lifting the enlarger head higher so that the image was being projected in a larger size and the 10×8 paper space on the easel was selecting a portrait strip up the images to contain the cones, fences and coloured floor surfaces.
Obviously because I’d lifted the head up a way the inverse square law of light power meant I’d need to increase the time of the exposure.
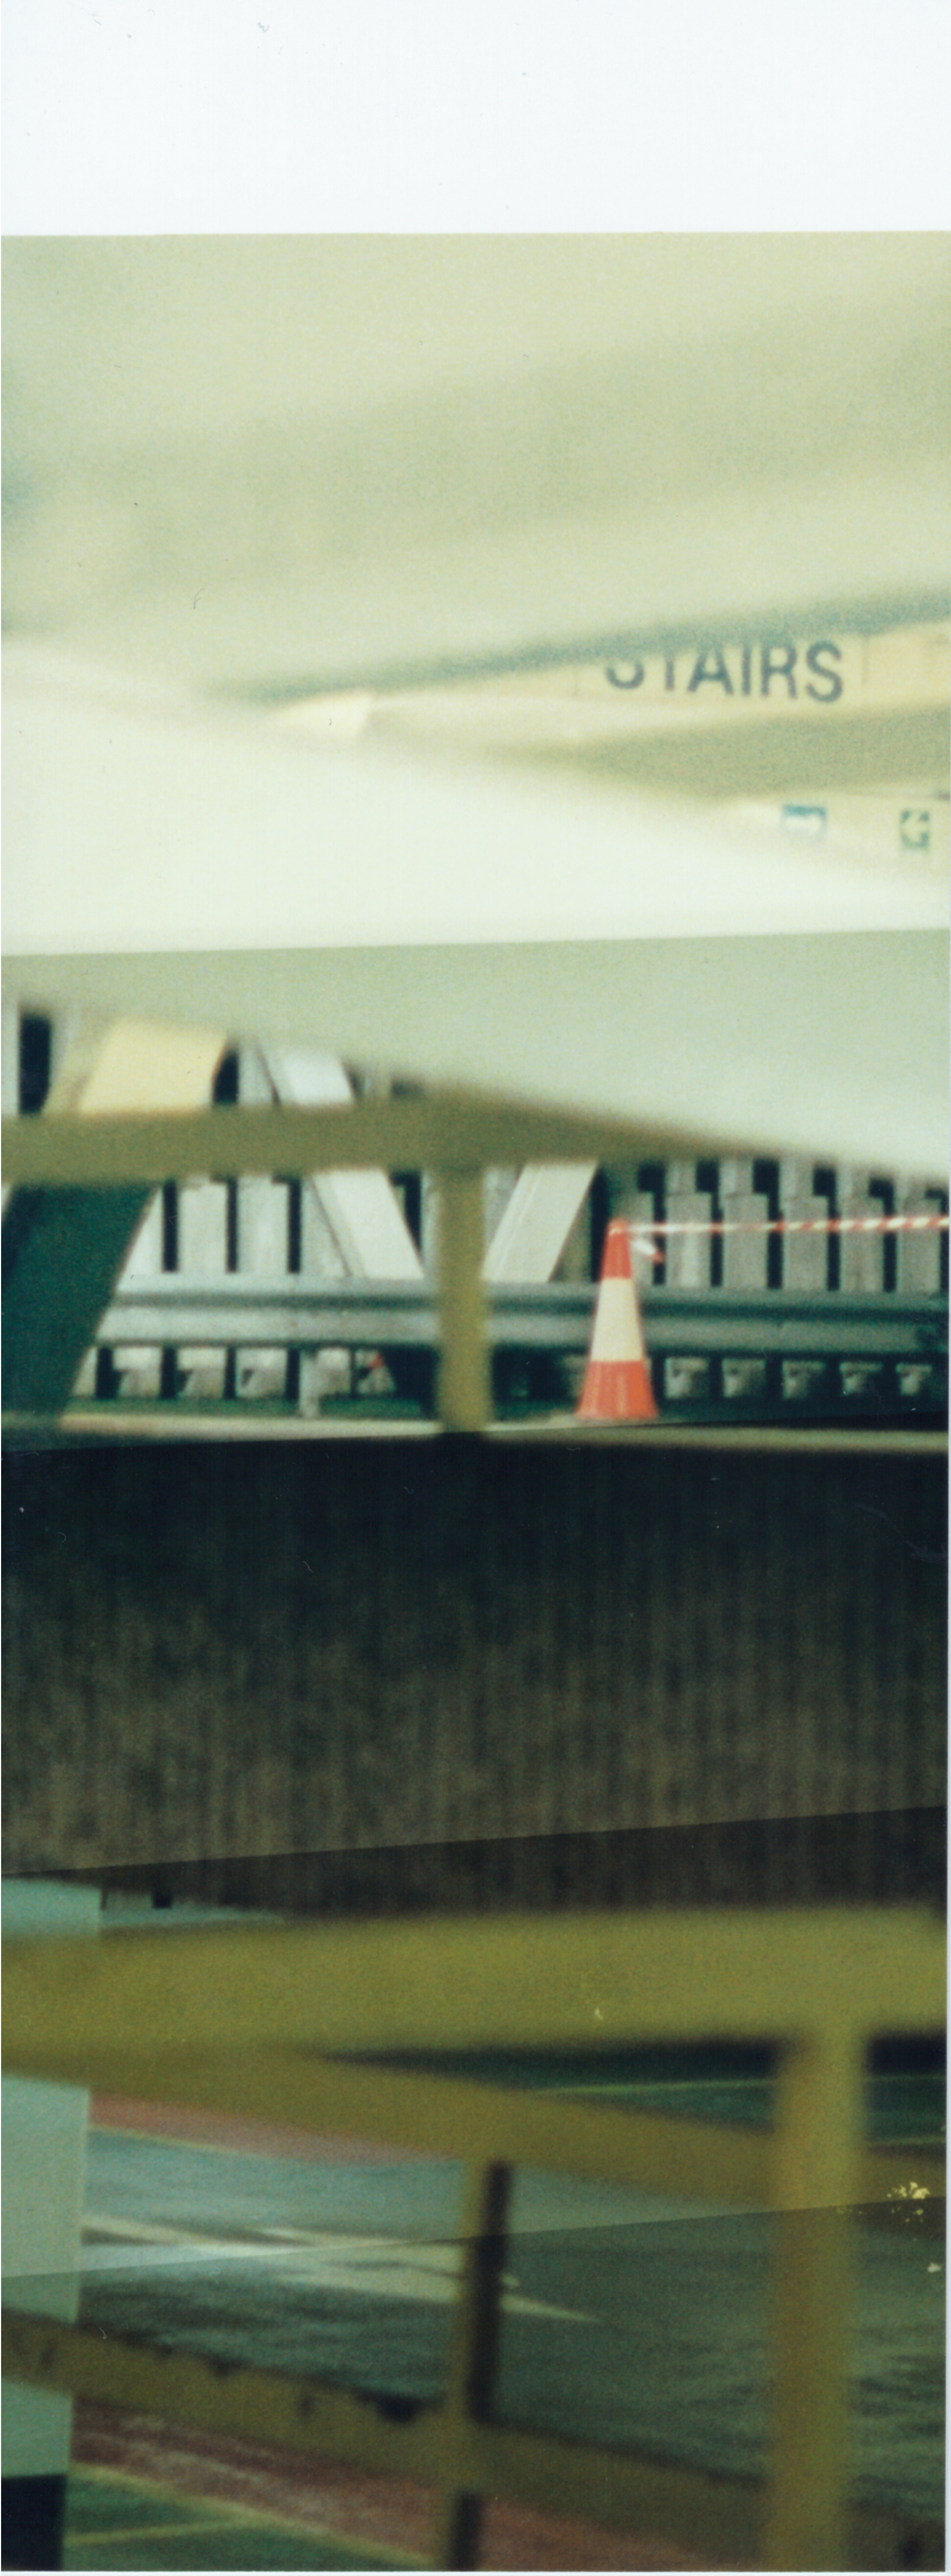
This strip above is in 4 second increments of time and you can see how much larger the cone is in this strip than in the previous prints. The top of this strip saw 4 secs of light whilst the very bottom was exposed to 20 seconds. It looked like around 12 secs was acceptable but I also had to take a bit out of the yellow by increasing Y filter from 80 to 85.
As it happens the print came out ok but it wasn’t a very interesting photo, Matt said that he had preferred the landscape version with a little more negative space in the image.
Above you can see the Print (56) in Landscape and then (58) the cropped version. There was a print (59) too as I tried to remove the blemish on the negative that can be seen in the lower right corner on a yellow rail. I tried cleaning it off but it made very little difference and when I reinserted the neg back into the Enlarger I must have missed the alignment so the next version was a complete miscue.
Light Reading
The difference in the time of exposure is quite interesting and fascinating that it makes such a big difference, according to Andrew Bellamy’s Analog Photography Reference Manual for Shooting Film (Princeton Architectural Press 2019):
light at 2x the distance is 1/4 as bright as at the source (two stops);
light at 4x the distance is 1/16 as bright as at the source (four stops);
light at 5x the distance is 1/25 as bright as at the source (approx. 4.5 stops)
If I’d moved the enlarger to twice the height of the original I would have had to increase the time by a factor of four. As it was I had to increase it from 5 seconds to 12 secs, approx. 2.5 times the exposure time. Working it out backwards this means that I lifted up the head 50% further than it was.
For an illustration if it had been at 10 inches height for 5 seconds, then it would need to be 15 inches for approx. 12 seconds..
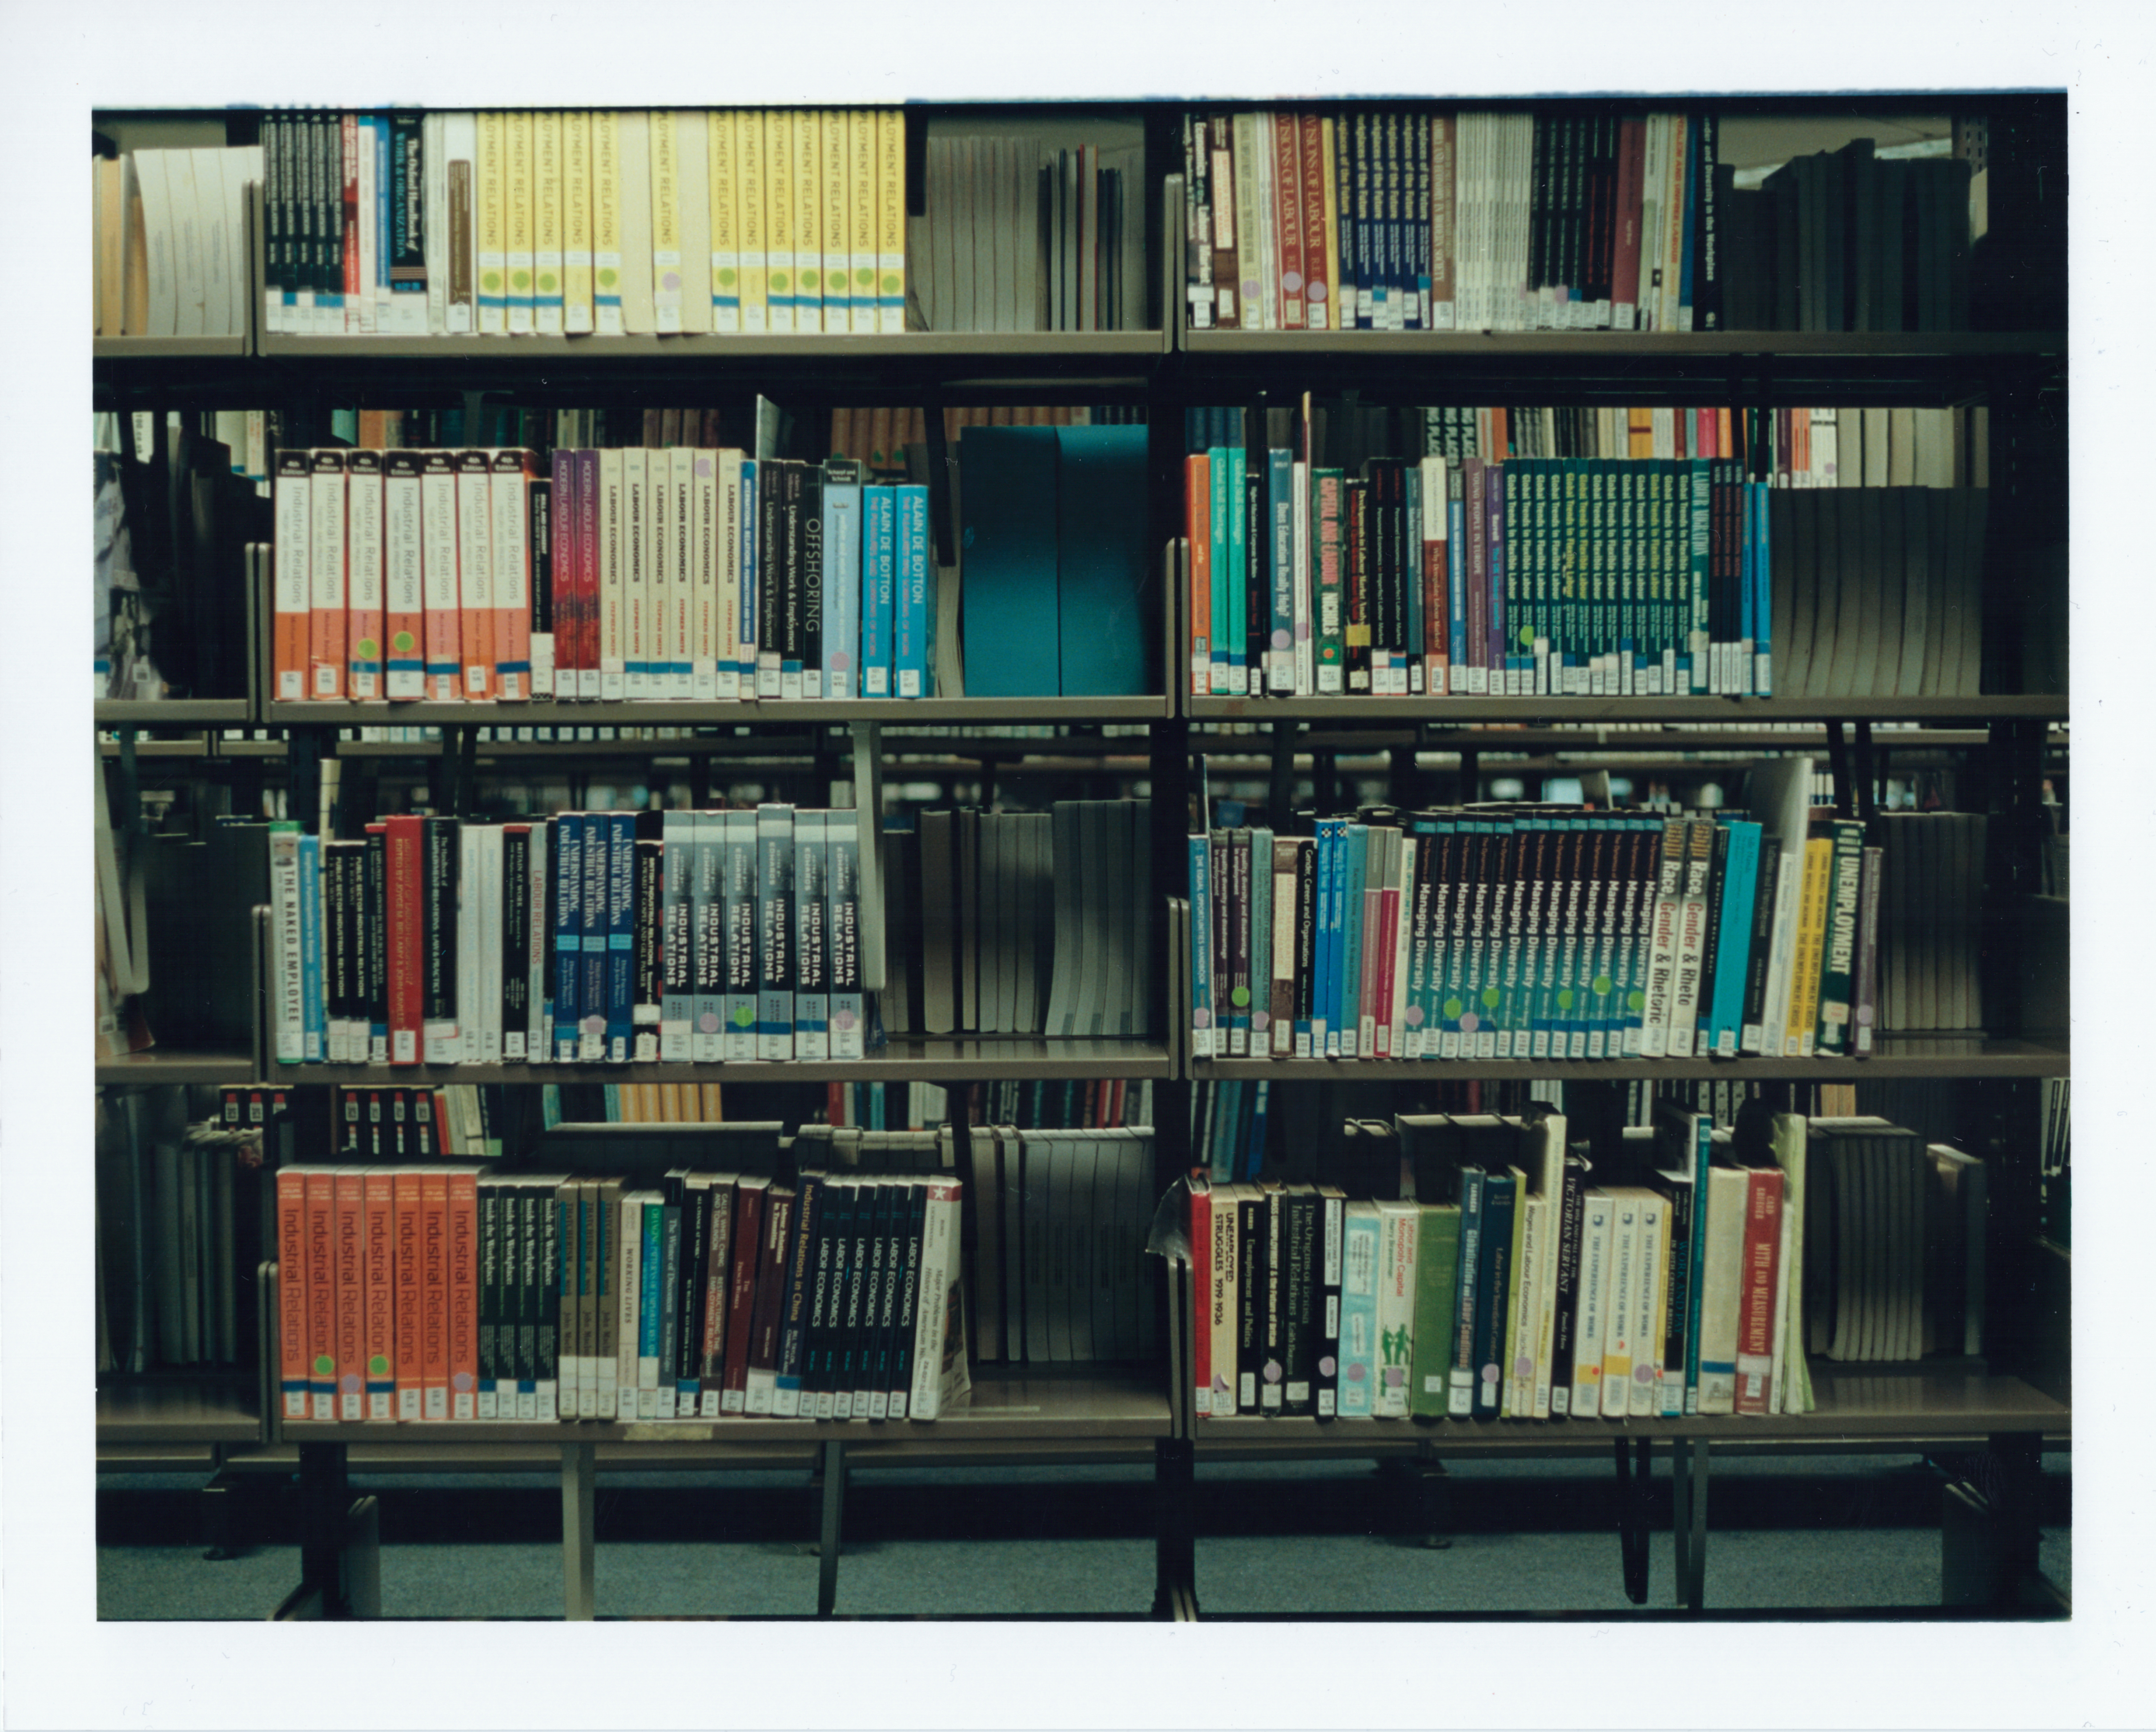
Booksm Art
The next negative I chose, didn’t really fit in with my theme but I wanted to see if my ability to hold the camera at 1/60th sec shutter speed was ok. This was taken from Study Room 123 in the Harrison Library, whilst I was in a work Teams call and I found that I could see people walking back and forth through the shelves.
The first strip went in for 2 second intervals and it looked like 6 seconds seemed the best approximate exposure as can be seen in (60) test strip and full strip (61) below.
I also found that I needed to focus keenly on this image so I was trying the focus finder again and I saw the spines of the books through the tiny little lens.
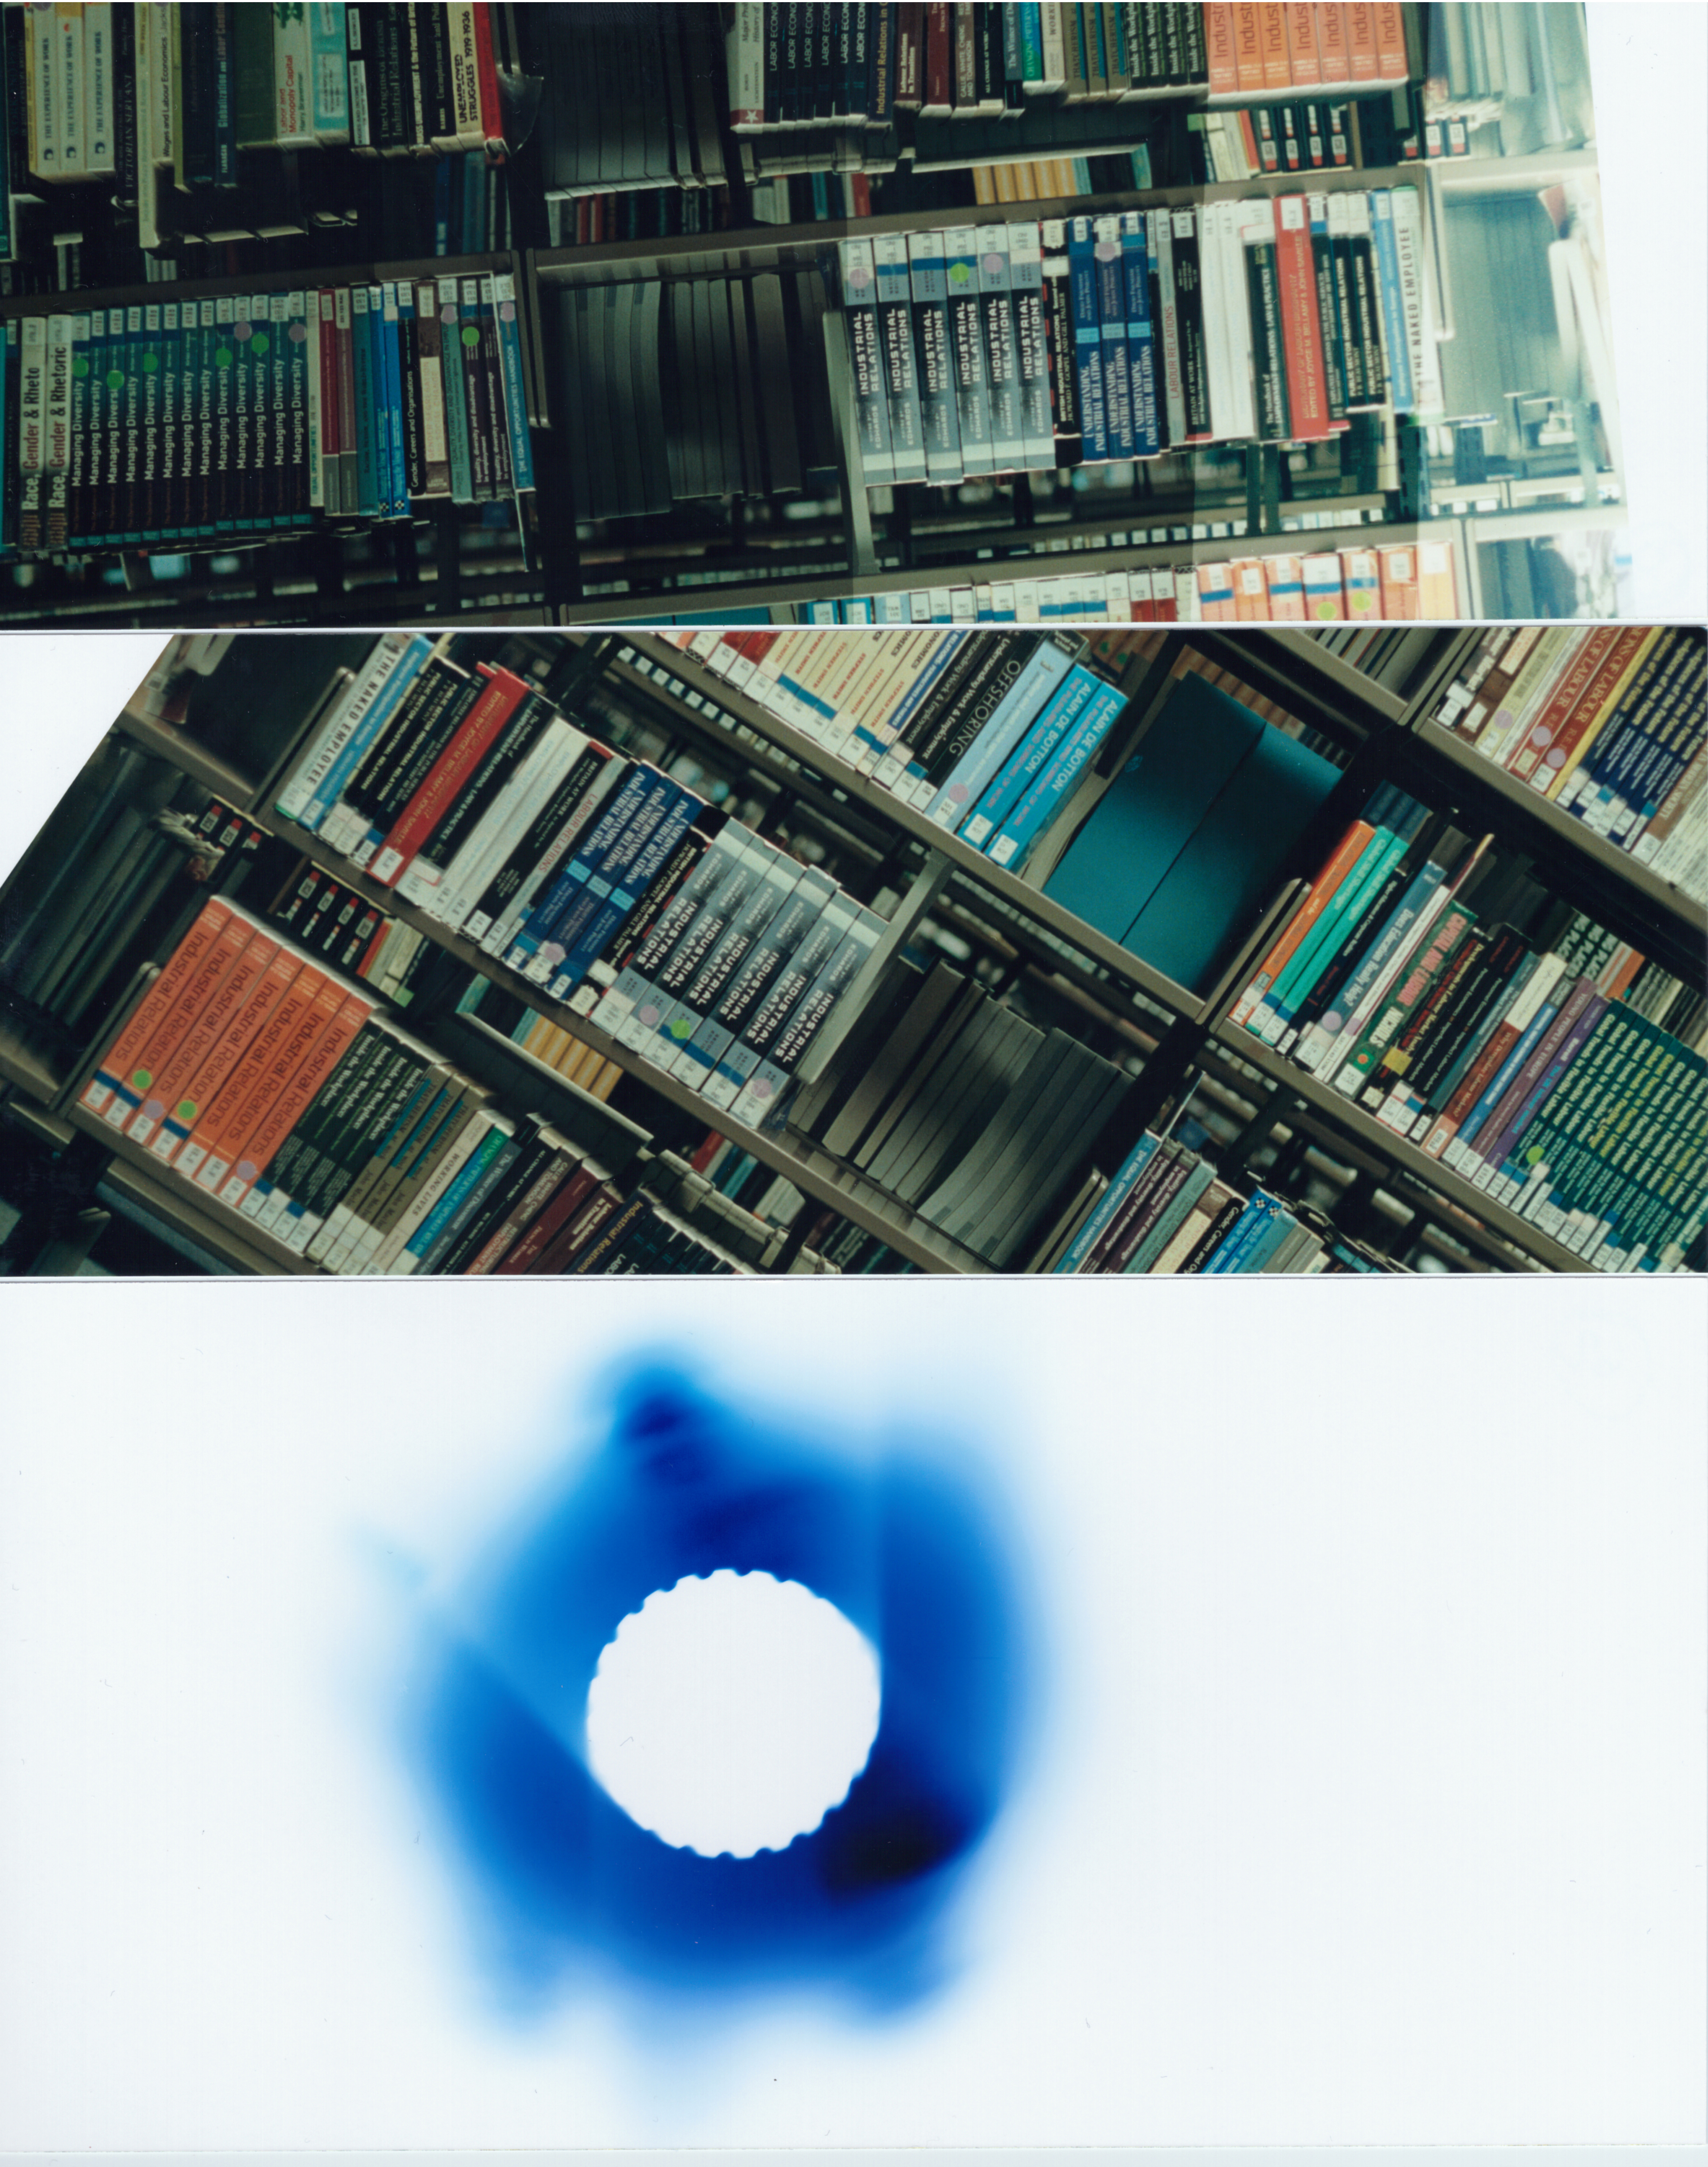

As you can see from the images above it worked ok and I was happy with the full print that followed, even though it was a little irrelevant to my cause.
You can also see that the lower left image of a white print with blue details is an experiment, carried out whilst I was waiting for another print to emerge. This was created by using a test strip and holding it briefly on the illuminated dial of the LPL Enlarger timer unit. I like the castellated pattern in the centre and the ghostly fading light rays. It feels like a false colour image from a space telescope of a black hole or supernova explosion or similar.
A Step Too Far
As a last fling before locking up for the day and getting on the road I thought I’d give another car park related image a go. “Man On Stairs” shows a pedestrian descending a stair case that I know very well from when they used to lead to “The Fridge” nightclub. The stark contrast of the white, blue and black made it an interesting shot for me and it was a straightforward image to get out after a test strip showed that 6 seconds looked perfect and the filters were set to 90,90,0.
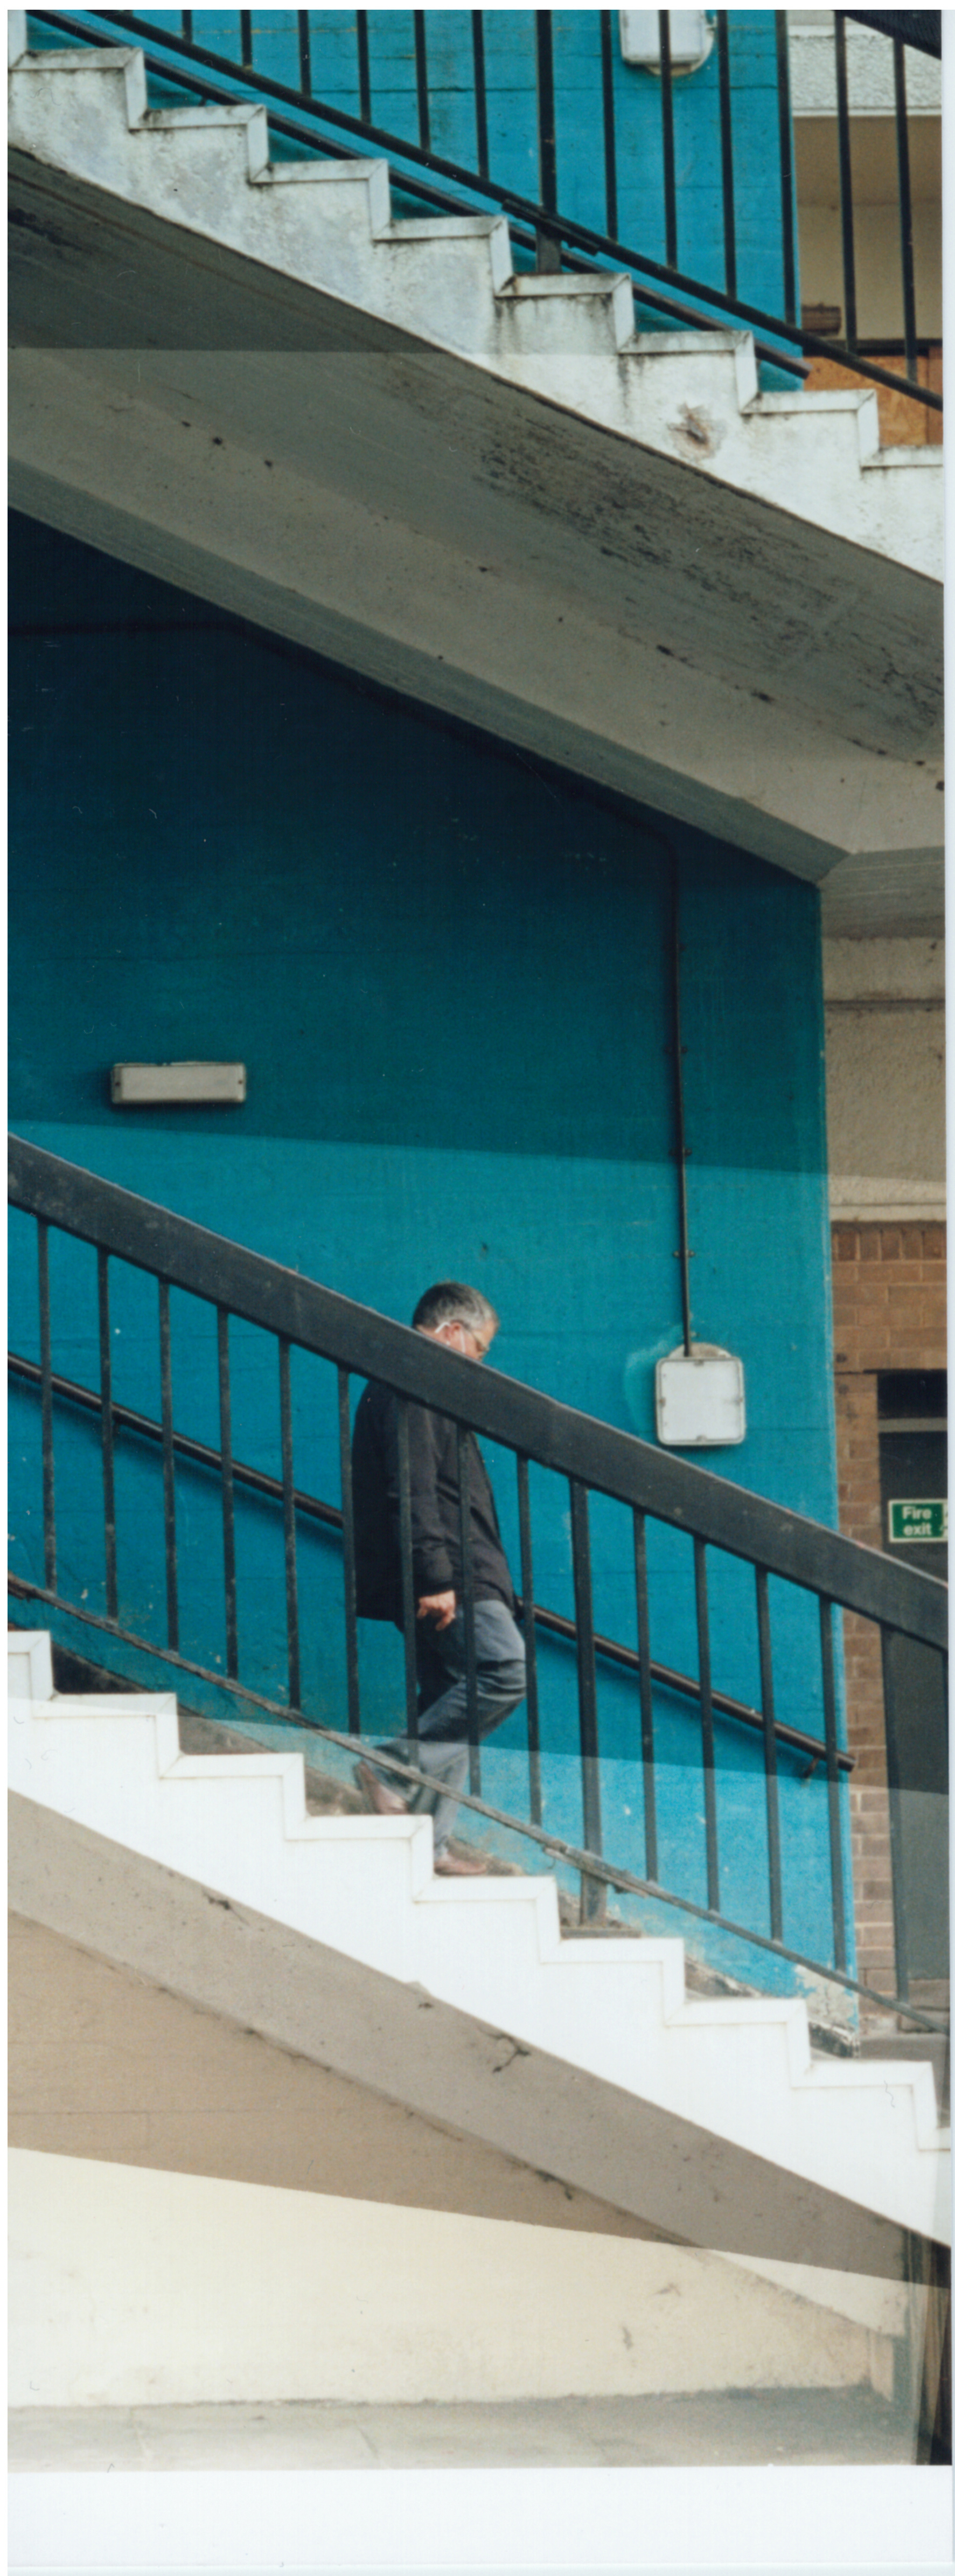
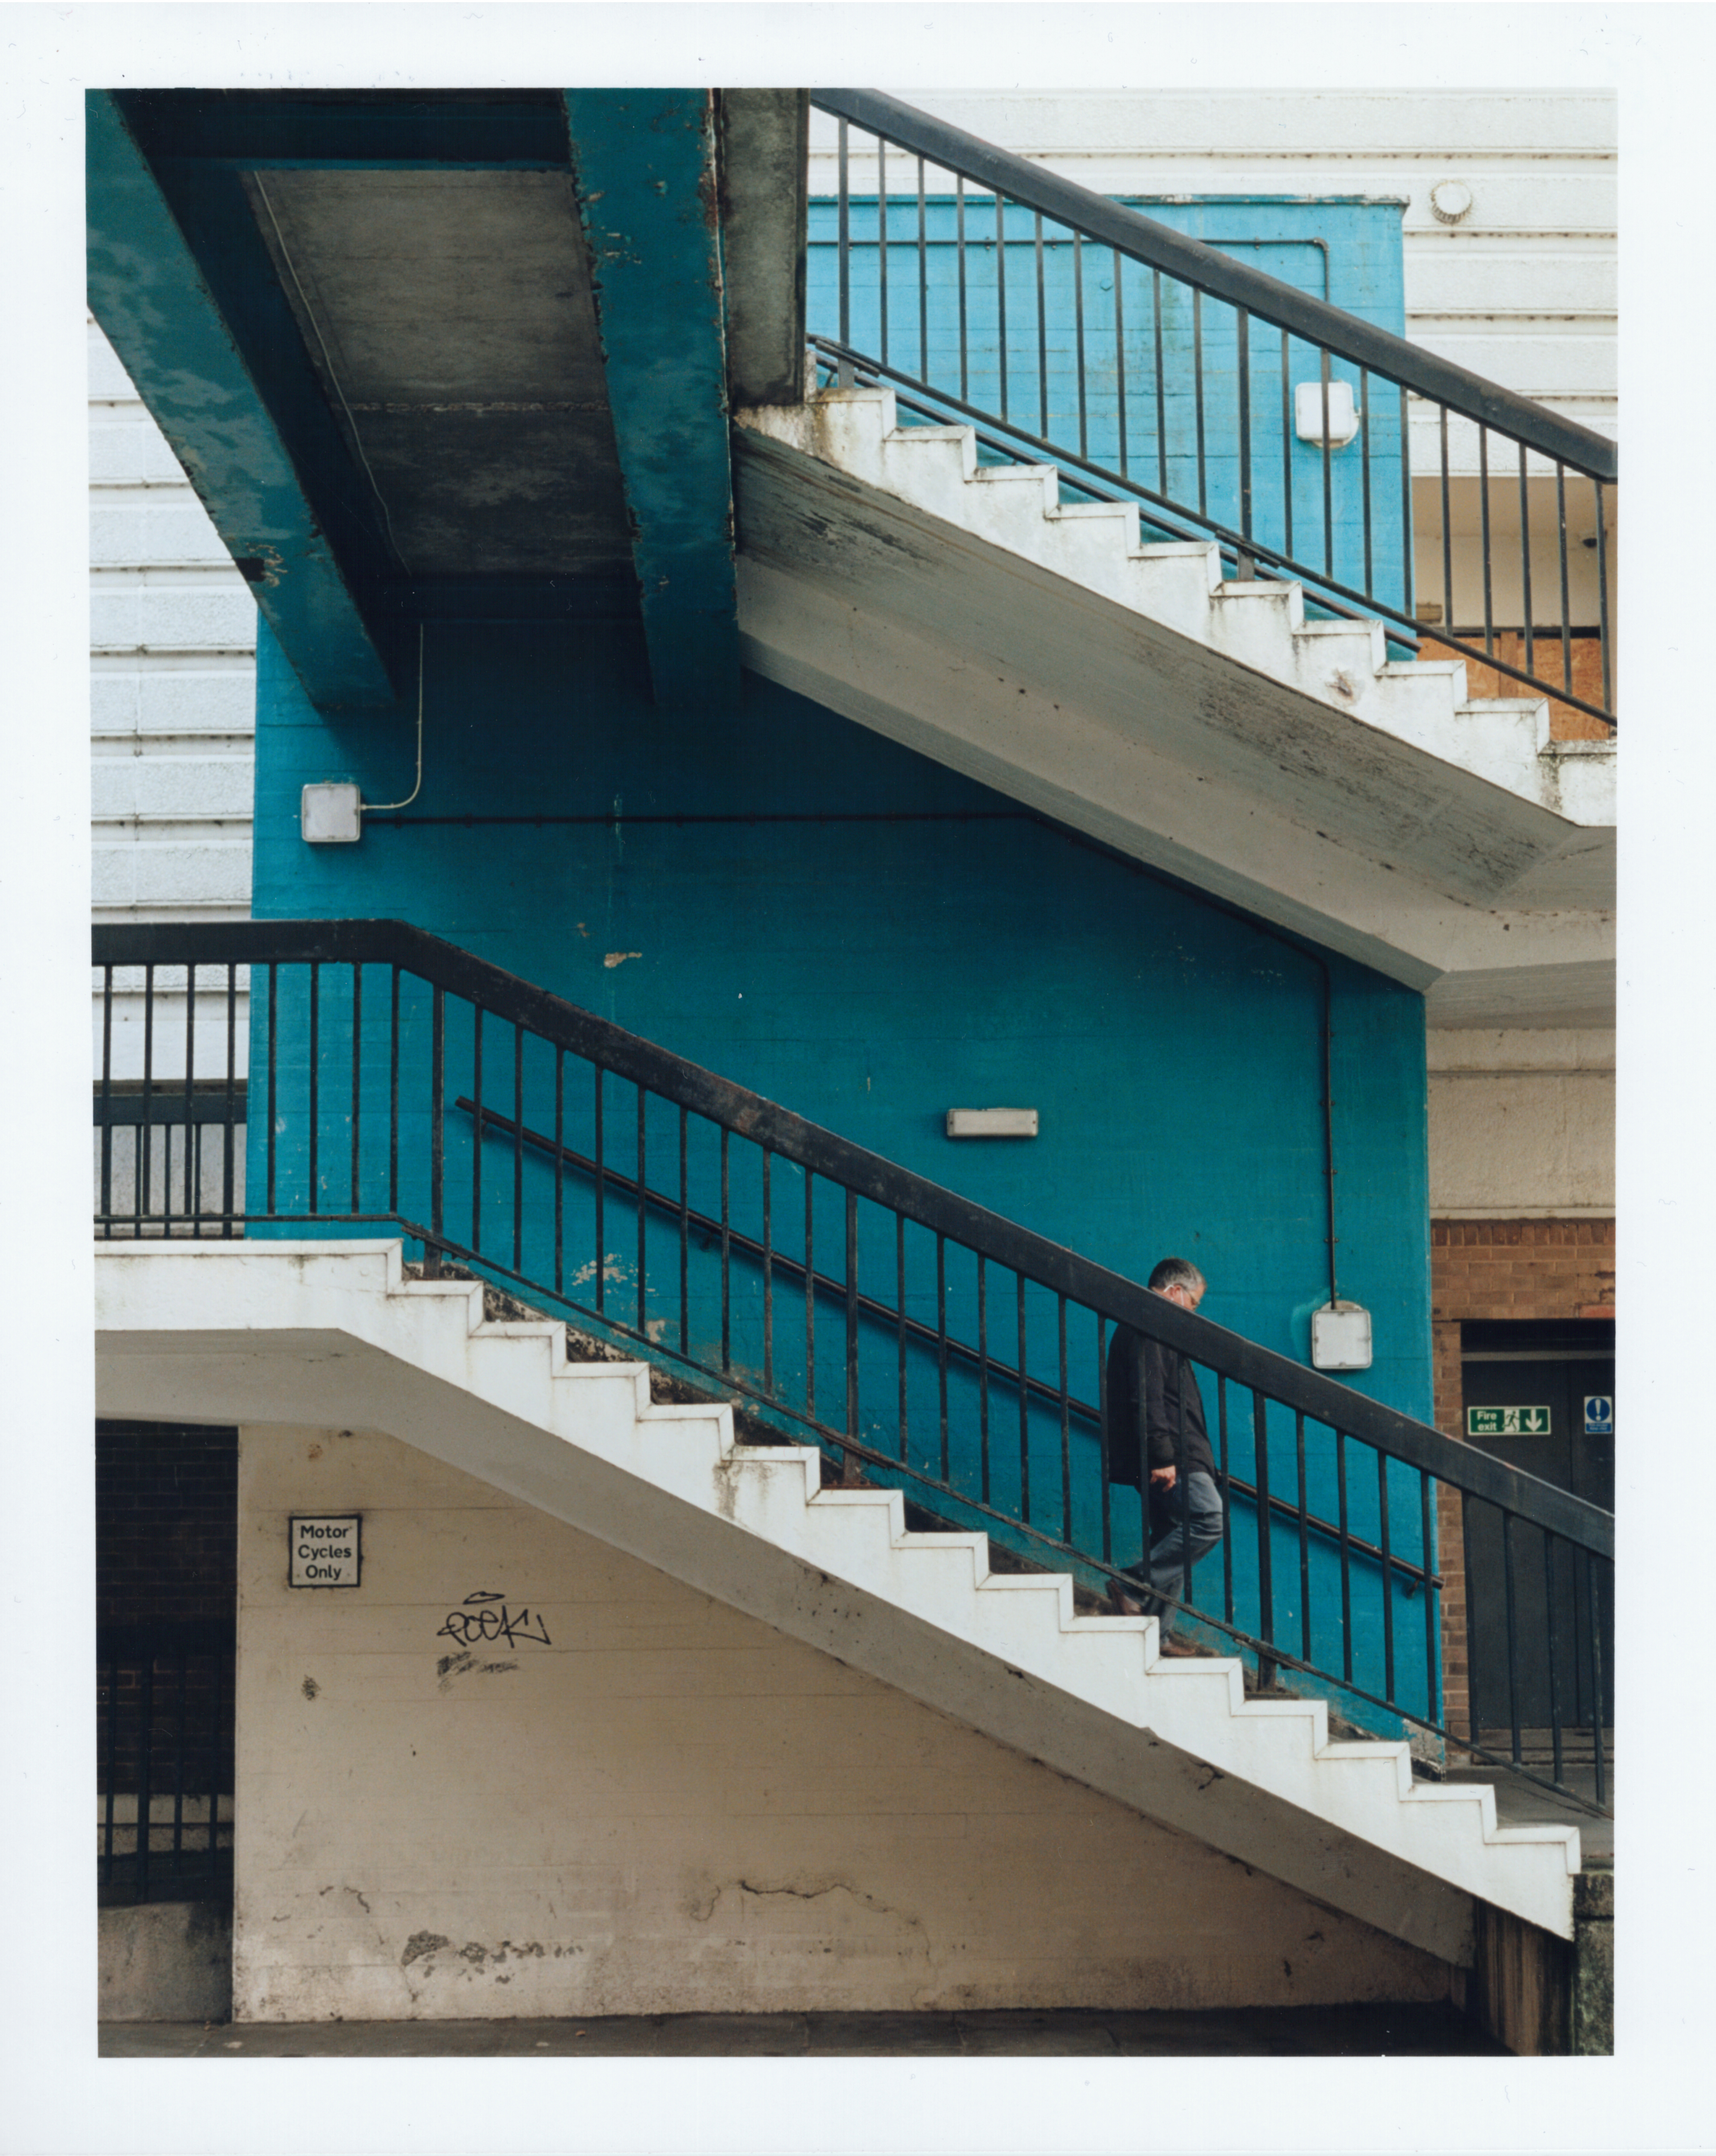
The above images are the test strip for Man On Stairs and the full print. This looks like a basic scene to many folk but for me it takes me right back to seeing some strange sights on or under these particular stairs. I revisited this bridge and stairway last night trying to use my last bit of colour film up and there was a young man and his bike sleeping in the doorway to the old nightclub, it was very quiet in the area and I didn’t hang around to disturb him.
Critique Session
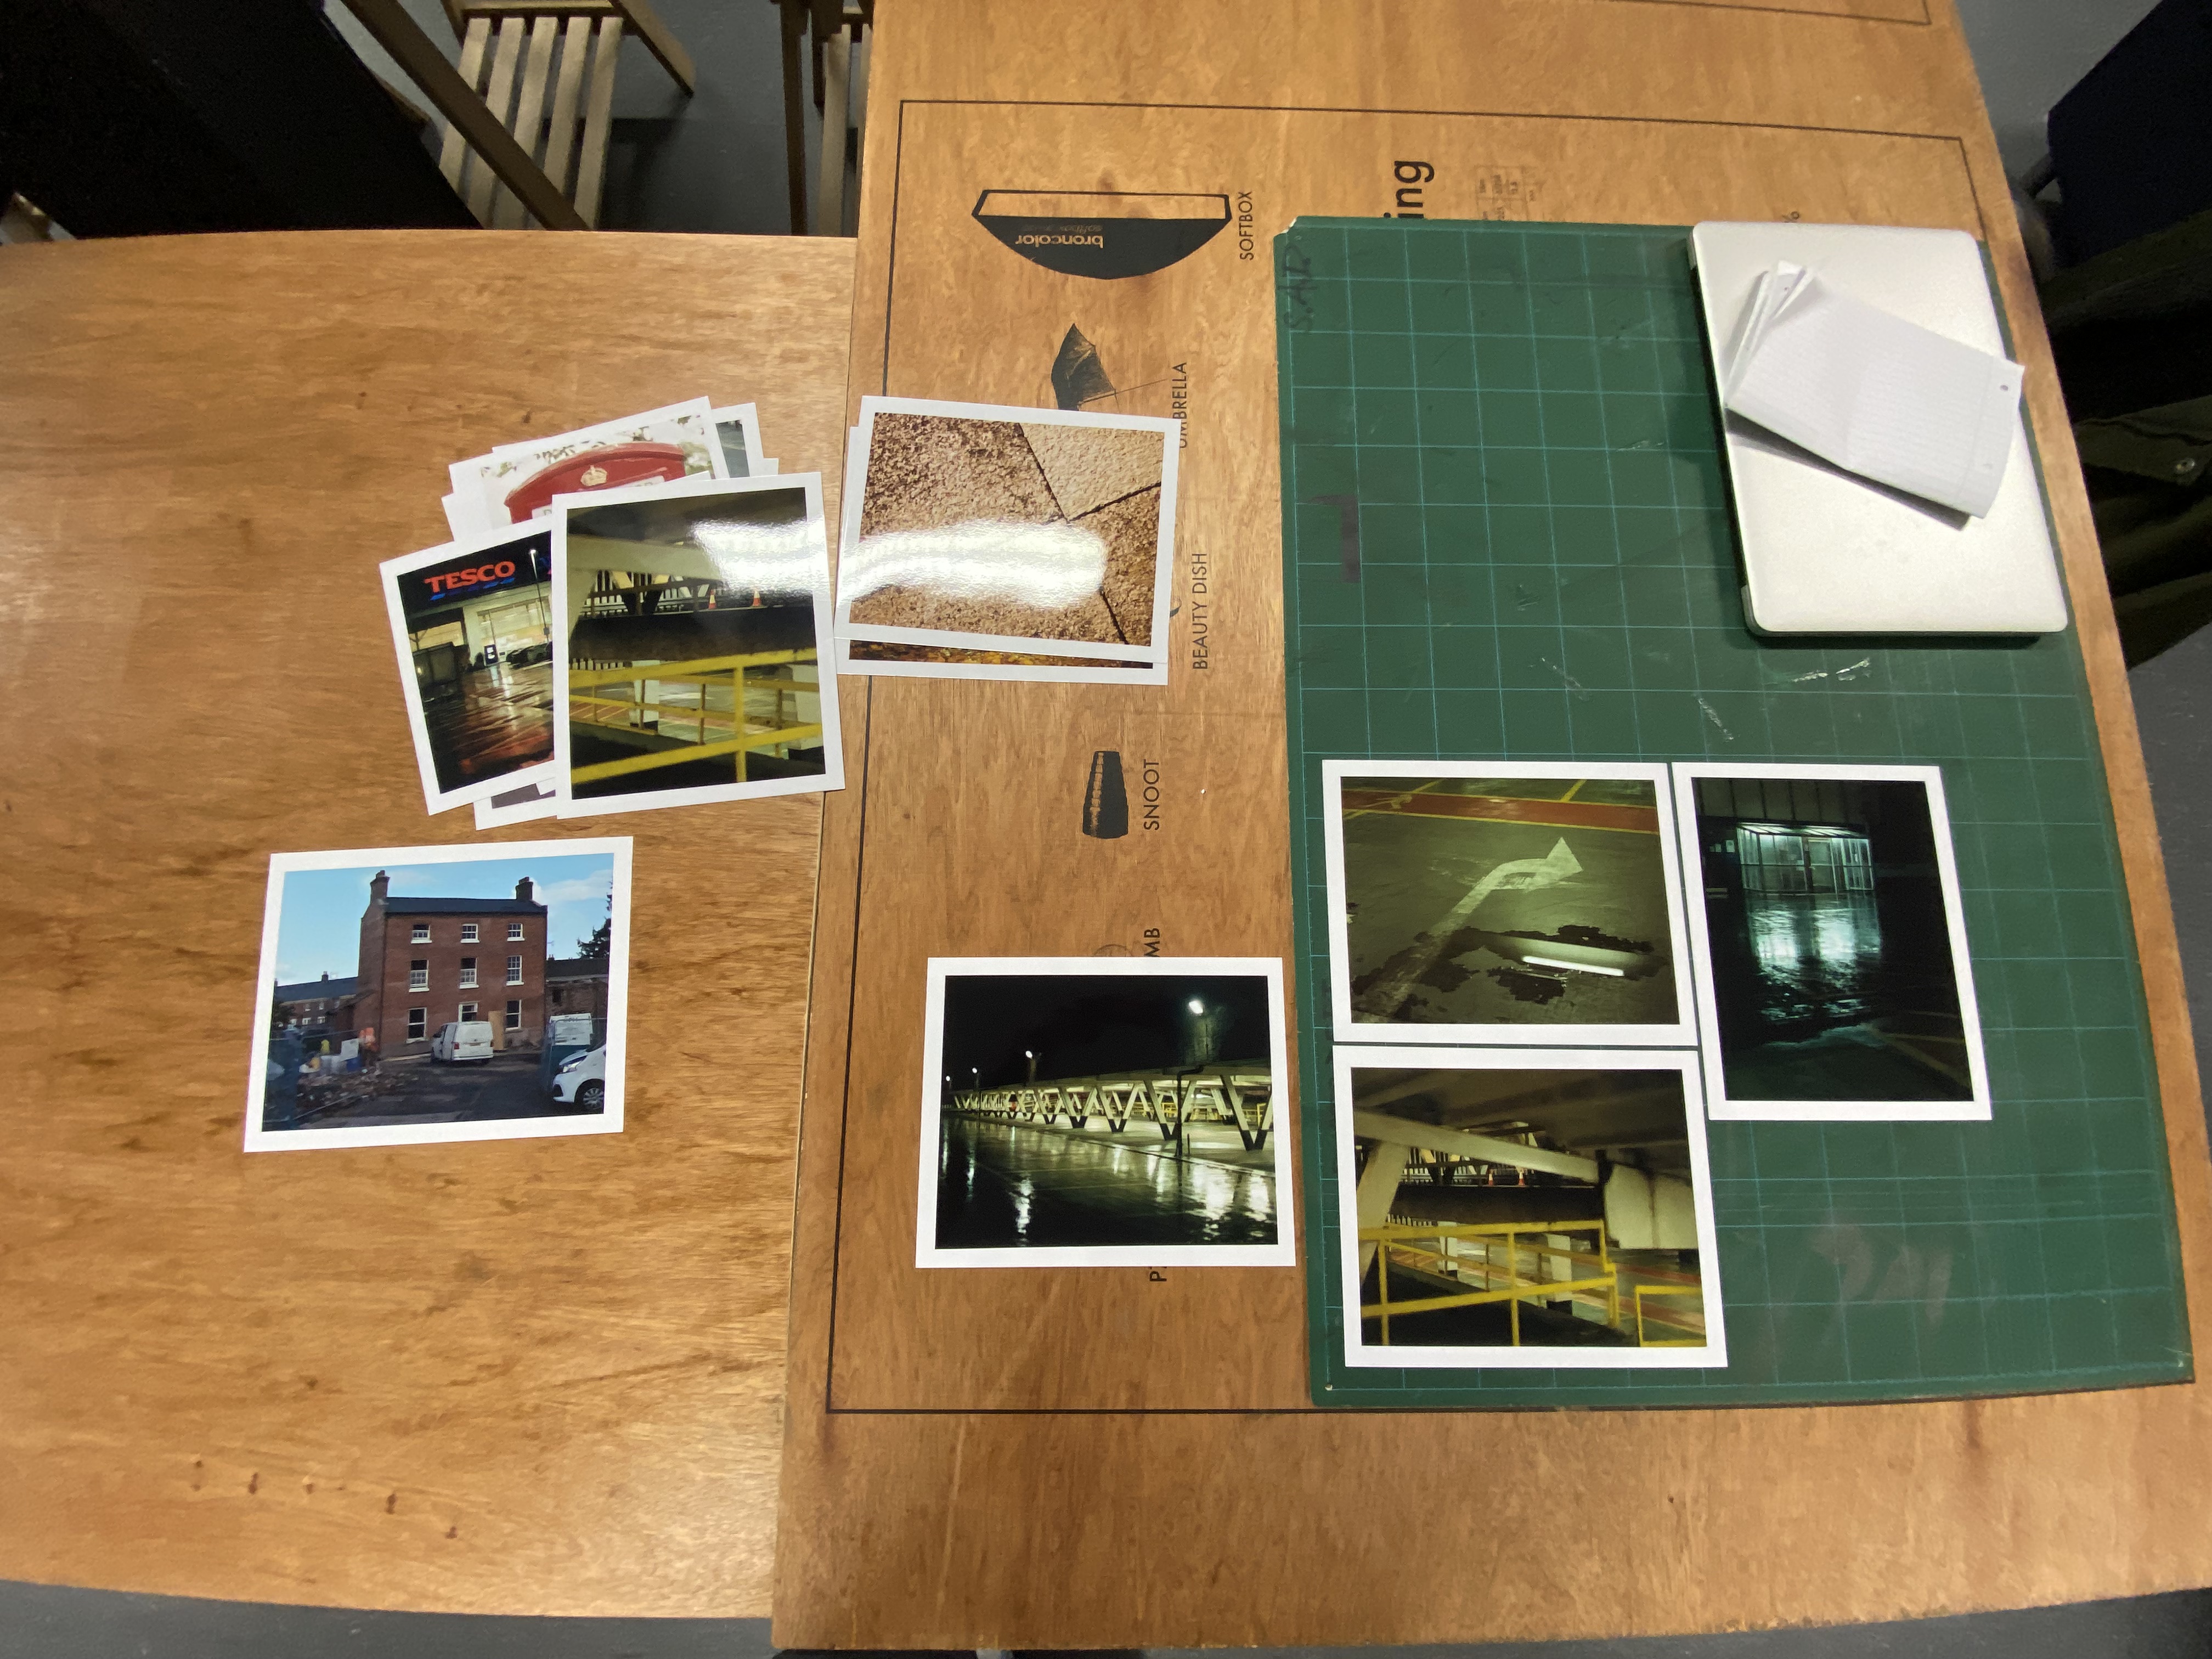
Part way through the afternoon on the Tuesday Matt suggested I place all my prints on the table top and try and work out a set of usable prints so that’s what I did. Not one to turn down free critique and feedback.
I placed all 17 prints on the bench and then Matt slid at least 12 of them out of the way immediately, not impressed and kept three that he thought represented a strong body of work, another that could be attached to it and then another that was a good standalone image but didn’t fit in with the remainder of the images.
He apologised for being a “Harsh Editor” but he didn’t need to, after all he’s a professional and fully aware of what makes an interesting image. His assessment of the images that he preferred, aligned with my favourite images, chiefly the night time rainy photos with light reflections. These photos were all off Film #4 and it shows that my use of the film camera to make images was improved from the early days of Film #1. Matt suggested that it was interesting and could be continued into the Black and White project that was also coming up.
This sounds like a good thing to do, as I’m sure there’ll be plenty of nights of rain and cold weather for me to explore…
Black and White
Next week is the Black & White session where we get to go around Wolverhampton City Centre with the Black & White Film in the camera. Let’s see what occurs from that. I think it might be time to break open another sketchbook too!!
I’m also looking forward to having the red light on in the darkroom and being able to see where my hands are and what I’m doing…
Be First to Comment