After converting the Fujicolour films to Redscale in the week, more in this post, it was time to get out and shoot it in my Bronica ETRS. It was a bright Sunday morning with some rain planned for after lunch so I packed my ETRS, the two converted films, the tripod and my shutter release cable then headed off to Shirehall, the subject of my Level 6 project thus far.
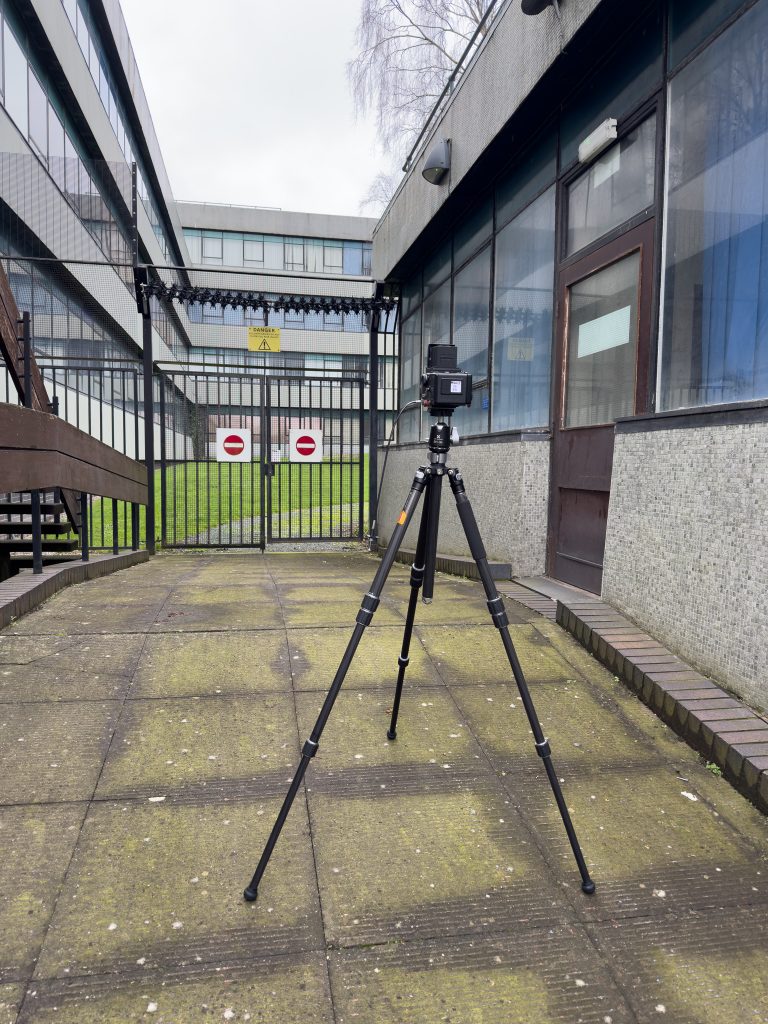
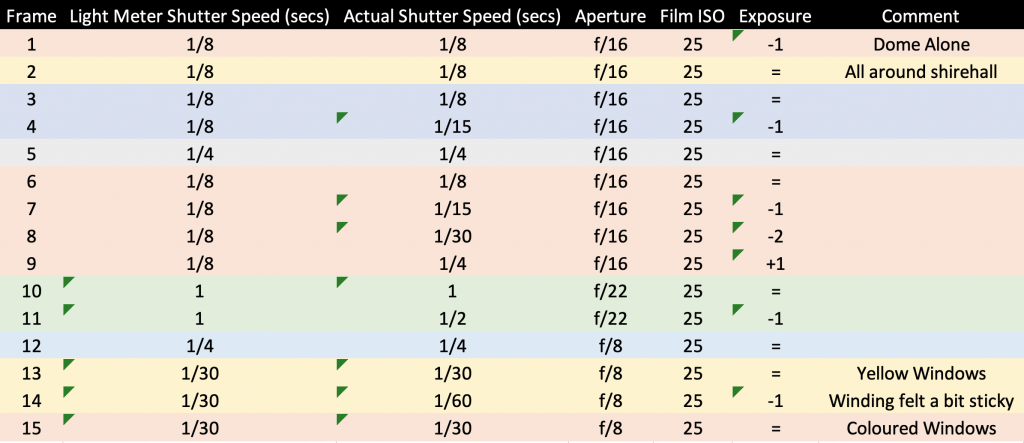
Table Stakes
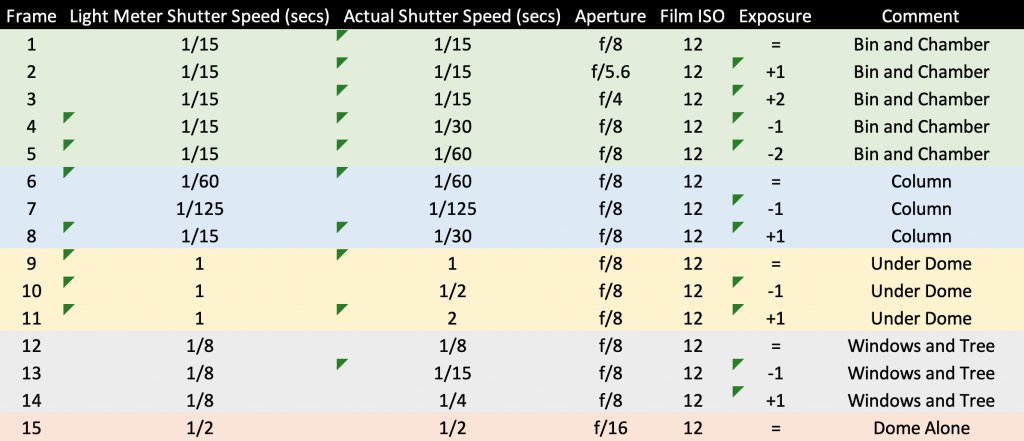
The table below shows the first roll of film I shot, its roll #123 and was originally a Fujicolour Pro 160 on 120 that I would be shooting at 6×4.5 cm in the Bronica ETRS with the Zenzanon 75mm f/2.8 lens. I had loaded a roll of film in to each of the two 120 Film Backs and chose this one first. Euripides had advised me that flipping it to make it redscale would drop the ISO about three or four stops and suggested I shoot this ISO160 film at ISO12 as the light has to go through the backing plastic before it gets to the chemical emulsion. He also suggested bracketing it a little to see what impact it might have on the final images, by bracketing he means to under or over expose it by a stop or two to see what the best settings might be. You can see from the table below the details.
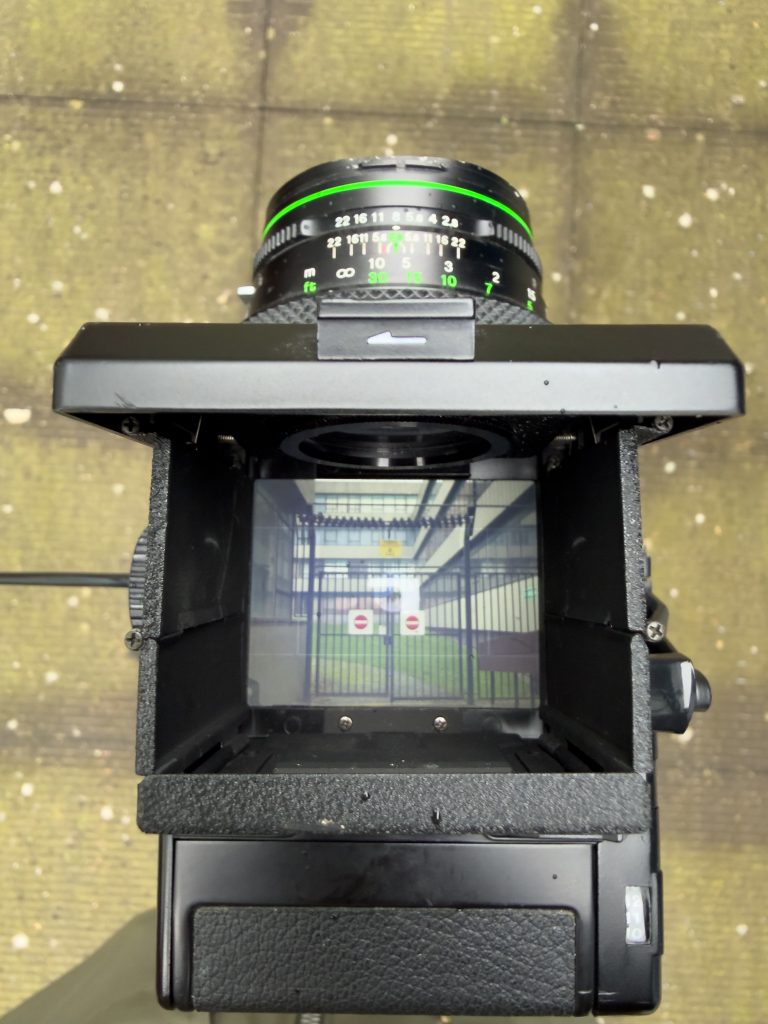
Light Meter Shutter Speed vs Actual Shutter Speed is measured in seconds and the light meter was done using the LUX app on my smart phone which has been pretty good in the past. I do have the AE-II Prism/Metered viewfinder but chose to shoot it without this to make the bracketing easier to deal with, and also the angles I was shooting at meant it would have been tricky getting my eye on the cup of the viewfinder. I shot instead with the waist level viewfinder. The LUX app was set as f/8 aperture, ISO 12 and had it suggest the shutter speed. You can see that they do change in a couple of places where there is an over or under carried out.
The Exposure column shows the = symbol if I used the suggested shutter speed from the meter. If it shows +1, this means 1 stop of over exposure. On Frame 2 you can see that I opened the aperture a stop to allow more light in, frame 3 was down to f/4 for two stops of overexposure when compared to the meter suggestion. Frames 4 and 5 are underexposed by 1 and 2 stops respectively. On these frames though I altered the shutter speed a stop or two rather than moving the aperture, this you can see they stayed at f/8 but the suggested time of 1/15 sec is altered to 1/30 for one stop less light and 1/60 for two stops less light. This is the way that both of the tables on this post will appear.
FIlm #123
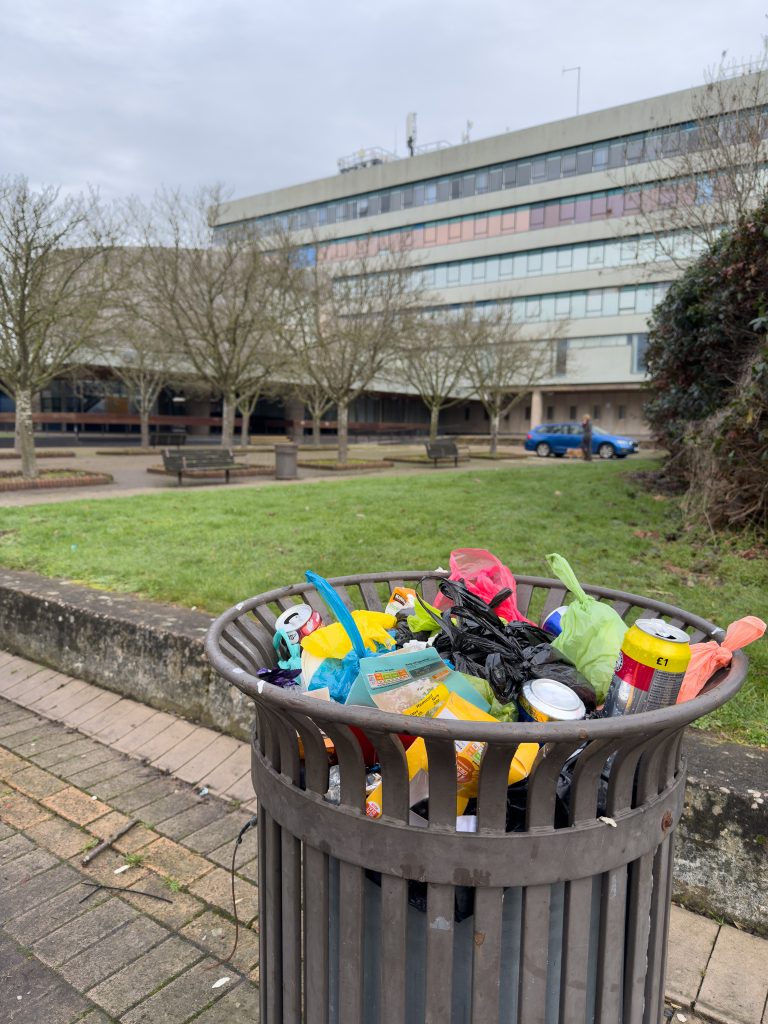
The first frame on the notes says Bin and Chamber which is the photo beneath. You can see on the left, the screenshot of my LUX app on my phone which shows the ISO12, f/8 and the suggested 1/15 as per line one on the table above. THe reason I took the photo was to capture some of themixture of colours in the top of the bin to see what that looked like on the redscale film
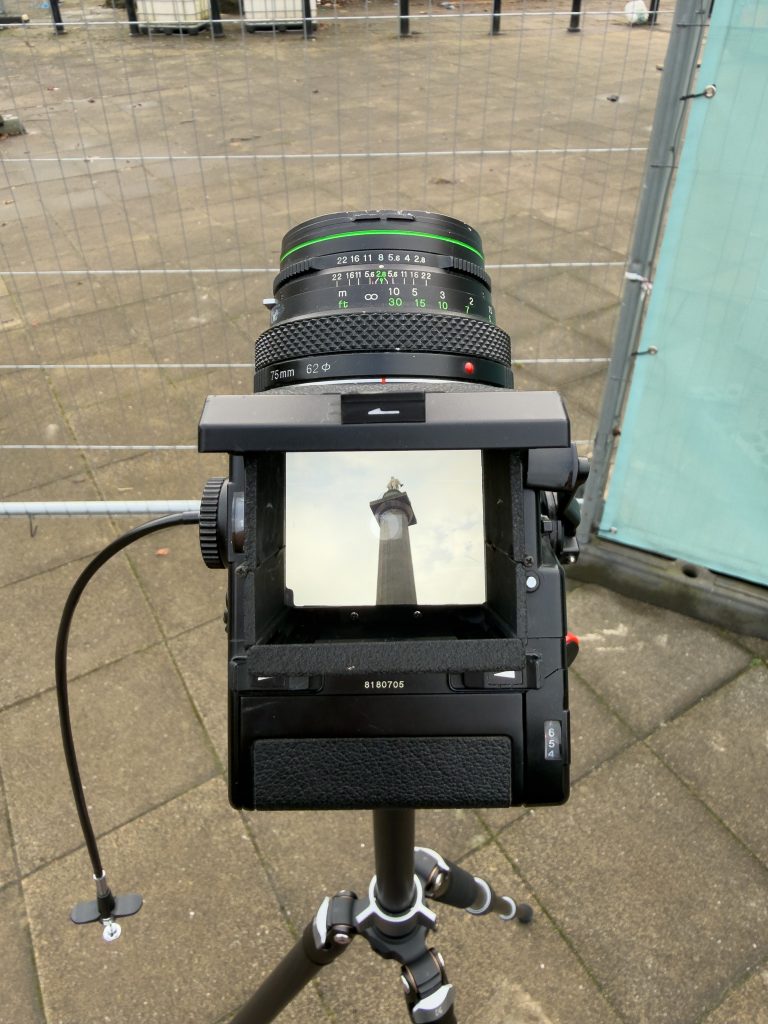
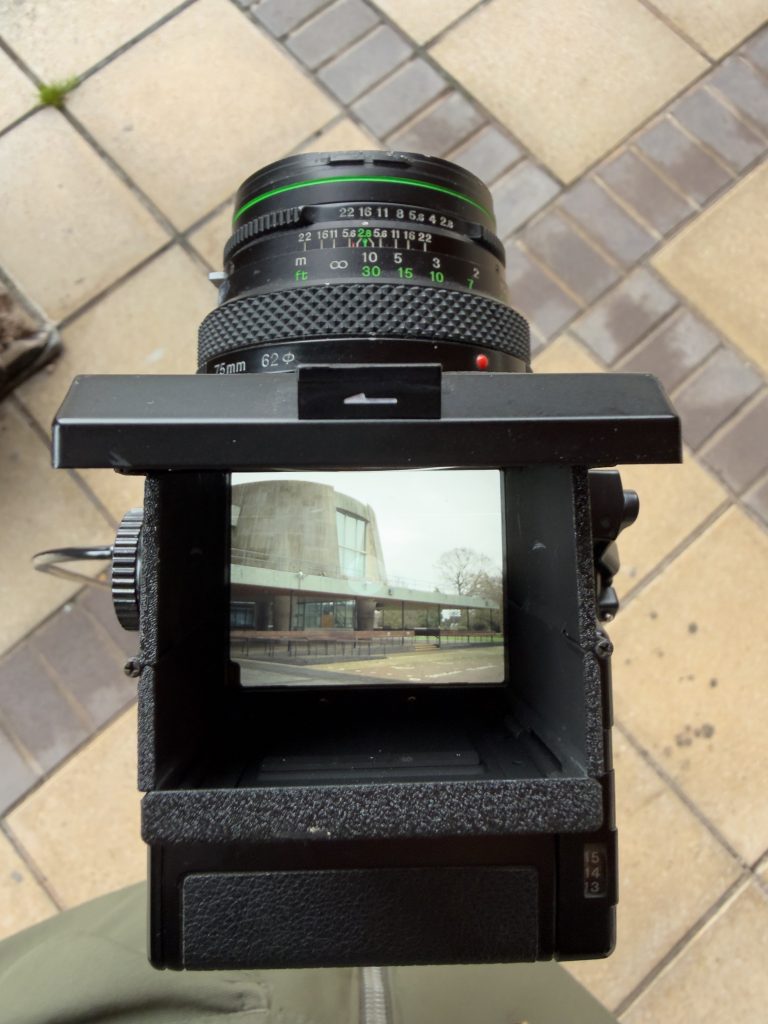
The pictures below relate to the 6th, 7th and 8th frames of the Lord Hill’s Column which has just had the scaffolding removed. Again the first image is the LUX Screenshot with the second being my view of the scene through the viewfinder. The metering is not going to be super accurate as the field of view on the phone is a little different to the 75mm lens but I am fairly confident that it will be close enough. On this subject I used three frames, one of suggested, one under and one over.
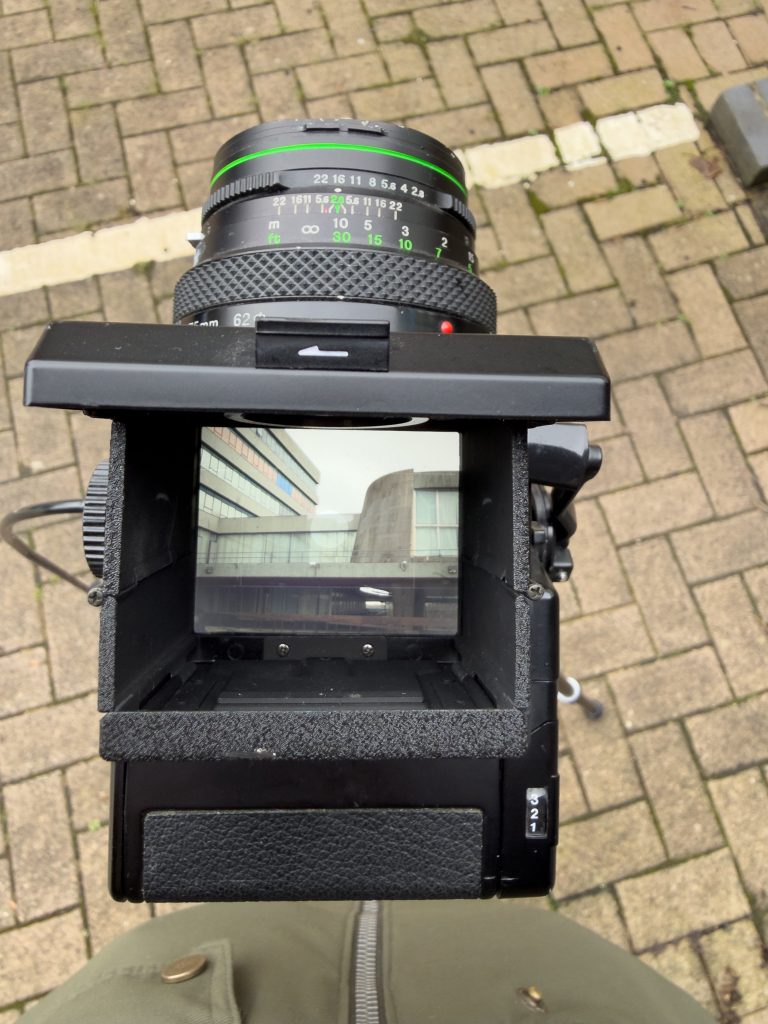
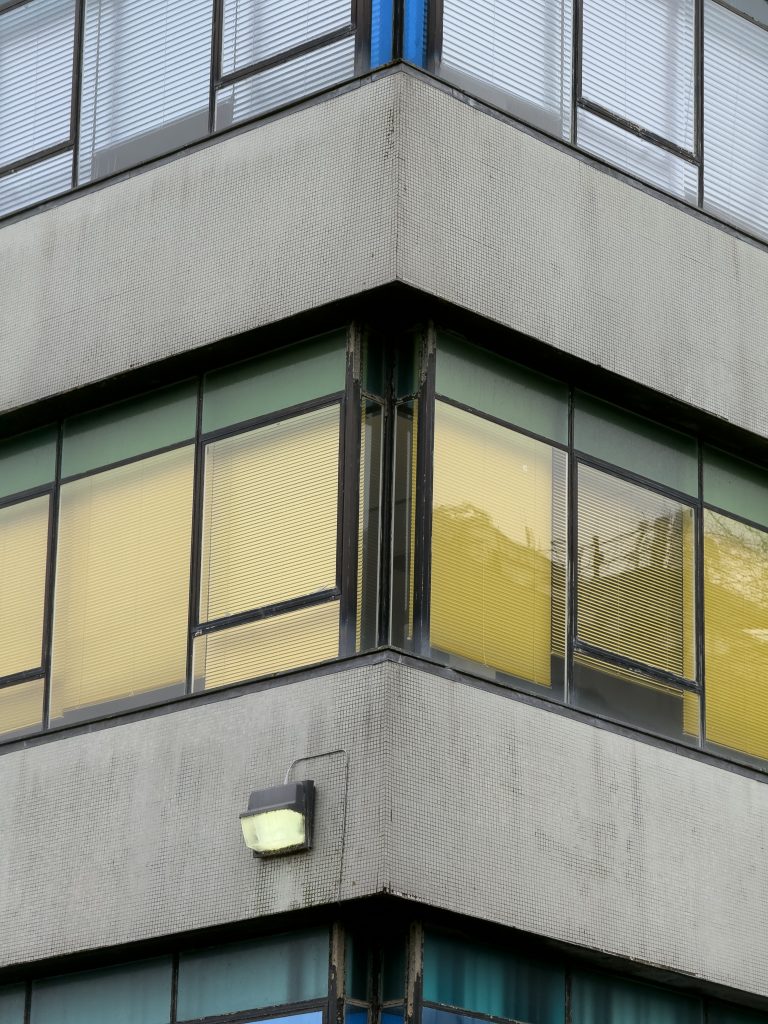
Looking at the first two subjects/scenes Id captured there was not a huge amount of colour in the way of grass or anything else so I looked for another subject to see what the green grass would look like on the redscale film. I turned around and spotted a large space of grass along with the union flag half way up the flag pole, not because it is half mast, but the unofficial people going around with the flags could only reach halfway up the pole. In the background there are also some of the coloured windows showing the reflective window films, and I figured this might be a good exposure.

Frames 9,10, and 11 were shot under the dome of the Council Chamber, probably the most iconic part of the former headquarters of the council. I like the lines, curves and differences in material in this scene and whilst there was little colour in it, the wooden ceiling above might show some nice colouring once processed. I made a short video here too to show the scene and then the photo being taken but it wont show up on this page, so I have uploaded them to my Insta feed.
Film #124
After some images of the windows and a couple of trees etc, I switched to the next film, this one was a Fujicolour Pro 400 that when flipped to redscale came down four stops to ISO 25. I redid my LUX settings to set it to 25 and then used it for the remainder as I had with the first roll. The table below features all of the same details but for some reason I didn’t note down what it was that I was photographing. Some of this detail can be seen in the photos that I made with my mobile phone and screenshots of the LUX meter app. The table is below:
As you can see from Frame 1 of this film I shot the same scene as I did at the end of the previous film to see if there is any difference between the two films. I also did few brackets on this roll and tried to find colour to fill some of the frame with.
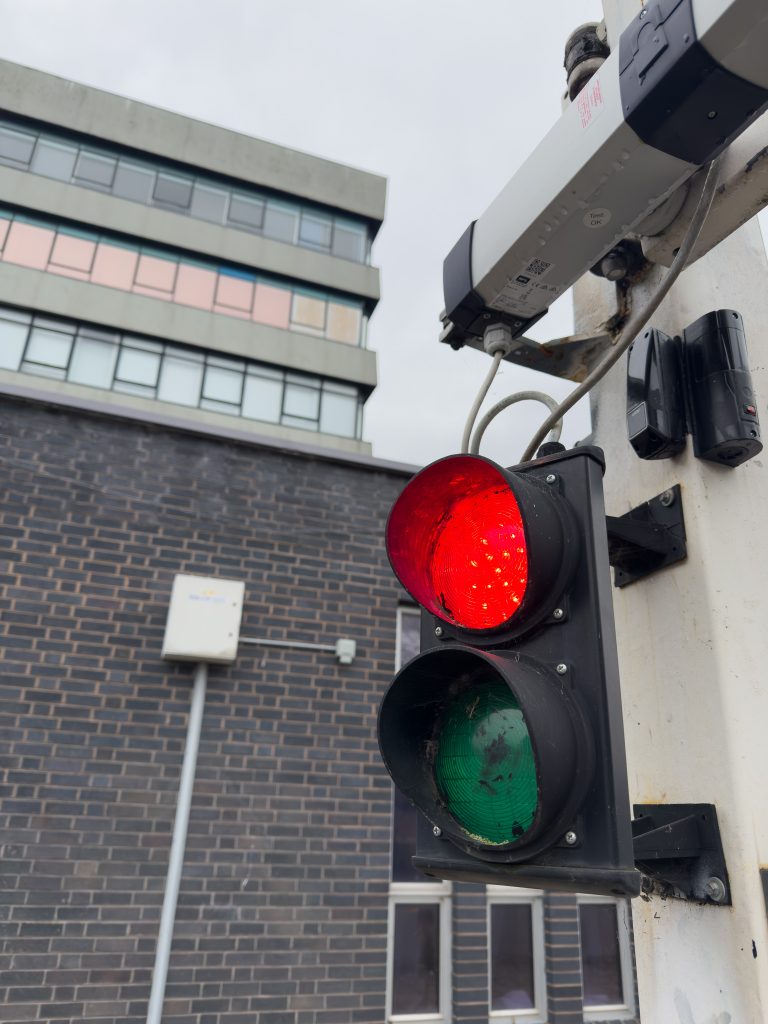
Of note on this film are shots of the red light at the car park entrance and the Shirehall 6 storey building in the background. I shot this at f/16 as the shots at the end of the first film were showing up a danger of overexposing on the LUX app. It stayed on f/16 for the first 2/3rds of the roll and changed back to f/8 at the end of the roll. I was mainly controlling the bracketing by altering the shutter speed on this one too.
Conclusion
It was tricky trying to shoot these two films using the ETRS with the waist level viewfinder as the directions are reversed on the screen but I felt better at it after a while. The bracketing makes sense too but a couple of times I caught myself trying to overexpose and moving the settings to underexpose. I wanted a stop more exposure so moved the shutter speed from 1/30 to 1/60 which would halve the time the shutter was open collecting light. I think I stopped the mistakes before I hit the shutter release so none made it through to the exposures on the film.
I’m glad I made good notes on the differences I made to the exposures as it should show up on the film when they are processed. Hopefully I should be able to get them processed at Uni on Wednesday if there is some Blix and Dev in the C41 processing setup. I have emailed my tutor and course leader to see if they can check this, then I can get the films processed and possibly even scanned in on the Epson flatbeds at the uni.
Also Films #123 and #124 ? This is the number of films that I have shot since beginning the course in 2021 and I struggle to think where they have all gone and what I may have captured on them. I have all of them safely collected in Kenro sleeves in my negative storage folders but it seems an awful lot of film to have shot. Watching Paulie B’s Walkie Talkie video on Youtube with Matt Stuart he said that he shoots this much in a month so it’s probably not unreasonable.
Once the films are developed and scanned Ill follow this post with another showing the outcomes, with the table of notes next to them for clarity. I’m excited… I am a bit scared of light leaks though, when I was converting them in the dark loading rooms I noticed a shaft of light that might have fogged some of the film but hopefully I wrapped them tight enough to fog any of it during loading and unloading from the camera. Time will tell!!
Be First to Comment