During this academic year I’ve been completing the Experimentation & Dialogues module on the Level 5 of the BA Hons Degree In Photography at the University Of Wolverhampton.
Part of this course module is the “Practice” part. This involves creating some work that will ultimately end up being exhibited as part of the Level 5 Exhibition at Easter time.
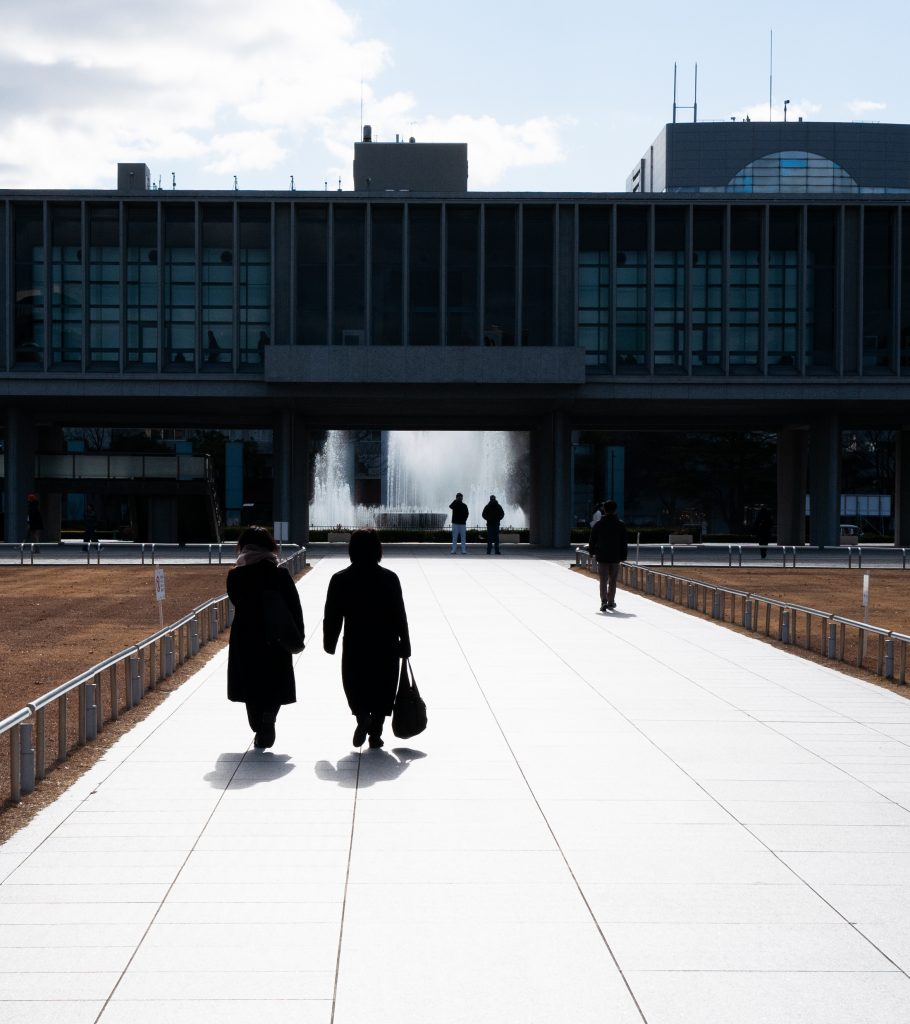
During my planning and preparation I’ve selected three images that will be displayed as part of my submission. These are all images of the inside of a factory where I have worked for 35 years, all taken in the dark with exterior light spilling in through the narrow windows in the factory walls.
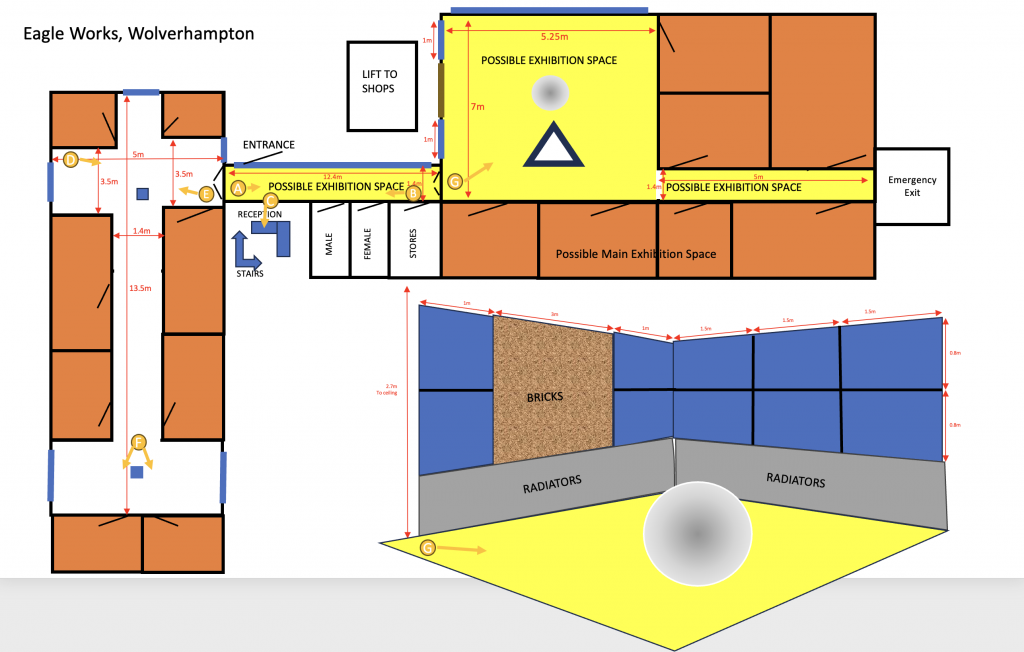
We are to exhibit in the Eagle Works studios above the Mander Centre in the city centre of Wolverhampton in April and I figured that I would like some large images but didn’t want to bagsy/shotgun the wall space at the cost of my other six classmates, our “collective”.
My initial idea was to create some sort of wooden frame and present an image on either side thus freeing up the remainder of the wall space for the others. Part of this inspiration was a visit to Centrala with the university in 2023 when I saw an exhibition use a screenless screen, made of a wooden frame upon which the images were hung.
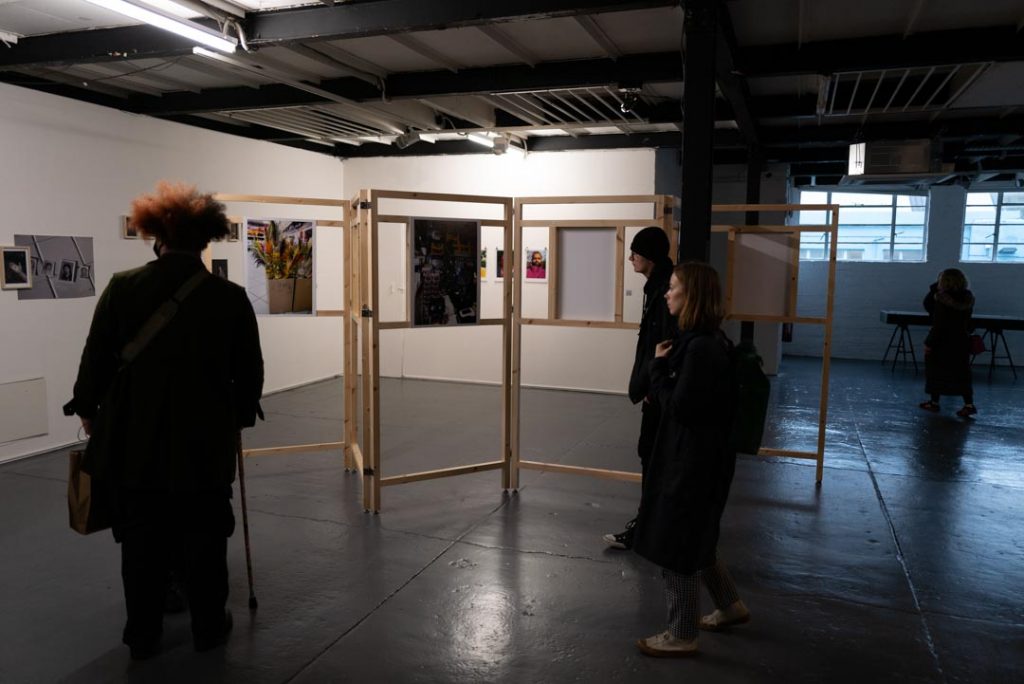
The idea was renewed during a trip to Japan and the Tokyo Photographic Art Museum in January when there was an exhibition of images all suspended on wooden frames and these kept the images away from the walls allowing the other works to sit on the wall with tonnes of space around them.

My thought was to create a stand of sorts using wooden euro pallets used for transferring goods around the world and throughout my workplace. I was going to lay one on the floor flat and then stand two upright providing a space for two images of a reasonable size to be displayed back to back..
After a while I looked through my images and found that three images felt a better number of images to display, I had a good selection of photos that I was going to whittle them down but would have a good three images. To do this I thought about changing the two images back to back to a triangle shape of three pallets with an image on each face. If I was going to stand these up at the right height though I’d probably need six pallets or th images would be too low for the viewers.
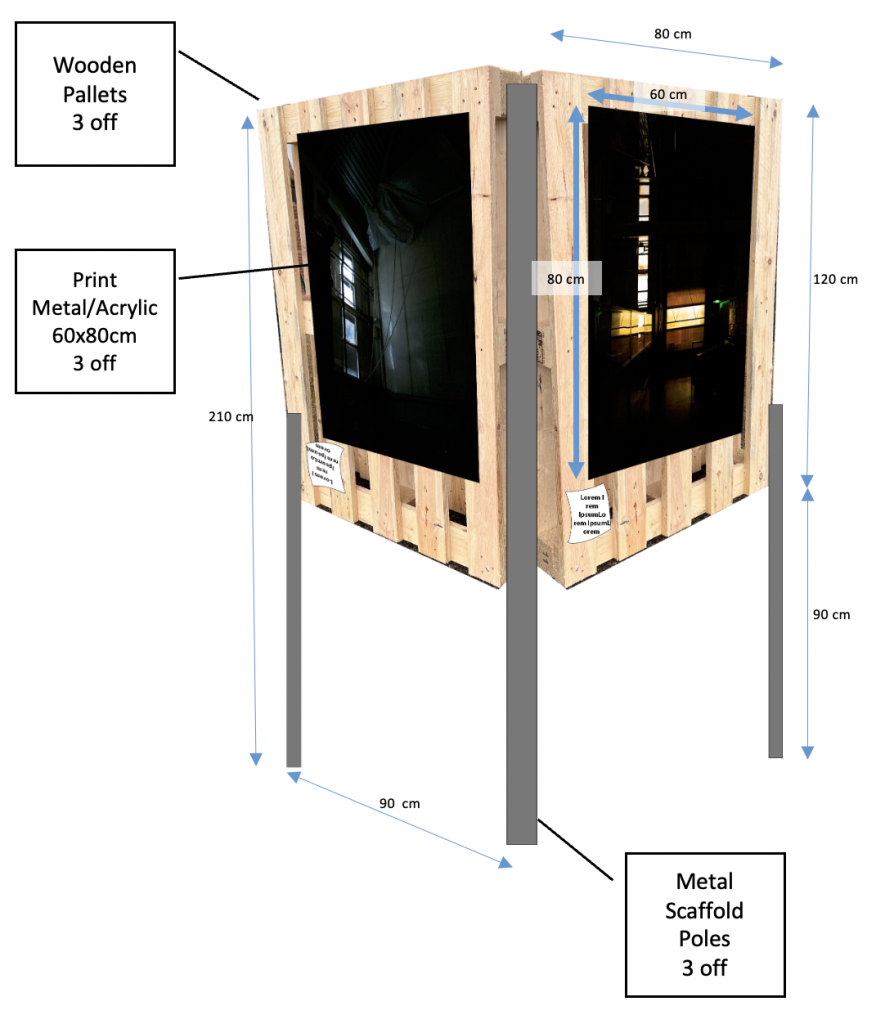
The image below shows the initial three pallet triangle mocked up wand stood on a single pallet. There is a top down view too that shows the three pallets in a triangular formation screwed to the floor mounted wooden structure.
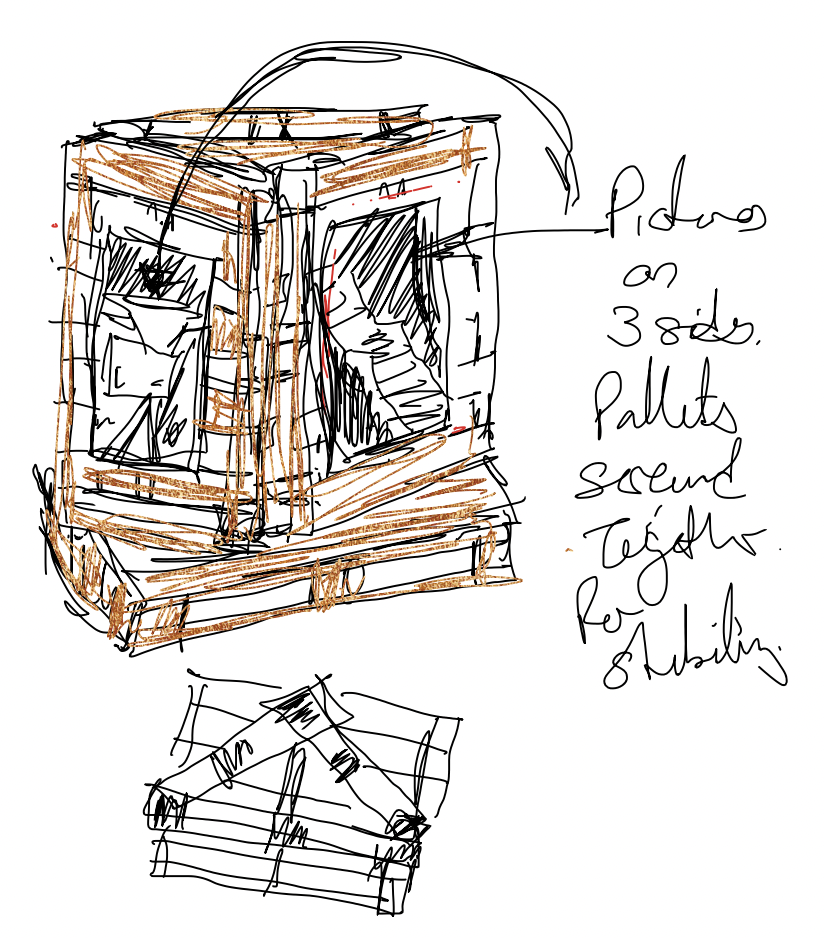
It was while I was thinking about lifting these pallets off the ground level that I was also thinking about some works that need completing on the factory roof to prevent leaks. Part of the project for this work would involve scaffolding and the idea of scaffold poles then popped into my brain. I could have the three pallets in a triangle and then have three scaffold poles, one on each corner that would stably hold the structure.
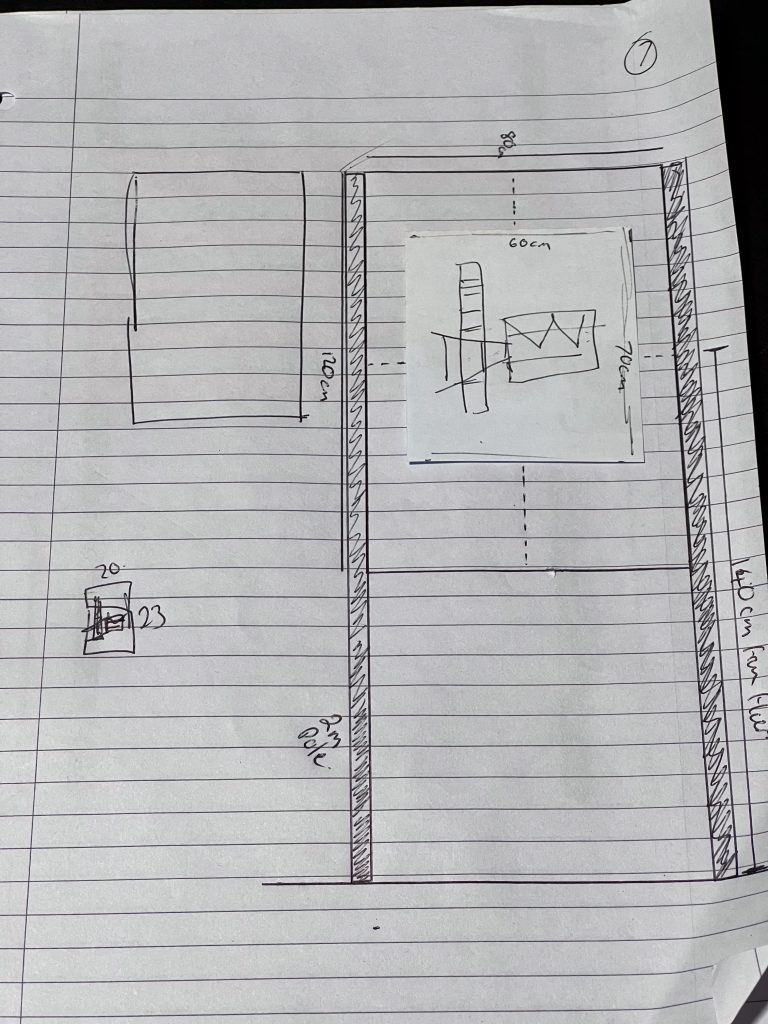
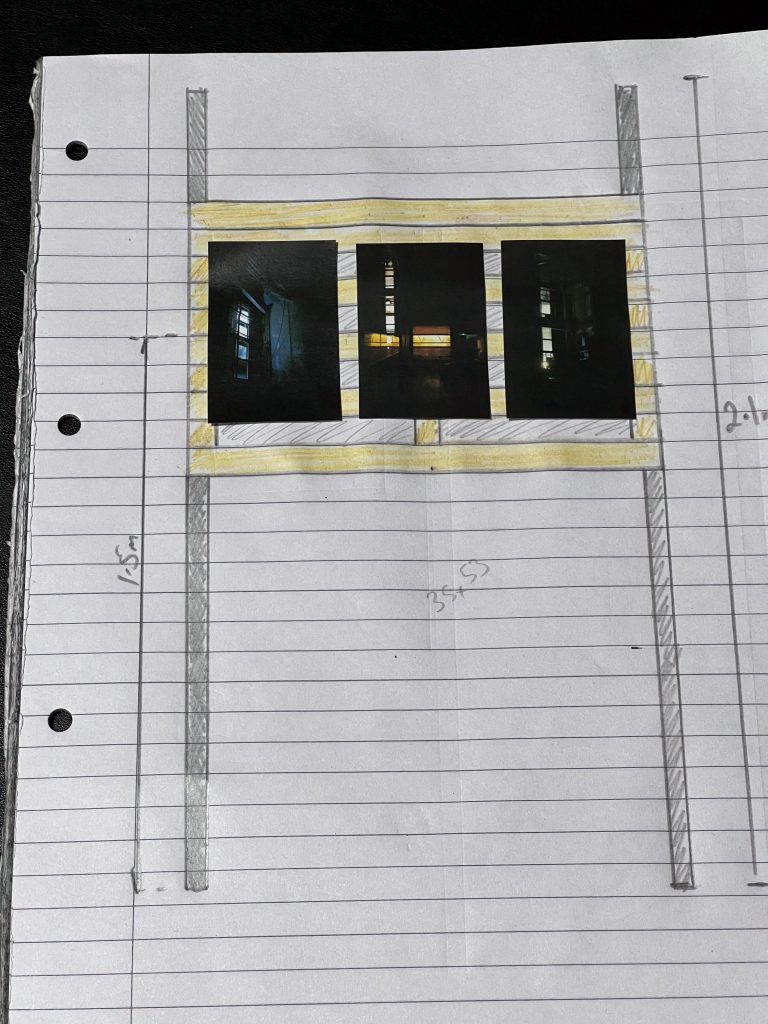
As you can see from the sketch above a single side is shown with the 2m scaffold pole on each side of the wooden pallet which measures 120cm by 80cm. My idea of a print size was around 60cm in width by 70-80cm in height. The centre line of the height of the pallet and thus the image would be set to around 150cm from the floor as described by Naomi Greaves in the artist talk a fortnight ago.
Last week (Sem2 Week 8) I was unable to join the rest of my group in a visit to the Eagle Works and had to pass on my designs to Sylvia to see if she could represent me whilst I was undergoing a work audit on Effluent Consent and Air Conditioning TM44 regulations. (Exciting huh?) I felt that the above image was not good enough so mocked up another rough sketch and then sent this to Sylvia and the rest of the Collective so it would help inform decisions made on the day.
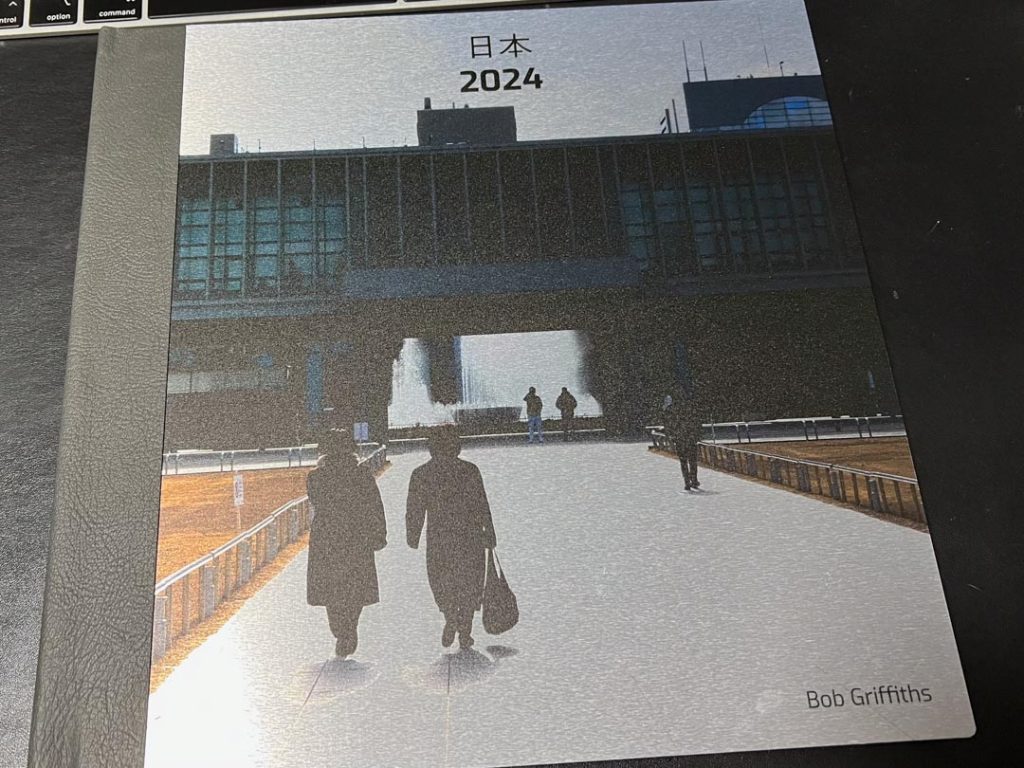
I’d looked at Metal prints and found that the dark nature of my images especially with the highlights might not be best suited to the medium. The following book I had printed had a brushed aluminium print as a cover and the ground which was white slabs has lost a lot of detail and oddly the shadows of the people show up as weird blotches rather than a shadow. With such a heavy reliance on the light and darkness in the images I discounted this as a medium for now, even though Aluminium is a huge part of the factory life and products created therein.
When the collective went to the space to see who would be assigned to which section it was decided that the floor space in the centre of the space wouldn’t be large enough to house the large structure I’d proposed so I should look to trim it down to something more manageable.
I’d still want to utilise a pallet and poles as a way of keeping these elements involved so I set about looking for another way to simplify and space-save. My initial thought then went to using a single pallet, landscape this time, rather than portrait, and display three photos on the same face.
I would prop up the pallet by fixing it to the scaffold poles and then fix it to the wall with a fixing of some sort to prevent it from tipping forward and squashing a small child.
Pallets
Where do I get the material from to make this presentation structure? My work? Nope.
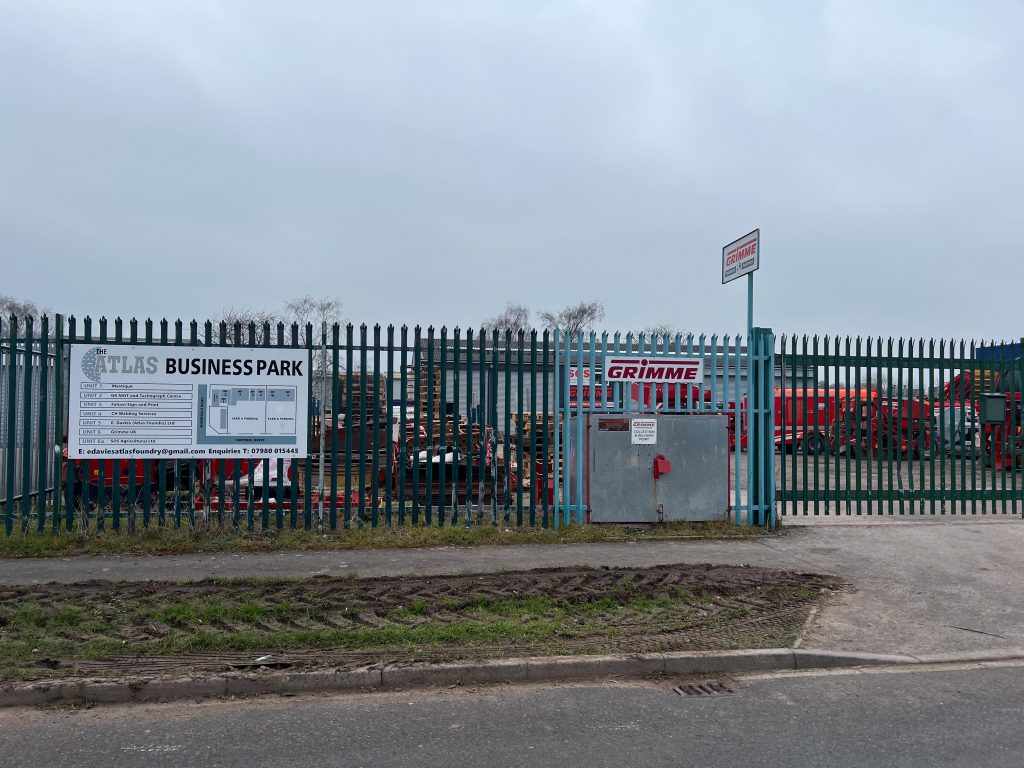
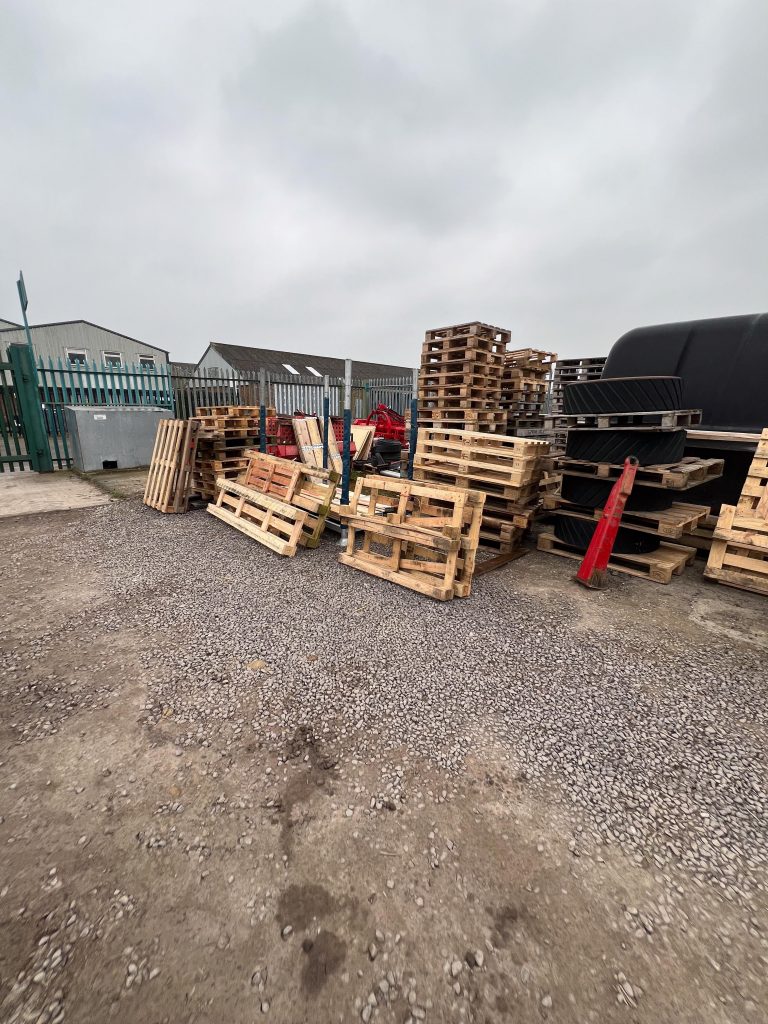
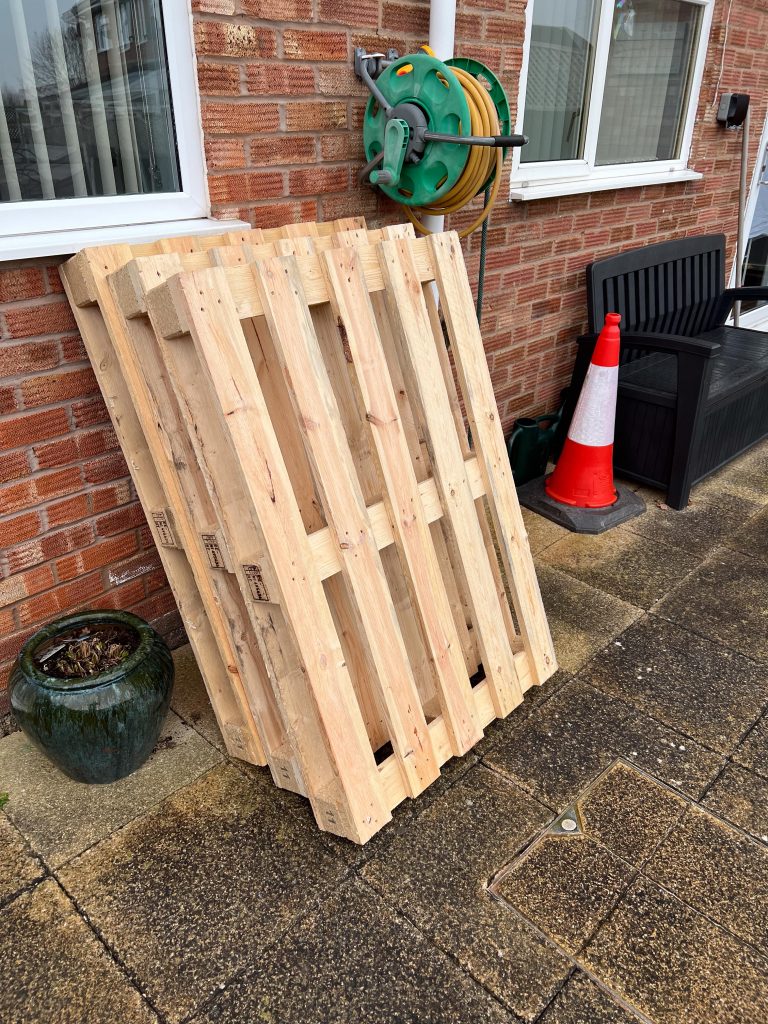
Taking waste material from work is a no-no as the waste from factory processes often gets recycled and provides another income stream, so taking waste is akin to stealing. As a result of this it’s time to go looking around industrial estates to see if there are any other merchants, producers that might be able to offer me what I am after. As I drove around the Ennerdale Road estate near to my work I went past a few different places, one of them being Grimme Farm Machinery dealer and I could see some pallets through their fence. Walking into their yard and heading to reception I spoke to a guy who was very helpful and understanding and told me that I could help myself as they are allowed to sell them for tea money. I paid him a fiver and picked up three 120cm x 80cm wooden pallets all the same size. With a big thank you and a quick loading operation into my estate car I was away and then stored them in my back garden for now.
Poles
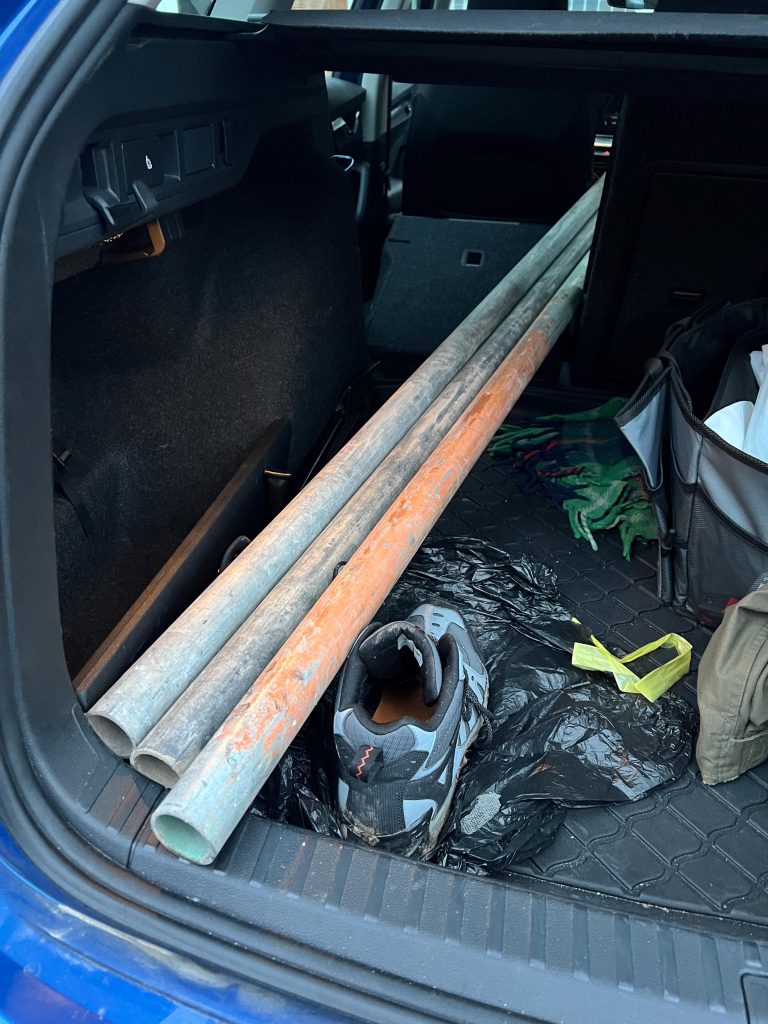
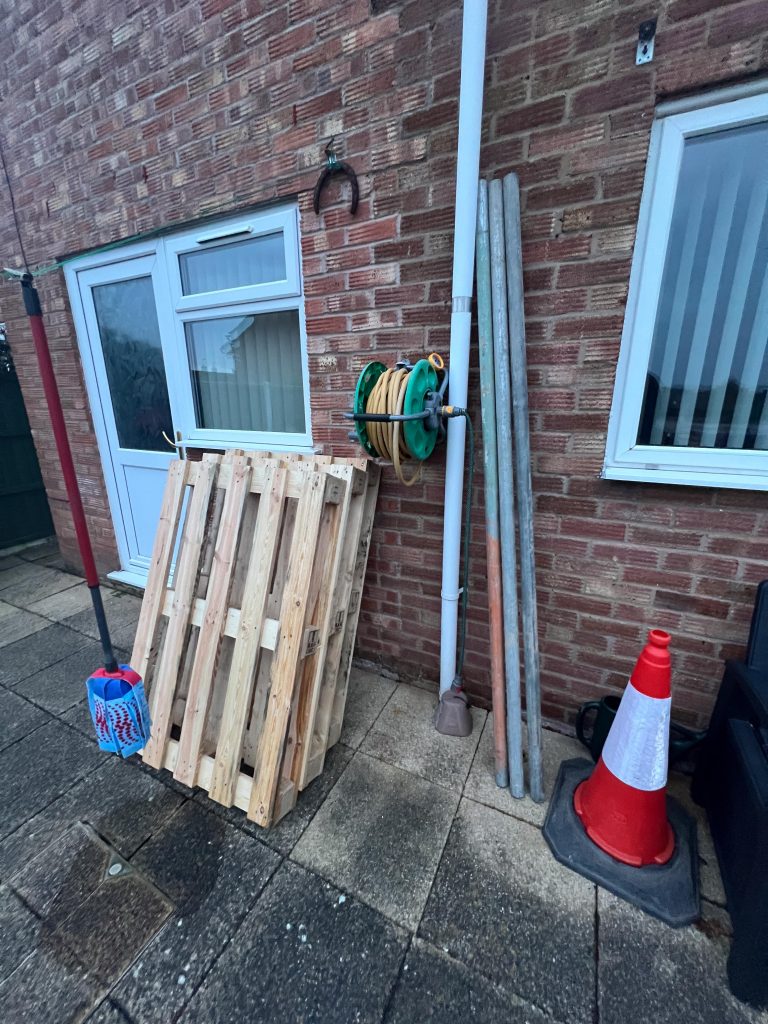
The next day I was on the way out and thought that I could visit the Jarvis Scaffolders around the corner from our factory and I asked them if I could purchase three short poles. He offered me 21ft, 14ft and 7 feet lengths and I chose three 7 feet (2.1m) long poles, loading these into the car, with the seats folded down and then headed home. I chose poles that had a history and were marked and painted etc rather than clean and unused newer poles, to reflect my experience over the years in the factory leading to me being scarred with learning opportunities.
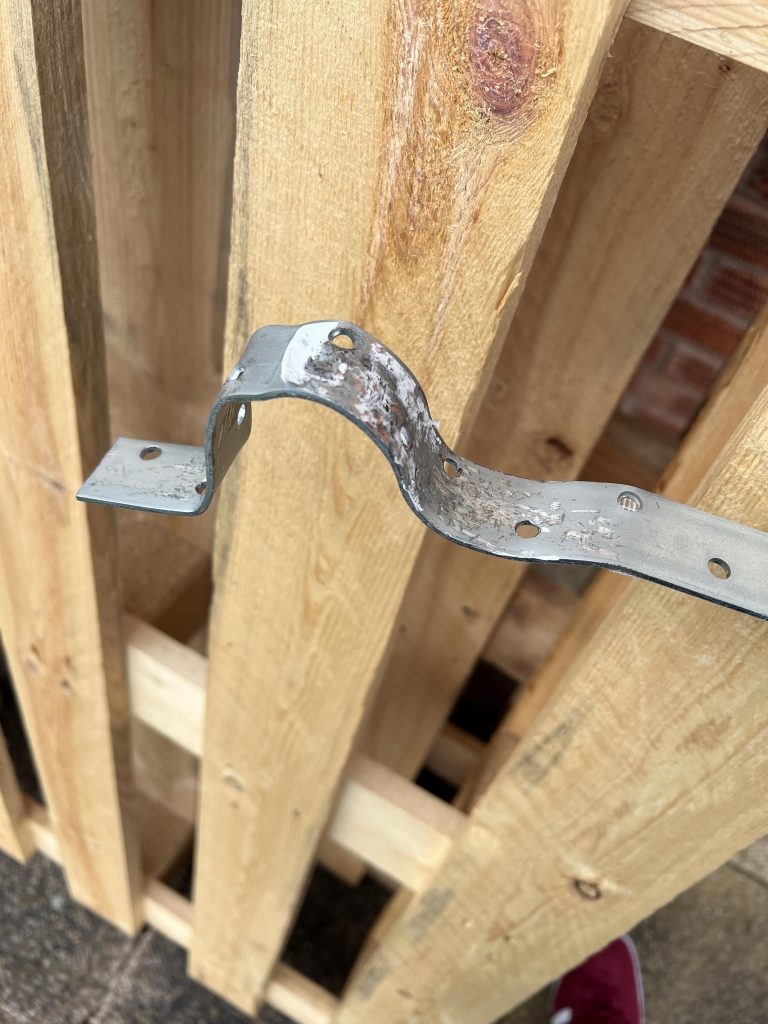
On Monday night I was preparing to try an assembly operation so I could photograph it and use it in the practice review on the Tuesday. I had been to B&Q and Wickes after work to see if I could buy some clips that would hold the poles to the wooden pallet, but there were none. I bought a couple of long strips of flat metal with holes pre-drilled and thought that I could bend this around the pole and use it to fix to the pallet.
I put the metal bar over the pole and thrashed it with a hammer until it was somewhere near, then tried to screw it to the pallet. It worked but it looked hideous and I figured that there must be an easier way. I decided to not waste any more time on this as I felt I was going to lose a finger or something daft cutting with an angle grinder or hitting it with a hammer. I also tried drilling some holes into the galvanised steel poles so I could screw through them into the wood but I broke three drill bits owing to the awkward operation, then stopped.
Fannys and Oysters
After finishing Uni on Tuesday, yesterday in fact, I headed to the Jarvis Scaffold team again to ask if they might have any fixings that would help me, and they said that they didn’t have anything suitable, after I’d described it’s application. The one guy in the front desk suggested that I should look for some Oyster Clamps and that there might be some at Salop Hire Services. To those outside of Shropshire, Salop is another word for Shropshire.
As I strolled back to my car I felt as if the chaps in Jarvis might have been playing a prank on me with their friends at Salop Hire and waiting to laugh at me turning up and asking for some oyster clamps. This is the sort of thing that happens in Engineering companies, and I have been caught out by people in the past when I was a young apprentice. I never got caught for a “Long Weight” but was asked to go and get some skyhooks from the stores once.
Fearing the worst but trusting the Jarvis guys I headed over to Salop Hire and asked Mark if they had any Oyster clamps and he smiled before asking me to clarify by saying “Do you mean fanny clamps?” Here we go I thought, they’re having a giggle at my expense and then he took me into the store shed and showed me some clamps that looked like I could alter them by drilling some holes in them to achieve my goals. It turns out that “Fanny Clamps” is a term used by scaffolders in a sort of slang language and they weren’t mocking my lack of scaffold knowledge after all. I offered him some money and after asking for six, he told me that they were £2 each but a tenner would do. Absolute bargain.
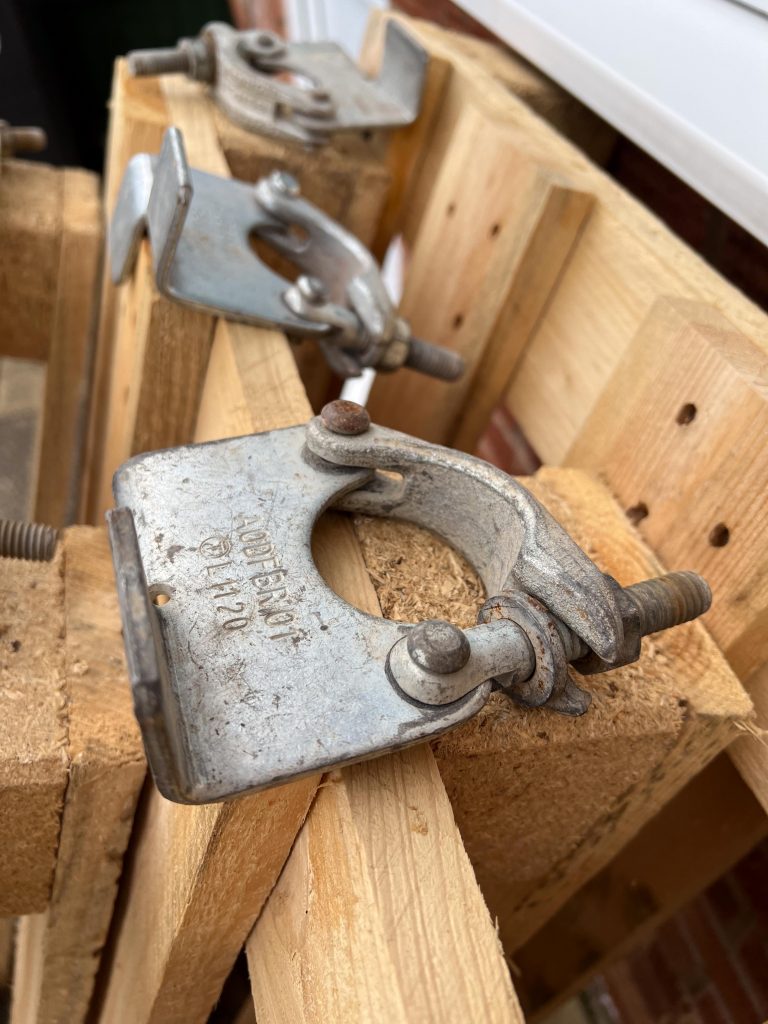
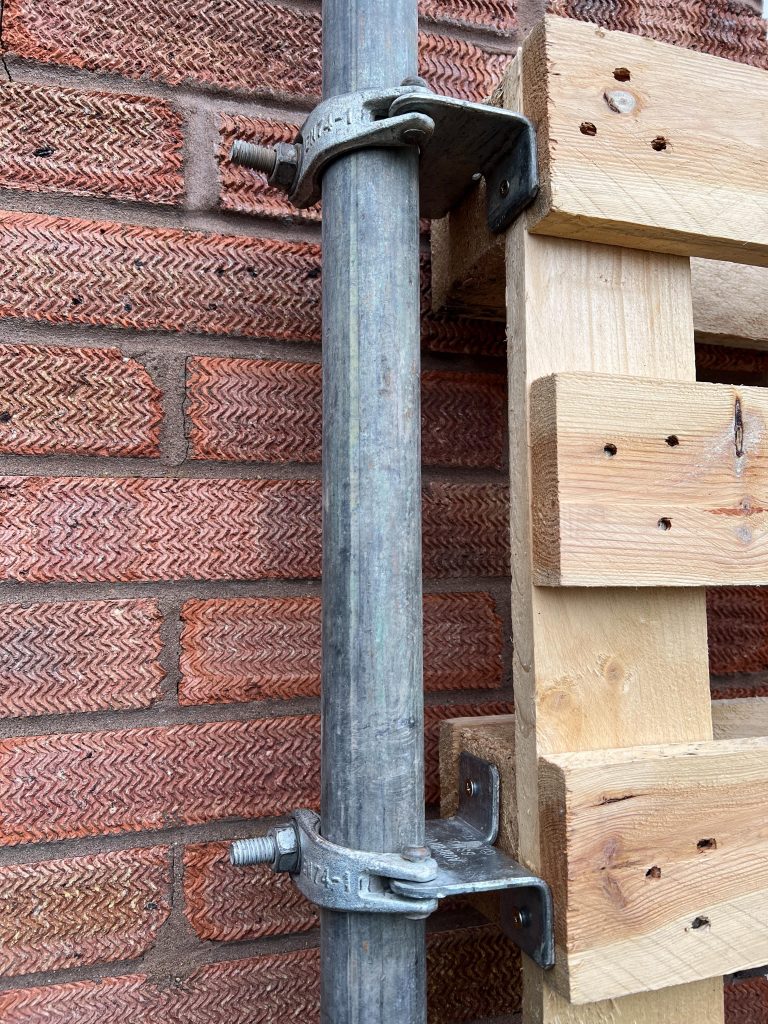
When I got home I looked and found out that these were called Board Retaining Clamps and are used to retain the kick boards that stop hammers and tools being kicked off scaffolds to land on an unsuspecting pedestrian beneath. I got out my drills and began to operate on these clamps, first I used the automatic centre punch to mark an indentation in the metal, then I could centre the drill on this mark and drill through with a 6mm drill.
It wasn’t easy though, I dulled a drill before realising that drilling steel needs a slow drill speed and I’d been in mode 2 on the drill which was a bit fast. I broke another two bits but managed to drill the 12 holes after about an hour, Then it was time to try and assemble the whole piece to see what it might look like on the day.
I screwed the clamps onto the sides of the pallet and then offered up a pole at a time, making sure the centre clamp was at 1.5m from the floor. Once I’d completed the one side, I turned it over and repeated the process. It went together using an adjustable spanner and held in place really well, despite it being a chunk of weight. If I were to mount the pallet directly to the wall it would be too heavy and pull out any rawl plugs so the legs are necessary to ensure minimal damage to the walls of the studio/gallery space.
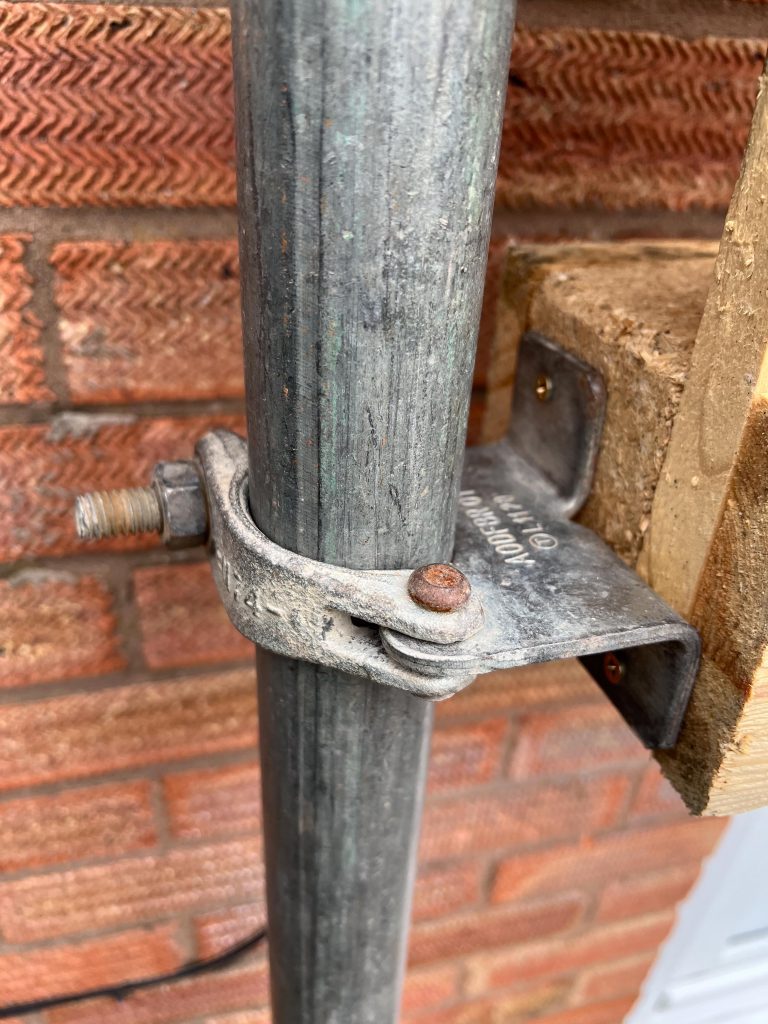
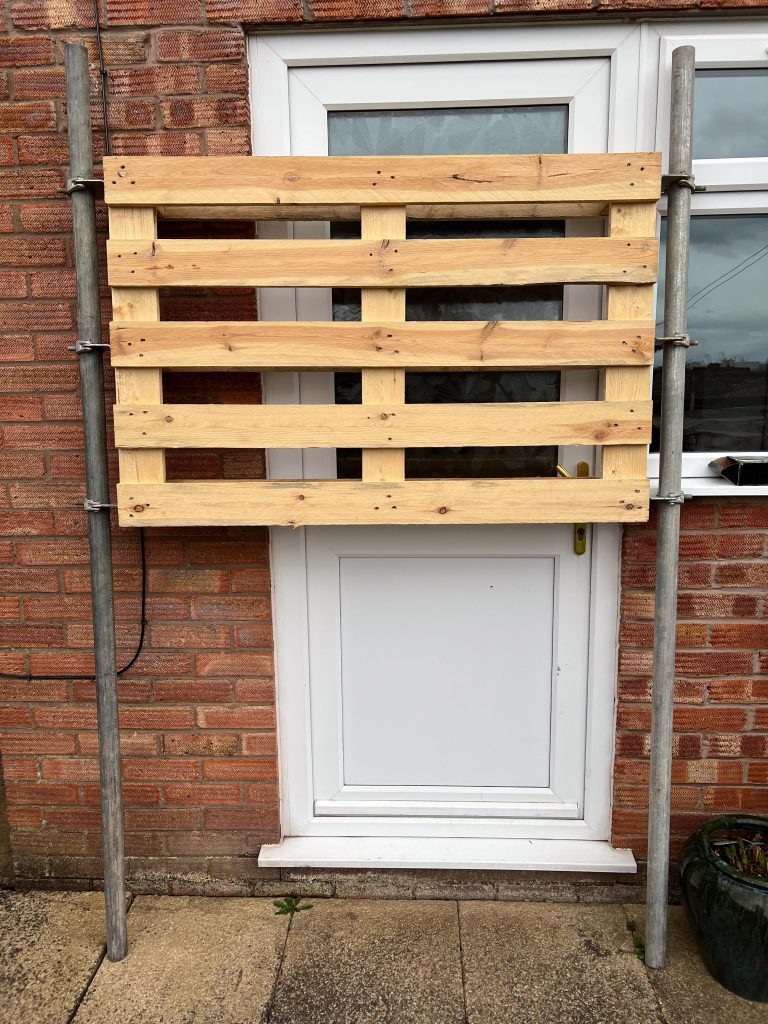
As you can see from the gallery of four images above the photo of the assembled beast is somewhere near the sketch. It is bloody heavy though and I think I should fix it to the wall to prevent it tipping forward. I can do this by screwing through the top and bottom wooden slat on the rear, into the wall and using a rawl plug and screw etc. This isn’t to take any weight of the hanging but like an Ikea Billy Bookcase, just to stop it tipping forward.
Light Duties
Whilst I was helping my brother moving house on Saturday, we went to Ikea and I found a pair of Vattensten LED RGB light strips that I can mount on the rear of the pallet and provide a backlit glow of a tone that matches with the images on the front of the structure.
It was thinking about lights that started me off wondering if I could include video or sounds from within the factory at night using something like an old iPad or tape recorder. I’ll still look into this as an addition as it may add to the presentation.
Prints
With the pallet form finished and ready to go, almost. I felt it was time to consider the printing. We now have tow weeks of time outside of university due to the Easter holidays so when we go back in on the 9th April, we don’t have long to get prints created and ready to present. I didn’t want to leave it that late and would prefer to be prepared.
With this preparation in mind I started up the SAAL Digital app on my Mac Studio and designed the prints that I would need. Each print needed to be identical in size to sit uniformly on the pallet face so I decided the dimensions would be 35 cm width by 53 cm height. These dims came from the pallet being 120 cm wide, so three images would need to be less than 40 cm wide, I chose 5 cm so that there could be some good space between them. The height of the images is a function of the width and it turned out to be around 53 cm.
Looking at the materials available for the prints, I;d selected the Acrylic image print. Acrylic is used in many processes within the factory and is often used as a guarding material to prevent swarf (small bits of metal) from going into the eyes of the operator and it felt like a good material to use.
I have got a print of New York nighttime skyline from the Staten Island ferry that I made in 2019 on an acrylic sheet and it looks amazing. The darkness is superb and the lights seem to dazzle from the material.
I chose therefore, three identically configured prints in 35x52cm size at a cost of around £93 each, this came out with postage to be around £280 in total and I’ve used part of my student loan for this. I ordered from SAAL digital, but I also looked on Jessops, CeWe, Boots and others but the websites didn’t always offer a custom size and they were often even more expensive.
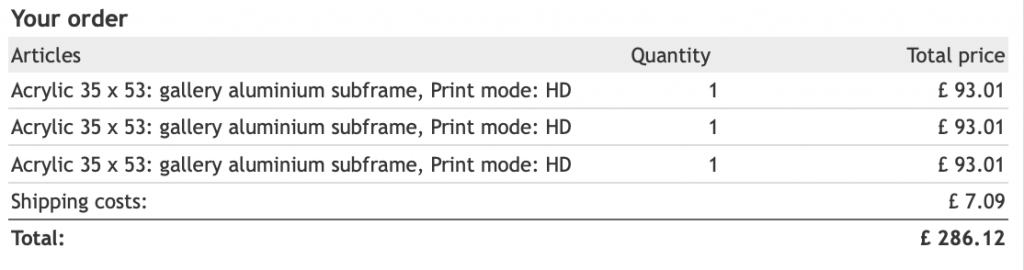
The costs then, so far are:
- £286.12 for the Prints on Acrylic
- £10 for the clamps
- £25 for the scaffold poles
- £5 for the pallets
The prints I have ordered also have an aluminium subframe to space it from the wall/pallet by 4mm and allow easy fixing.
Dates
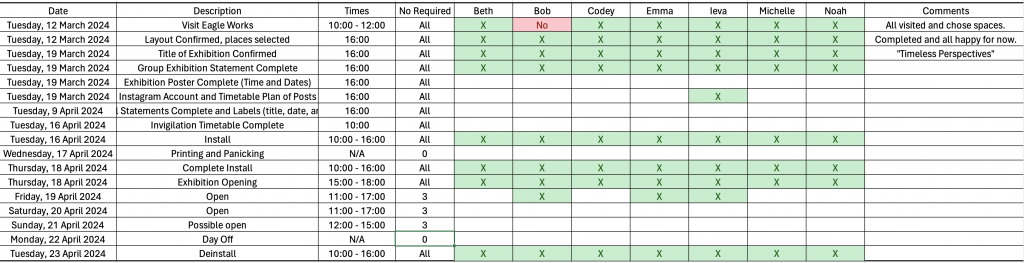
The exhibition will be hosted and invigilated on the following dates and times (as of last info)
EXHIBITION EVENT DETAILS:
Private View will be Thursday 18th April 3pm – 6pm
Exhibition opening times:
- Friday 19th April 11am – 5pm
- Saturday 20th April 11am – 5pm
- Sunday 21st April 12pm – 3pm (to be confirmed by Sarah hopefully by next Tuesday)
We have a timetable to help with invigilation and also with specific tasks that need to be complete by particular milestone dates as can be seen in the small screenshot of the spreadsheet.
Summary
I hope that this post helps explain some of my reasons why I chose this structure and material to present my photos on and gives you a good idea of how it might look in situ at the Eagle Works in April.
My choices all have a reason that fits in with the aesthetic of the images, the story behind the images and the rest of the work in the gallery.
It hasn’t been easy to gather the materials but most of it is now in hand, it’s not been cheap either but that is what I’d planned to use the student loan for.
I’m also contemplating putting the other photos I chose not to display into a small zine to have underneath the artwork.
Be First to Comment