In Week 6 Seminar Alice challenged us to carry out two challenges.
1: Make a photogram in the dark room
2: Print an image onto an alternative surface.
My initial brainstorming led me to have a few ideas
1: Upside down phone on paper, tools for cutting up on the paper, project an image through at the same time, use laser pointer or torch too, what else could I put on the paper?
2: Print on thermal printer, dot matrix, ASCII Art, T-Shirt Transfer, Tattoo?, Transfer onto plate or ceramic, Emulsion transfer like slate that Dea Paradisos made at flaxmill, transfer to tile, transfer to material If we can make a connection between the surface and the image that’s even better.
Photogramazing
During the hour between the seminar and the review of our work in the afternoon I headed to the darkroom to play with some ideas for the photogram and if I had the time to print a couple of images out for my final year project experiments and tests.
My first try was using a piece of test strip and placing my iPad screen on it for a few seconds. I needed to be super careful as Simon was also in the dark room and I didn’t want any of my stray light fogging any of his work so I was careful and respectful about flashing light around.
The first test strip came out completely black, there was too much light coming from the iPad so I tried the iPhone as I couldn’t control turning off the light quickly on the ipad. My first trial with the iphone uncovering some paper led to another completely overexposed test strip.
The third strip was an improvement as I turned the brightness on my iPhone down to minimum. It appeared that anything over half of a second was way too much, so I thought I’d try it with a quick put down and remove in a super fast movement.
The resulting image shows up the icons on the screen but due to the movement onto and off the paper, the image is blurred. It was then when I thought about whether this was really a photogram so I left it there and went on to creating a more traditional photogram.
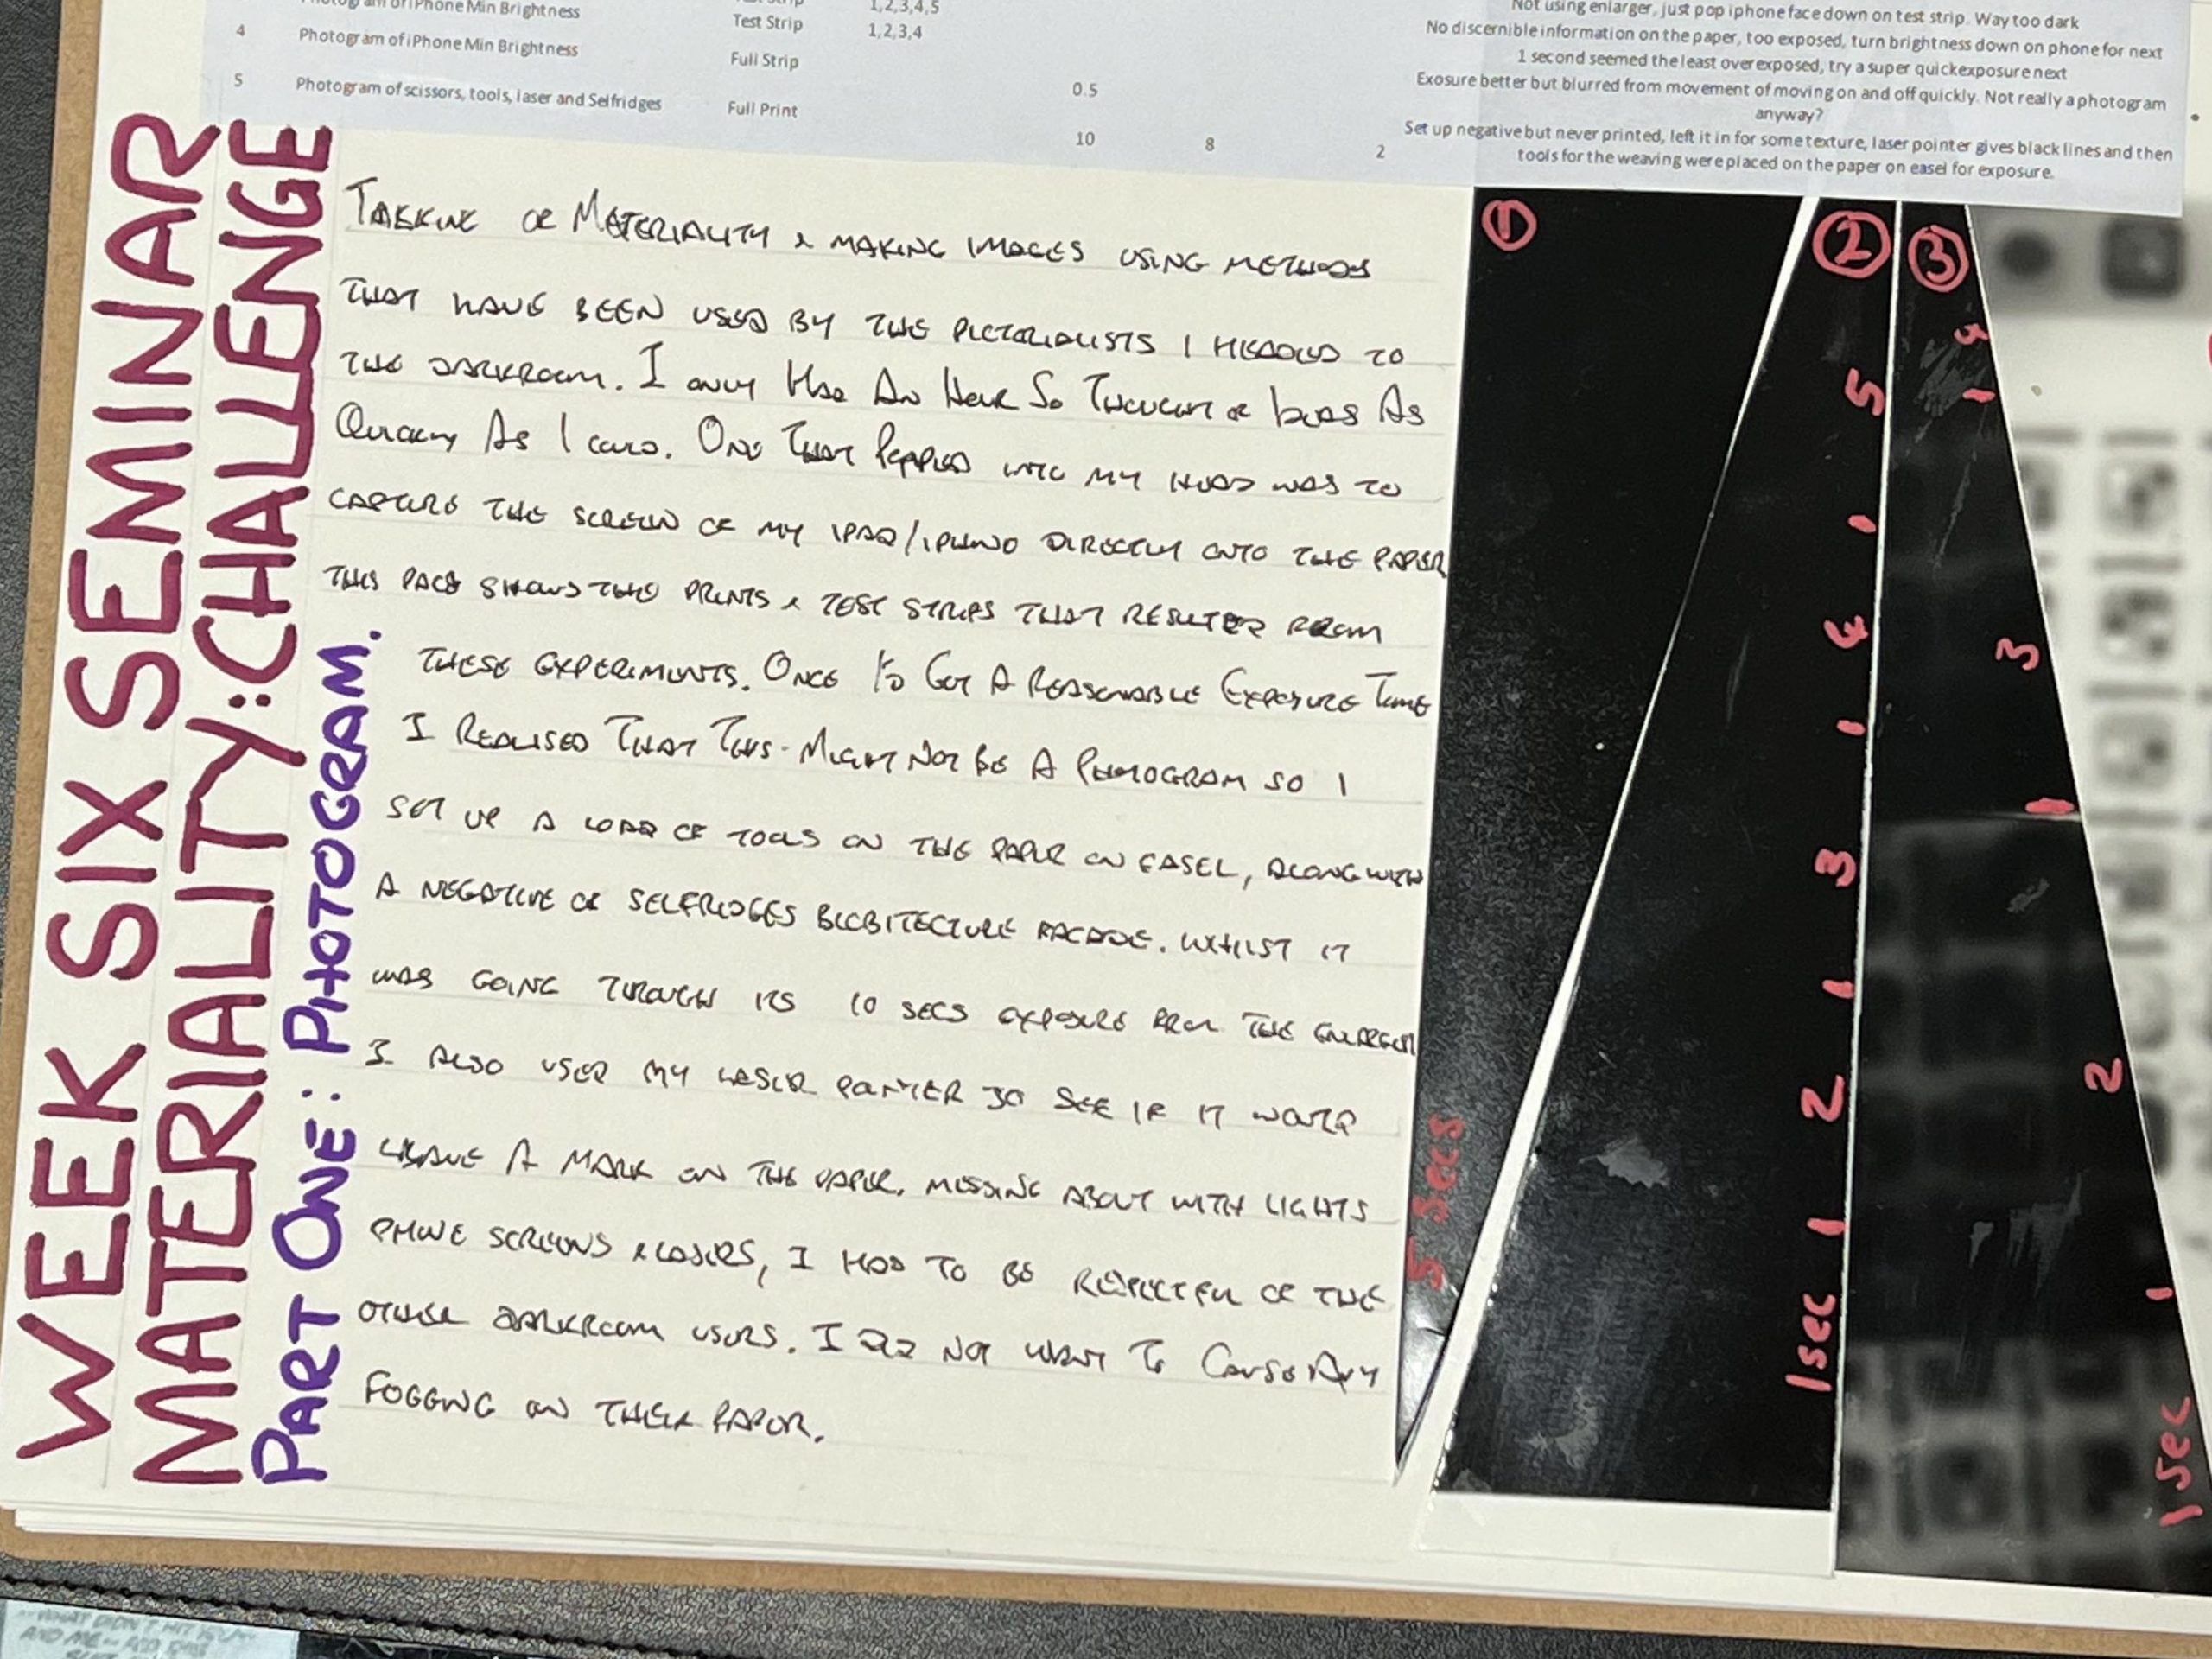
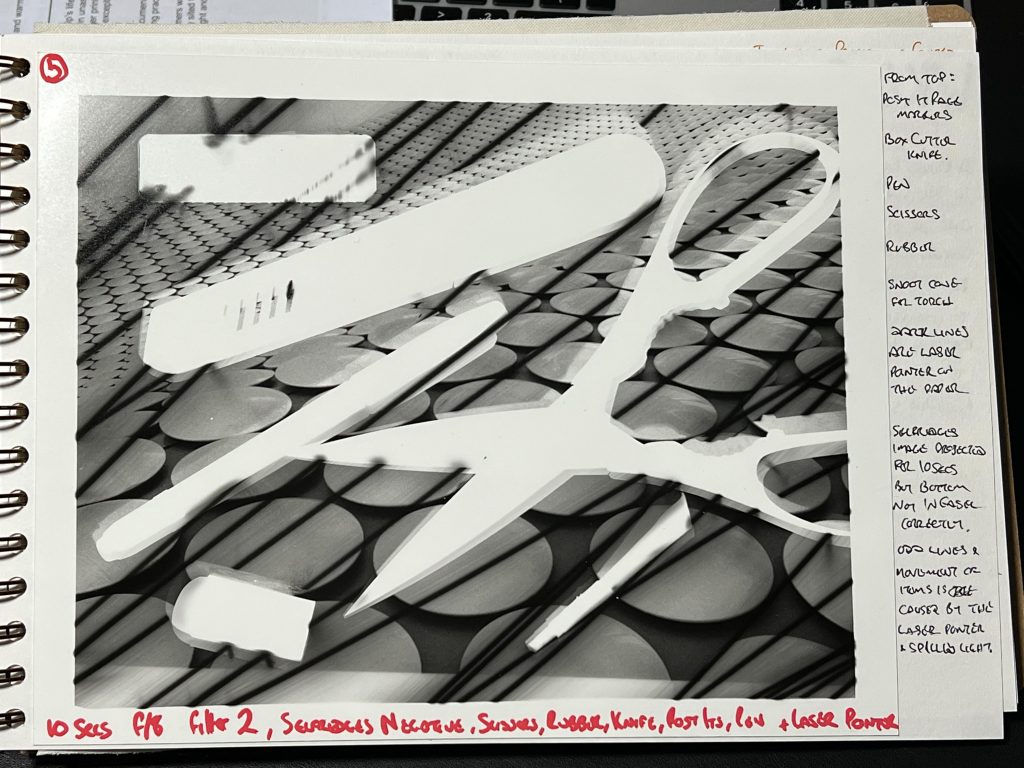
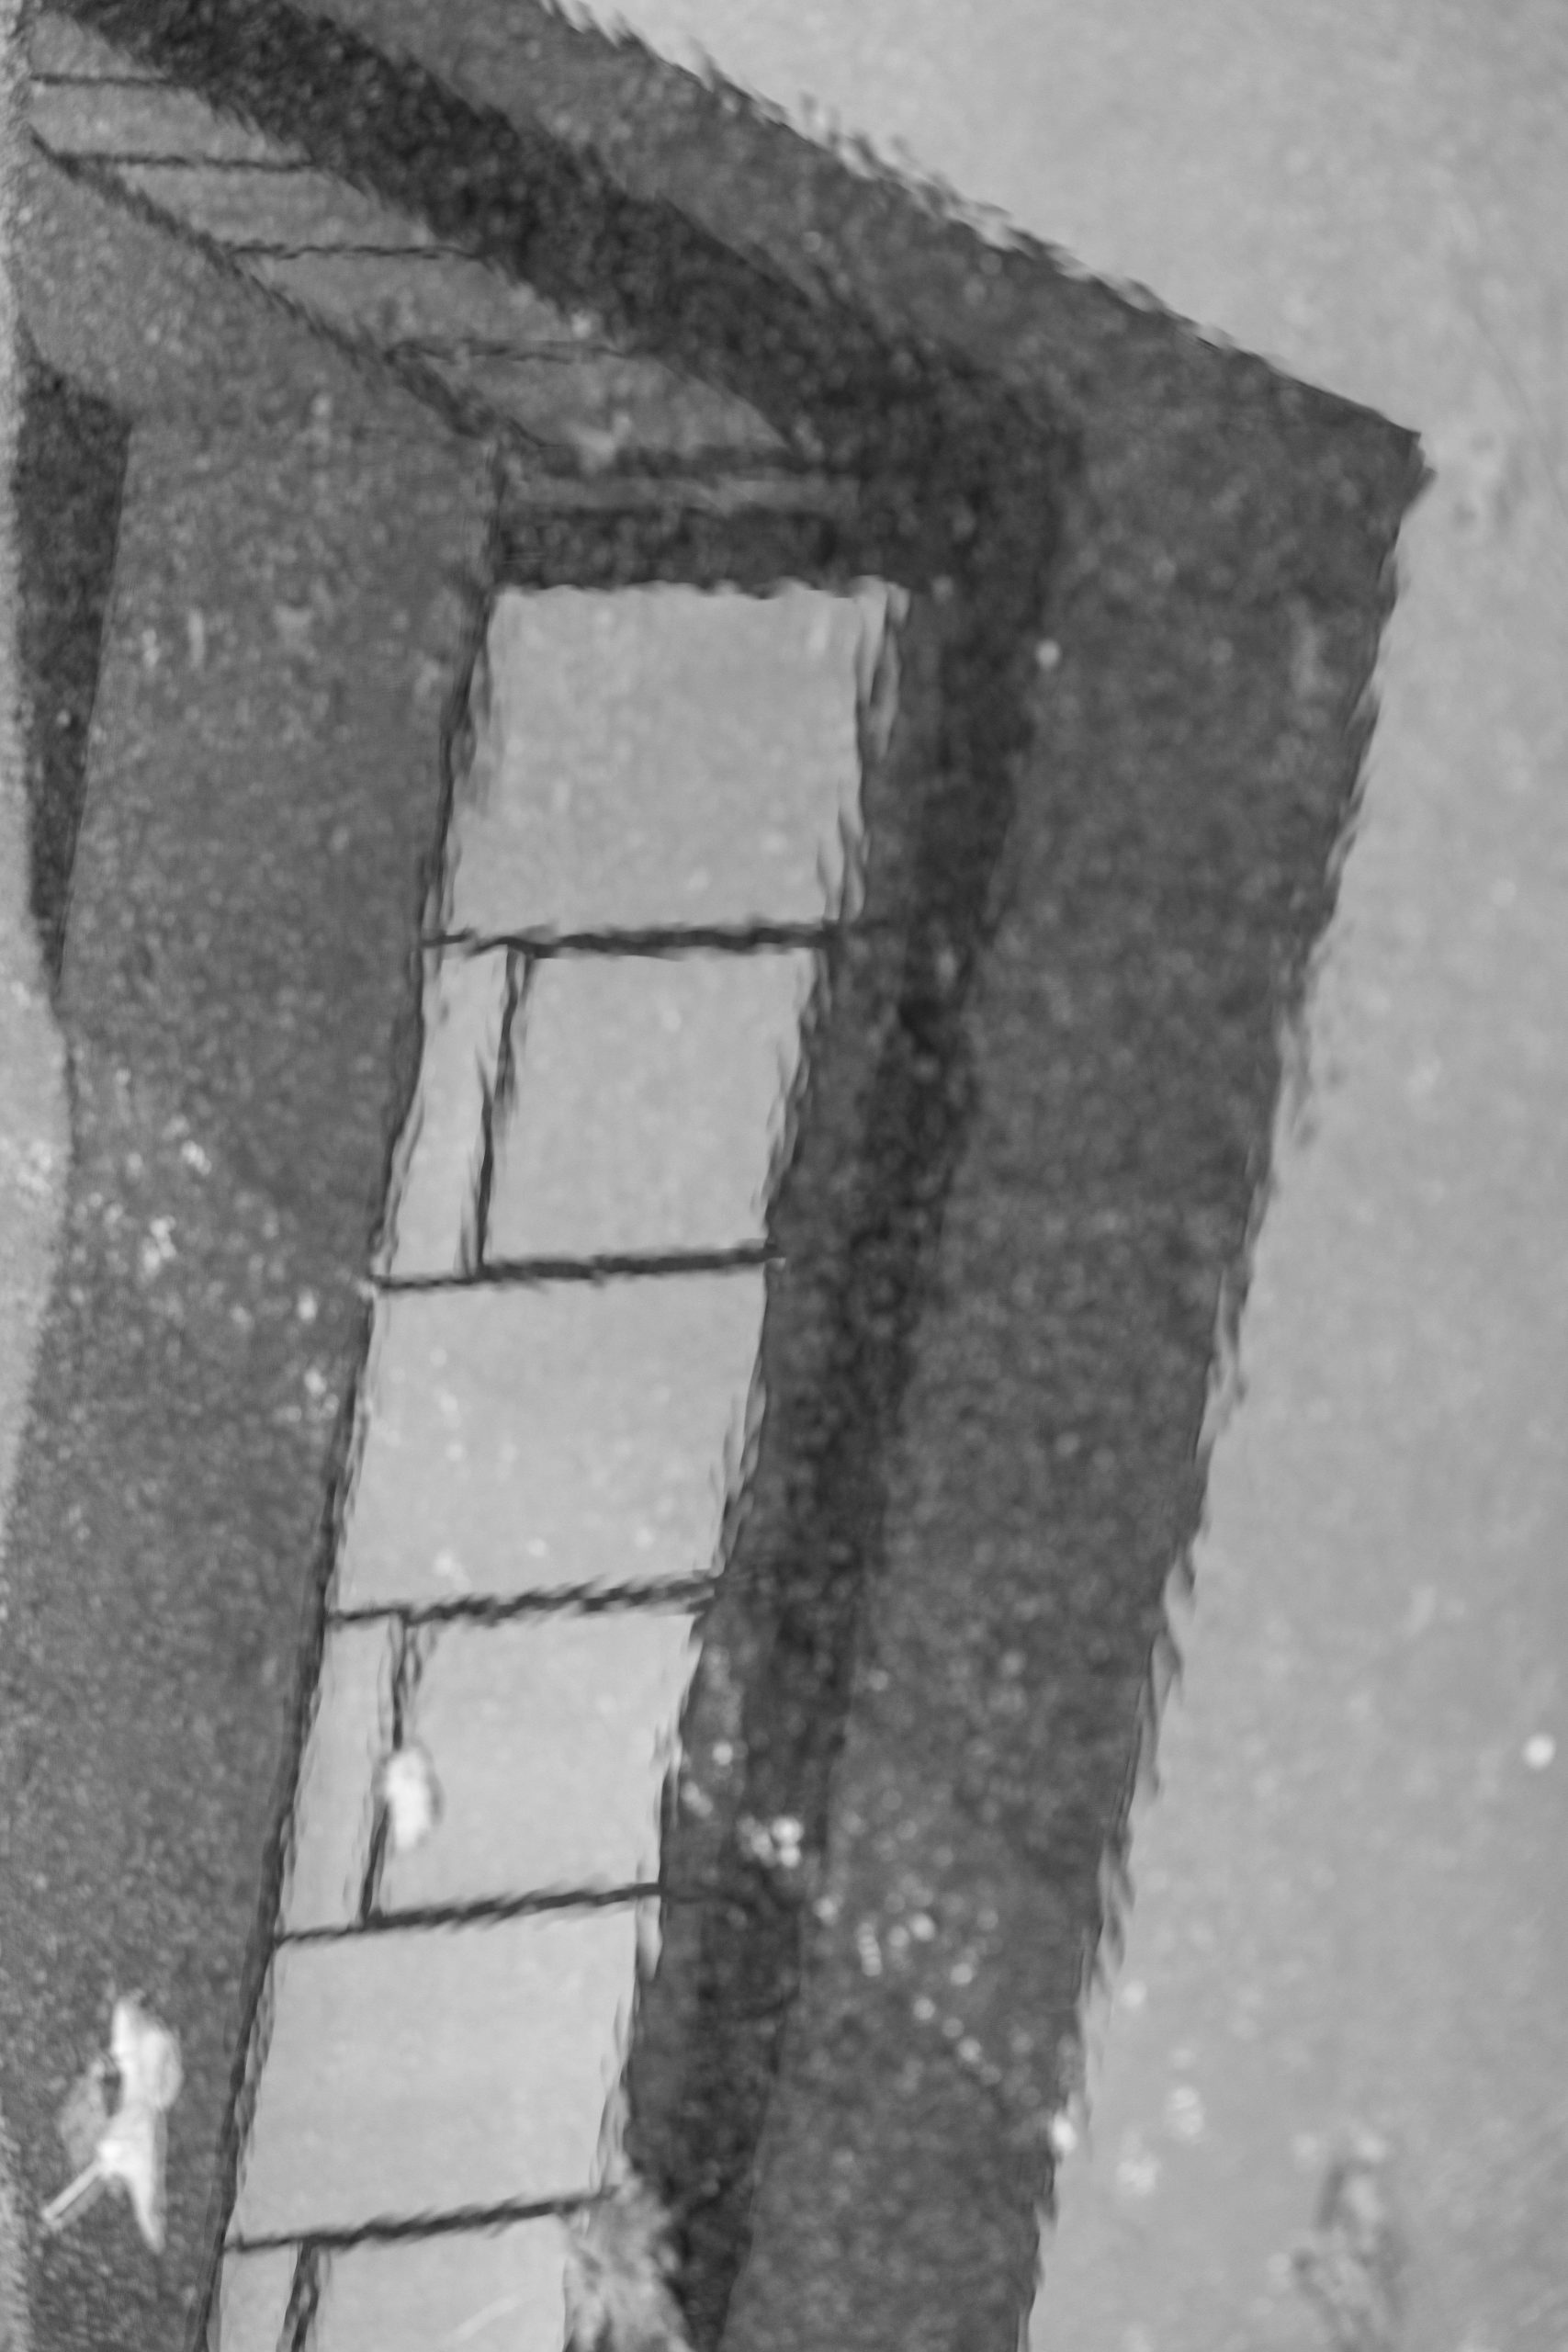
I placed a sheet of 10×8 paper in the easel, and placed a load of tools from my pencil case on the paper, before turning on the enlarger lamp for 10 seconds. In the enlarger was a negative of the Selfridges Blobitecture building in Birmingham so this would hit the paper wherever there wasn’t an object blocking the path. I also had my laser pointer with me as I was going to experiment with my full year project so I wiggled this over the image too whilst it was still on the easel.
Popping it into the developer, I was running out of time and figured that if I didn’t manage it now I could retry later in the afternoon so I left the enlarger set up.
As you can see from the image below it worked out great. The objects placed on the paper blocked most of the light getting through to the paper and the image is left white. The black lines zig zagging across the page is the random paths of the laser pointer and in the background you can see the outer shell of Selfridges. Overall I was happy with this for a quick attempt at a photogram.
After this we had to rush to the review of our groups work and never got back into the darkroom to continue so tidied up and then left.
Transfertastic
Once home I figured that I would try the Image Transfer for the second part of the challenge. I went out to a few shops looking for some items for my Dad as he needed an Electric Razor and slippers as he’s in hospital. Whilst out I went to The Tile Shop in Shrewsbury and bought a single 60x20cm tile much to the confusion of the shop sales assistant. I bought three smaller tiles 15x15cm from B&Q and then lastly a metre of Leatherette material from Dunelm.
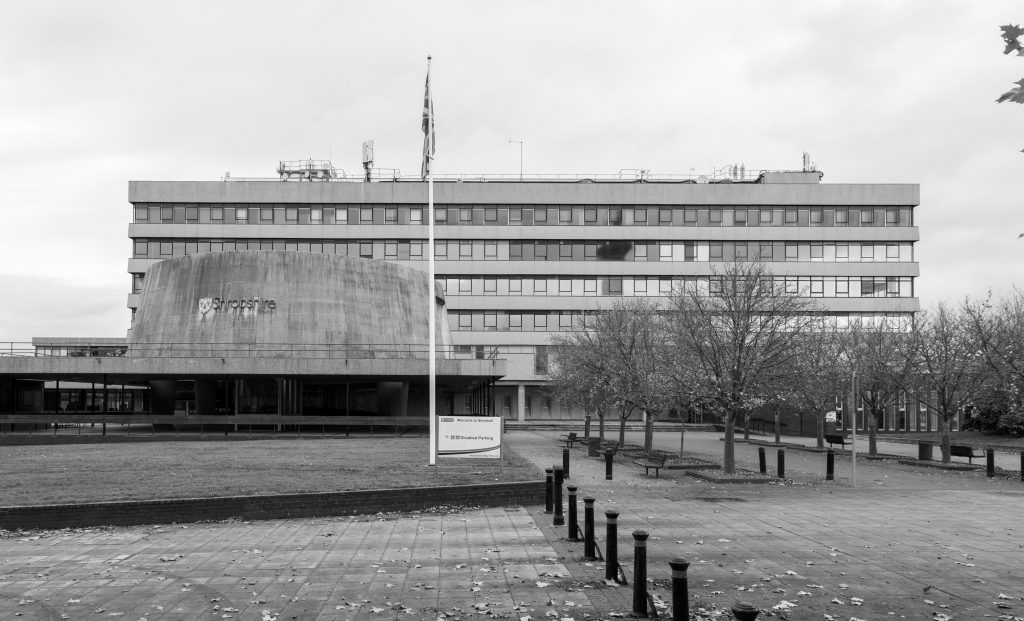
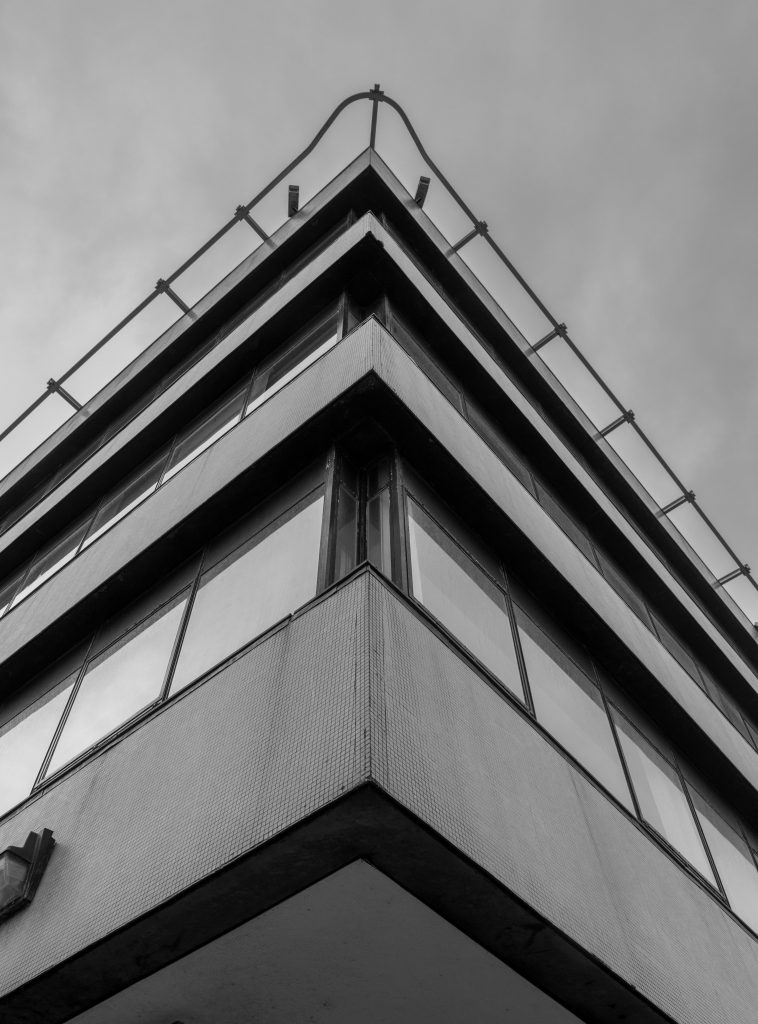
Once I had these in the car I headed off to Shirehall with my digital camera to take some images to use on the Tile. It was a grey tile with a texture, almost wood like, but I felt that the Shirehall Council Offices building which is on the list of C20’s Buildings At Risk according to their website, would be ideal.
Selecting the three images I cut the borders off and then stuck them to the tile using acrylic gel medium and then left it overnight to dry. I also did a colour image of the Multi Storey Car Park and stuck this face down onto the leatherette using some iridescent gel medium.
The prints were done on my laser printer as the toner is melted onto the top of the paper and doesn’t soak in like an inkjet printer does. The theory being that wetting the paper and rubbing and rolling the paper away should leave the image on the surface.
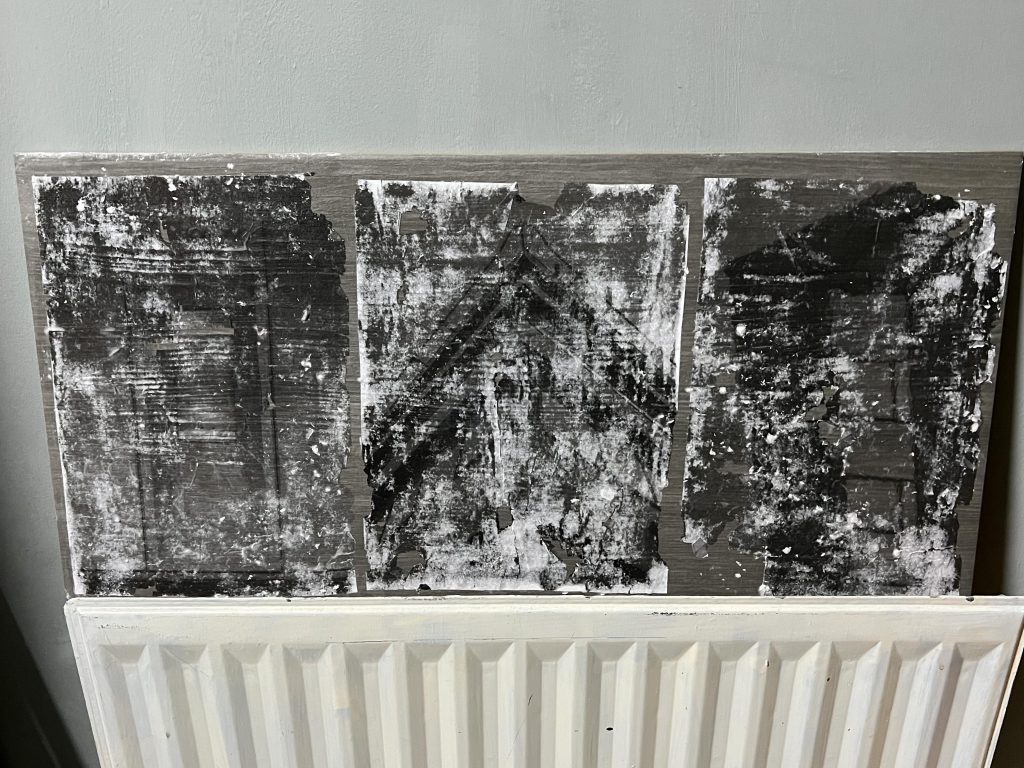
The next day I moved the tile to the kitchen and began the process of rubbing the paper away, jsut as it looked like it was starting to work I noticed that the whole image was sliding across the face of the tile and it was ripping and tearing. I was a bit annoyed that this hadn’t worked but the surface of the tile is designed to not let things stick to it so I shouldn’t have been surprised.
Once I’d removed enough so that I could see the images I left it to dry again, and once dry the images were concealed by the residual paper that had dried white. I’d read that this was ok and covering it with sealant, or in my case a varnish, would soak into the paper and make it more transparent. Even after I did this with the varnish, it never got much better and I was disappointed with the quality of the images left behind. It kind of fits as the building is starting to deteriorate, looks very aged and run down in many places. It is literally falling apart like the images that appear on the tile.
Surface Tension
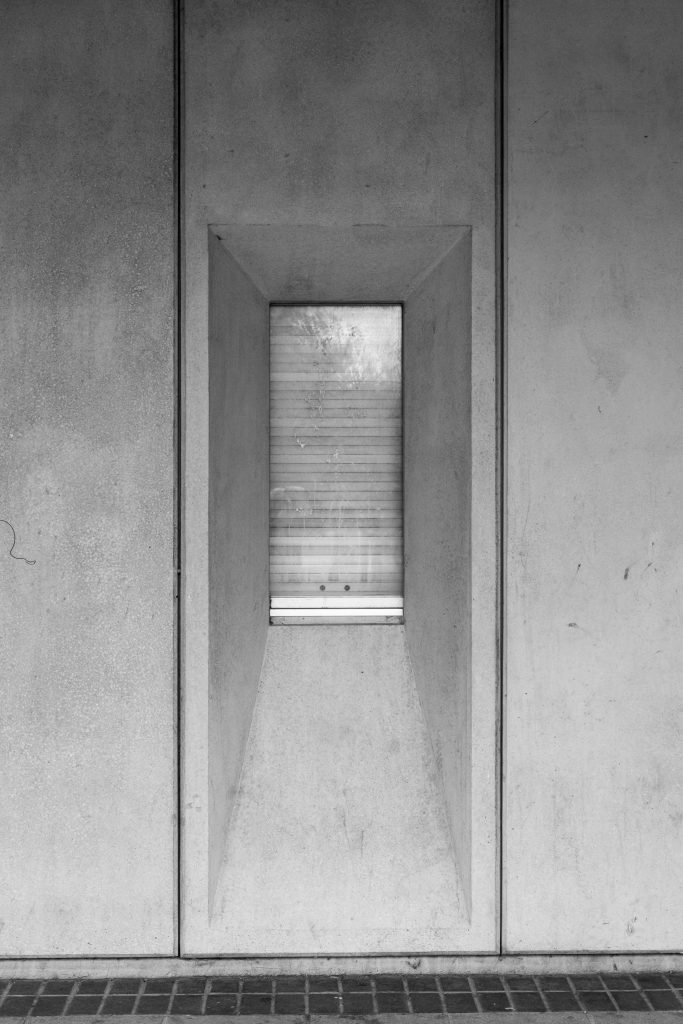
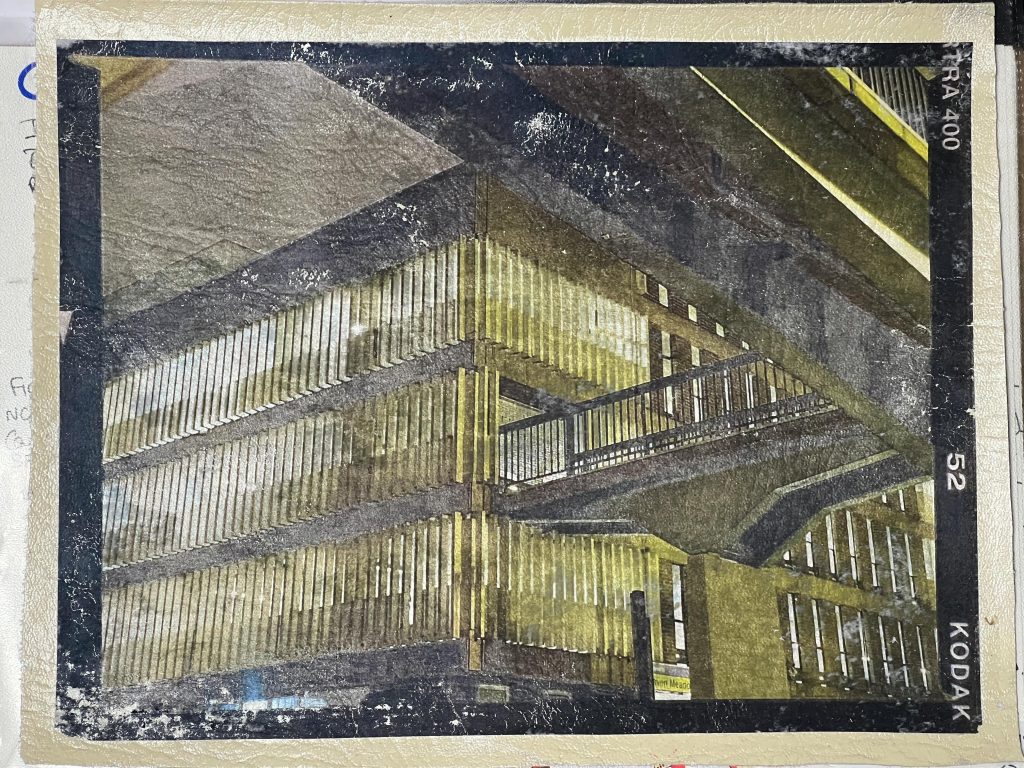
I went to the second option which was the image on the Leatherette material. In my mind the leatherette material was the opposite end of the scale to the multi storey car park which was not malleable at all and would not flex or bend. The material was designed to look like an animal hide which is the outside of the animal and the outside of the car park was made up of ribs of concrete which put me in mind of an animals ribcage. I used an Iridescent Medium on this one as the sparkliness of it looked like it might give me a nice effect of the lights coming through the slits of the walls.
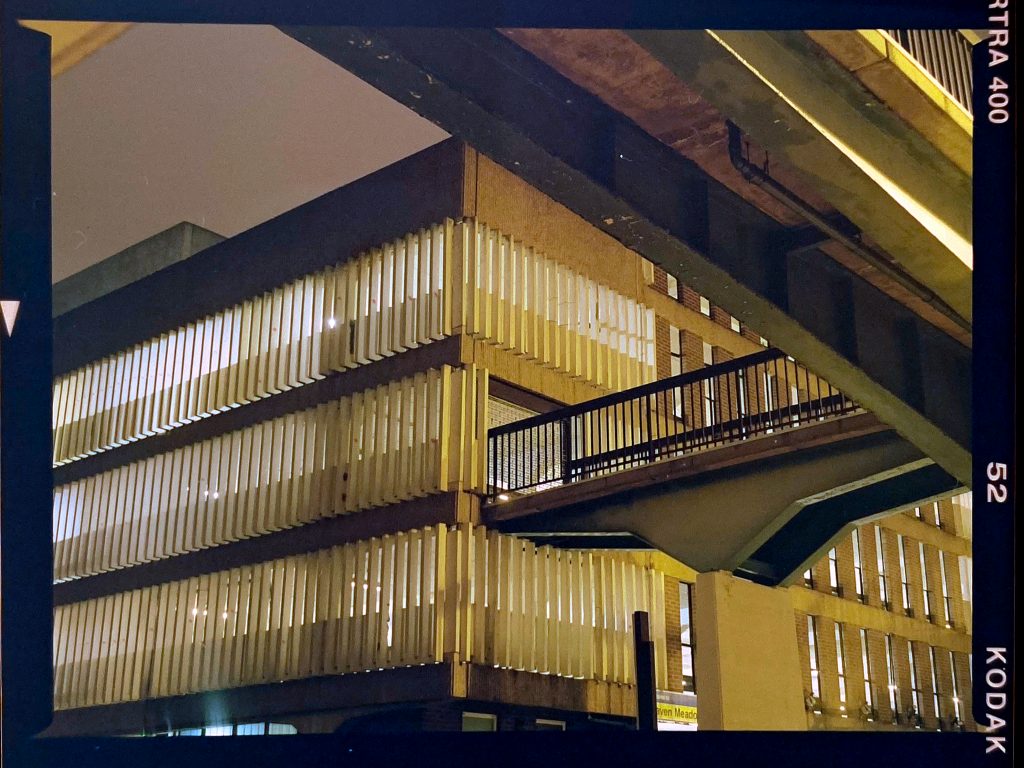
I dropped the material into the sink and it immediately went soggy and then I was easily to rub the paper off the image, carefully, so as not to damage the ink left behind on the surface. This image was a digital scan of a 645 negative and it had the film details on the borders so I made sure I flipped it around in lightroom before printing so that the image would be the right way when separated from the paper.
The material was then dried out and the residual paper again went a little white, not as bad as the tile version, but I painted it with varnish and it looked instantly better immediately. It does shine also like a foiled image which I was pleasantly surprised about, it also looks great with a backlight behind it too.
Here is a 6 minute long video of the process that I followed to make the images that can be seen here and in my sketchbook. It’s a link to a youtube video.
Conclusion
The materiality of these two images (or four images) are something very real and tactile. The effort that has gone into them is considerable and for the larger part of the small project to have resulted in a poor image is just a learning experience. I still have some leatherette left over and have the three smaller tiles which I’ve just stuck pictures from the London Underground onto and will try and rub the paper off tomorrow.
The image means more to me that I have physically handled them to get them to this state and position. The fact that the car park image is on a faux animal hide might raise some questions and there was no real reason why I chose this material other than I spotted it amongst all the others and thought it might make a good image surface.
In terms of the grey tile and the concrete architecture on it, this might be a little too on the nose and cliched but the car park image makes me happier as it’ll be confusing for the viewer.
I’ve learnt that White Spirit, Acrylic Varnish, Isopropyl alcohol all combine in a small room to make for a rare atmosphere. Also that it’s not easy to wet paper and get it off a tile unless you just run it under the tap when it’ll all just slide off towards the plug hole of doom.
The car park image on the material gives me the same feelings I had when I made the Cyanotype images of the barbican comic panels, which was a hand crafted experience. THis is also similar to when I get a decent print out of the darkroom, either colour or black and white. There is a palpable feeling of achievement and accomplishment.
Comments are closed.