This Tuesday we were informed that Niki was off work sick so we’d be getting on with our work in the afternoon and then catch up with a tutorial in the future. It was Niki’s last week supporting Level 4 and it’s a shame as she has helped unlock some of the art that existed inside me that has resulted in some vastly different work this year. I wish her the very best of luck for her future and can’t thank her enough for her help this year.
The other classmates were busy in the studios making work for their 4FP017 Module which involves reinterpreting a painted portrait from the past and capturing an updated version on film or digital sensor. This is similar to what I had to do with my classmates in my first year.
Darkroom
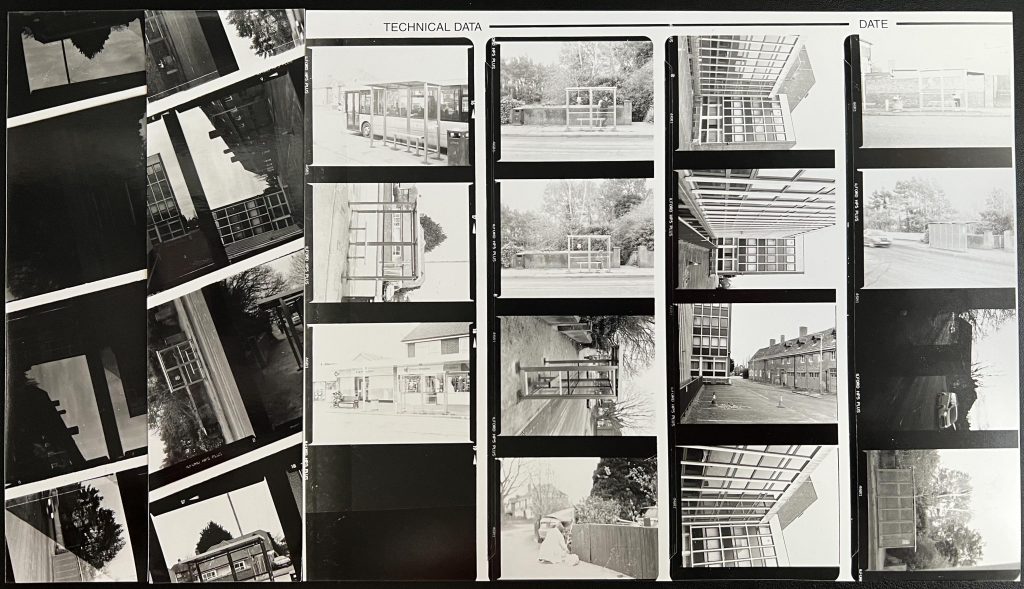
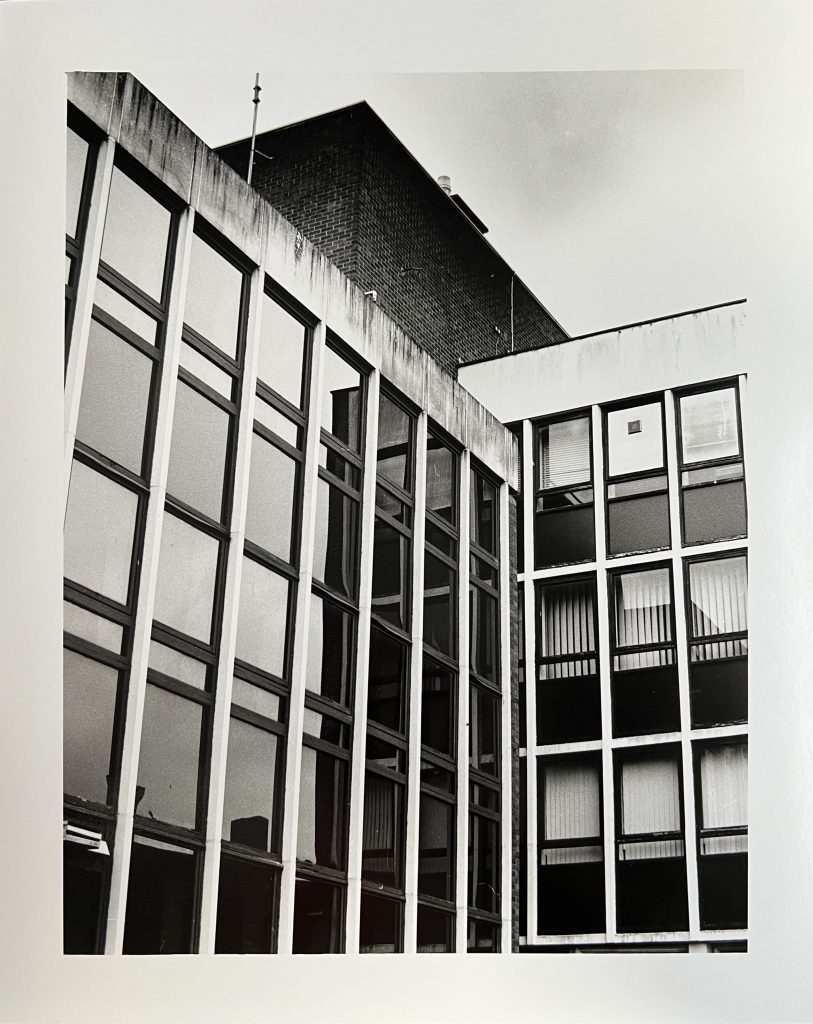
For me it was an opportunity to print a contact sheet and maybe a print or two from Film #51 which was an Ilford HP5+ 400 120 that I’d shot through my Bronica ETRS medium format camera with the 75mm lens. The pictures were of bus shelters around the Shrewsbury town bus routes that were due for replacement or had already been replaced. I’d also stopped by the Whitehall Council buildings in the Cherry Orchard area of Shrewsbury which is now an NHS walk in centre and an unused office block hidden behind the red sandstone building called Whitehall.

This is a digital photo of some of my work in the dark room. On the left you can see two test strips with the leftmost being split up into 2 seconds exposure increments. The next strip is a 3 second exposure but it was a little dark.
On the right hand side we can see the first contact sheet print of the whole film, it was a nuisance actually as the negatives wouldn’t stay in the little flaps in the contact printer so I had to load the negs and then open it upside down to put the paper in. You can see from the table above that this is number 3 and it tells you that my changes to the enlarger settings have made it underexposed.
Print 4, for which the settings can be seen in the table above shows that the following contact sheet was better with the tuned in settings and comes out well. You can see that a coupl eof the images are not exposed correctly in camera but the whole contact sheet seems to be about right.
The photos that I like are annotated with green posca markers and the red cross marked images are not of immediate interest to me. The images of the bus shelters might not be of interest to many people but I think that they capture the difference between the old and new.
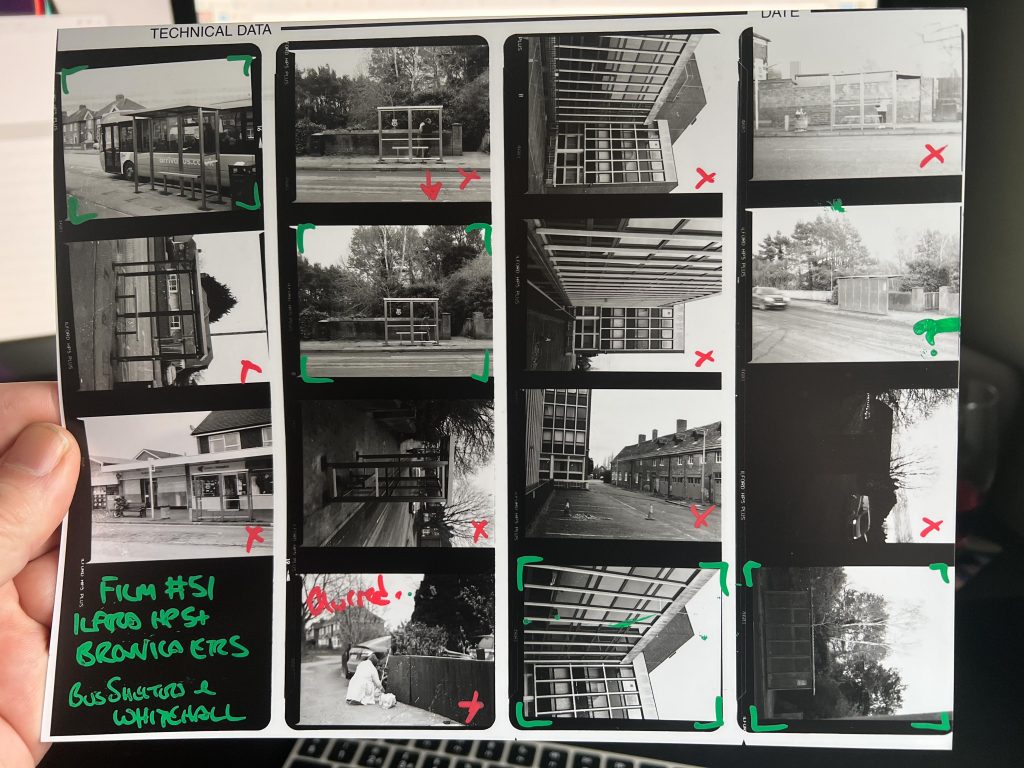
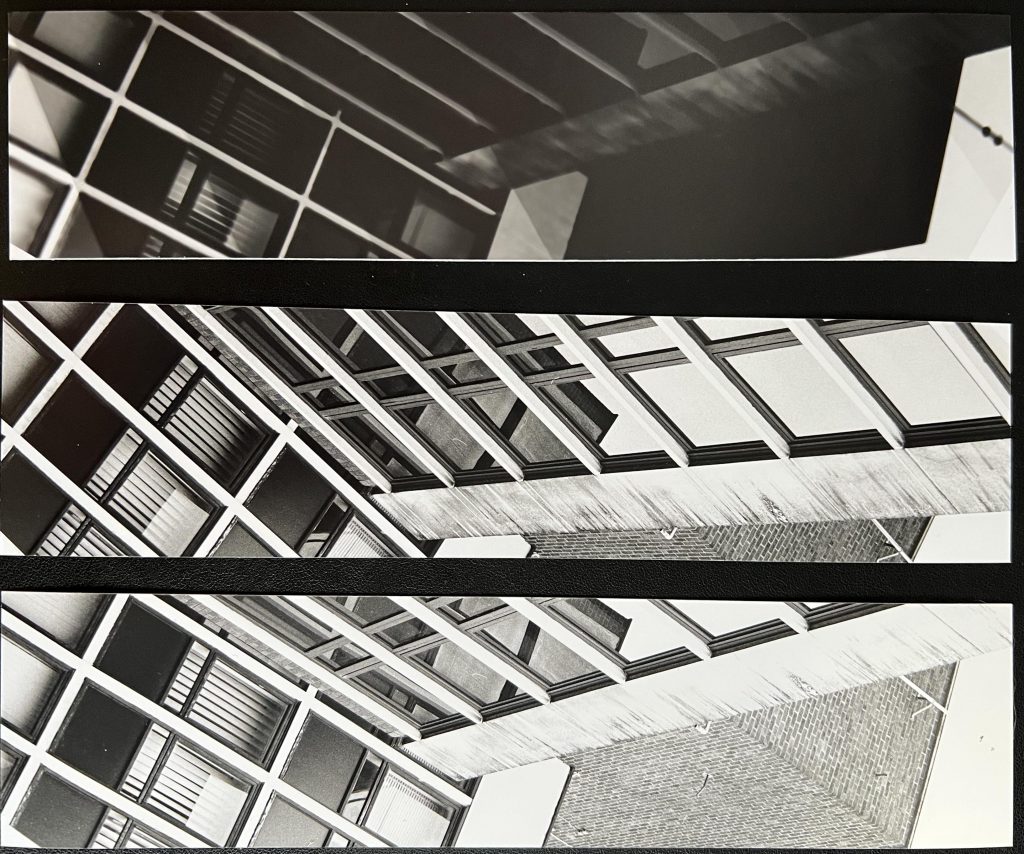
The images of the uninhabited office block are exposed nicely in the camera but I only see one of them immediately that I’d like to make a print of. In fact this is my next move.
Cornered
The following test strips are printed on Ilford MGRC Pearl and you can see in the top image the steps of exposure that span from 2 seconds to 16 seconds. the sky in the right hand side of the strip appears to contain some detail after 14 seconds but if I were to print the whole image the rest would be overly dark. I think that I’ll need to print it for the correct exposure as you can see in the centre strip and then do some burning on the sky.
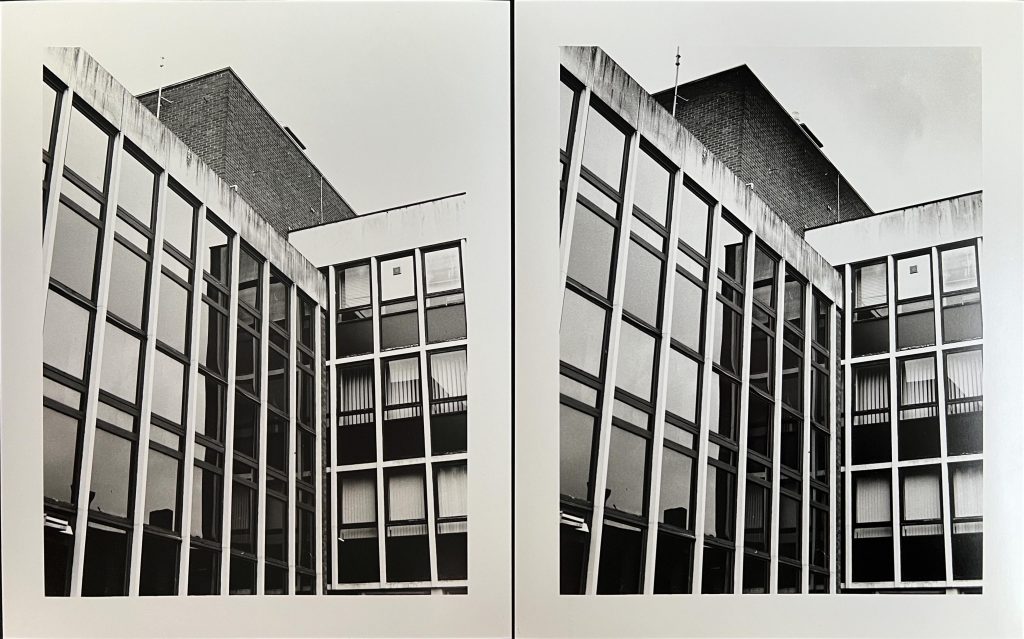
You can see from these iPhone images of the prints that the left print has no defined sky and there is no definition between the sky and the border of the image. I’ll redo it again for 3 seconds and this time use the black card to move over the rest of the image leaving the sky light to fall upon the paper. The black card must be moved constantly to avoid a hard line so I gave the sky about 5 or 6 seconds exposure, just to get that definition you can see on the top right hand side.
You can see from the image above that the image was created similar to the previous image and the burning has affected not only the sky but has had an impact on the brick built top of the building which I’m not overly happy about so I left it here.
To improve this print in the future I could use a stencil cut to the W shape of the roof line and use this to get an accurate mask for the burning operation. Either that or I could do a split exposure using a higher contrast filter for the sky and a lighter filter for the building.
Sheltered Existence
Going back to some discussions I had with Niki a couple of weeks ago and how I remember standing or sitting at bus shelters to go into town with my mum long before out of town supermarkets were a common feature of towns. I became aware of some work by the council to replace a large number of these old and tired, some covered in graffiti, shelters with new designs.

Many thanks to Shrewsbury Town Council and also the lovely lady I spoke to on the phone who sounded perplexed when I was explaining this sudden interest, I thought for sure that she’d just screw the note up and throw it in the bin, but she did not. Credit to her.
I went out with the Bronica ETRS and also my Canon 5D MkIV as I knew I had limited film in my bag. It was getting dark quickly as i’d gone out shooting after 5pm when I’d finished my day job.
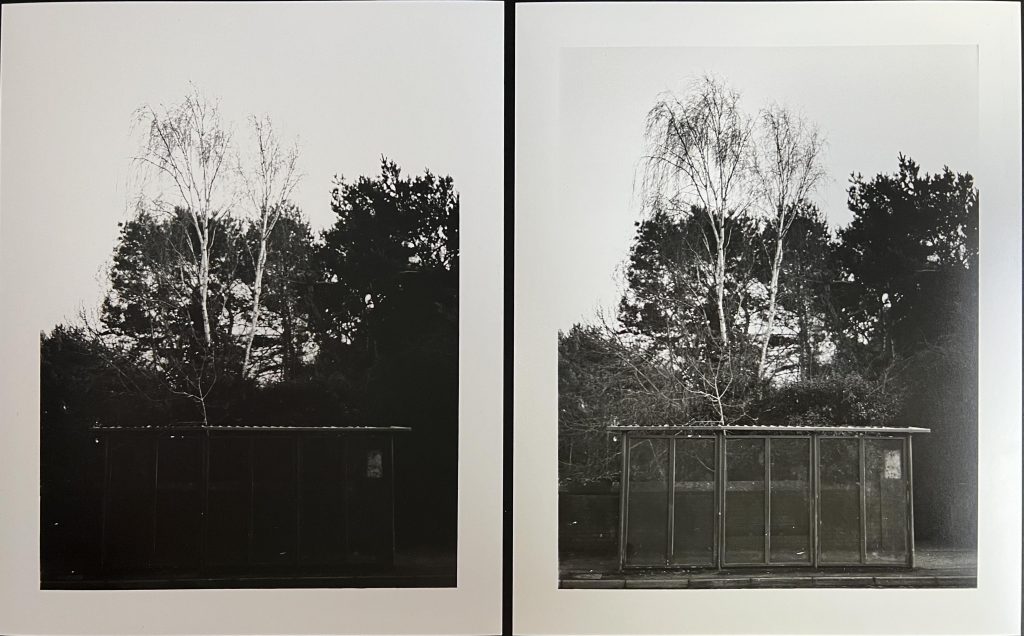
You can see in the images above that the print on the left was too dark, this was using a 3 second exposure under an f/8 aperture enlarger so I backed off the time a little to two seconds. It did leave the undefined edges around the sky as you can see in the left image so in this second print (12) I used the black card to expose the sky a little more. You can see the grey tones making up a spearation between the sky and the print border. But there was a little part of the sky on the centre left of the image that was missing, so I went back in for another attempt with a little more burning.
The images below show how I’d darkened the sky some more and I must have slipped up on the covering of the print as it looks as though some of the light has made it to the actual bus shelter as it’s a little darker than I’d hoped for.

These were my last two pieces of Ilford MGRC Pearl I had with me, I do have a new box at home.
As it was my last print I thought I’d mess about a little and see what happened when messing with the chemistry a little. The image on the right hand side was the last piece of paper so I took it over to teh work area before exposing it inder the enlarger. I painted some STOP solution onto the palm of my left hand with the tongs rather than dip my whole hand into the solution. Once it was damp with Stop I placed it gently onto the paper then washed my hands in the water tank.
I put the paper under the enlarger and exposed it, using the card to burn the sky some too and then followed the same usual process, first into the D76 dev solution, then the stop, the fixer and finally the wash. The Stop has reduced the effect of the Dev process but I think if I’d used the Fix for my hand print it might have completely masked off the area and prevented any exposure being shown through the Dev process.
There is a pink stain on the bottom edge of this final print of the session and I think it was a result of contamination but I can’t figure out how I did cross contaminate. According to other dark room users in internet forums it’s likely to be a fix issue and I must have wither touched it with contaminated tongs or fingertips.
The last print went through the RC Dryer when it had been on Run Down mode, cooling down ahead of being turned off, so I don’t think it dried properly. That’s the reason, I think, that there was some chemistry still on the paper that hadn’t dried and was affecting the penultimate print. You can see this on the top edge of the left print.
Conclusion
The film was quite successful and the contact sheet came out well apart from a couple of images that were incorrectly exposed. These images could be rescued by allowing more or less time under the enlarger lens and lamp but the contents of those particular images don’t interest me at the moment. I shan’t be throwing away the negatives for these images but I’ll keep hold of them in my folders in case I need to find them in the future.
This was the 51st film I’ve created since I began the course in September 2021 and it’s quite a milestone. I’ve shot a few films previously using my old point and shoots when I was in my teens but only for family snaps. With this collection I’ve started to think about shooting more digital as it’s a little easier on the wallet. I’ve picked up some films for the future but I will be reserving them for specific projects I think.
The alteration to the prints using chemistry was interesting but I don’t think it links into my practice fully so I probably won’t be spending a lot of time doing this in the future.
I think I’d like to do something with these prints and the weaving process, we’ll see.
Comments are closed.