Friday 3rd February
Research
Whilst waiting for the Riso Printing introduction with Jim we sit in a computer suite and carry out some research on the pcs. Alice also helped us with some information on Context too, we must have looked like we weren’t really that bothered about context with our previous reviews.
What is context?
Context shapes meaning and sets the scene
Whilst researching it’s important to think about historical, cultural and physical contexts.
Sources
Alice also showed us more sources of information using the Wolverhampton Uni library website. Box of broadcasts was demonstrated so we can go and look at TV documentaries or news programmes if we need to include them in our research. It also provides the Harvard reference and citations to make life easier. I did wonder if it was capable of normal programmes so I went back and found the episode of the Chase and the three episodes of Fifteen To One that I was in but if I’d wanted the Eggheads show I’d need to request it and I guess that this might cost the uni money so didn’t worry about that.
Whilst researching I found a couple of useful sources, one on BISF houses that I was talking about in my research mood board and a couple of childhood memories and photographs as aids.
I also used Browzine on the library website which is great for looking at journals and magazines in PDF format so that the information can be used in essays or research work.
I’ve used the arts and architecture database, which holds images and photos, in the past but Alice also showed us arts and architecture source database which holds much more information.
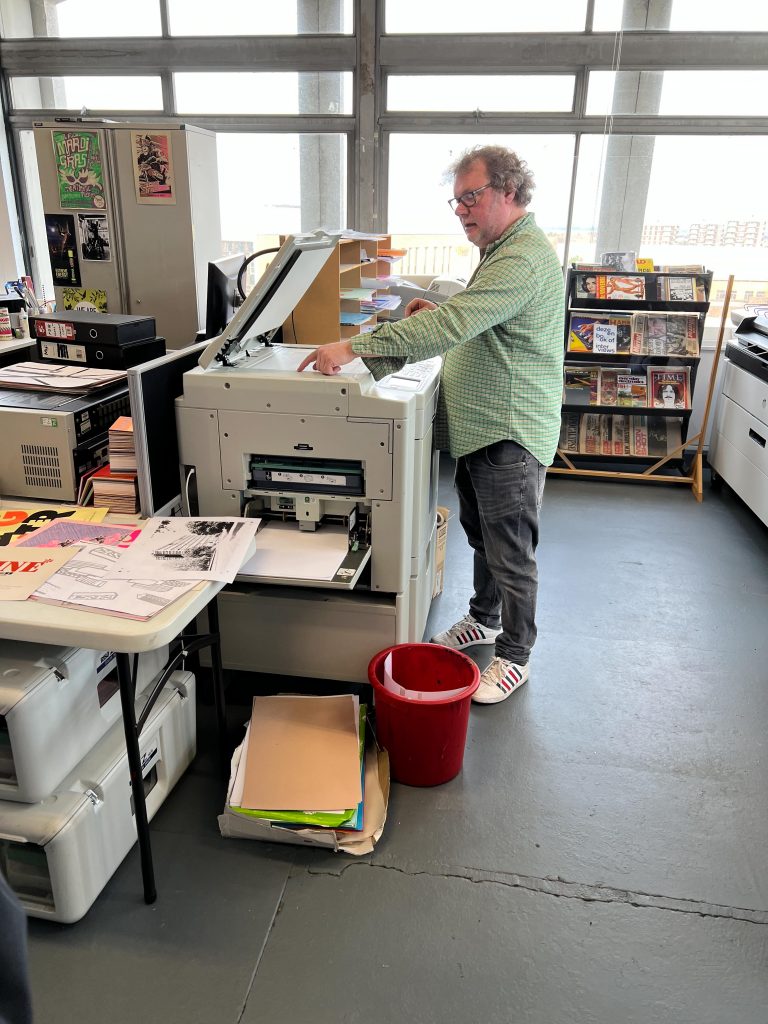
Riso Time
Riso Printing from 11:30-13:00 Jim in the Print Hub
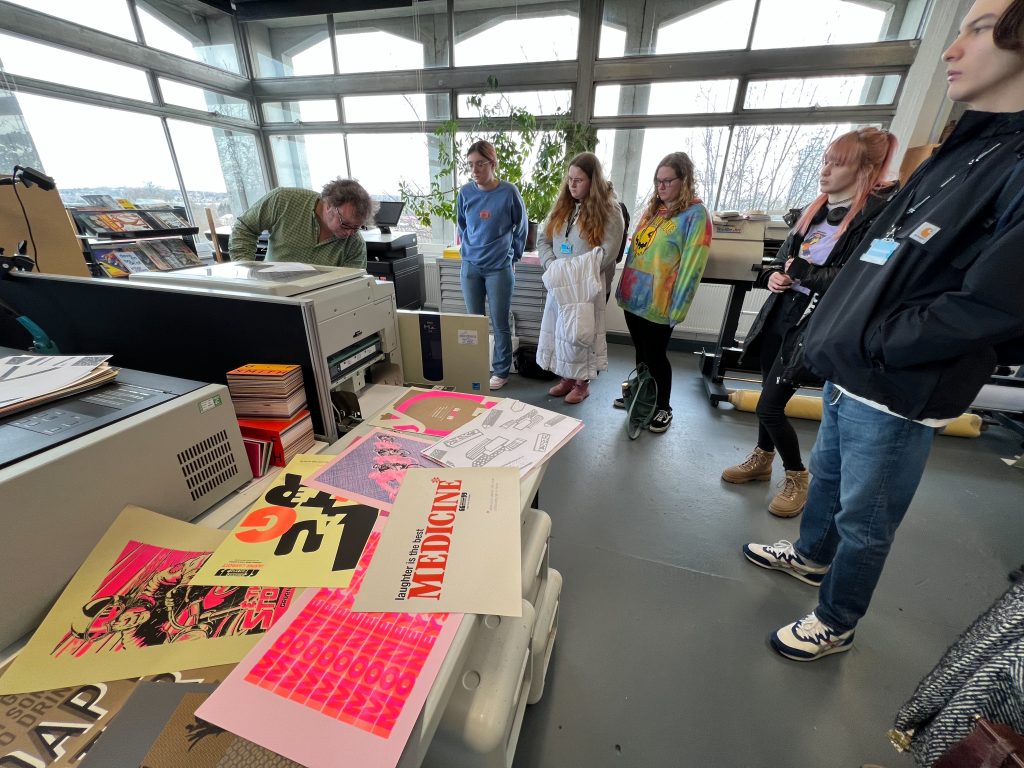
Riso Printing had its heyday in the 80s as it was a much cheaper way of printing than the other methods available at the time.
Some important Notes:
- Maximum Size = A3
- Two Colours simultaneously
- Colours Available: Yellow, Black, Fluro Pink, Fluro Yellow, Black, Gold and Red.
- Black and Gold can print on Black paper, opaque.
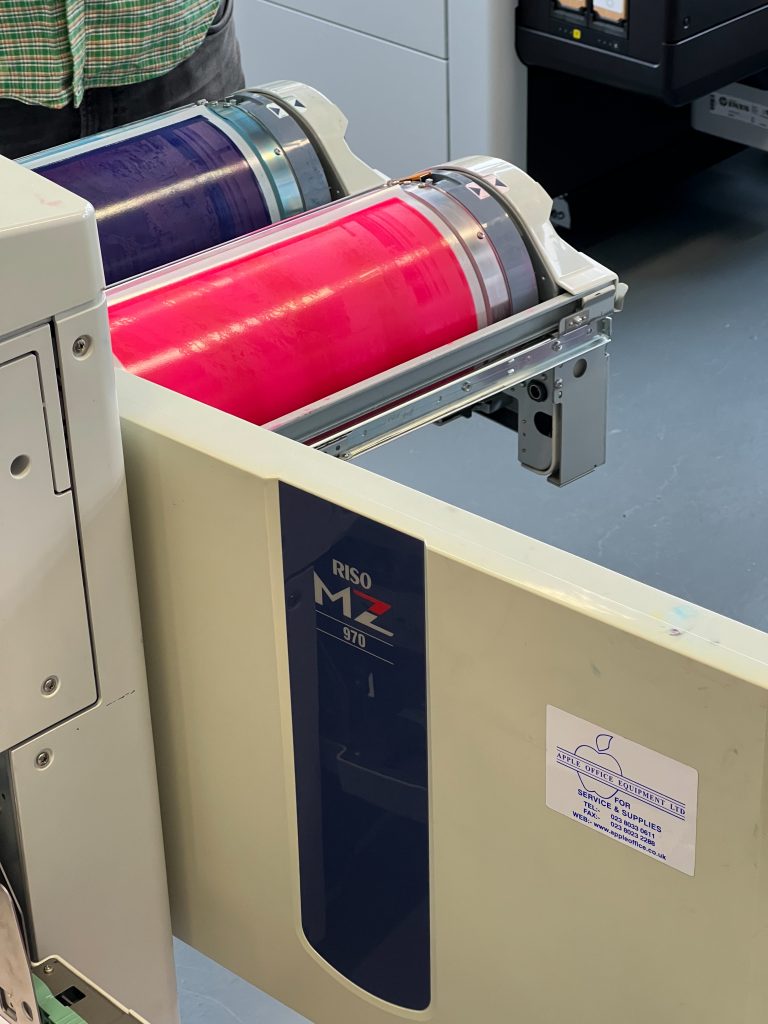
- The ink is in cartridges, slid into the centre of the drums that fit into the machine.
- Around each drum is “Master Making Material” this is what blocks or allows ink through to paper like the silk screen in silk screen printing.
- The master making material is made from Banana hemp and the ink is made from Soya, but don’t chomp on either. Quite enviro-friendly
- Each master costs £1
- Each sheet of paper = 5p
- Each inking = 5p
- Paper can be up to 280gsm but no higher and NO glossy finishes as the ink will stay wet and not soak into the surface.
Jim pointed out the costs of printing on Silk Screen as a comparison.
Print to transparency film = £7 for A3
Transfer to Silk Screen= £10
There is also a bit of a delay between having an image and getting it onto the silk screen as it needs to be done by the technician. I watched the videos on Canvas showing Andy demonstrating the painting of the screens with the emulsion, exposing them to the UV light and then jet washing the unexposed areas to clear the screen for the ink to come through. It was a very insteresting set of videos and I felt it would be useful for Print Club which I’d be attending next Tuesday as we might possibly be looking at Silk Screen Printing.
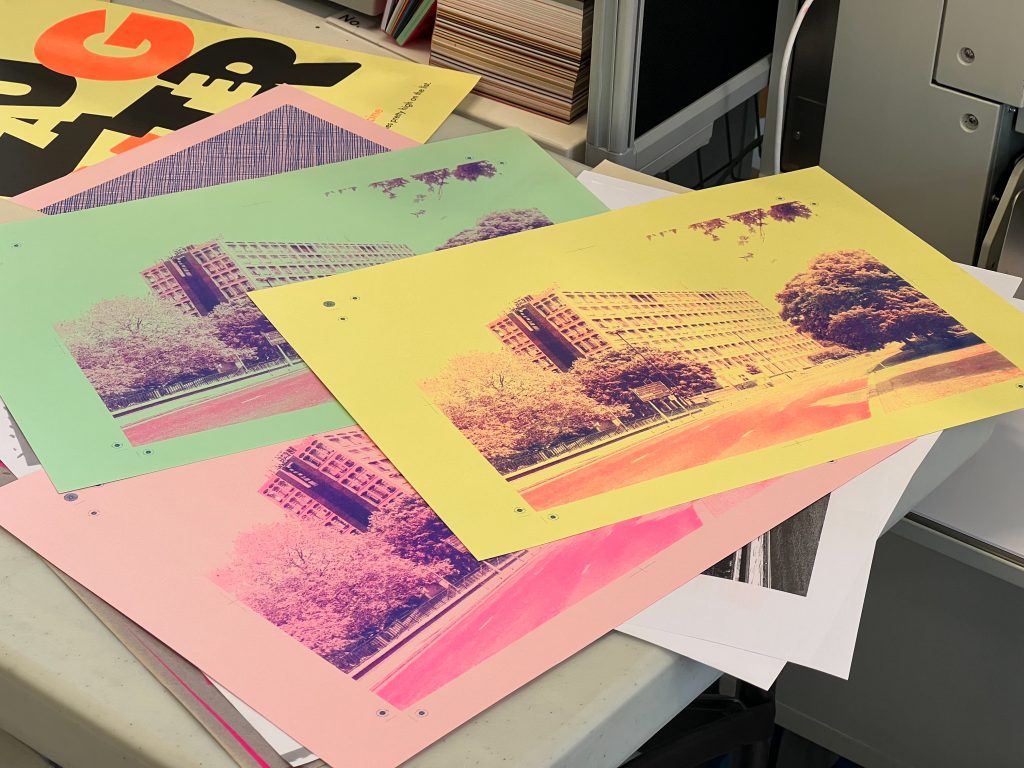
Riso is ideal for flat colours on the paper like Pop-Art.
Can also print half tone and duo tone, even trio tone.
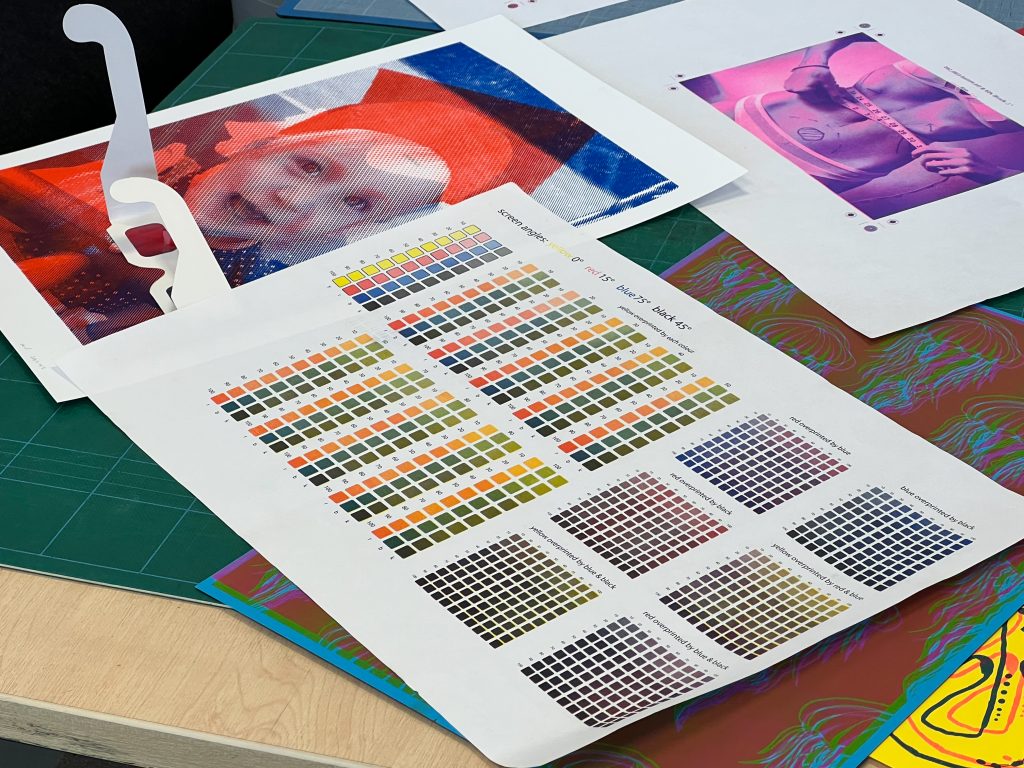
Jim showed us a print of his daughter that was two images in one, use of red/blue 3d glasses meant that you can see one image when looking through the red lens and the other through the blue.
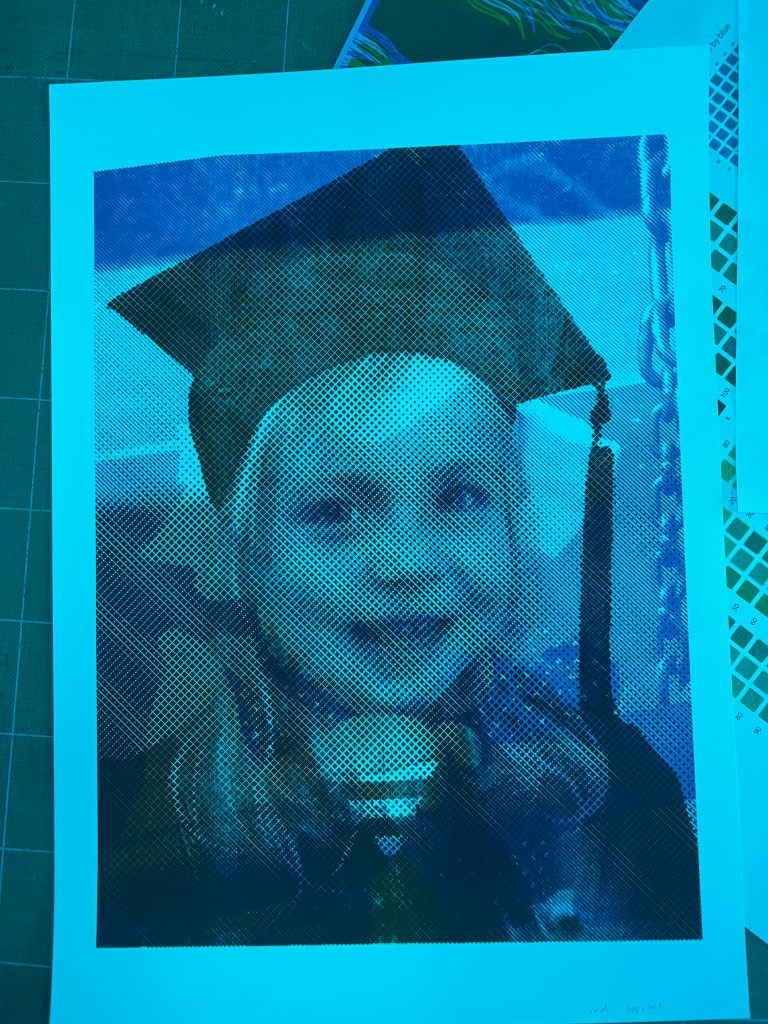
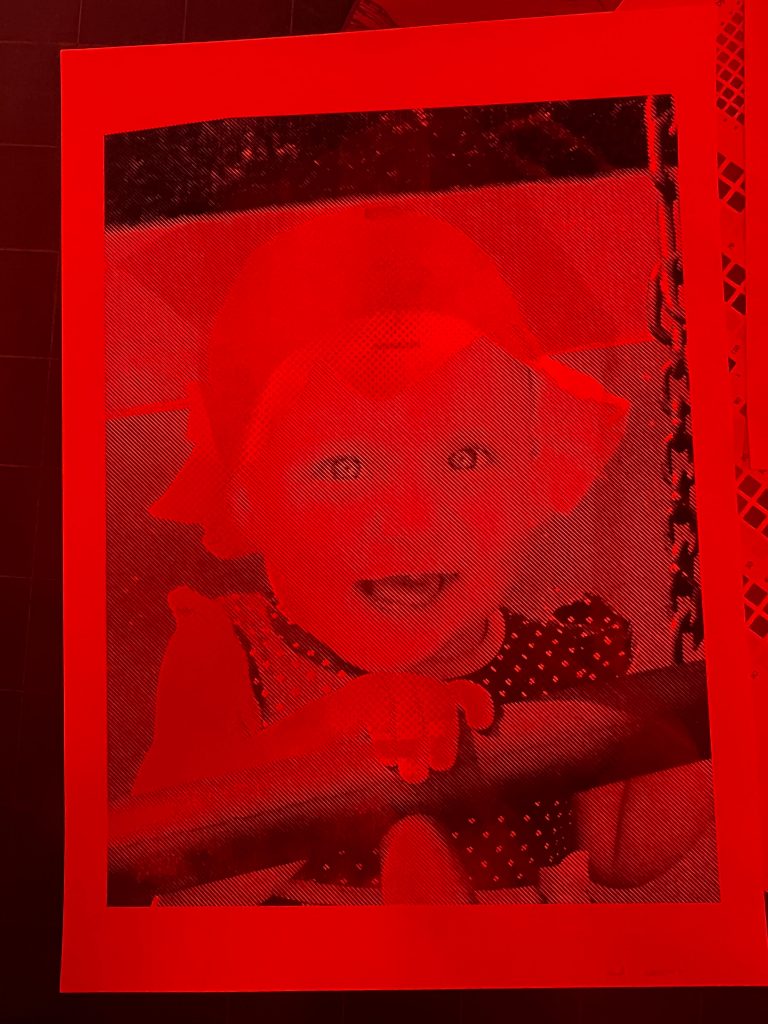
This is interesting to me as it’s similar to my merging of two images together, and is like a lenticular image but both images are viewable all the time.
Some images that Jim showed us in zines were indicative of times people purposefully left out a colour from the RYBK (like CMYK) and get a good effect. Printing Red and Yellow but leaving out blue gives a strange tone to the whole print.
The size of the image is A3 so if you want an A4, it would be in the centre of an A3. I figure that you’d be better off making the image two A4s and printing two at the same time, wasting less paper.
Prints can include registration and cutting marks to help with alignment, if needed.
The Riso printer can only print to within 5mm of the edge of the paper so it won’t do full bleed.
Jim tells us that when making the master material for each of the channels, one for green and one for red in this case,
The Left slot in the printer is more reliable for Making Masters so Jim tends to have only one drum in there at a time then inserts both when it’s time to print.
Once a master is created on a roller drum it will print out a proof copy on normal paper.
Empty the Waste bin of previous Masters before printing new jobs, or it may get snarled up.
Strong Colours = Better prints
Riso Information
Two useful websites I found that helped me better understand and complement the teachings of Jim showed more information.
Brighton website for Risograph printing
https://blogs.brighton.ac.uk/viscommtech/risograph-printing/
DamnFineprint website for further info on Riso Printing
https://damnfineprint.com/pages/risograph-guidelines
Riso Steps
The steps I made a note of to prepare an image in Photoshop are as follows.
Open Image in Photoshop
Image/Mode/Grayscale to change image to grayscale
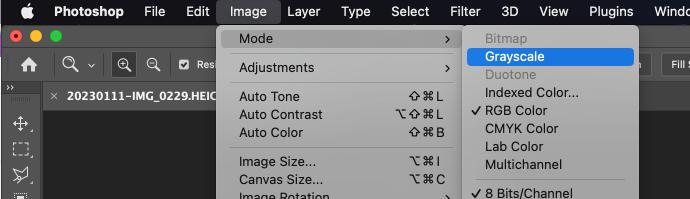
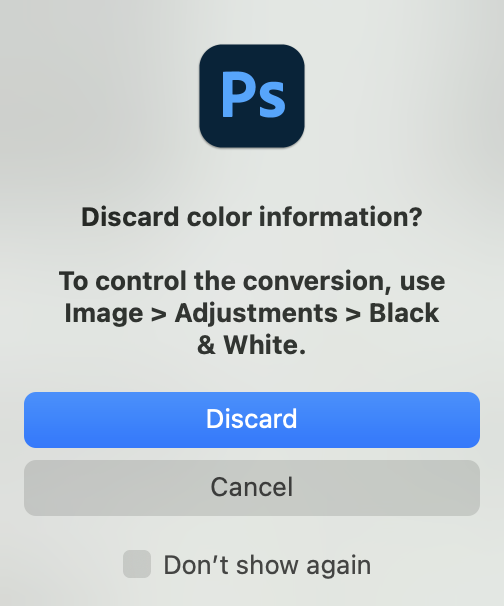
Discard Colour info
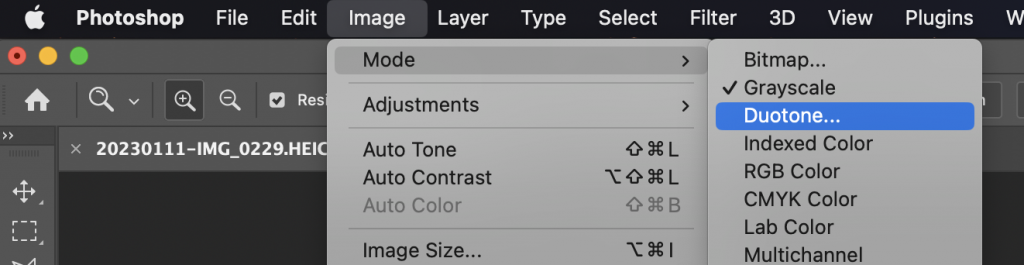
Image/Mode/Duotone
Play with the inks that you want to have in the image to simulate(ish) what you want the final image to look like.
Change Monotone to Duotone in drop down.
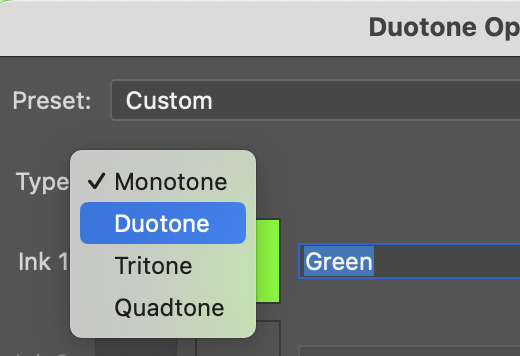
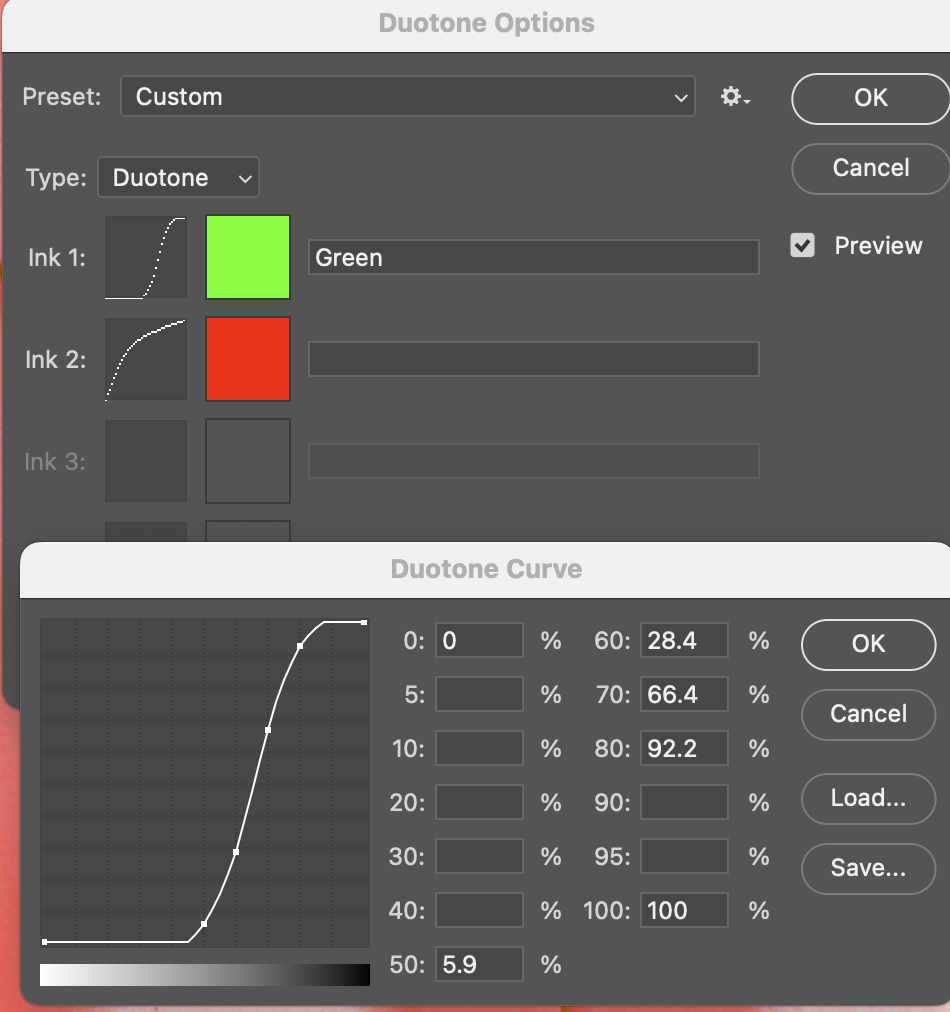
Click on Curve in box to bring up curve which can be edited
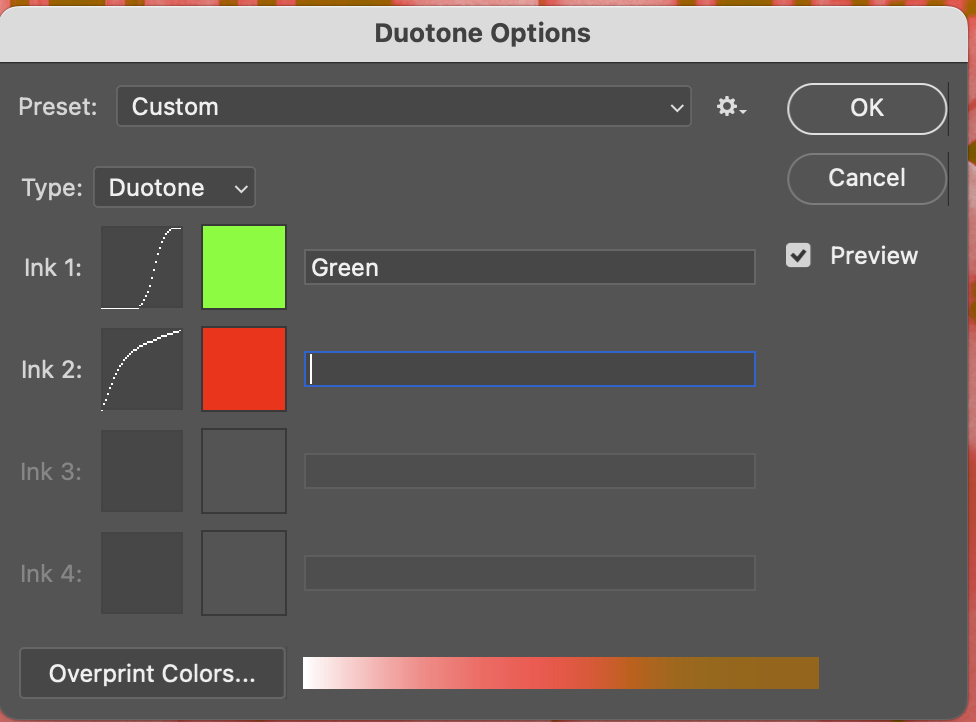
Changing curves to be opposites splits the picture into two colours.
Change image size for it to be close to A3
Image / Image Size, take tick out of box for Resample.
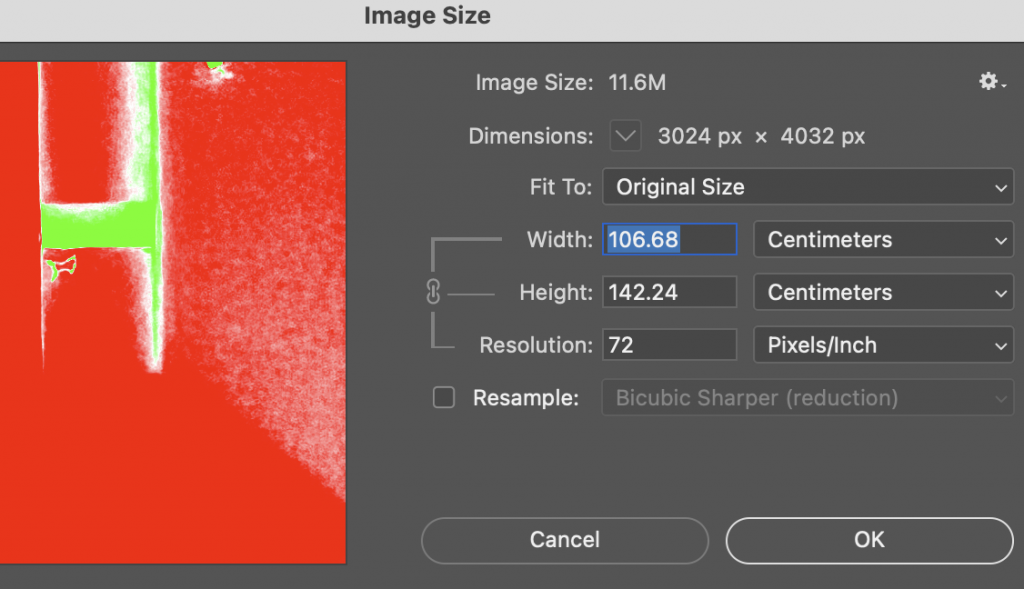
Changing the size of height (portrait picture) changes the Resolution
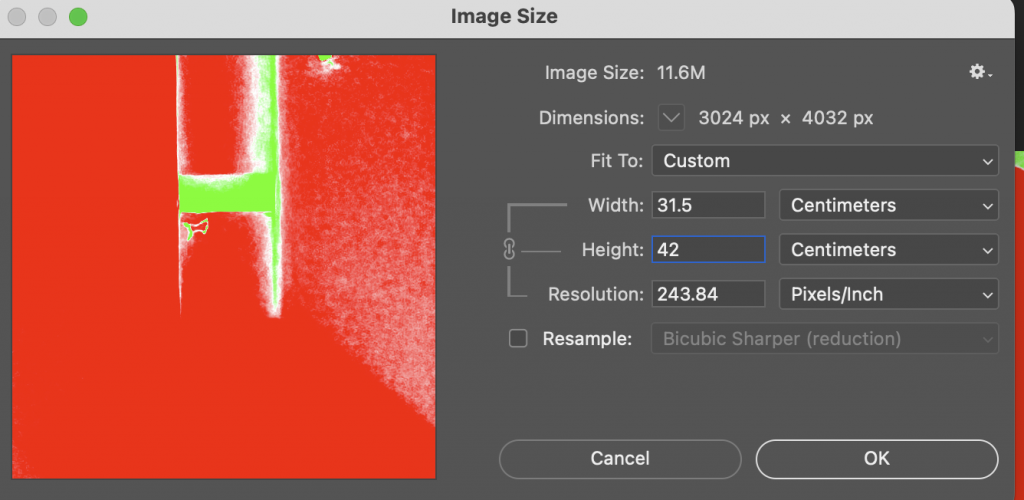
It is better when it’s closer to 300 so I’ll drop it down further.
Type 300 into resolution and the dimensions change to adapt.
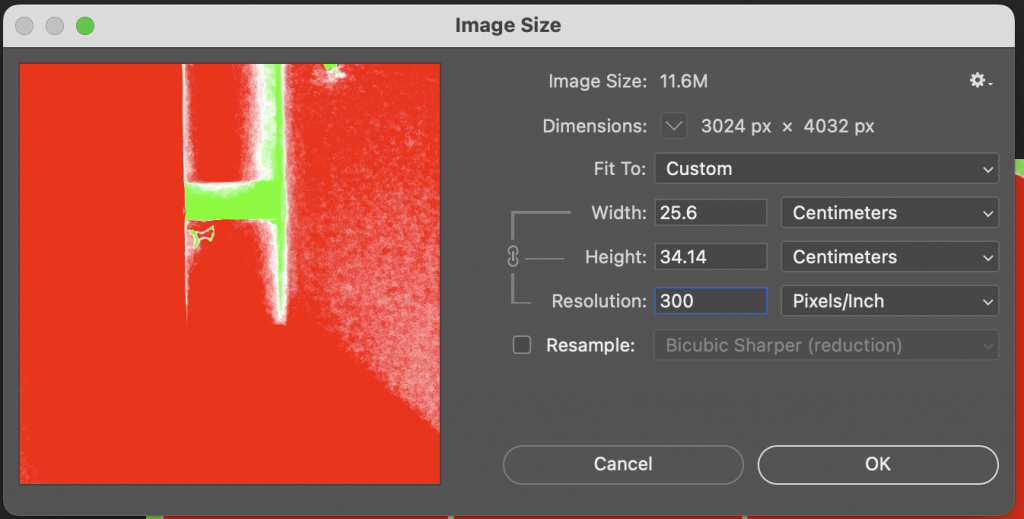
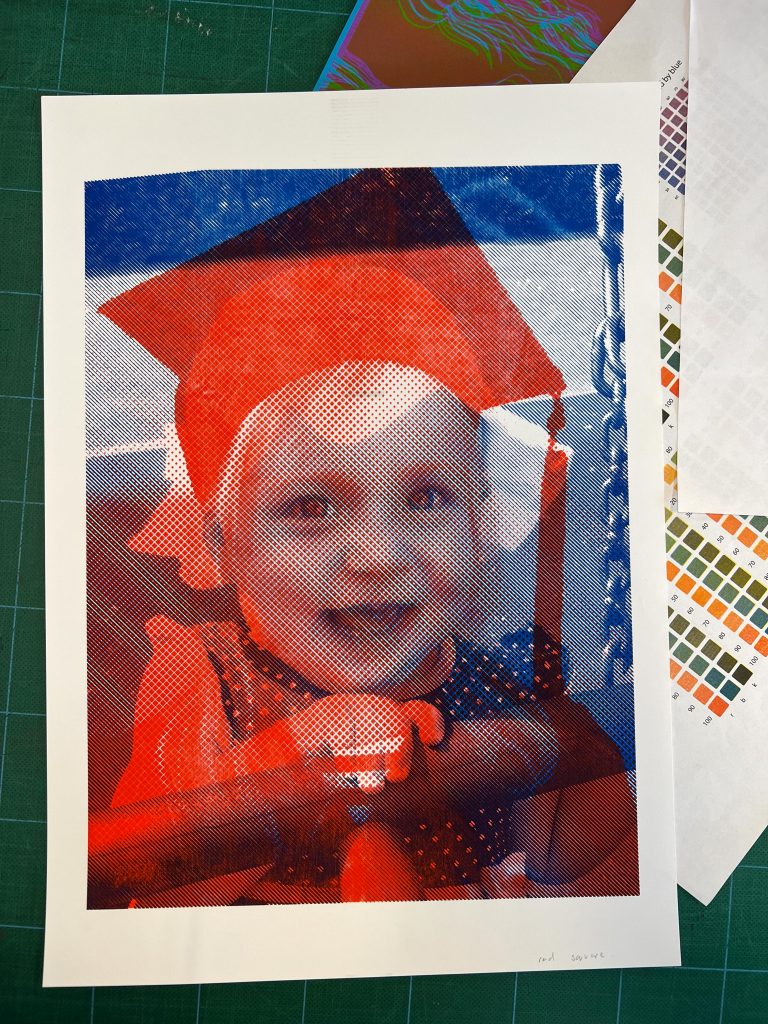
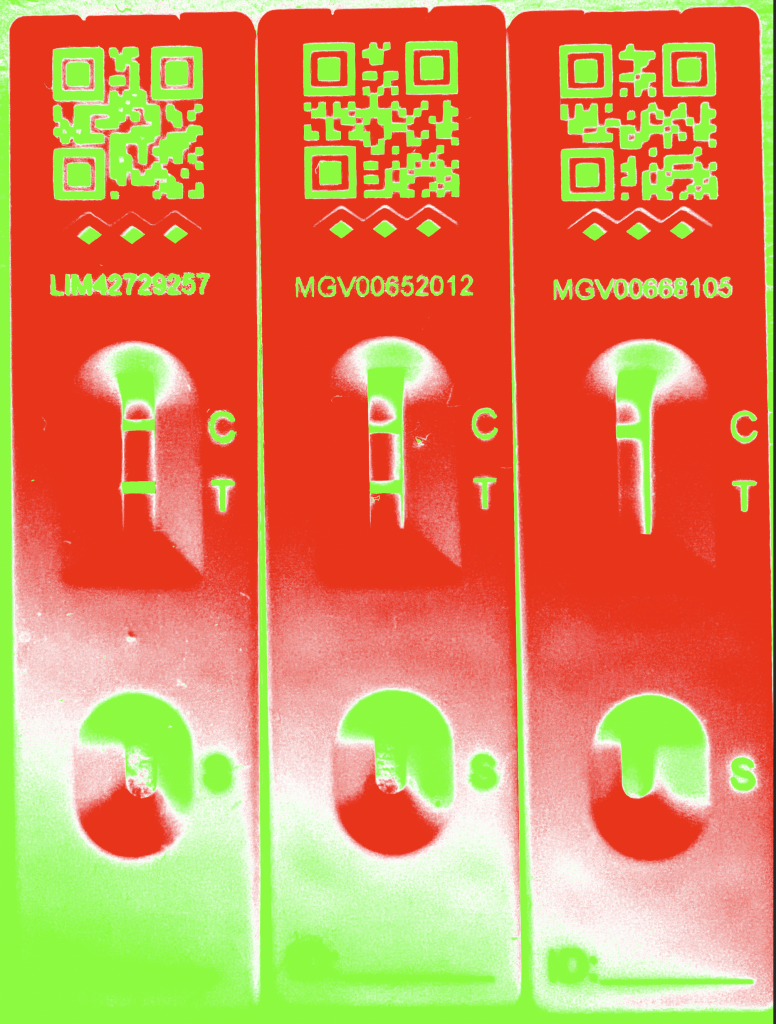
My final image ready to be output as two grayscale images.
It consists of two channels, one being red and the other fluro green. Each will be printed on paper as a grayscale picture and then transferred to the master making rollers.
From there it will be printed by the Risograph printer and hopefully end up with something that looks funky.
Trouble Steps
The part of getting the image out as two separate grayscale channel images is a mystery to me today so I will be asking Jim about this tomorrow as we go through the process.
Academic Coach Meeting
Once the Riso Printing Workshop had finished I headed to the MK Building foyer where I had a meeting with Lauren, my academic coach. I didn’t really have any pressing issues to talk to her about, as some of the other students she talks to often have.
I’m quite relaxed about stuff that happens and will just get on with things without suffering too much stress or anxiety so I just talk to her about little niggles that might crop up and we’ll also discuss how I’m enjoying uni and how I’m fitting in.
Part Timer
We started off having a chat about where I was up to, with being. a part time student it can be confusing for staff and other students too. I mentioned that there had been some afternoon sessions on a Friday that have been scheduled, when I’m not scheduled to be in but I stay anyway. It feels a little like the staff sometimes forget that the module I am studying this year should only be fixed sessions on a Tuesday afternoon and a Friday morning. If the friday afternoon is filled with a tutorial or group review it prevents me from hitting the darkrooms to continue the work I need to do.
It’s not the staff’s fault as it must be tricky to get everything scheduled to fit everyone’s calendars. We talked about how the group reviews were happening too regularly too with a review on a Tuesday afternoon and then again on a Friday afternoon but with so little time in between it was sometimes difficult to find something different to show or talk about. This was felt by the entire group so a couple of the class reps took it to the course leadership and this was resolved amicably with a slight change to a fortnightly session. Since this was sorted it seems that more of the group has time to get on with what they’re required to.
Fitting In
We chatted about how I felt I was fitting into the group and whilst it is different this year because I joined into a brand new group from my previous group I feel like I get on with almost everyone in the group and talk to most of my classmates. If anything, being on a part time course where each year of normal study takes me two years, allows me to build up more relationships with people. I still talk to the group I was a part of last year and my current group. I will move into the next year with the same group as this year but after they complete their second year and go into their final year I’ll be dropping back another group and meeting a whole other group of people.
I also talk to Level 6 students and those masters students who were level 6 last year, so I get to learn from all of these people and have twice as much time in the university as a full time student.
Proud
Lauren asked if I felt like I was a part of the University and I had to reply that yes I do feel like a part of the Uni of Wolverhampton, I’m proud to go to uni in the School Of Art with its history and prestigious reputation. I do like telling people I’m studying at Wolves and apart from my kids mocking me for it, they went/go to Leeds and Chester unis, so they try and wind me up but it’s just good old family fun. I offer to buy them a Uni Of Wolves hoodie each but they both turn their noses up as a bit of a giggle. I will get them one in my last year there..
Own Goals
The talk moved onto Goals and I was a bit concerned as I couldn’t remember what I’d set as a goal in our first meeting of this academic year. It is mentioned in an earlier post but I’d forgotten that I’d written it down there. The short term goal was to pick up some academic writing skills and though the work on the Exhibition Review this year for Alice and the harvard Referencing we did for hat I feel less anxious about academic writing now. We have an essay to complete before May so the essay structure and paragraph composition might be a challenge but I feel I’m able to cope. Lauren kindly offered to read through any work and offer advice if I need it.
The longer term goal was to understand more of what my practice is. I know I’m a photographer but what do I take photos of? It’s all a bit eclectic really with no discernible pattern although a quick look at my Instagram page and sketchbook reveals an interest in street, architecture, history and abstract photos. This is more my practice than the weaving experiments I’ve been doing this year so far so I guess I’m honing in on what it is that I find fascinating. This will continue throughout the rest of the year and we’ll check in at the end of the second semester to make sure everything is ok.
It was actually a nice chat with Lauren when I wasn’t expecting to talk about much and we had a good long chat about my experiences with the groups I’ve worked with, the actual work, and the staff and school. the goals conversation in particular helped to focus my mind again on what it is I’m looking at doing. I find goals a useful idea as it opens up your eyes to spot opportunities that come your way and offer a path to completing your goals. I’ve had some strange bits of fortune over the years through thinking like this so I’m not going to stop it now.
[…] your next shoot / practical experiment. For Task 1 I’ve already written the start of it in this post but will continue with what we did with Jim and I’ll use the Gibbs Reflective Cycle to […]