For my first session back after the Covid experience I was in the Studio/Darkroom space nice and early, ready to begin the process of developing three of my films #6 (Kodak Tri-X 400) and #6.5 & #7 (Ilford HP5 Plus) all used in my Canon A1 35mm SLR with a 50mm 1:1.8 Lens
First up was finding out about the paper we’d be using, Ilford Multigrade Resin Coated paper which is graded as 2 so the use of contrast filters may be used and larger than 2 filters increase contrast whilst lower than two filters decrease contrast.
With this bit of knowledge taken on board, (not fully understood until printing later on) it was time to take my three 35mm canisters into the loading room to get them onto the reels that would then be sealed in the light tight Paterson tanks, ready for Developer, Stop, Fix and Wash and Dry phases.
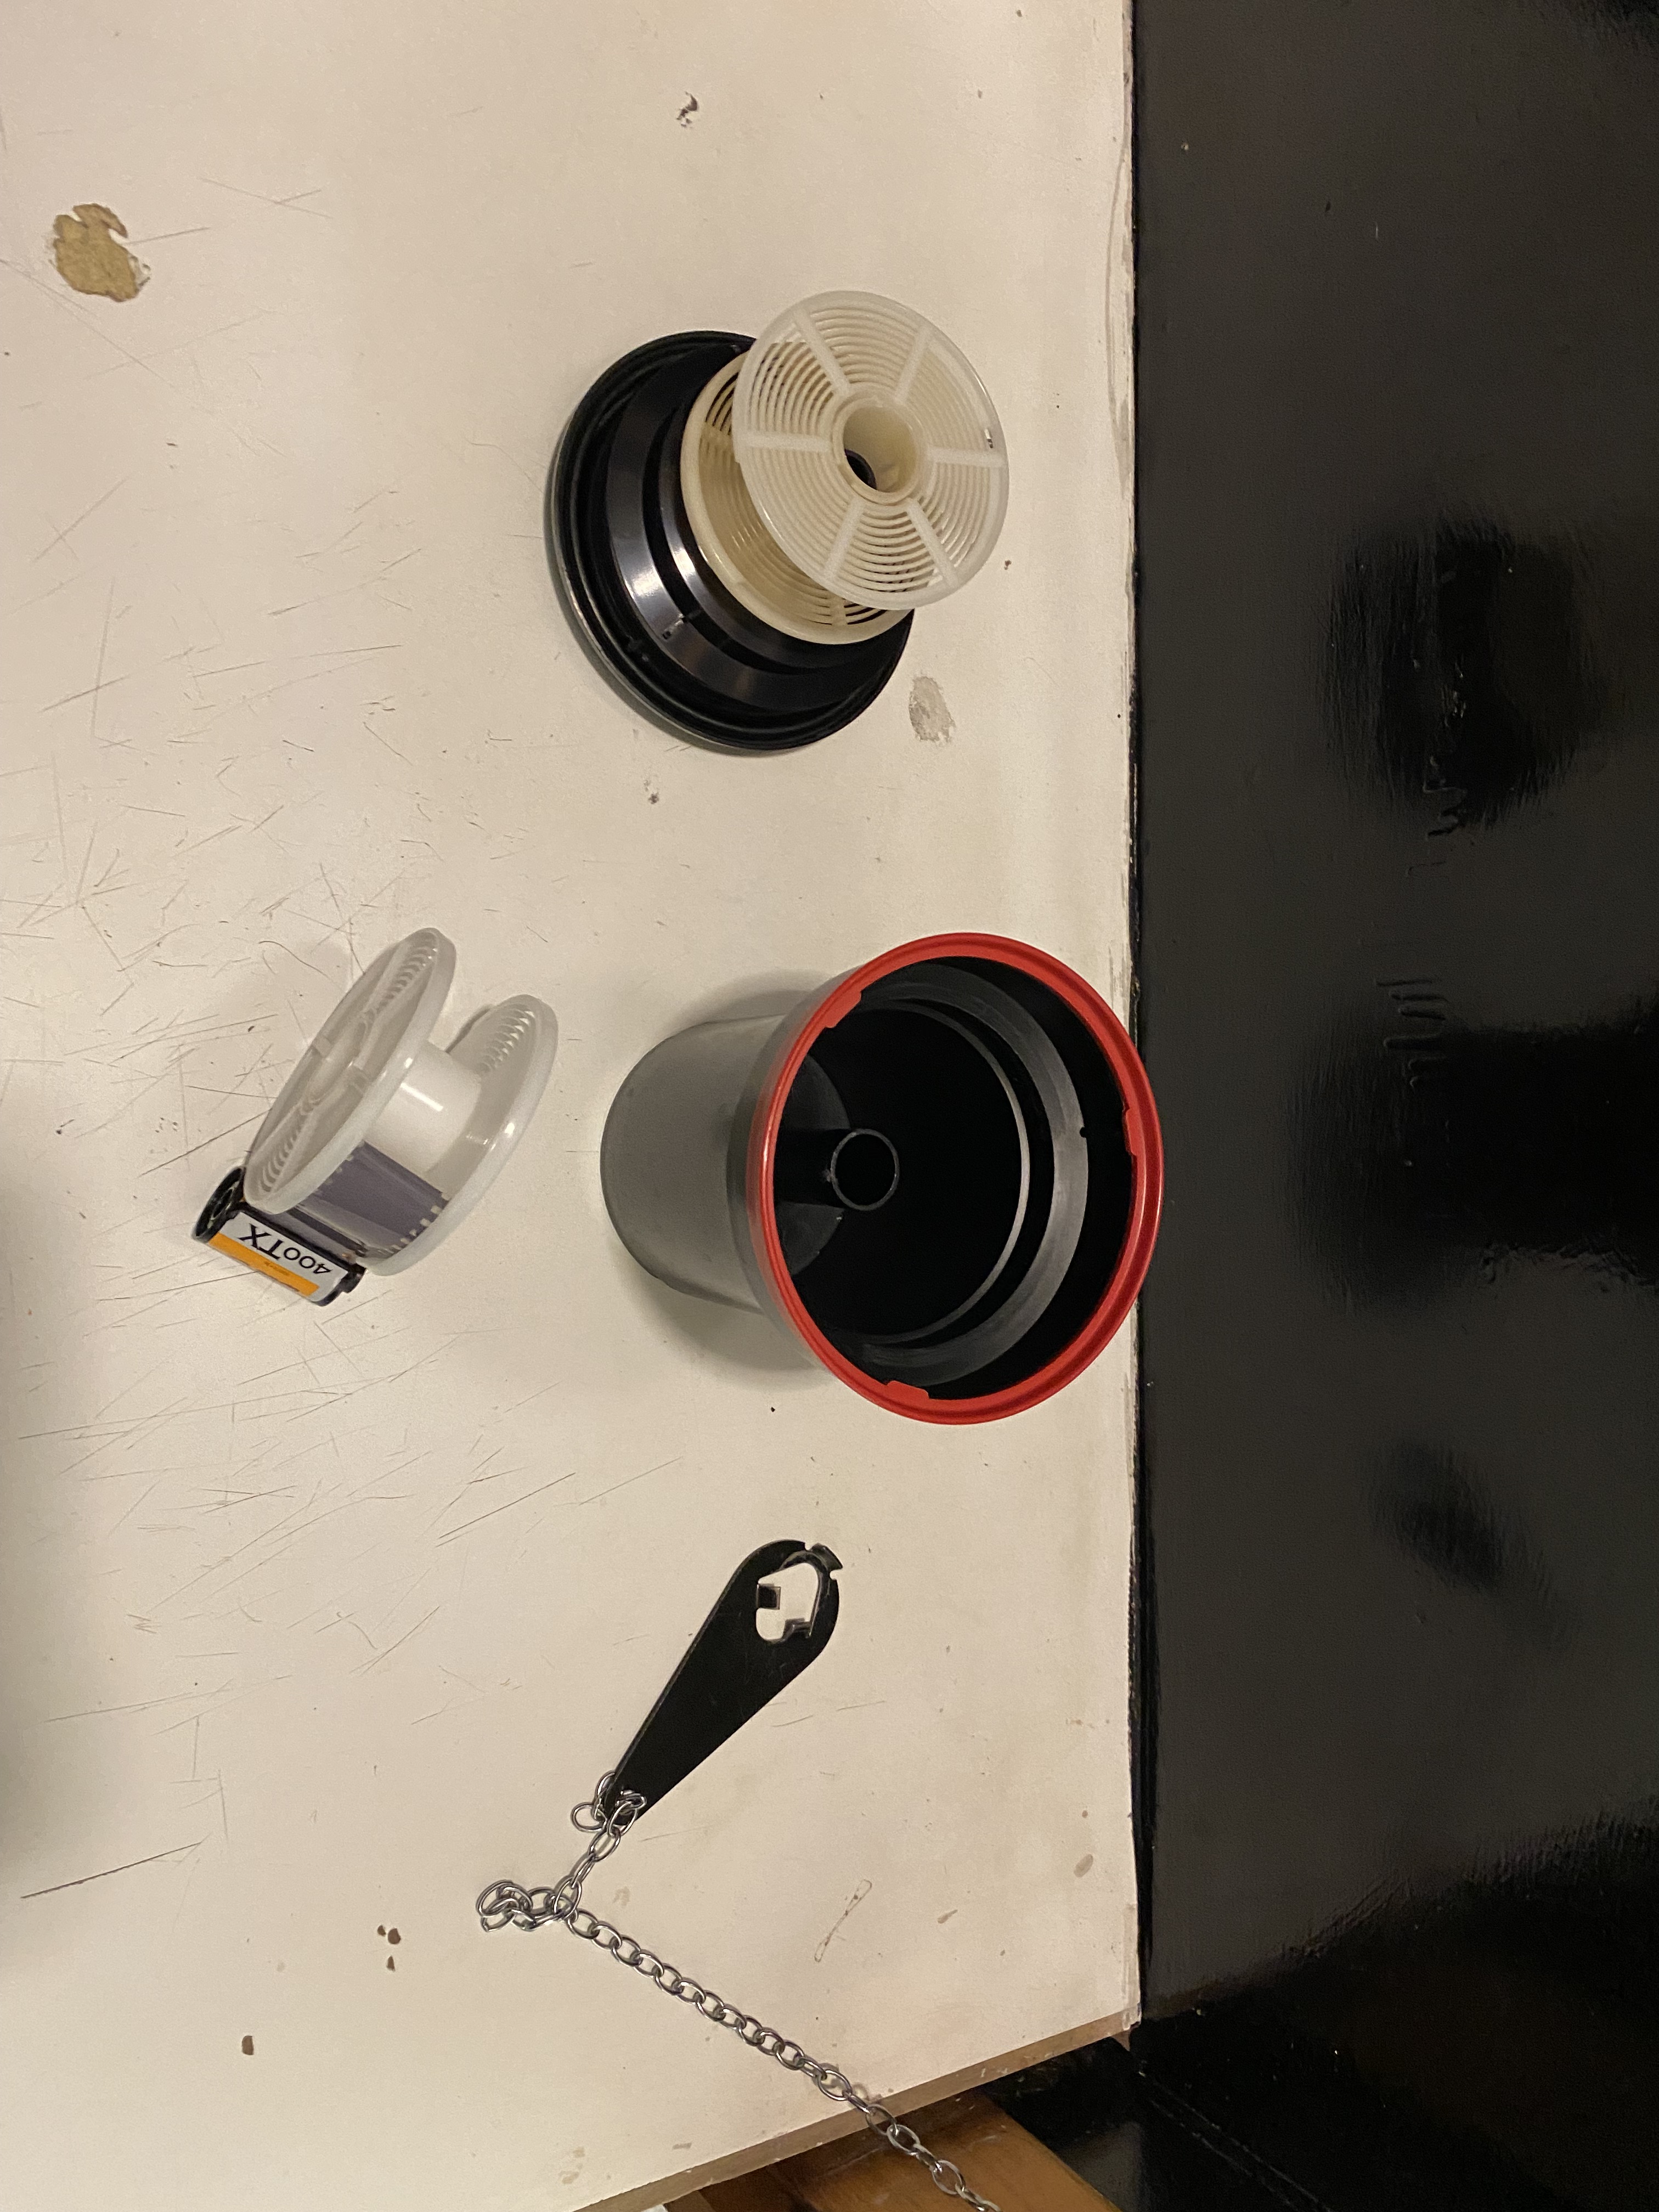
It was important to make sure that dry tanks and reels were used otherwise the film would be difficult to insert into the reels due to stiction. Dry tanks and the internals are kept prepared on the side so I picked one up and took it into the Loading Room. With the light still on I laid out the spindle, two reels, light tight top and the liquid tight lid on the workspace, along with some scissors, a film canister opener in case I needed it too.
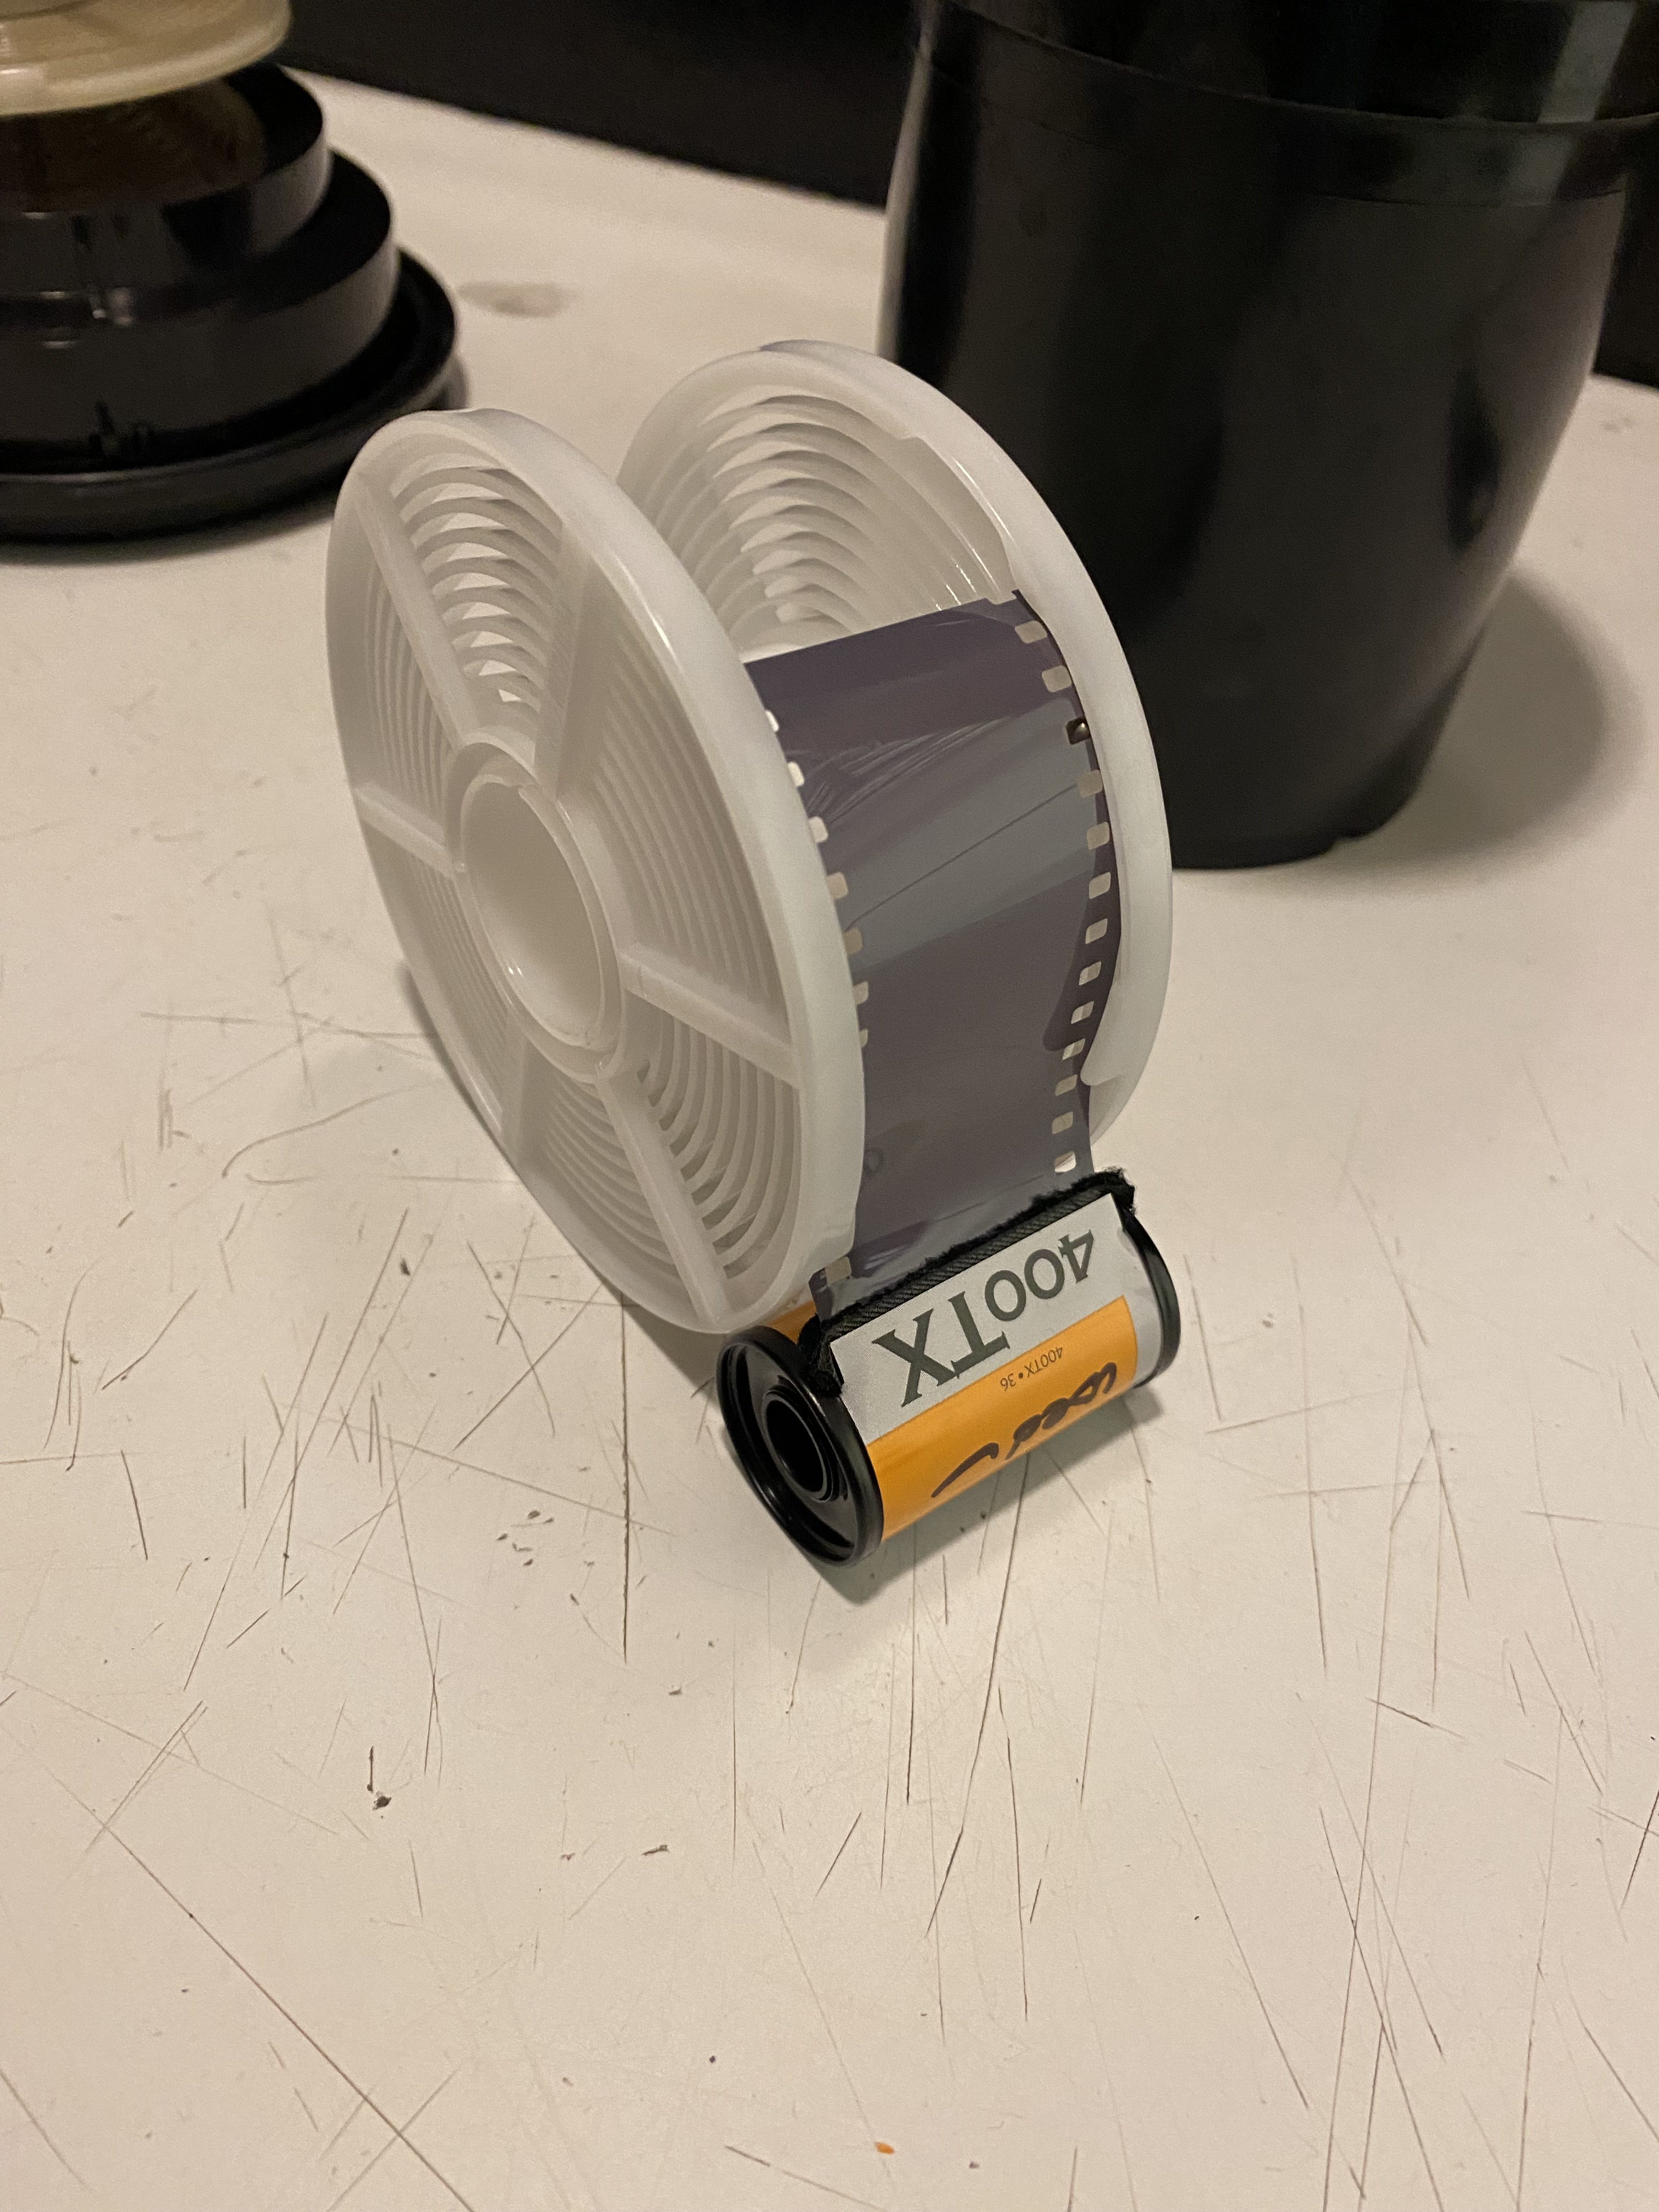
The leader that I’d previously retrieved had to be cut off square on the film so that it could run into the entry way on the reel. It slides in enough to go past the ball bearings in the runners of the reel and then with the lights out and in complete darkness, the reel is moved in a ratcheting motion until the film has completely exited the film canister and is in the spiral on the reel. This spiral keeps the film away from itself so that the chemistry can circulate and permeate all surfaces without some areas being covered by a touching piece of film.
Once the film is completely in the spiral the film canister can be separated by cuttin gthe film off just outside the canister before winding the film in so that it is not all on the outside edge of the reel.
With the two reels full of films (one was left to do afterwards) they were inserted onto the spindle and then placed in the Paterson tank and the light tight but not liquid tight lid was locked into place.
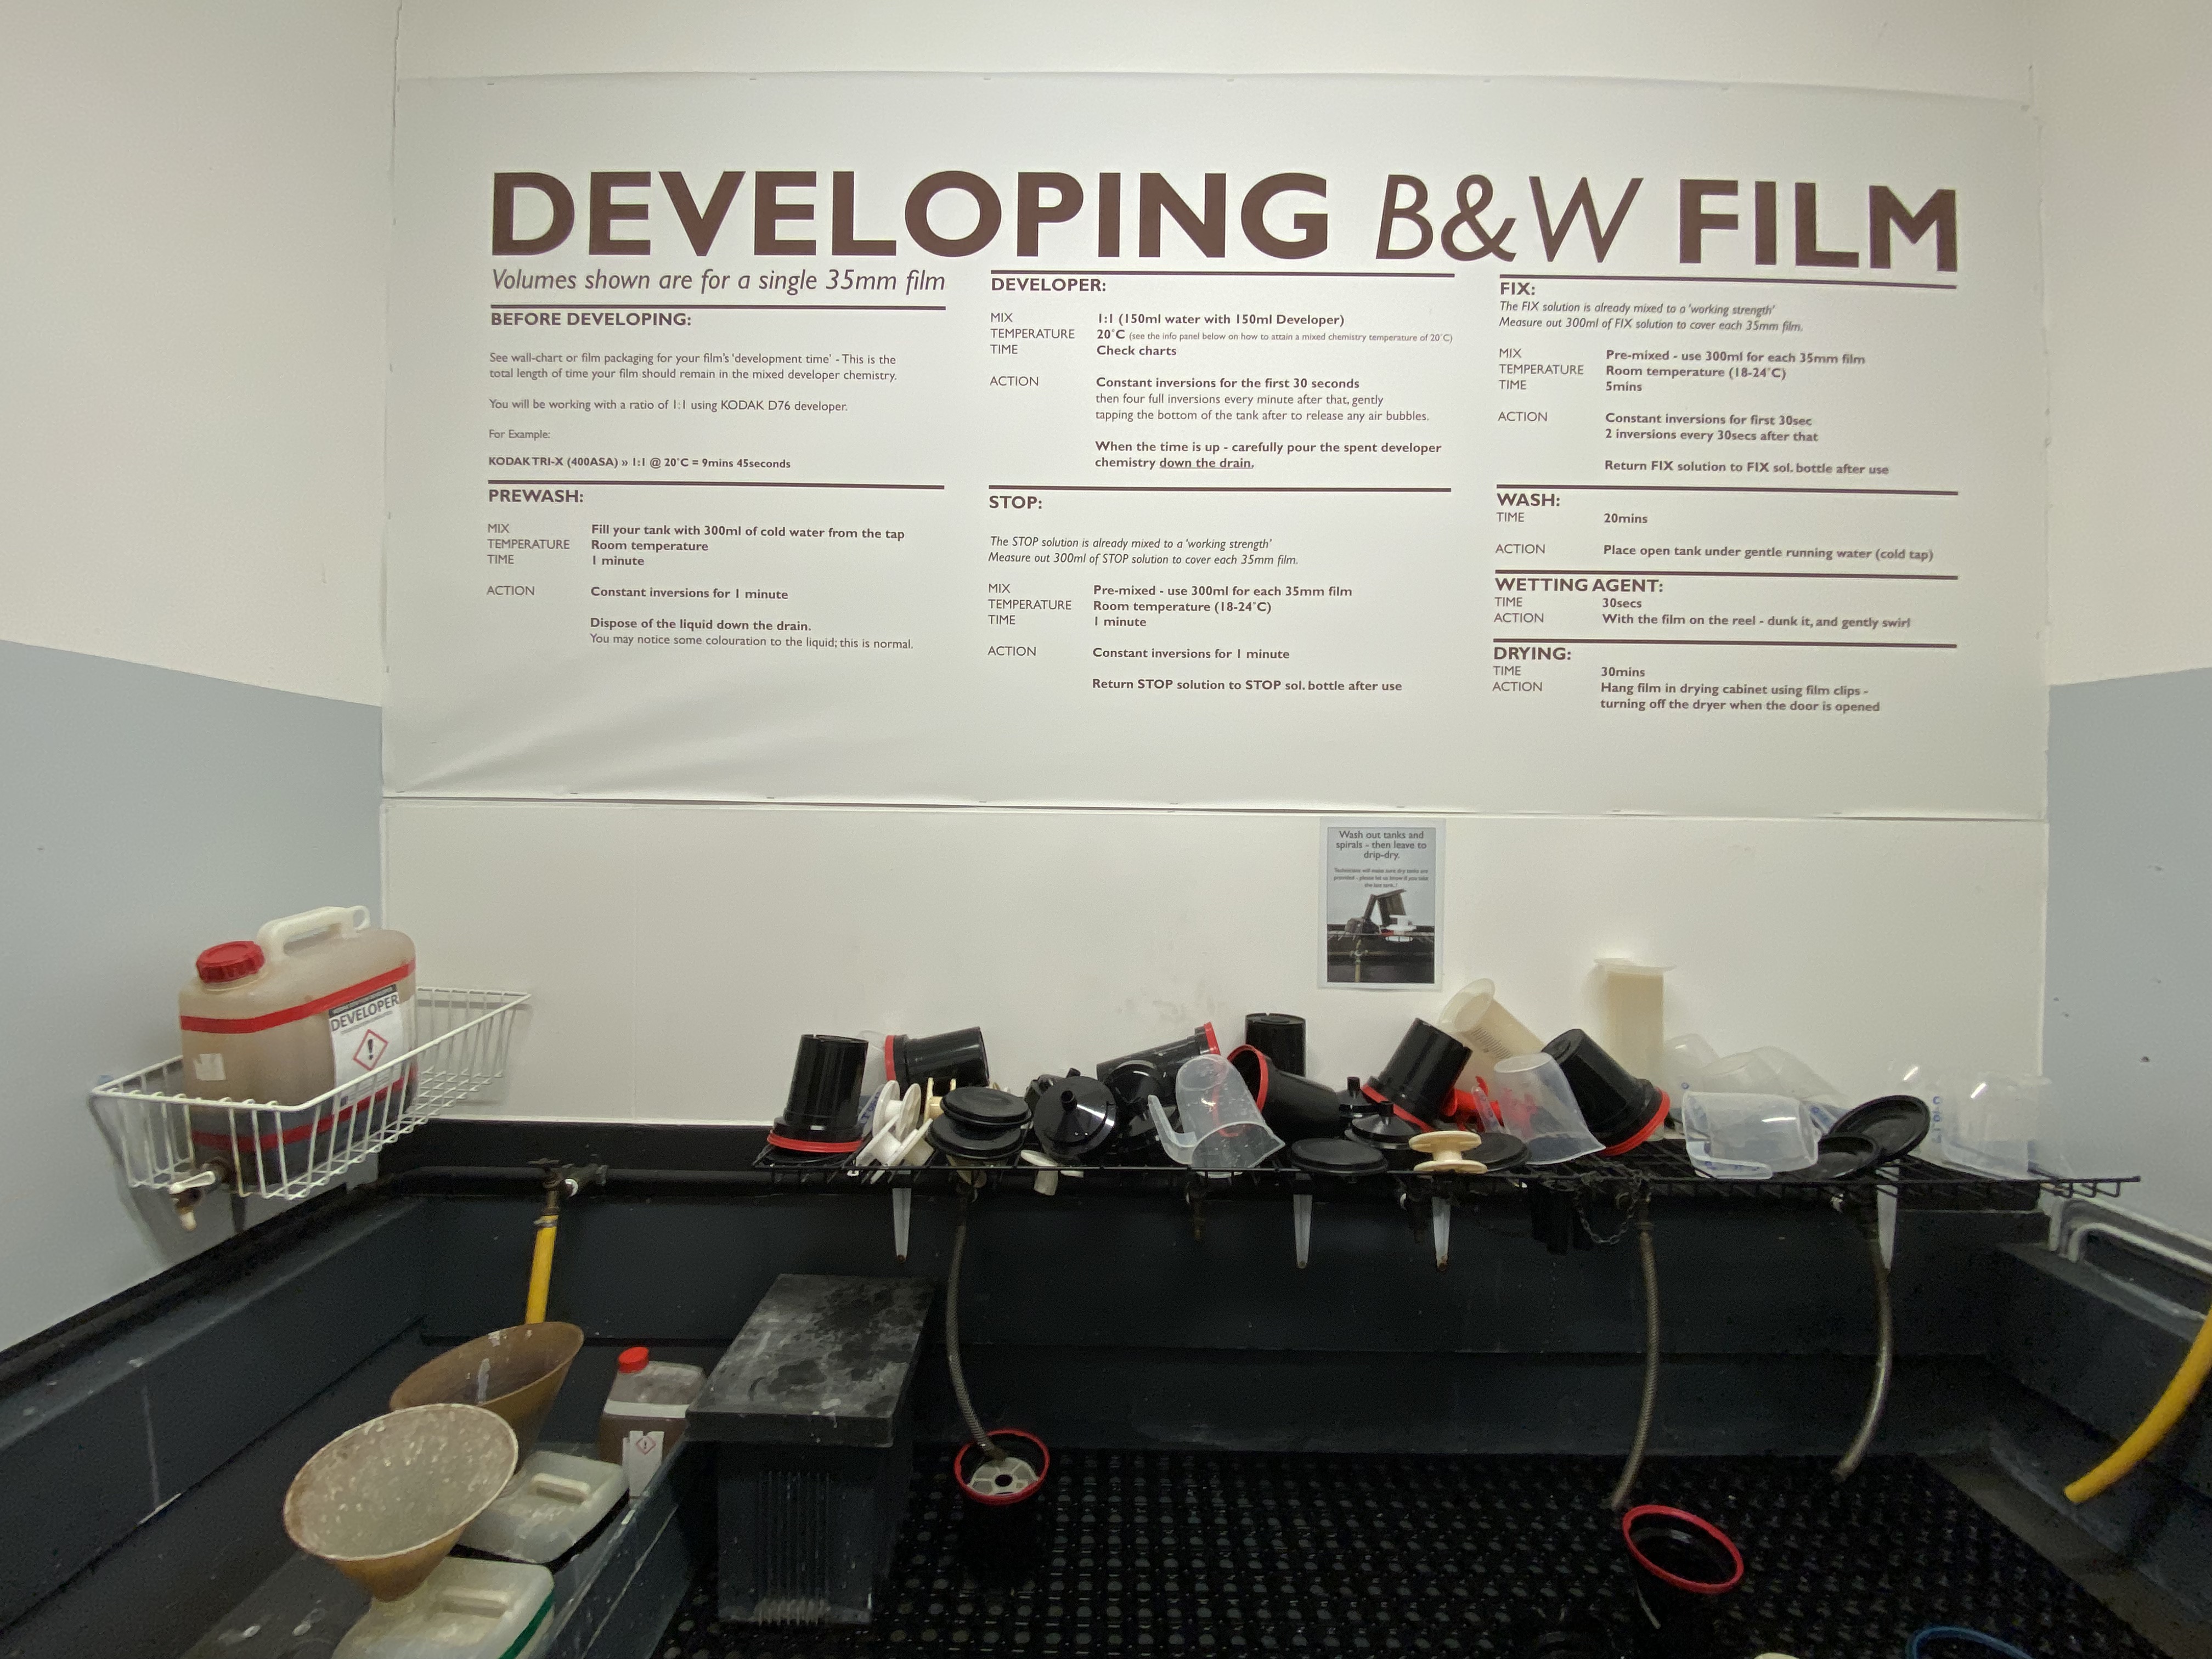
Mixing the correct volume of Developer with water for two films was ok but the temperature of 20°C needs to be ensured to produce normal repeatable results. The two films I did first were both Ilford HP5 Plus and as such needed 13 minutes in the developer so 600 ml of developer solution was inserted, the liquid tight top fastened and then the inversions commenced. Making sure to follow accurately the instructions that are very helpfully printed on the wall above the sink area.
After the 13 minutes the developer is tipped away before the Stop solution is poured into the tank and inversions constantly performed for one minute before being returned to the Stop bottle for reuse.
Matt suggested that we didn’t need to use the Stop solution and to just leave water running through the tank for five minutes, I’ve seen other people suggest the same too so and it works for them so it must be good. The Stop Solution’s job is to stop the developer from acting upon the film/negatives and causing the Silver Halide crystals to change structure.
The next job is to pour in Fix solution and this needs 7.5 minutes in the tank. The job of the Fixer is to remove the remaining Silver Halide that hasn’t yet been affected by the light and the developer. After this step the tank is now safe to open as the film won’t be susceptible to further exposure.
The penultimate wet job to carry out was the Wash which needs 20 mins under flowing water, and this removes any chemicals that may still be present in the tank with the films.
Once the wash has been completed, you can remove the reels from the tanks and submerge them in the Wetting Agent tank which contains a detergent that lowers the surface tension of the remaining water and causes it to leave the films surface. Water needs to be removed to avoid any marks that might occur from drying water droplets.
Taking the film from the Wetting Agent tank you can then unroll it from the reel and using a squeegee or two fingers run the full length of the film to remove as much water as possible.
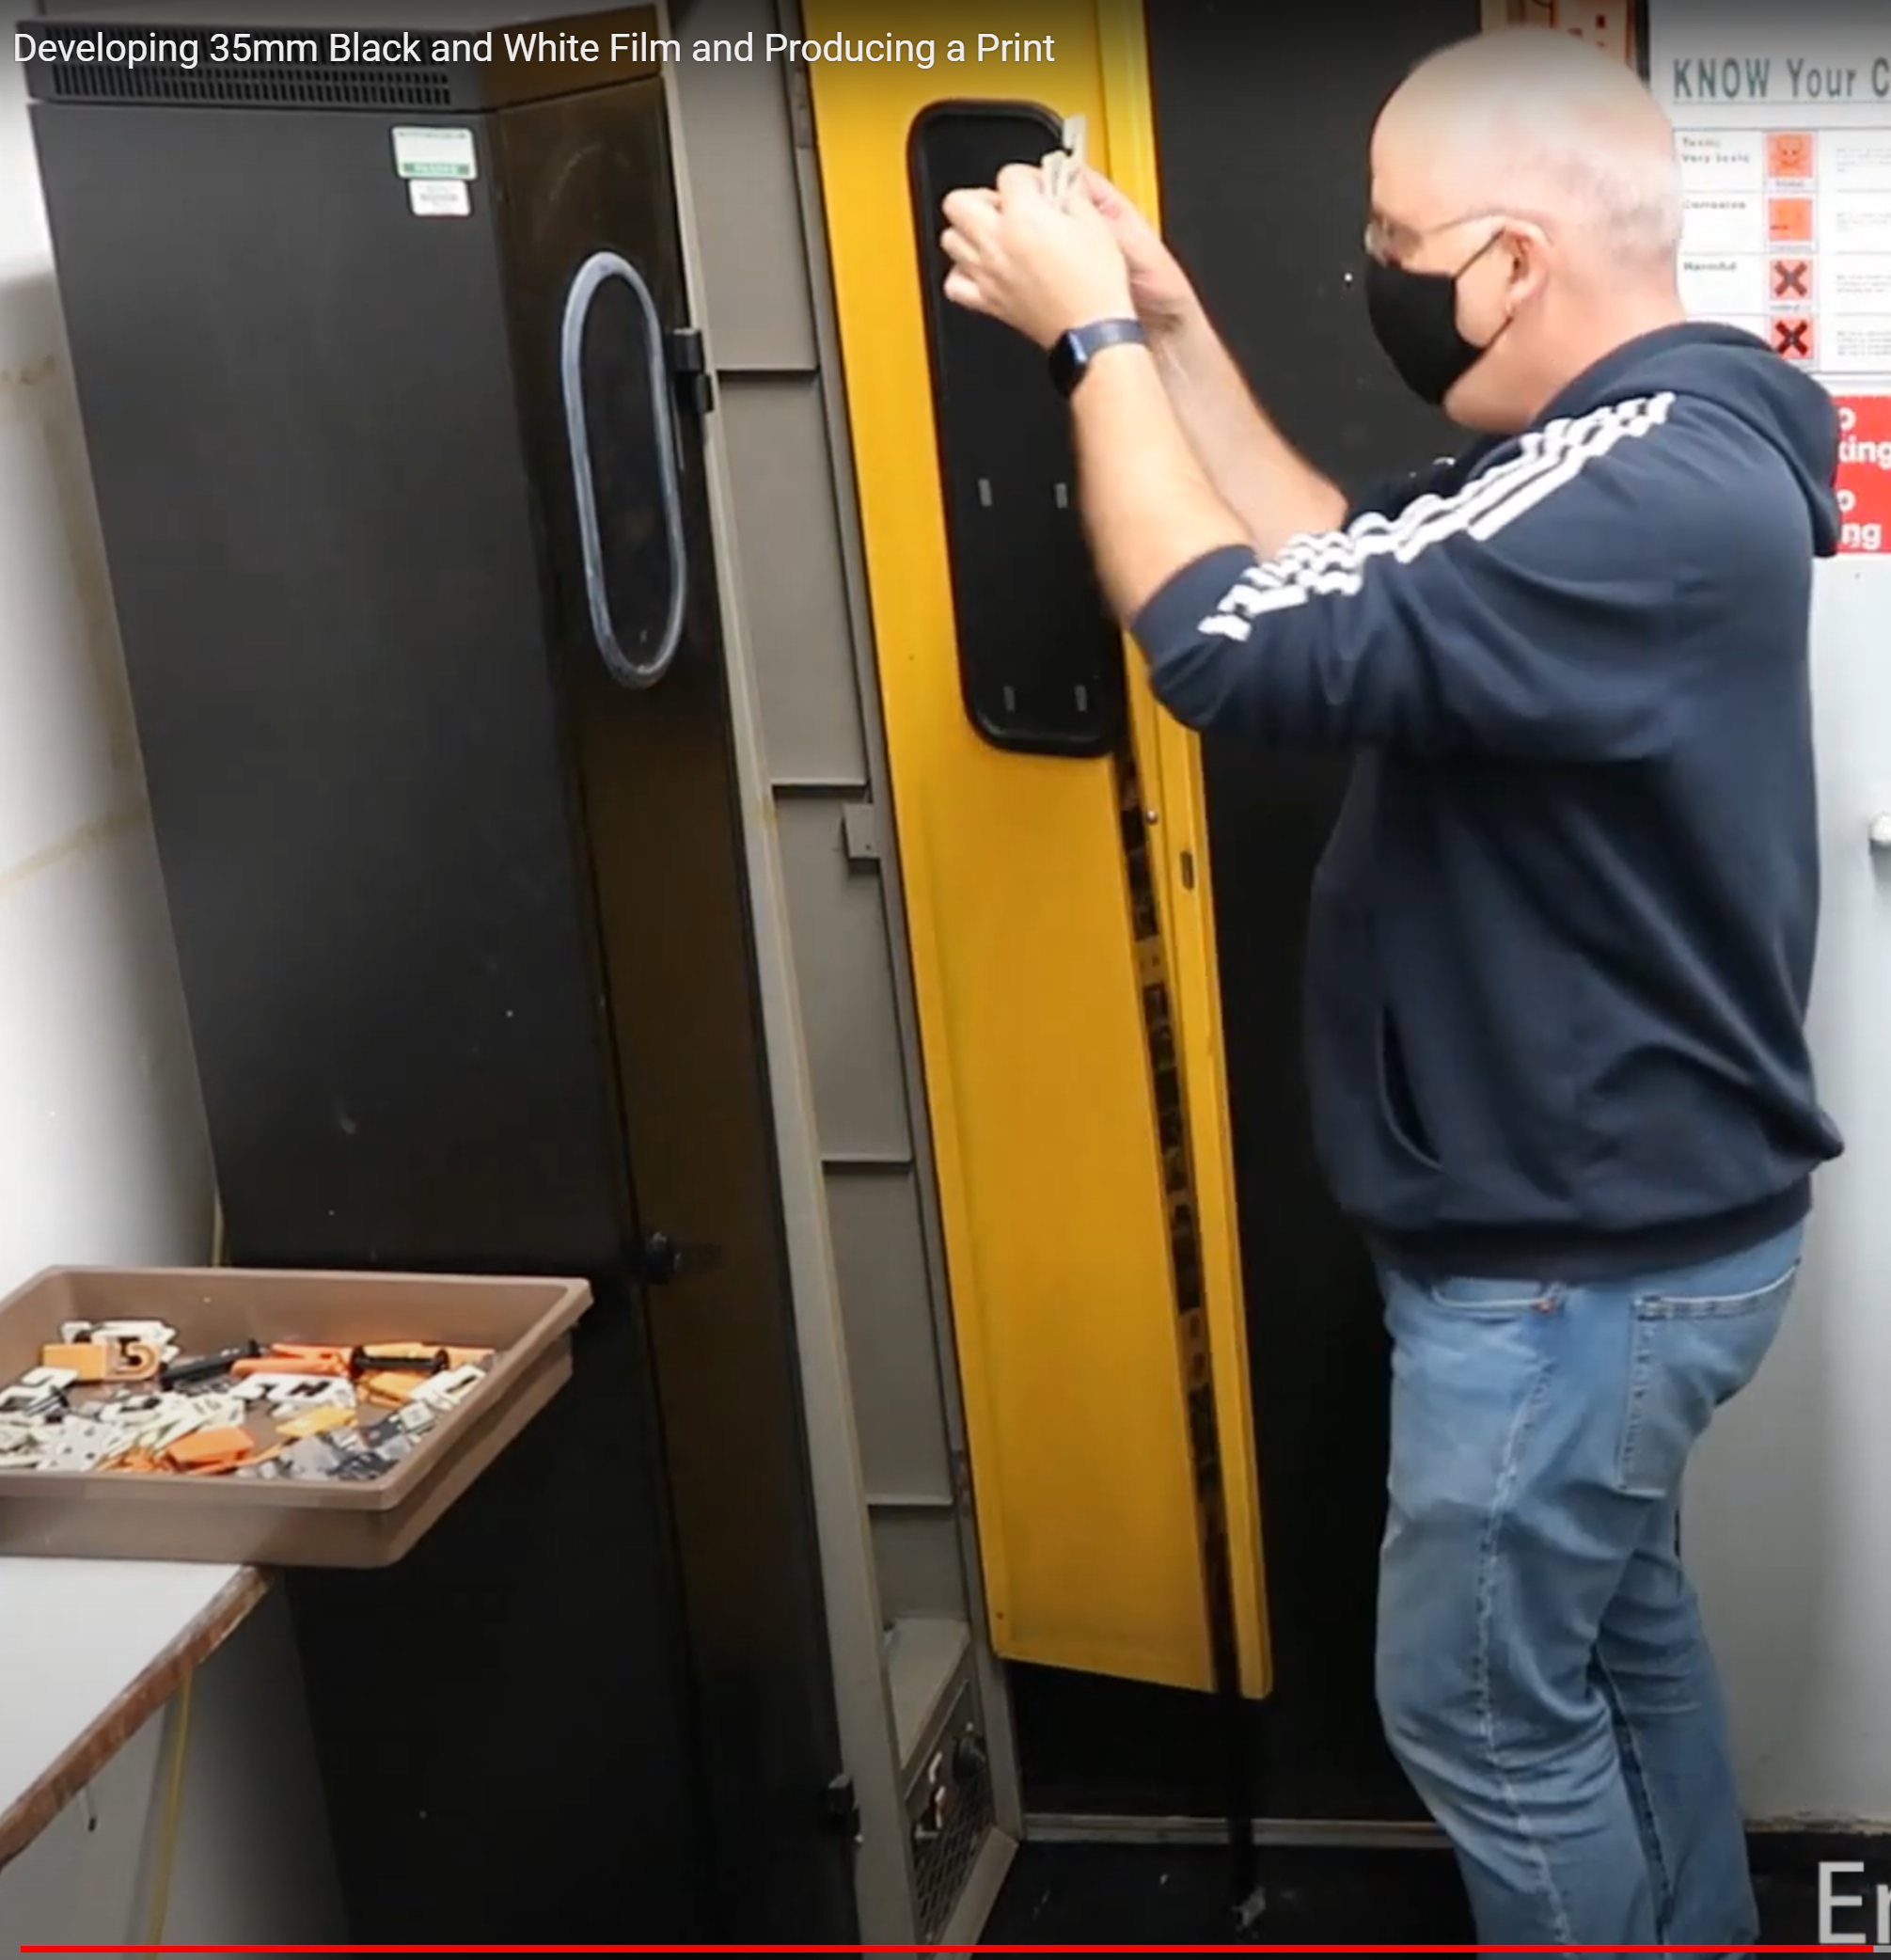
The final step is not a wet step as a hook is attached to the top of the film and a weight attached to the bottom end, then it’s hung up to dry in the dryer. Care is taken to ensure it’s not on when the door is opened or dust may get sucked into the cabinet and wind up on the film. Once this has had 30 mins in the dryer the film can be removed, weights removed and then cut into strips suitable to fit your negative storage solution.
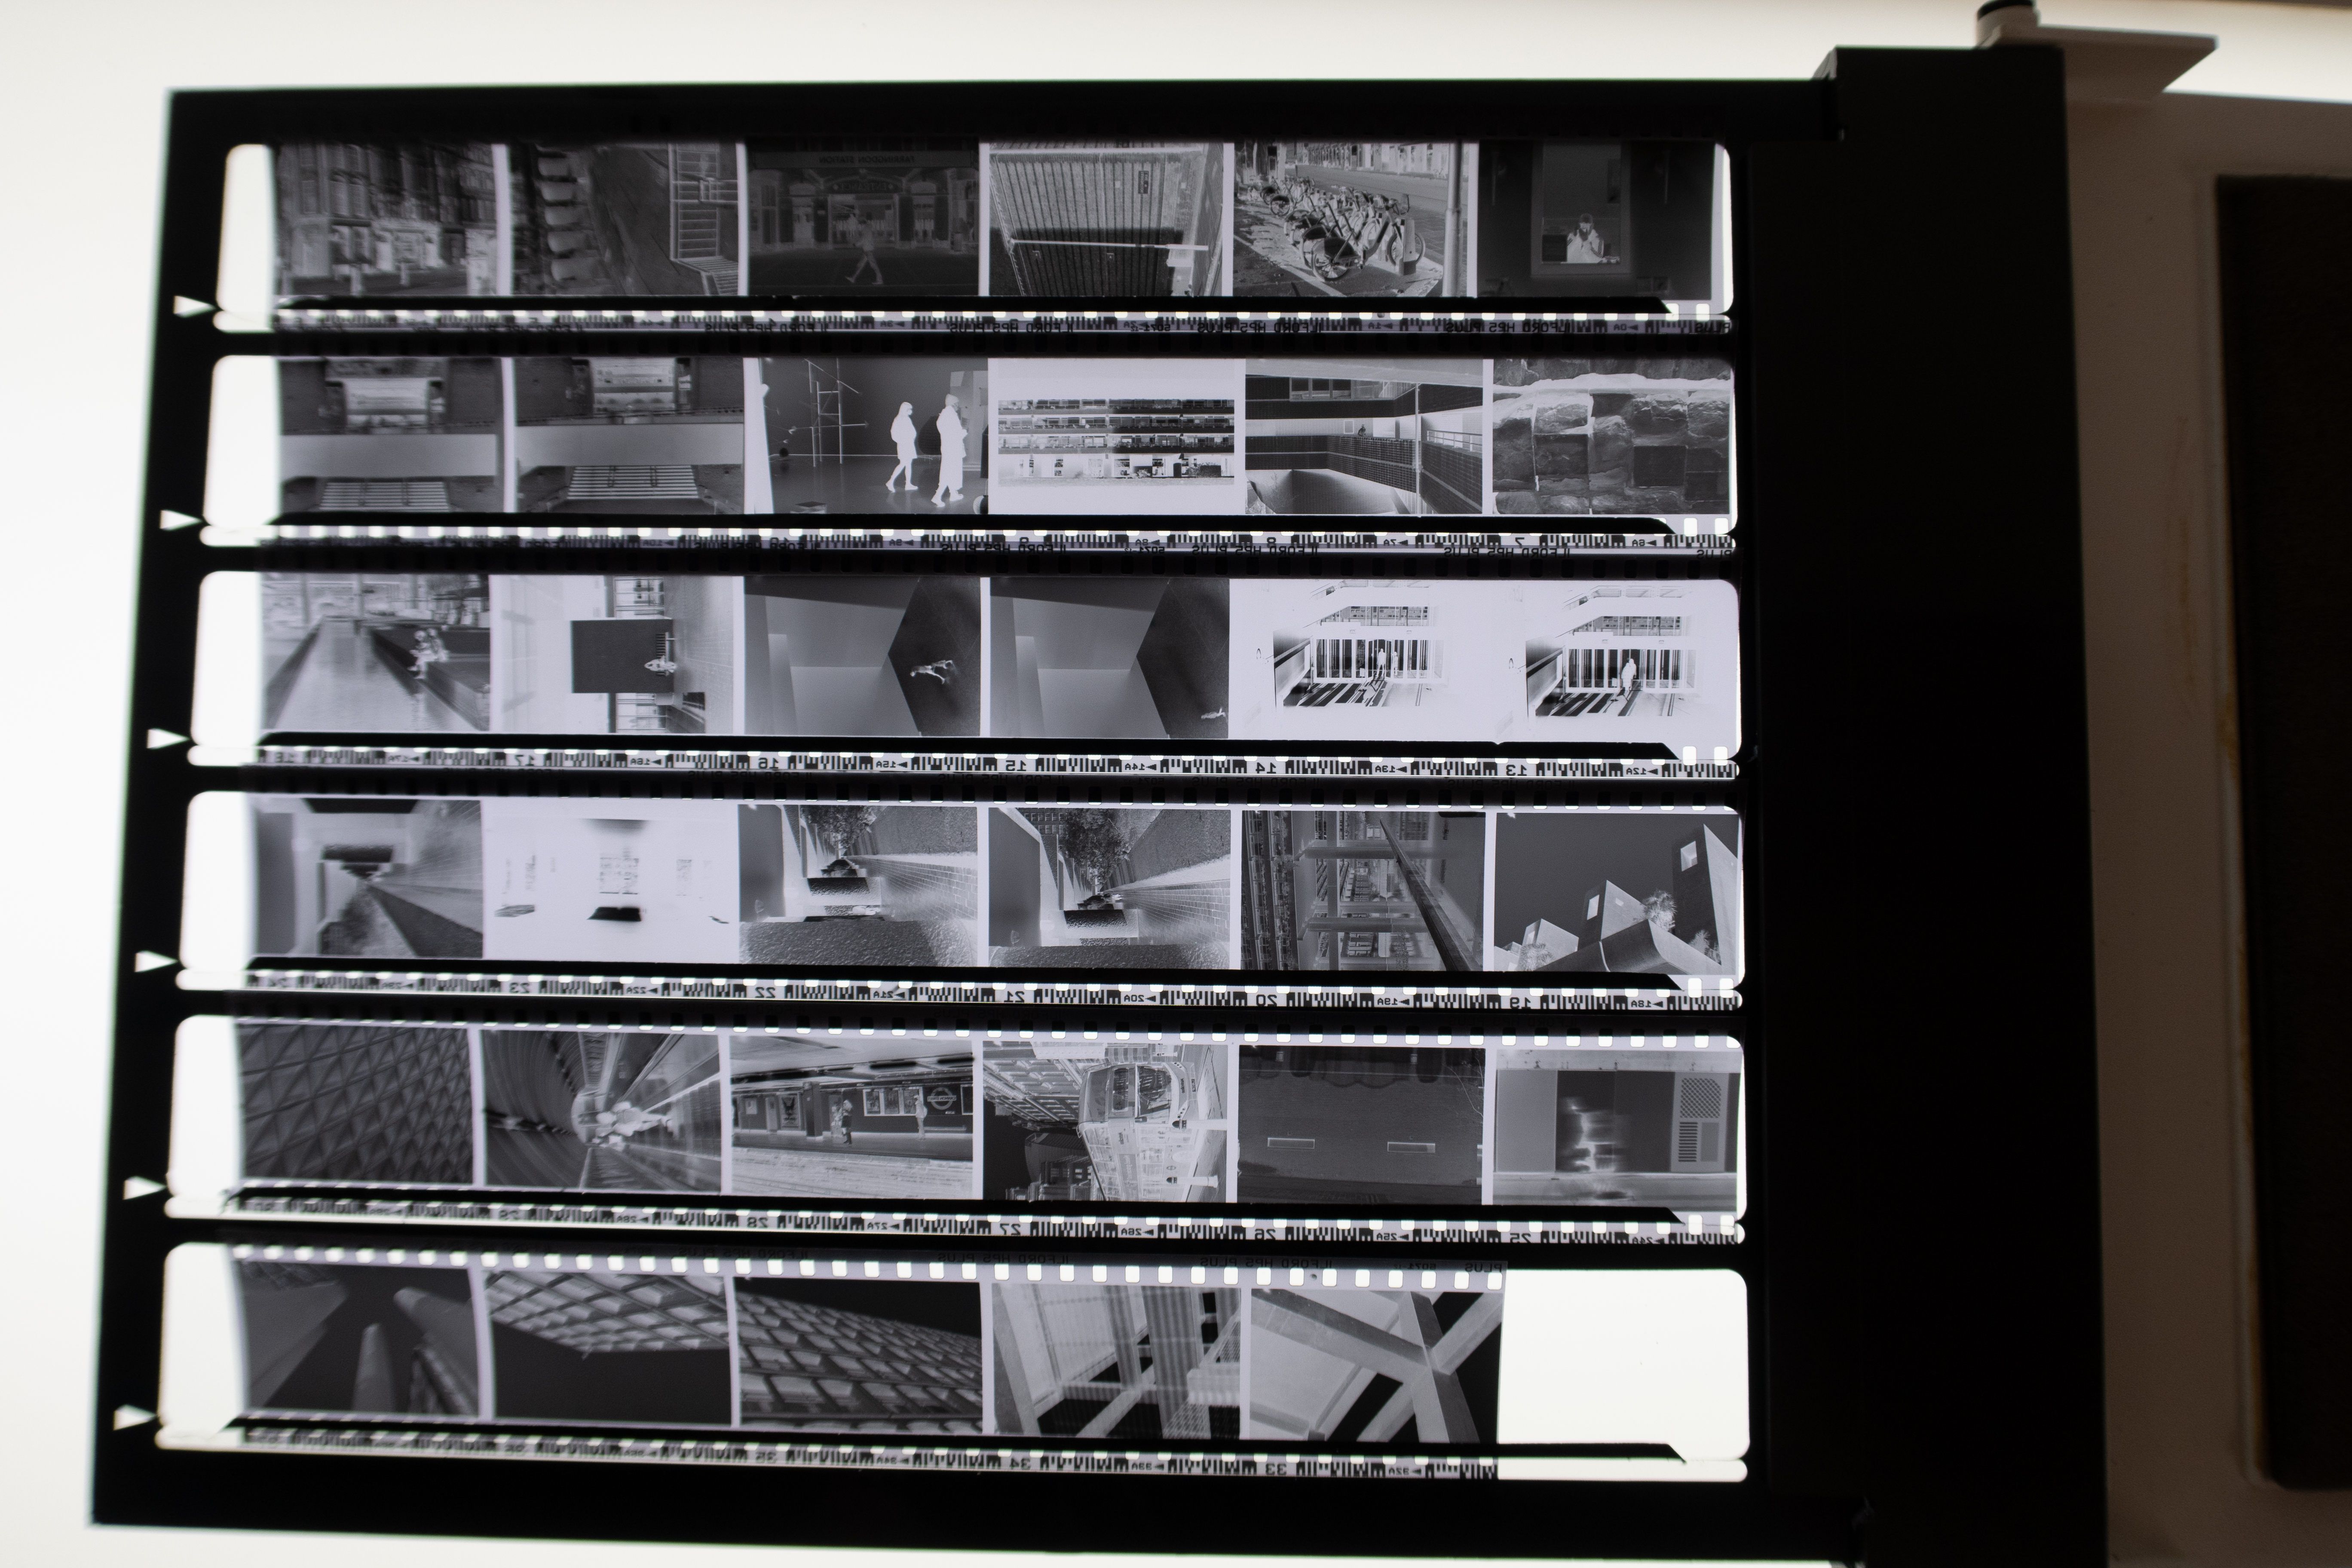
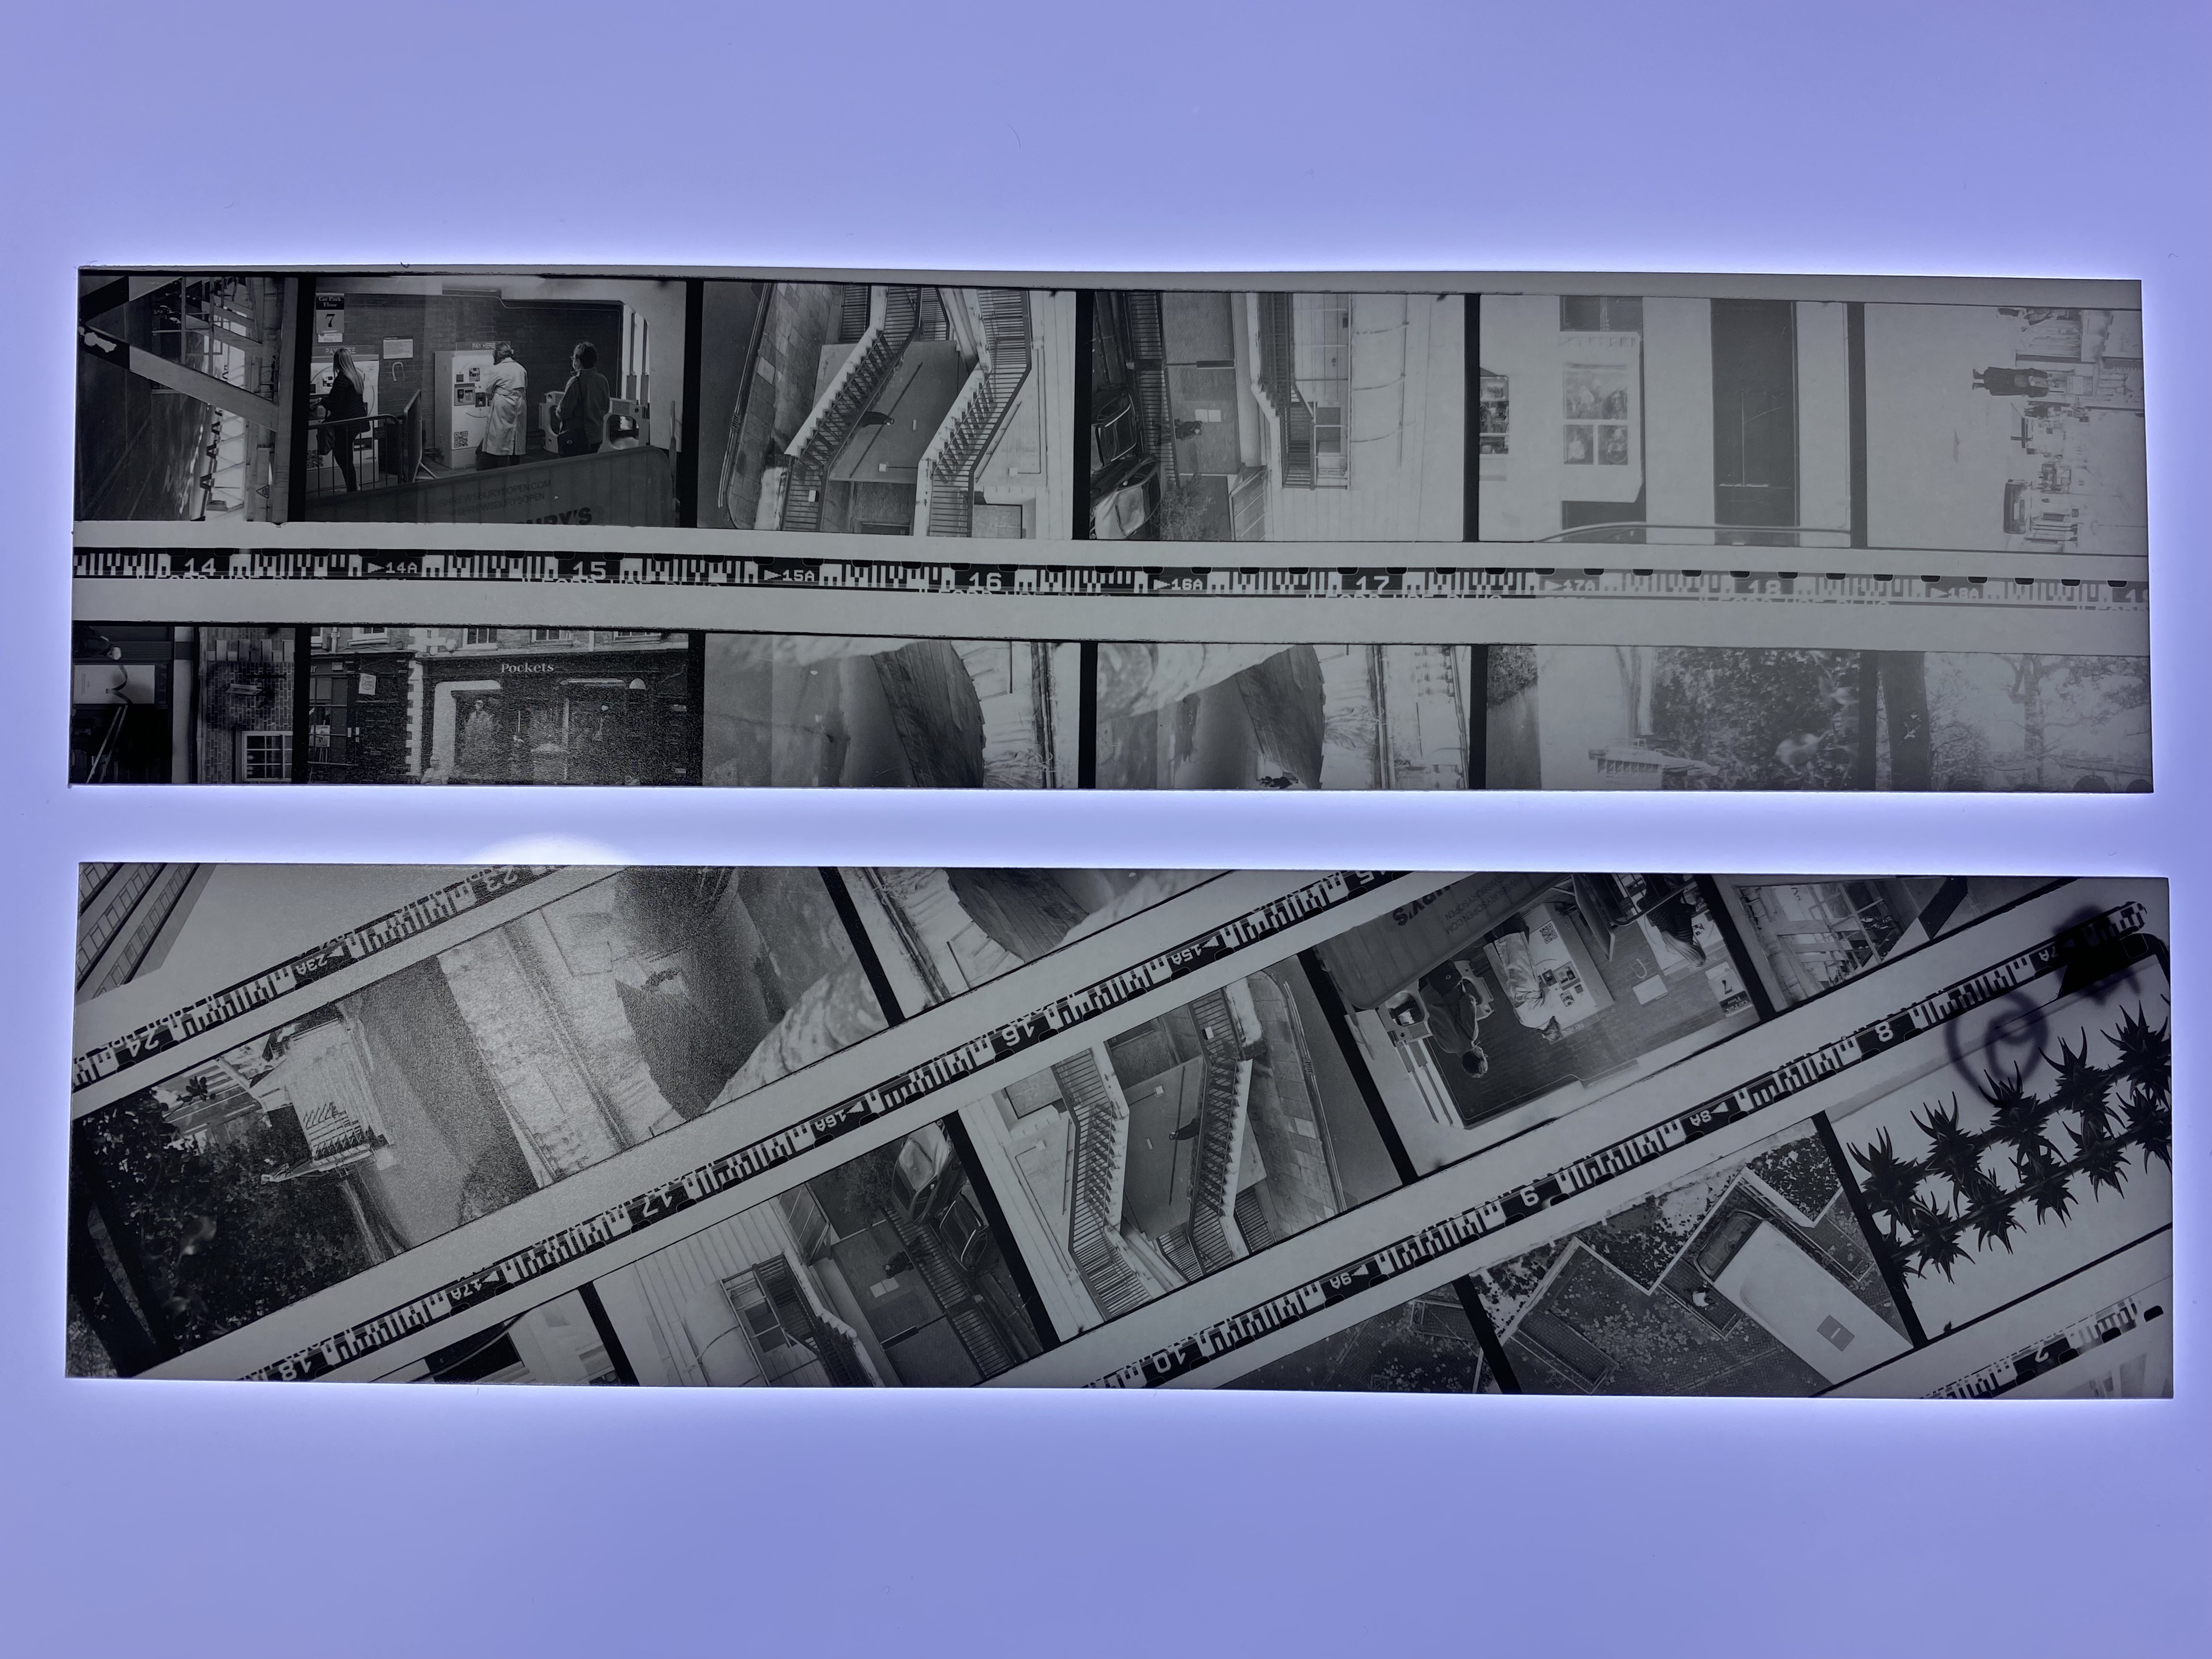
Cutting into strips of 6 frames of 35mm allows it to fit exactly in the Contact Sheet Printer tool and also fits my Kenro Neg storage sleeves.
Then it’s time to jump into the Darkroom for making the prints!!
A film of the whole process is embedded below but can be found on my youtube channel too.
The next and most exciting part of the process is creating the prints from the negatives we’ve just created.
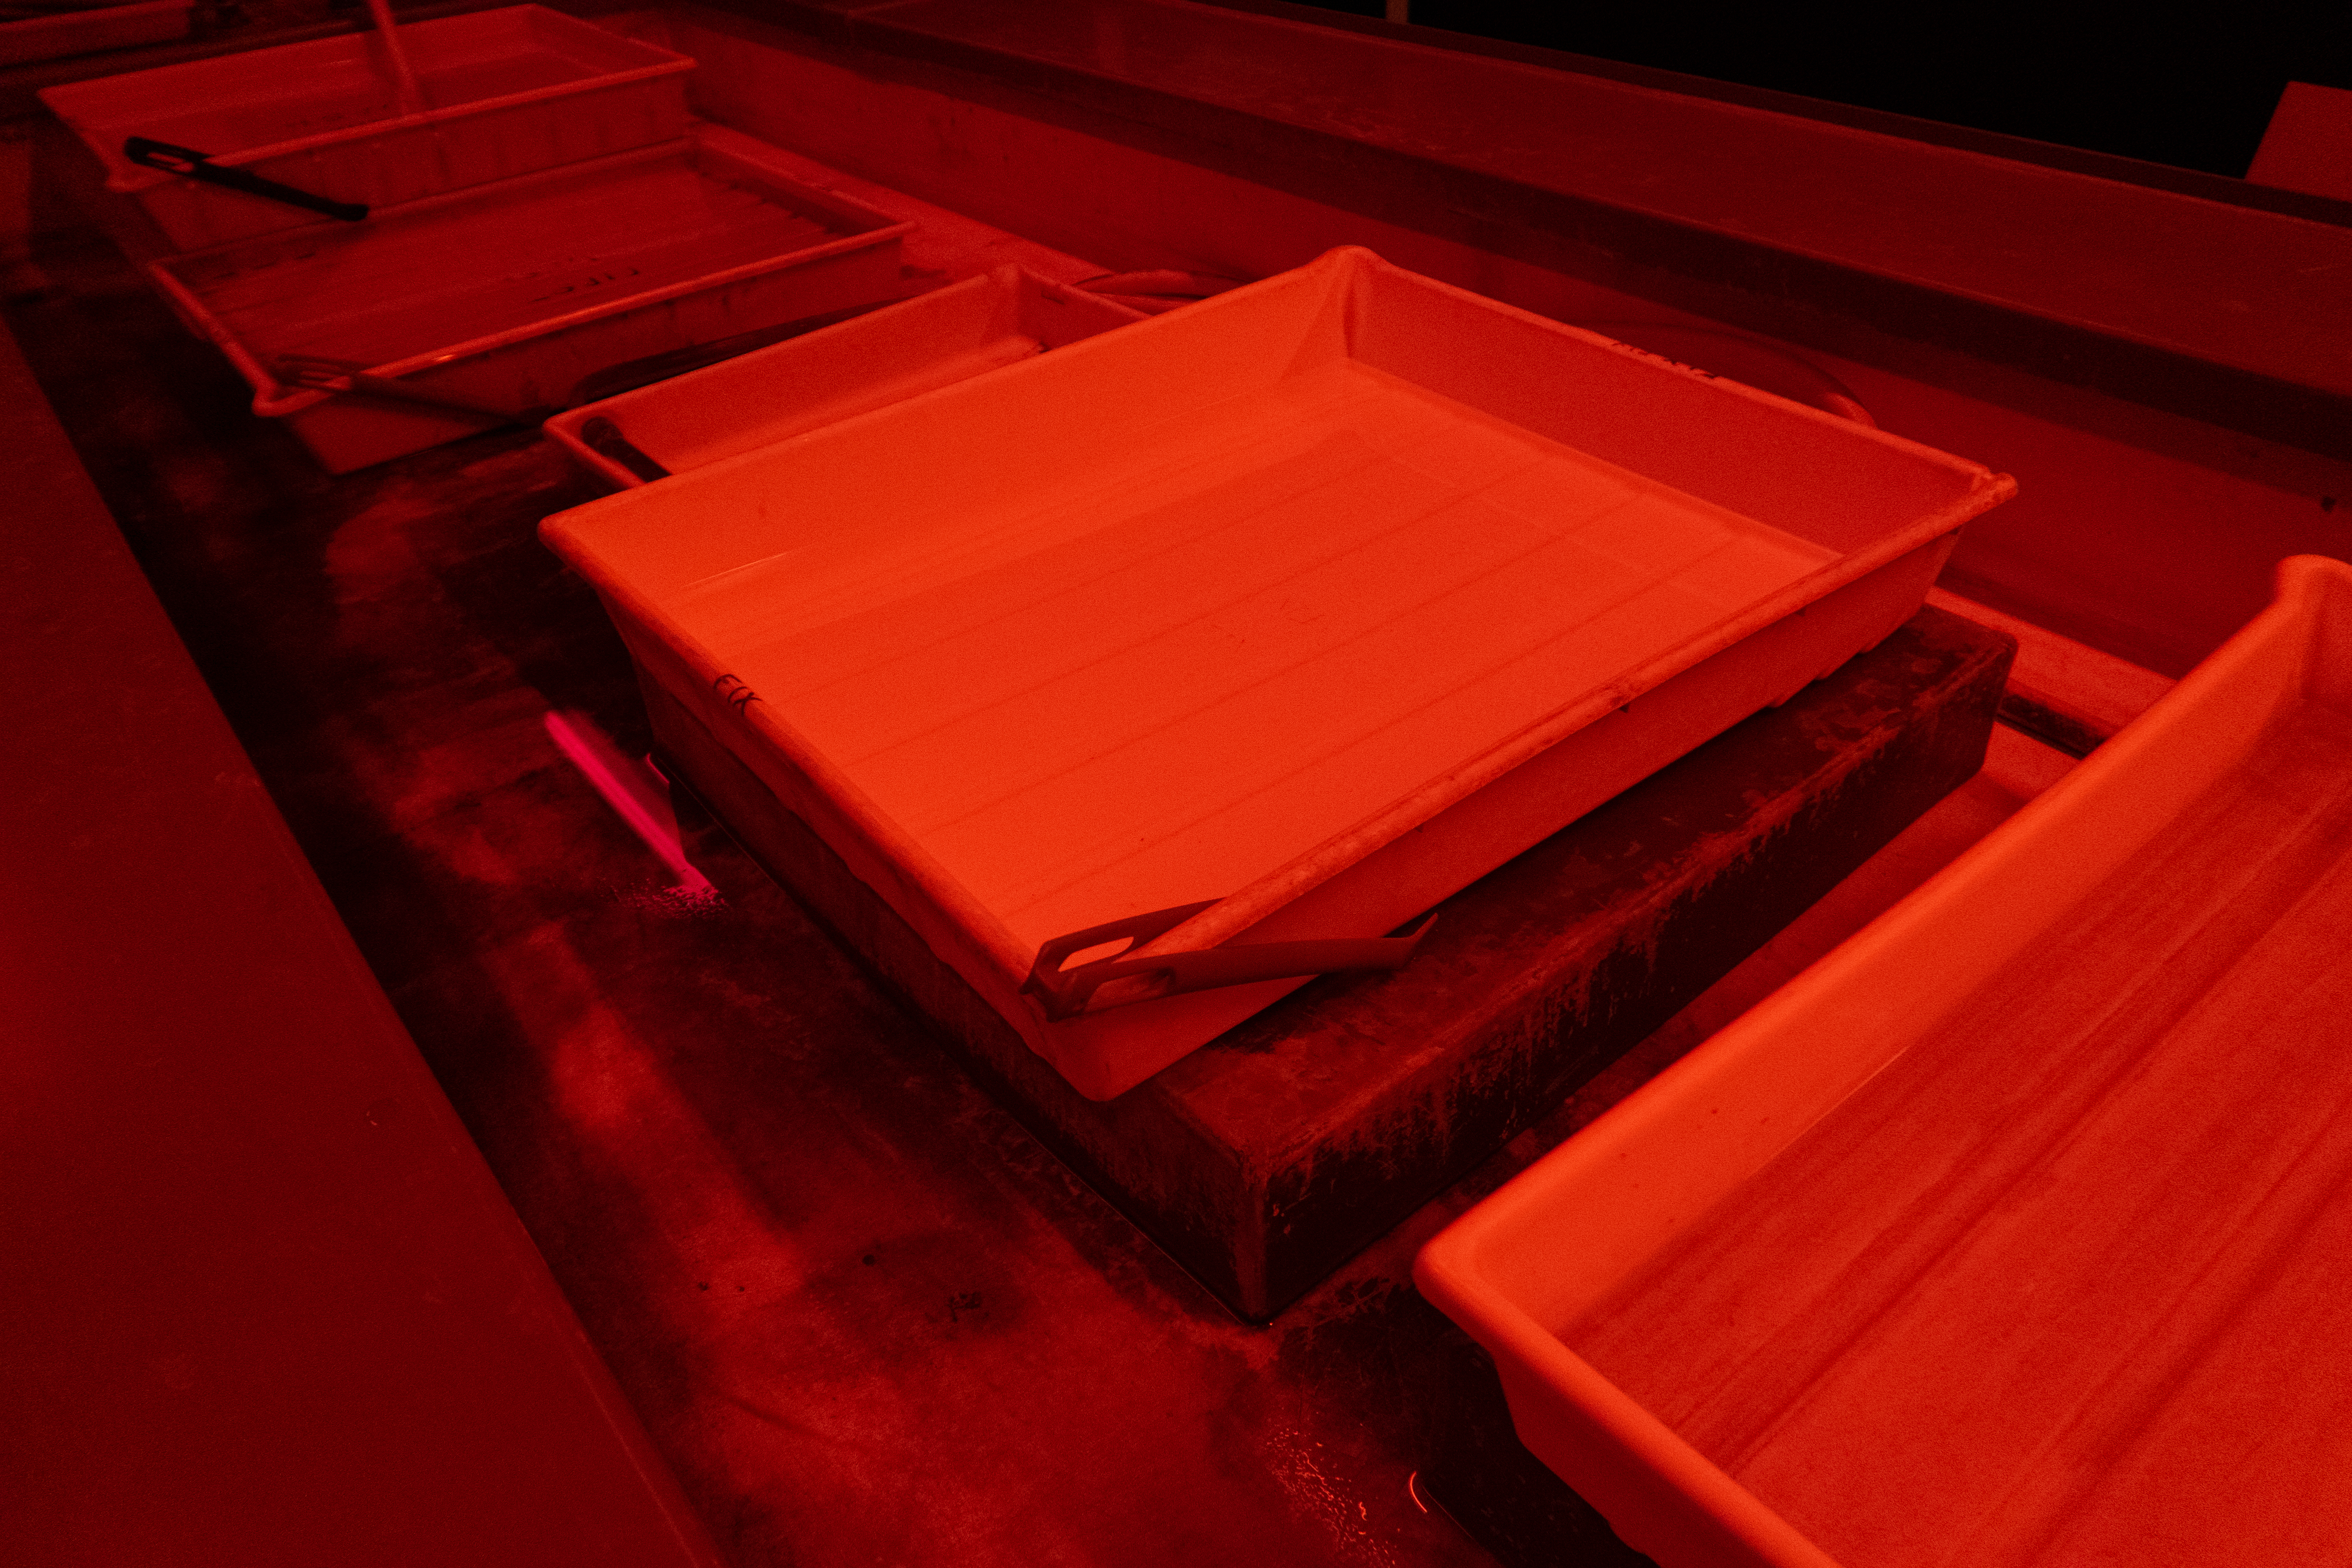
Into the Darkroom and this time as we’re using Black & White sensitive paper we can use the red safelights and see exactly what we’re doing at all times. Not like the colour printing process at all when all darkroom work was needing to be done in complete darkness. I like B&W Printing more due to the fact that you can actually see the paper you’re cutting on the guillotine and whether you’ve got the emulsion side facing up without having to do it by feel.

The process is pretty much what we do with the film in the start of this post but first we are projecting a light from the Enlarger through the negative onto some Ilford Multigrade Resin Coated paper for a determined period of time before moving it into the Developer dish and giving it some light rocking to keep the Dev fluid going over the paper for the single minute as prescribed by the paper manufacturer.
The time determined to be the correct length of exposure time is arrived at from experimentation after printing test strips at various times to see which is most appropriate.
Again the information we need to remember is printed on the wall with a very handy clock in the centre to allow us to remember, sometimes, when we should move the paper from one dish to the next.
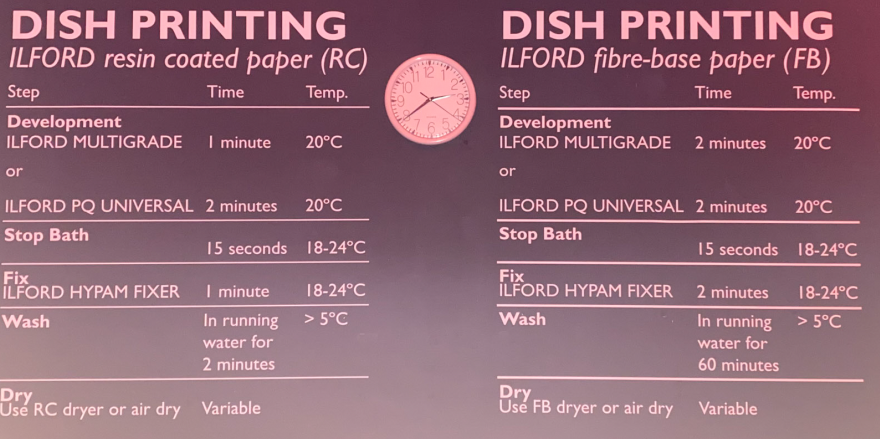
After the minute in the Dev, we pick it up using tongs and drop it into the Stop bath for 15 seconds before using another pair of tongs (to prevent cross contamination of Dev, Stop and Fix) to move it into the Fixer bath for a minute. Once the second hand has made it around the full face of the clock it’s time to lift it and move it into the first of the wash baths for a minute. There is a First and Second wash where the first may have some levels of contamination from the Fix but the second wash is higher up and should contain really fresh flowing water. After a minute in the first wash it’s time to repeat it in the second wash.
After another minute has elapsed we can pick the print out, pop it in a dry dish and carry it to the RC Dryer machine where it goes through some heated rollers and pops out the other side, dry and completely safe to handle.
One of my films was completely blank as I’d loaded it into my Canon A1 and used it on a shoot around Telford Centre and also in London but unbeknownst to me I’d been snapping and advancing as per normal but the film wasn’t advancing. After 36 exposures registered on the counter, on top of the SHard in London, the film continued to allow me to release the shutter and advance so I knew something was afoot then.
I waited till I was back in my hotel room later that night in the darkness of the bathroom and opened the back to find that the film was completely rewound into the canister so I’d either taken a few and then accidentally requond it or I’d not used it at all and then rewound the leader back in to the canister.
If I were to see this happen again, I’d open the back of the camera before trying to rewind it and see if I could somehow reload it and then continue to use it.
Jack, the lecturer, explained to me that a good thing to do is to keep an eye on the knob over the film to make sure that it also rotates when you operate the advance lever. It’s a good tip and one that I now do, I couldn’t bear to go around a good shoot and then not have any results but I guess it’s one of those things that happen.
The final print produced came out well (not accurately represented by a poor scan of the print above) but there were some areas that were blown out, all white, and some areas that were far too dark. Matt showed me how to Dodge and burn these parts of the image by using his hand under the lens of the enlarger and funneling extra light to hit the brightest and least exposed parts to pull out detail, and also how to Dodge areas, by masking areas of the easel and paper using his hand in the path of the light from the enlarger. It worked a treat and I was due back on the Thursday after booking a day off work so I could retry the dodging and burning technique on this same image. I’ll include that in the detail of the next part of my journal, this blog is my reflective journal by the way in case you’ve not noticed.
I also collect things I’ve done, thought, read, made and stick them in my sketchbook to allow me to capture my ideas. I’m used to working in a digital format usually so I decided to to this sketchbook work physically with the aid of some good quality books and tons of Posca pens and pritt stick.
Be First to Comment