With my Shirehall Project for this half of my Level 6 i have been collecting the fallen mosaic tile pieces, making prints off the walls, photographing using film cameras, digital cameras and drones. With the film cameras I’ve been using expired film, redscale film, converted redscale film, and even pinhole Holga photography. Video has also been experimented with as a method of capturing some different viewpoints of the buildings and the grounds, some of it on the iPhone, some on digital cameras, and some from my drone. I’ve also used the mosaic tiles in a 3D printed rubiks cube style box and also one of the missing piece puzzles where you slide them around.
Model
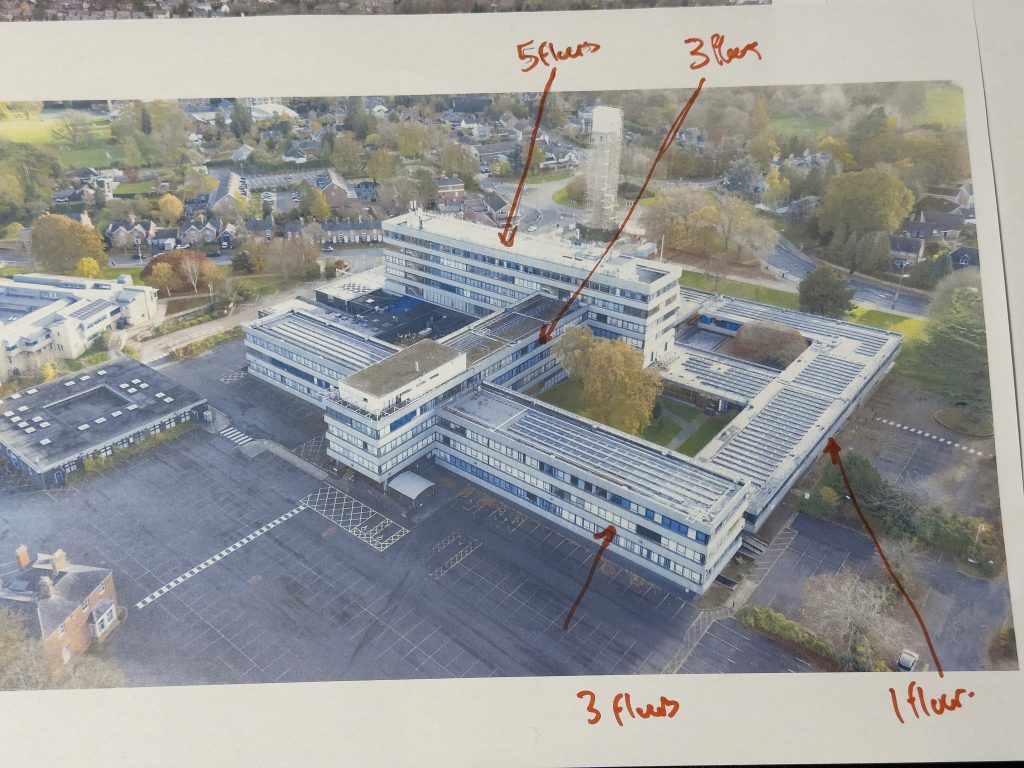
With not having done enough already I decided that I also wanted to make a 3D model in a computer software application and then see what happened after that. I set out with Google Sketchup and started creating a model based on my aerial photos, and approximate dimensions. I managed a couple of oblong shapes and then started a few more rectangular blocks before I hit a keyboard combination and it all centralised about one origin point. All of the individual shapes were stuffed inside each other all based around the one point in space. Nothing I did could rescue it, no Undo, no CMD+Z no revert no nothing. I threw my toys out of the pram and went on and got busy doing something else.
Third Dimension
Then I had an idea about photogrammetry whereby I could use the photos made using the drone of the angles of the buildings and combine this into a model file of some sort. I tried a few free tools to combine the images or videos to make a computer model but nothing seemed to work effectively. They all had issues with one part or another of the input images not being suitable.
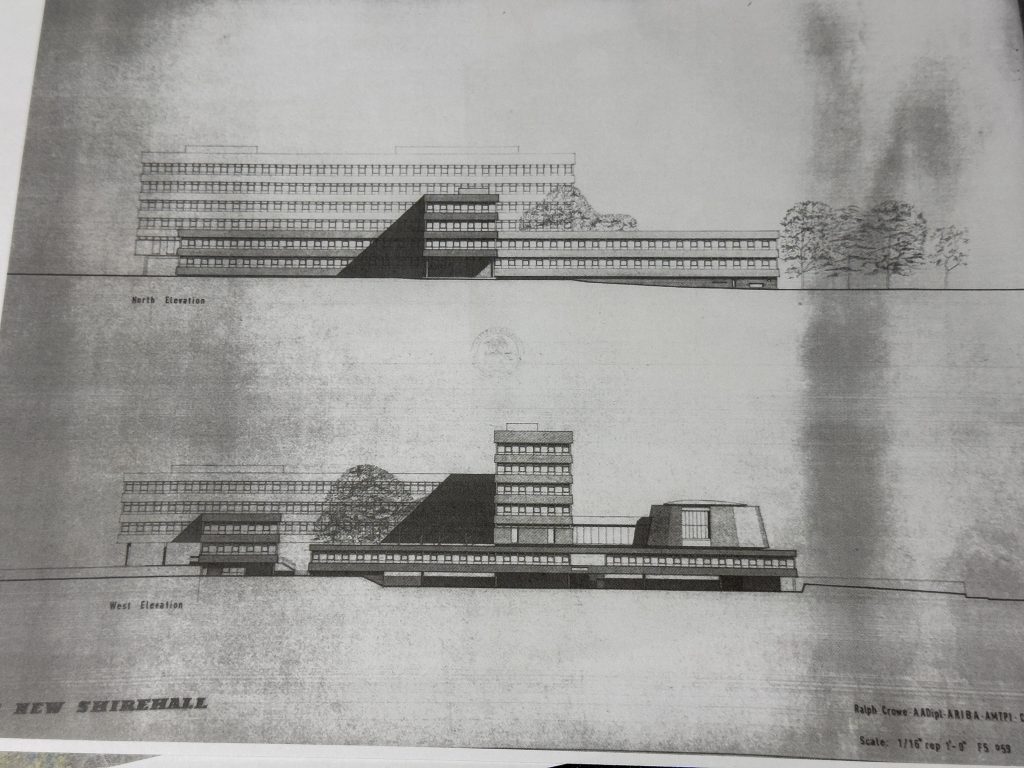
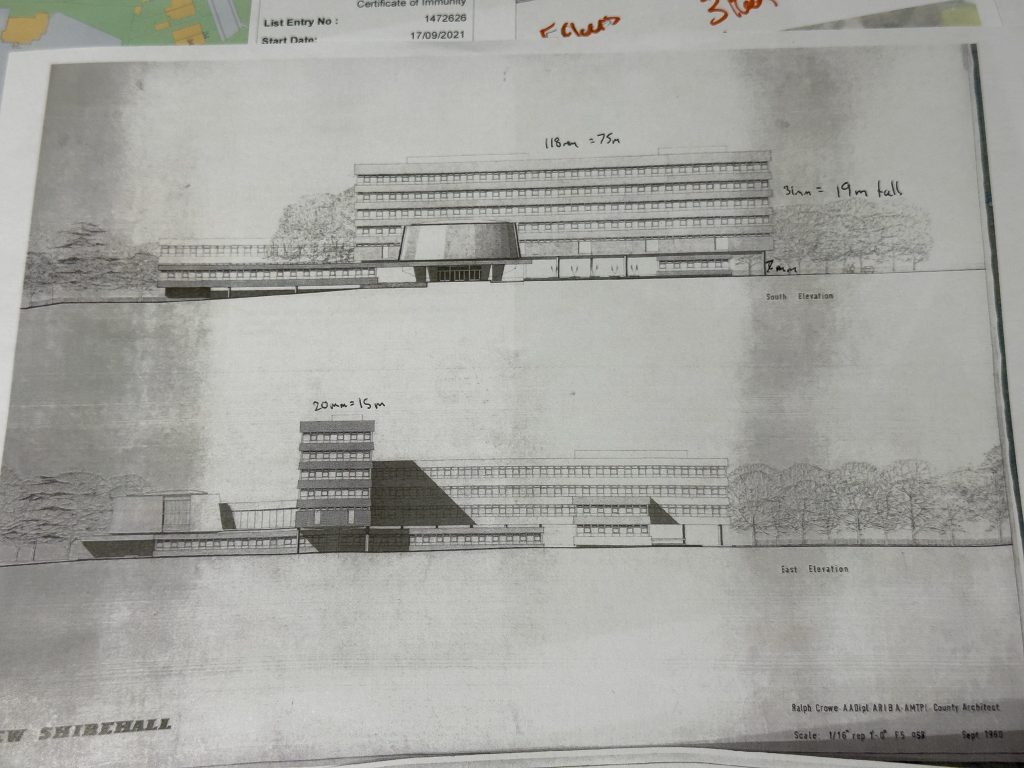
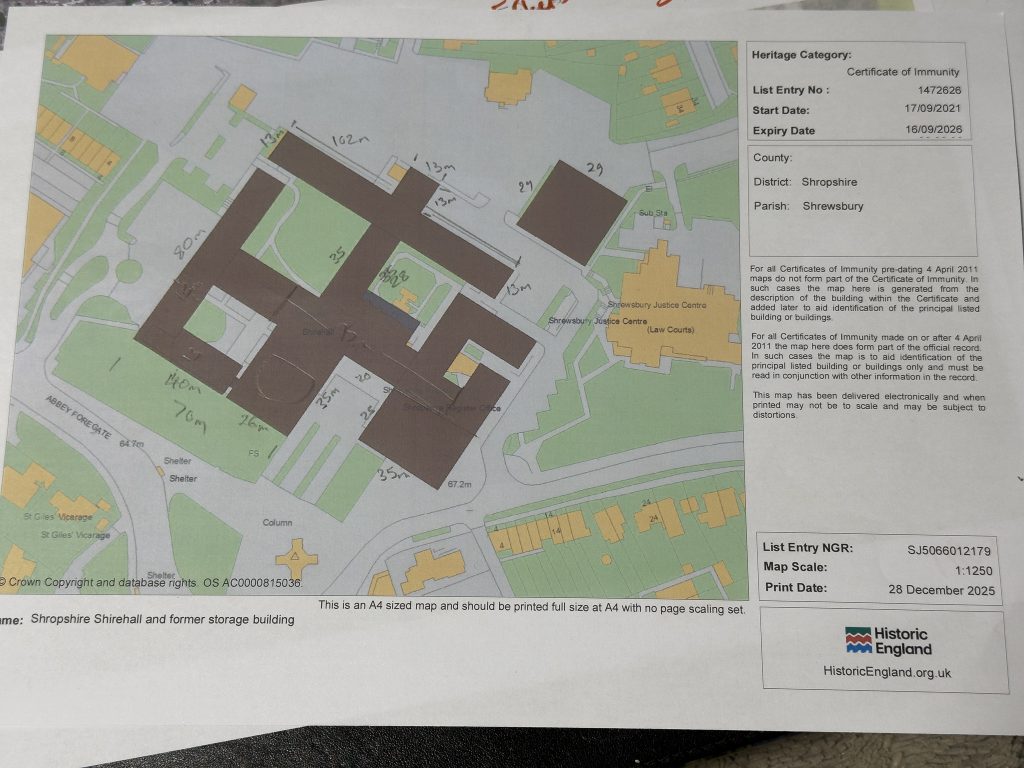
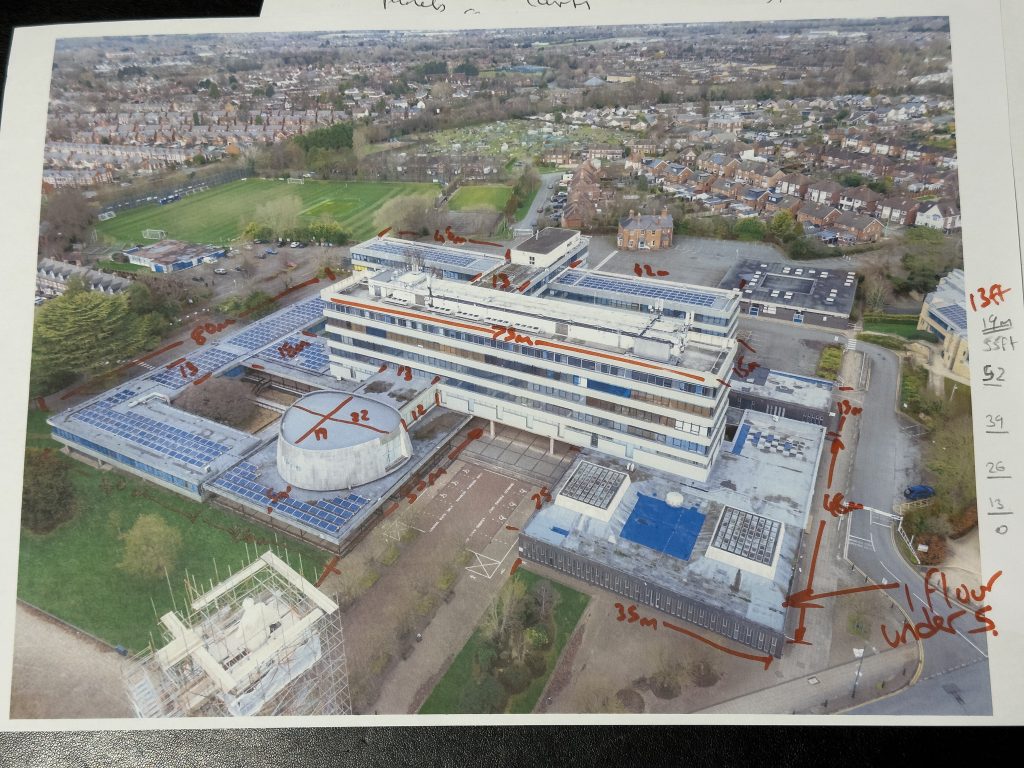
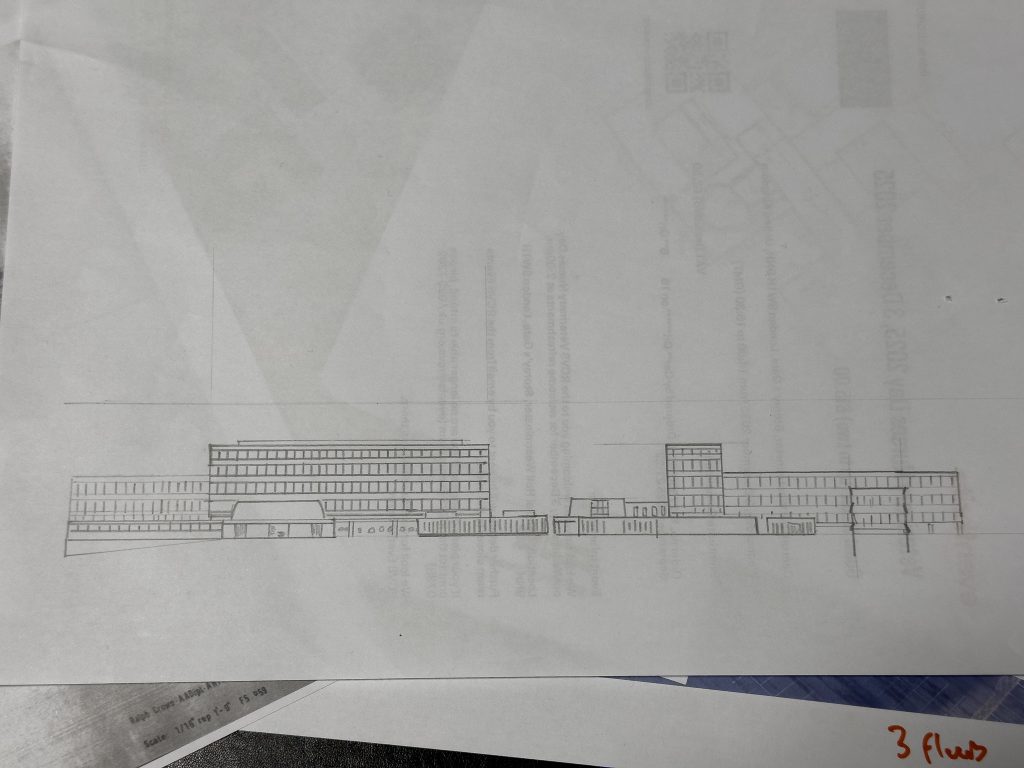
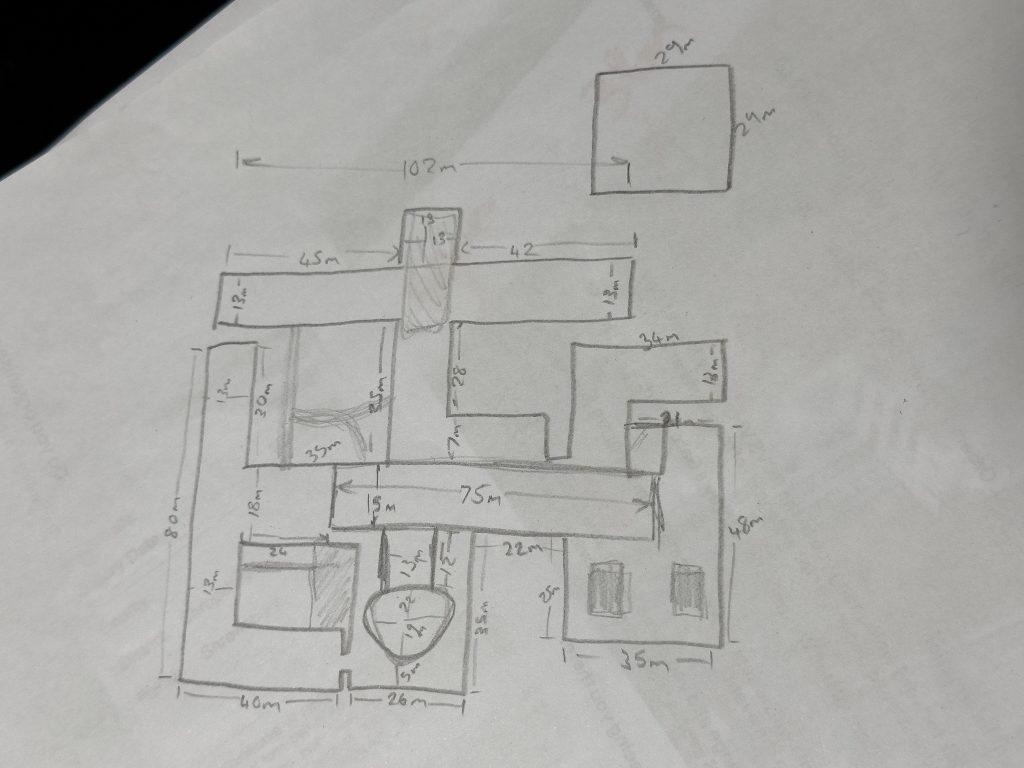
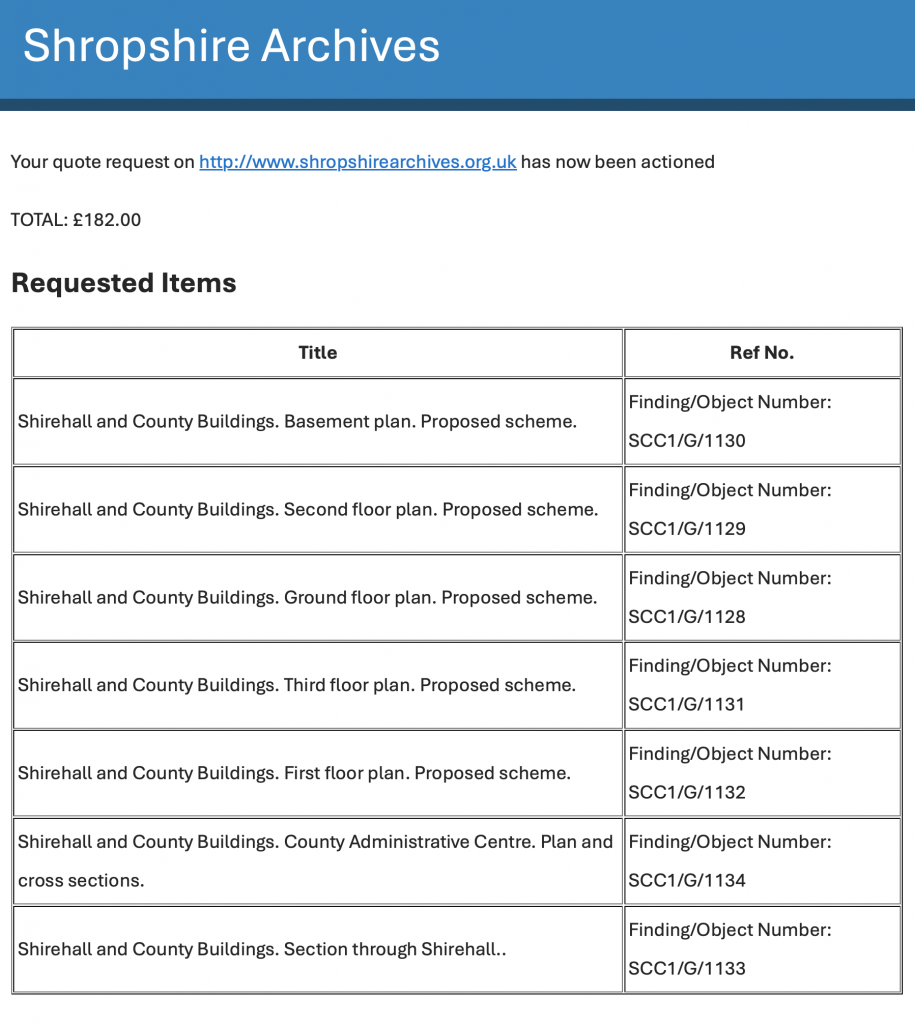
To get more accurate details of the dimensions I decided that I would contact the Shropshire Archives and see if they had any information about the Shirehall there. I did indeed find some drawings listed there. They were the original architects drawings and showed all different elevations of the different levels of the buildings. When I got the quote back however, it was going to cost me £182 to have them digitised so I thought of other methods to work out the size. I used Google Maps to do some Measuring and then I remembered that I had some photos of architects drawings from the tour earlier in the year. These plans came in handy and I was able to work out approximate sizes of the structures, using a scaling factor for known sizes and calculate the heights etc..
Artificial Lack Of Intelligence
Then I moved on to ChatGPT and the ability of AI to produce a 3D model that could then be turned into an .stl 3D Printer file, so that I might be able to make a printed 3D model. I fed the Large Language Model of Open AI’s ChatGPT with many photographs and videos, alongside the conditions I wanted it to adhere to in terms of the dimensions of the overall output, the fact that it needed to have all manifolds removed, and essentially be watertight or the print would not be successful. With all of the extra prompts and information as well as the images it coughed up the code that would enable me to create an accurate model of the buildings. Only, when I copied and pasted the geometry data from the ChatGPT window and pasted it into a model generator, it came out with a model of two blocks partially joined together. It looked like someone had glued two lego bricks together before sanding off the connecting nubs. It was dire and I was annoyed again so I left it for an even longer period.
Tinkering
Then a couple of weeks later, I was thinking about the issue and remembered a program called Tinkercad which is part of the Autodesk family. I know that Fusion 360 or Fusion as it is now known is useful for other people who make 3D Prints and thought I would give it a try. I signed in and made an account then began the learning tutorials with the most awkward part to get my head around being the grouping of two shapes, one solid and one hole, to get a cutout in the solid shape. It foxed me for an hour but I managed it in the end.

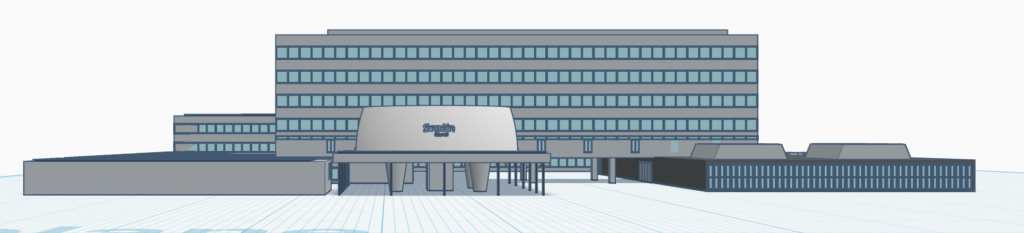

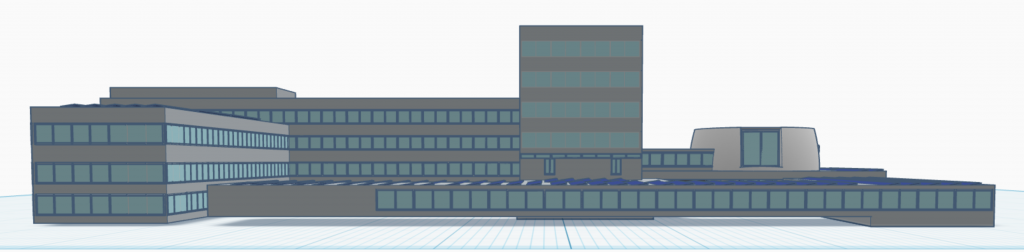
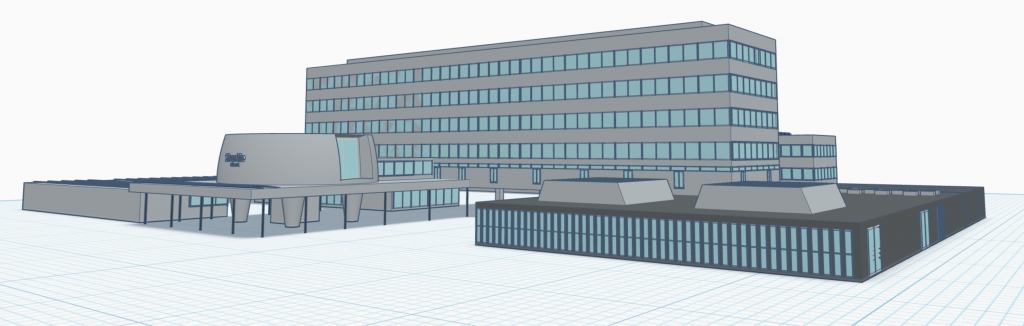
I set about by adding boxes to the “Workplane” paper and then resizing them to align with the drawings and sketches I have made in the run up to this work. Once I had completed the boxes for the buildings, I set about adding windows to the sides and then solar panels. I also added a dome on the front but I was unable to make it the same shape so its an approximate of the shape. I did work out how to make the cut outs for the large windows and alcoves in the side of the dome too and these look quite cool, I was happy with this part.
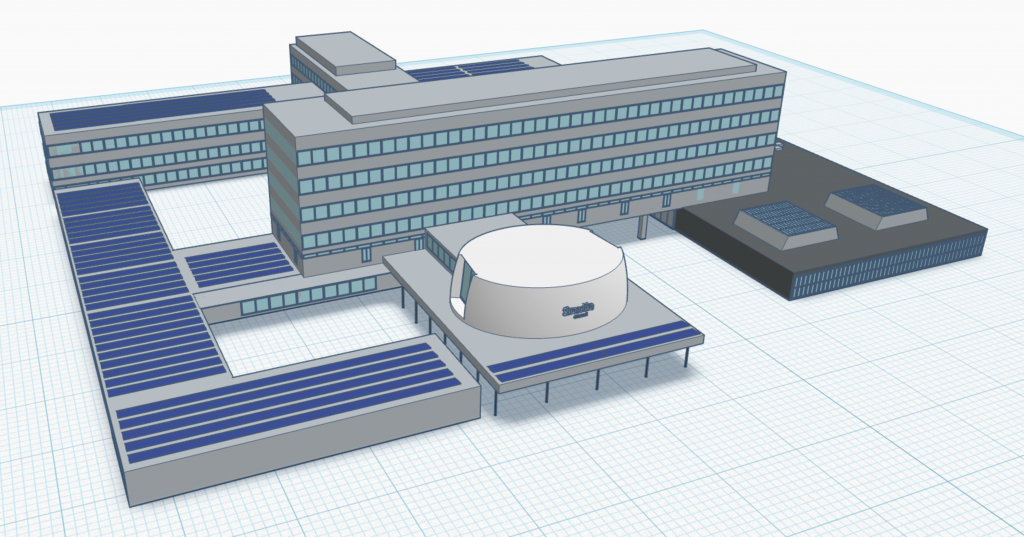
I continued refining it and adding more accuracy to the windows and sizes even adding the poles under the dome and the parts of the sky lights over the courts etc. Then when I was happy I figured that I would export it to an STL file for use on my 3D Printer, but the model was so complex that it couldn’t export it. I’m not saying that I created a complex model due to being great at it, actually the opposite. If I’d used more efficient design practices I’m sure it would have made a less bloated design file.
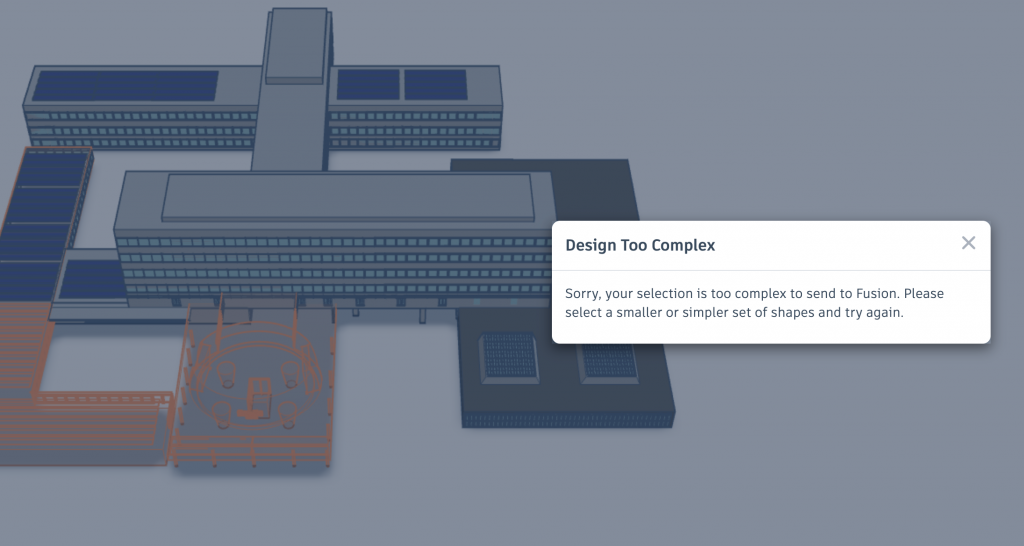
Whilst doing this operation I found that I was being advertised to use Fusion for free as a student so I signed up to this and installed it on my mac computer. When I tried to export the model from Tinkercad into a Fusion compatible file it told me the similar story, of it being too complex and that I should export it using smaller sections. This is my next step and hopefully if I can get it into Fusion, I can alter it to simplify and then create a model that I might be able to print out on my Creality K1Max printer.
Next Dimension
The next phase, post completion of the model into a simpler form for 3D Printing might even be to follow the path of SpacePlay who make Concrete Models of famous brutalist or modernist buildings from around the world. They have made models of Forton Services, Wolves School Of Art, Trellick Tower and many other famous architectural masters. I would think that they have taken a good while to master the art of modelling the buildings so to make the casting of them that much easier. There would be no possibility of having the bottom of the ground floor open with thin spindly legs so I guess it would take some more simplifying before i could contemplate this, but it is certainly something I will look at. The process comes from the 3D model in CAD, being 3D printed on a printer then using this to make a mould. The mould can then be emptied and then refilled with concrete/cement to give the desired outcome. But I know that it is going to be way more fiddly than this…
Be First to Comment