In a previous post I went into details about how to turn a regular roll of 120 Fuji Professional into a redscale film. Then there was another post about going out and shooting the redscale film through my Bronica ETRS whilst photographing the former local council headquarters, now it is time to look through the results of the photos, whilst comparing them to the exposure settings I chose at the time.
Roll One – Fuji 160 Pro
First up was the roll of Fuji Pro 160 that had been flipped over and rolled back up in the dark room. Doing this flip to redscale affects the amount of light that makes it to the emulsion, so on Euripides’ instruction and online wisdom found on youtube and other websites, you treat it as though it is 3 or 4 stops different from its box speed. With this in mind I shot it as though it was an ISO of 12, then adjusted the shutter speed or aperture to bracket each of the shots and see which one was most suitable.


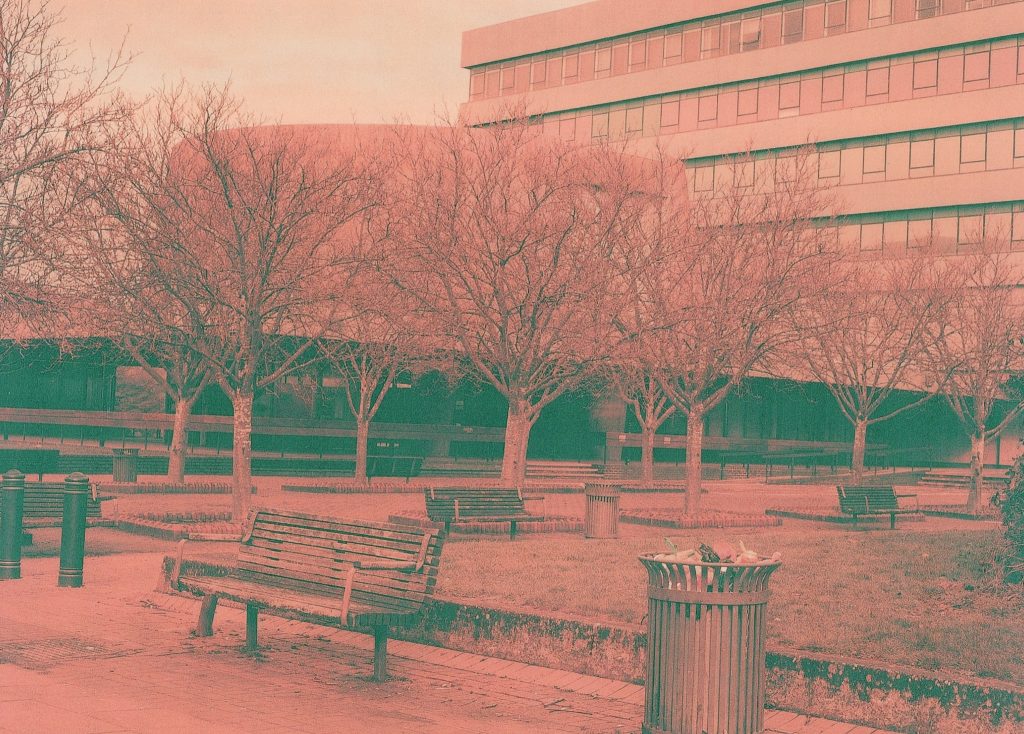
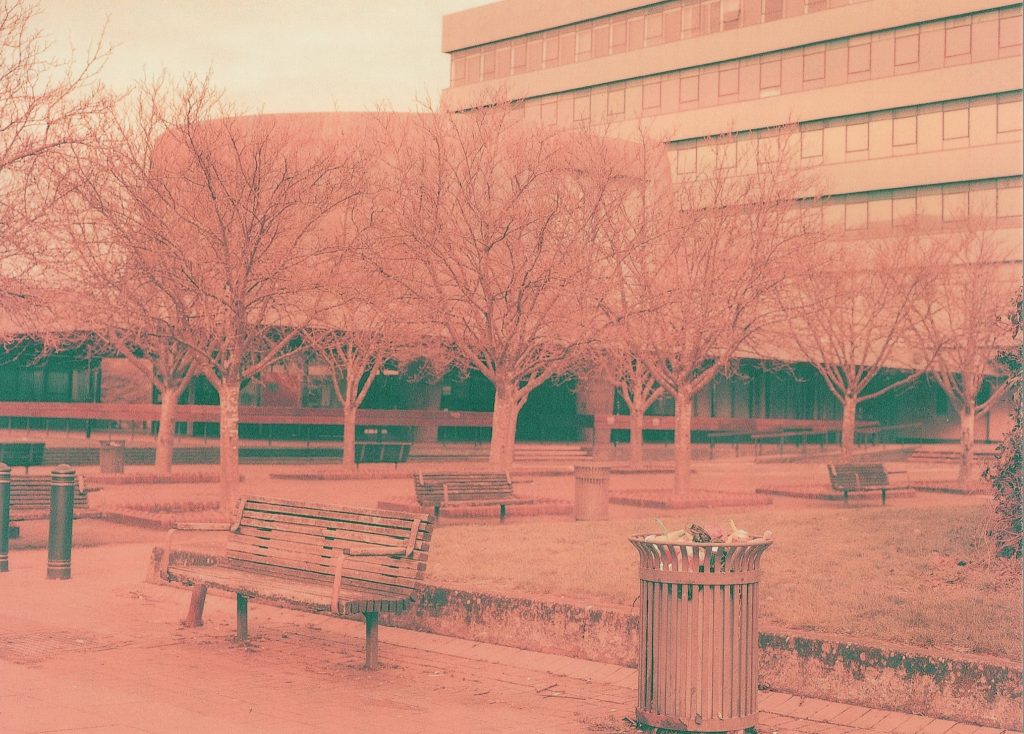
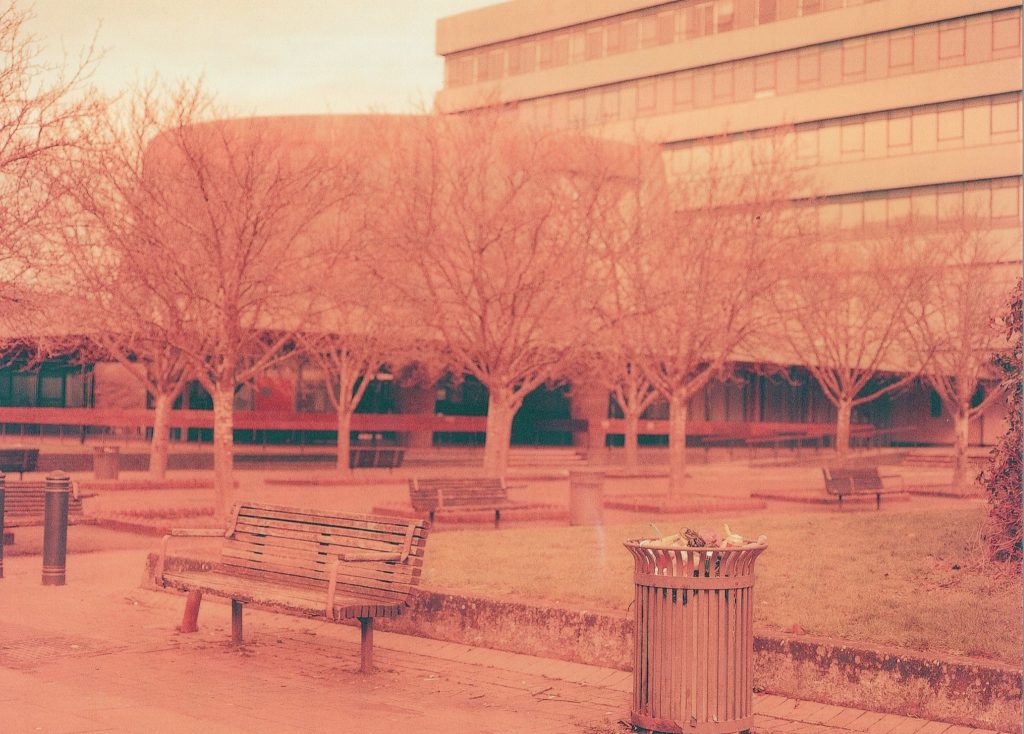
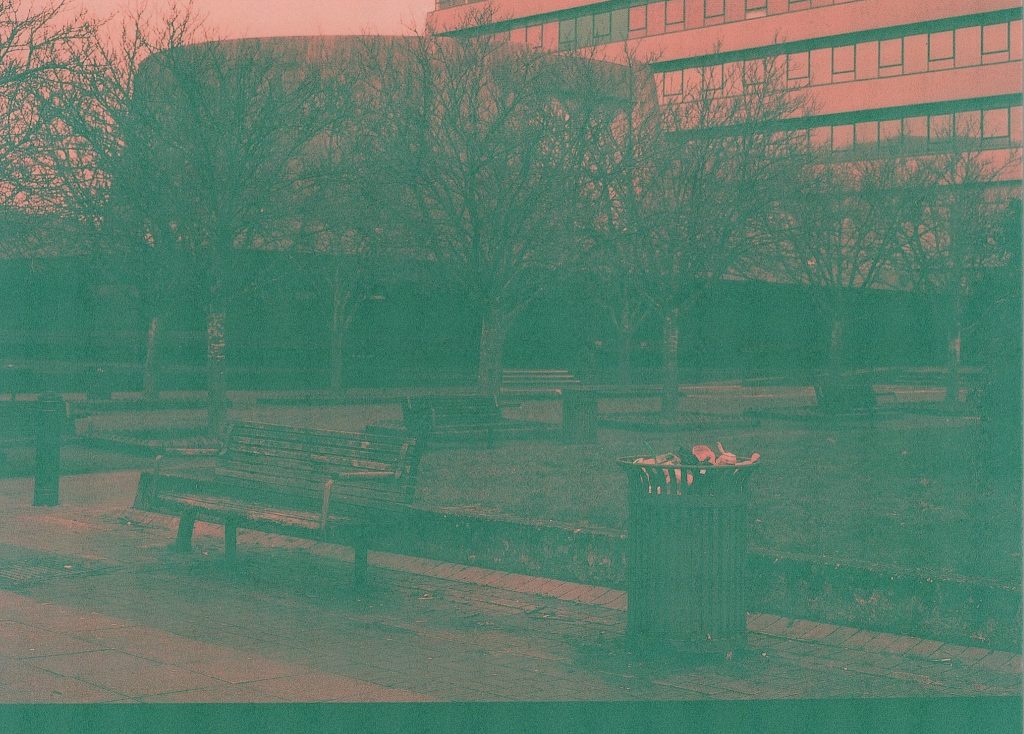
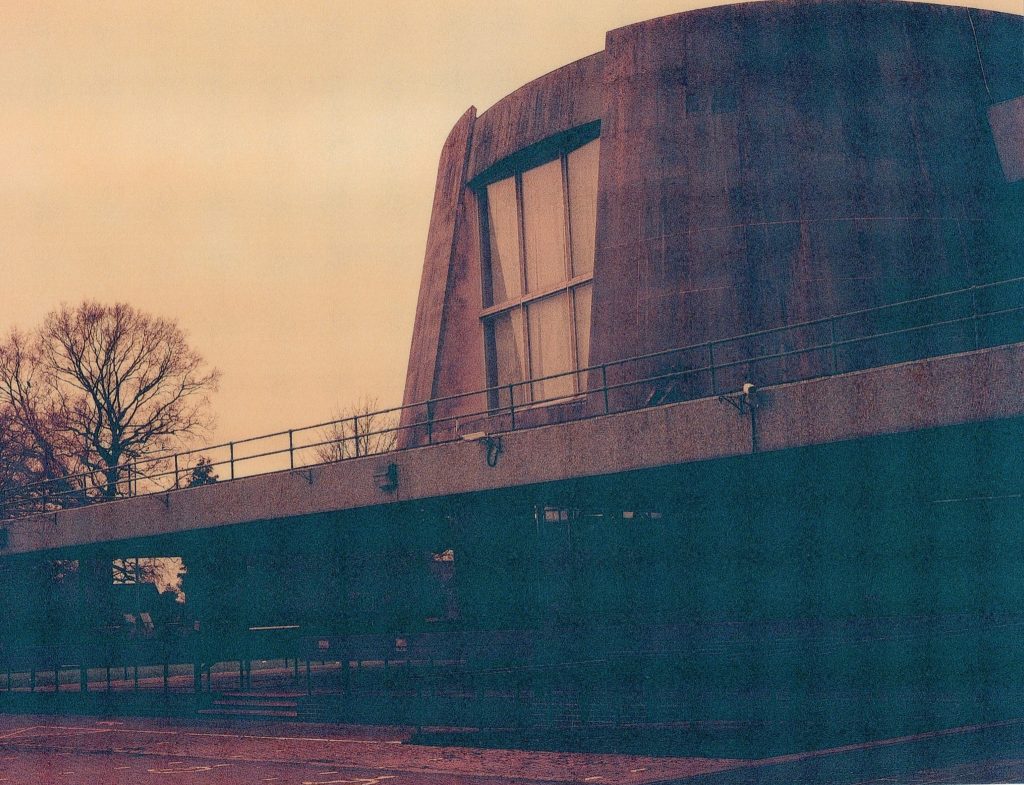
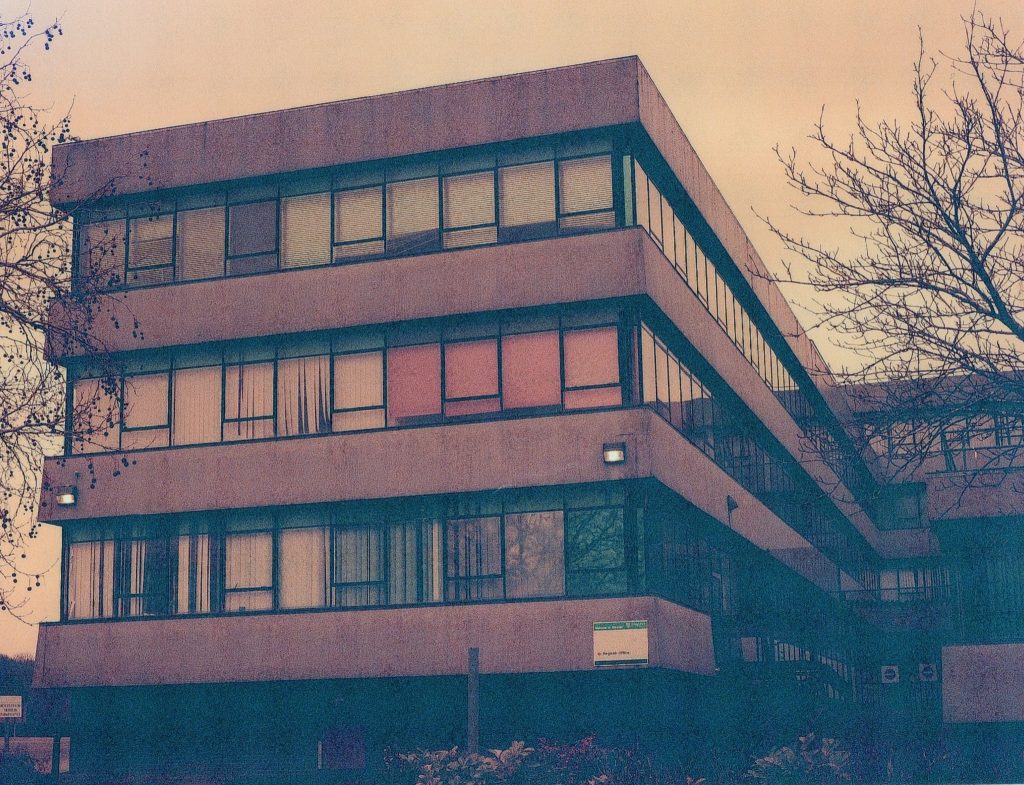
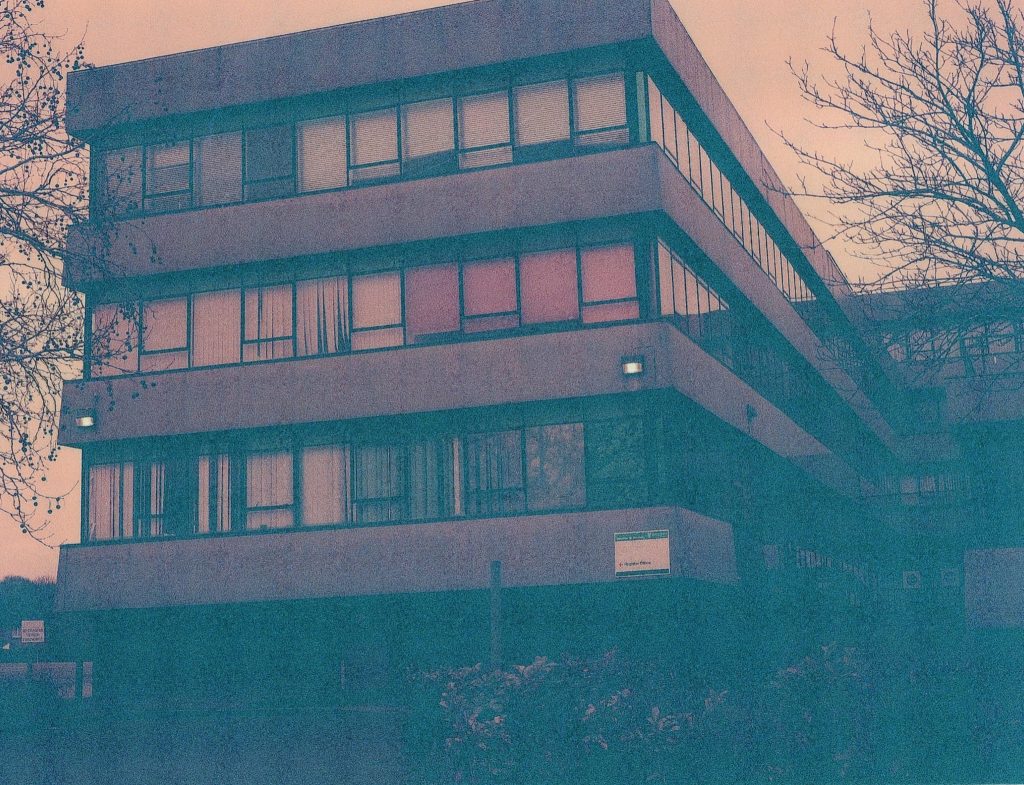
You can see from the gallery of five images above the different exposures as detailed in the table above them. Picture 1 shows an ok exposure and whilst the details are excellent on the tree branches, the blacks in the shadows underneath the dome structure are not quite dark enough and full of grain. In picture 2 the levels of grain are less but the picture is brighter. The blacks are blacker but the tree branch detail starts to be lost, this was an overexposure of +1 stop by opening up the aperture to f/5.6. The next photo, 3, was an over exposure by +2 stops from what the meter was recommending. I altered the aperture again to f/4 for the extra stop of light and this affects the depth of field and the trees and details of the background, such as the dome and large office block were out of focus and blurred. The blacks in the darker areas are nicely black but the colours overall and the detailed focus on the bin (trash can) are also a nice level.
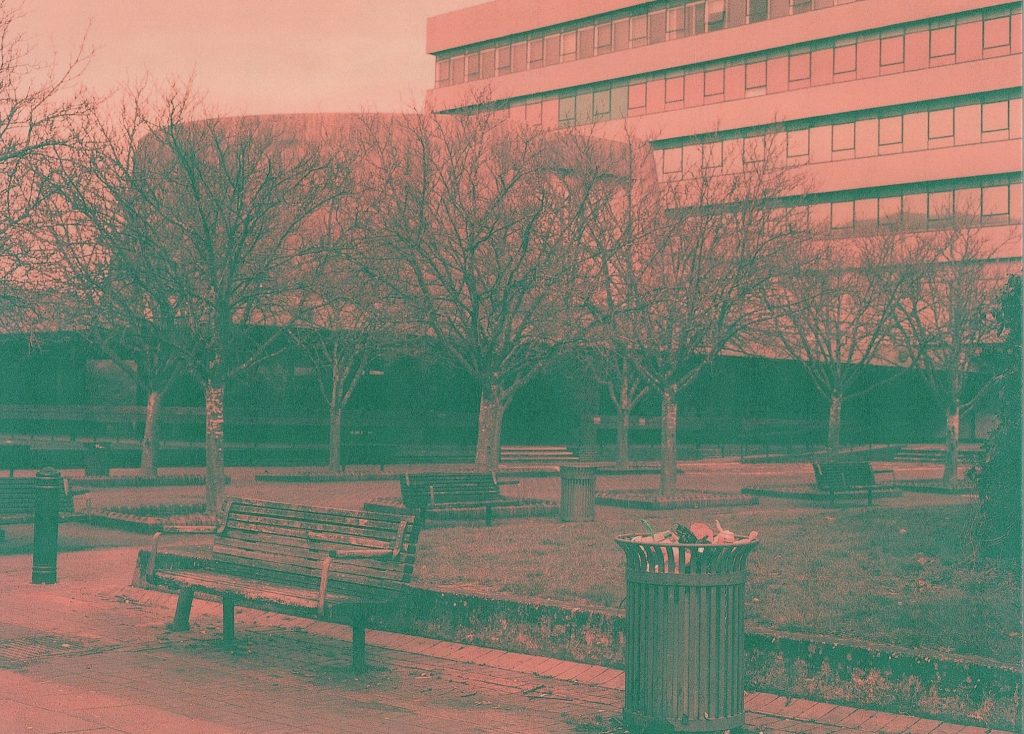
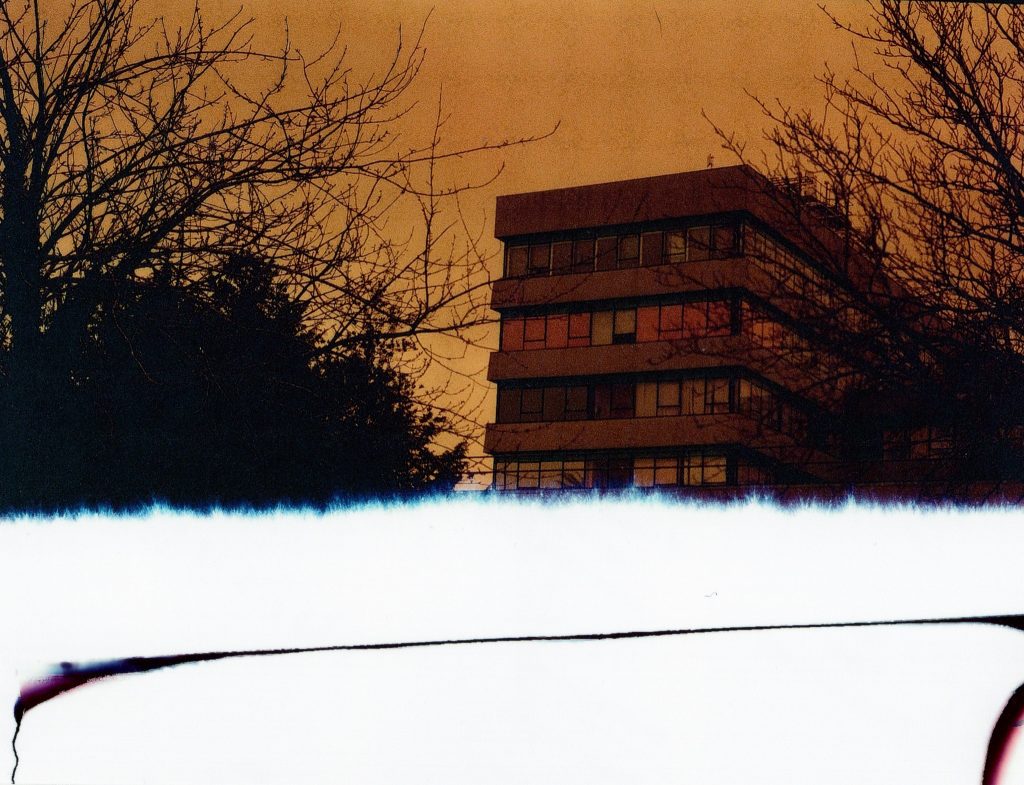
Picture 4 saw the aperture return to f/8 but the shutter speed shortened to underexpose by -1 stop from the recommended settings by the meter. There is far too much grain in the image and the whole photo is overly dark but there are some blues in the windows and the plastic waste in the rubbish bin. It’s interesting to see the lighter areas showing some colour and some dark tones. It makes me think that if the scene were a lot brighter then perhaps a single stop underexposure might be well worth a try.
In the last of the 5 photos you can see that it is exceptionally dark and even grainier. There is a strange pattern on the print that I received back from the lab too, a weird checked pattern that I don’t really understand. I think that I’ll probably do a print or two in the colour darkroom to see what they look like. I know that the lab has a job to do and it looks like they have done a great job, when you see the five photos side by side. It does look very underexposed so the black tones are very grey.
I think that the correctly exposed shot is the best for this scene but if it were a brighter scene then a stop less might be more suitable. I’ll wait to try it out in a brighter environment after I change around another couple of rolls.
Scene Two – Column
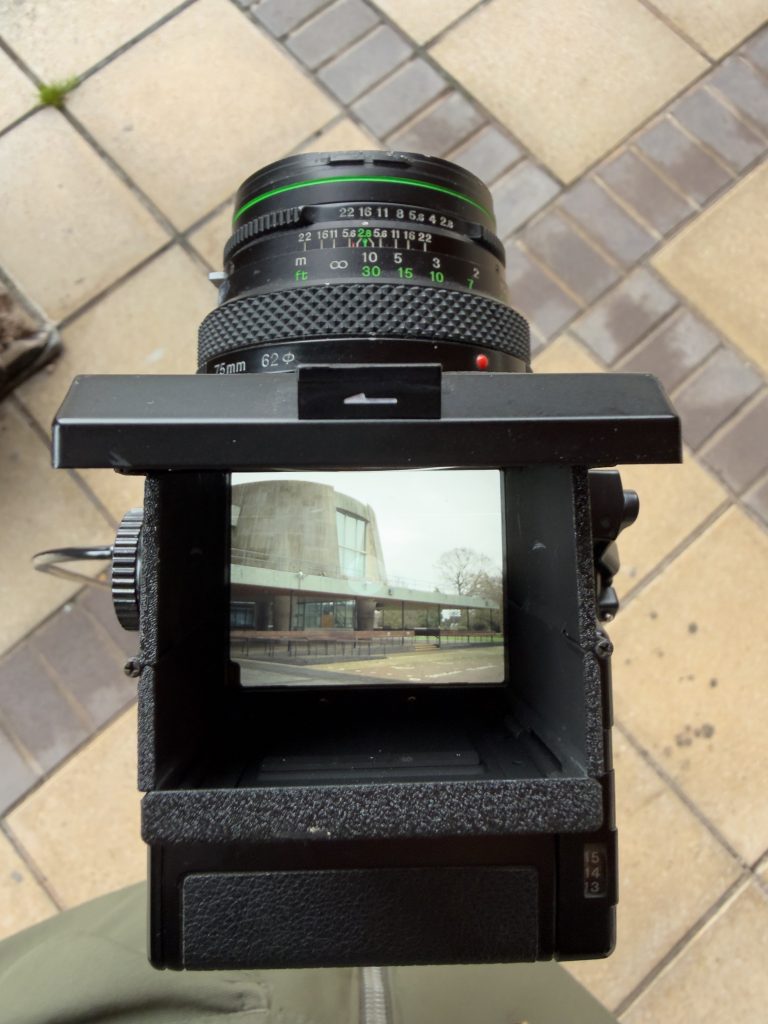
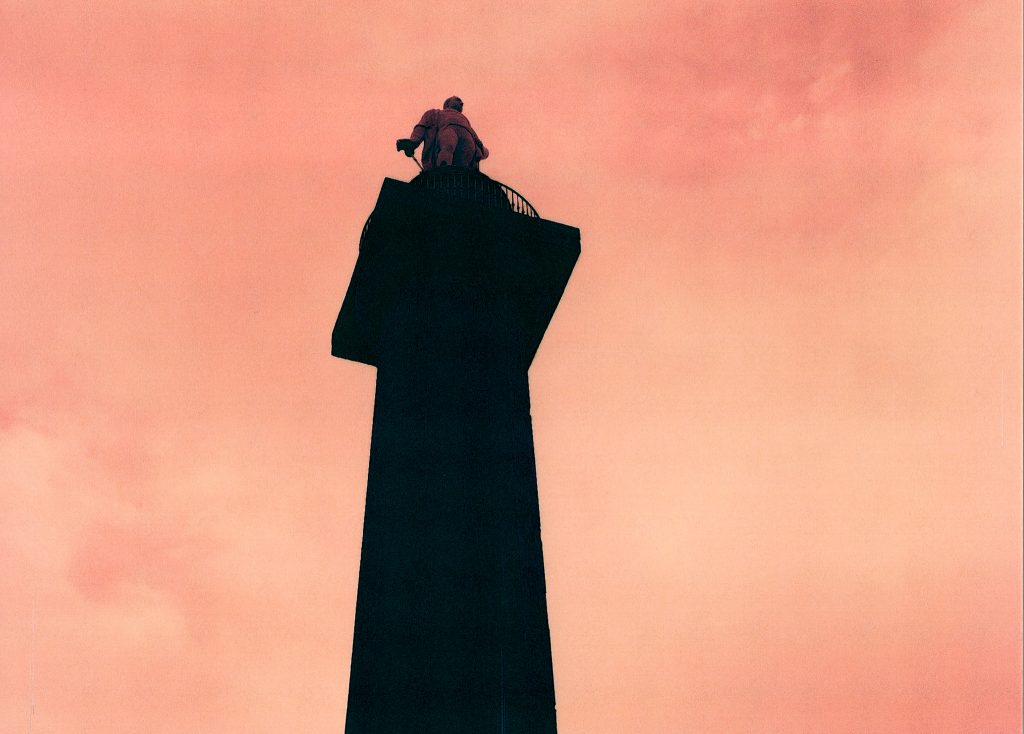
With a brighter scene next, let’s see how we get on. This shot is of the Lord Hill’s Column, a large monument to a Shropshire born General in the 18th Century. It was built in 1812 and is taller than Nelson’s column in Trafalgar Square, and has recently undergone some refurbishment. I turned my Bronica around to photograph it and chose to shoot one stop under.

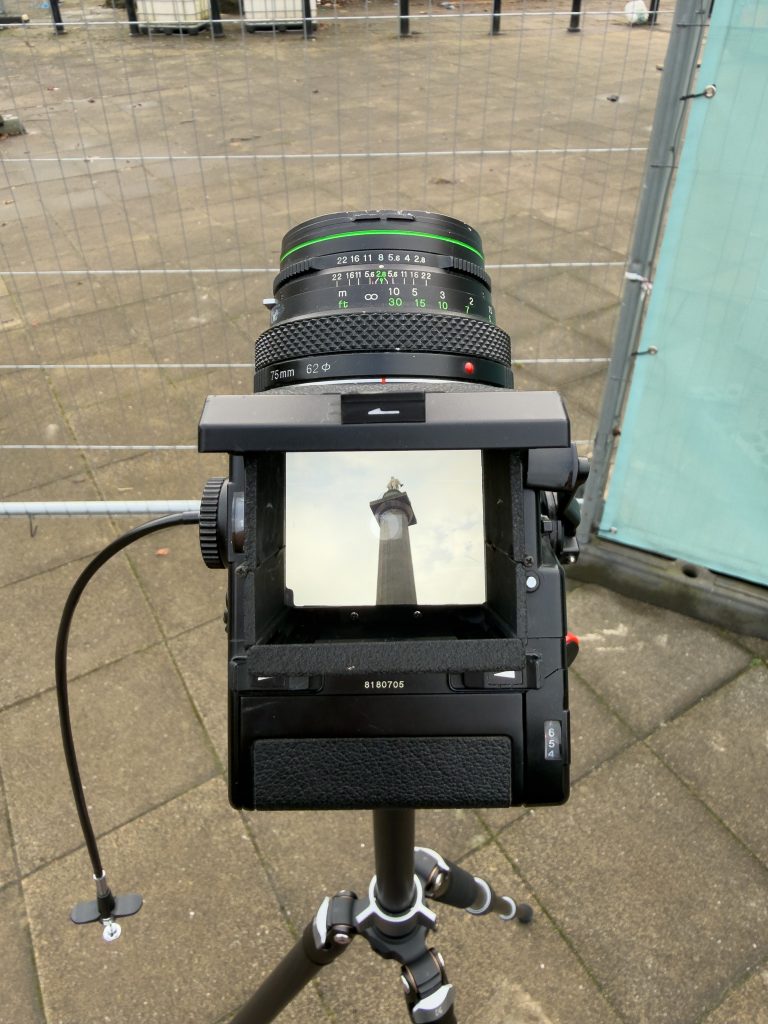
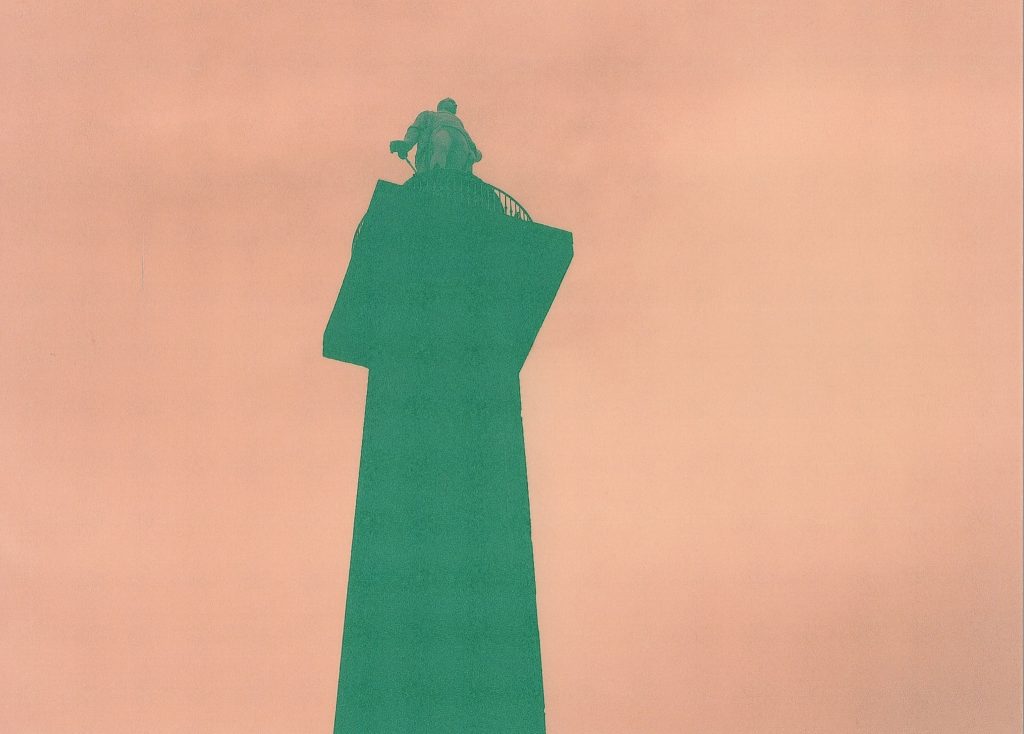
I left the aperture unchanged and altered the shutter speed to go 1 stop under the suggested exposure. You can see the camera with the waist-level viewfinder above, and can see that the background whilst brighter than the previous scene, you can still see the detail in the stonework on the front of the monument. Photo 6 below, shows the correct exposure, according to the metering and photo 2 shows the shot of 1 stop underexposed. Shot 7 looks to have lost the little available detail from the sky and the stonework is green and not anywhere near as dark as it should be. Neither of these are very successful in my eyes but the first image is better because you can see the detail in the statue at the top.

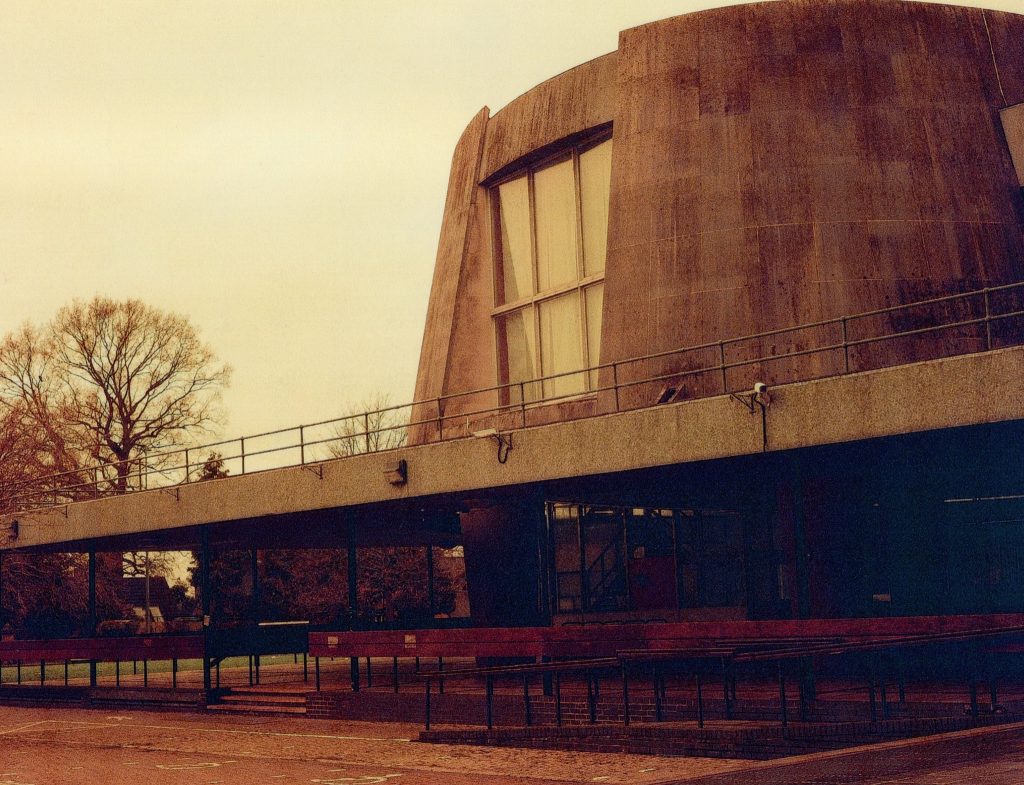
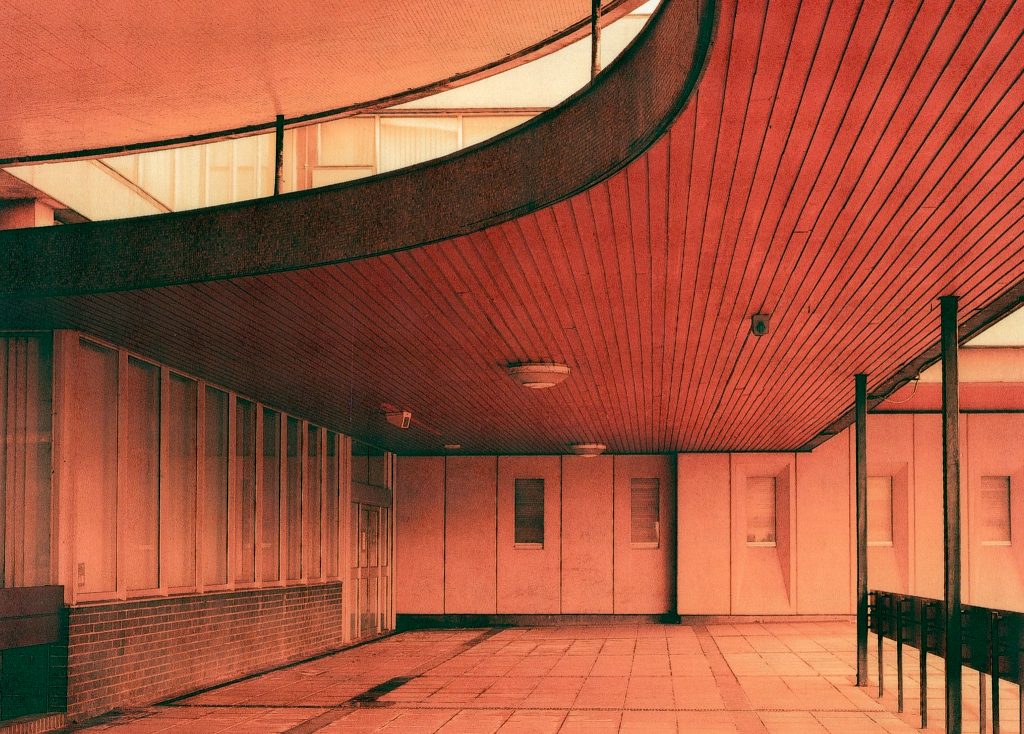
Scene 3 – The Dome
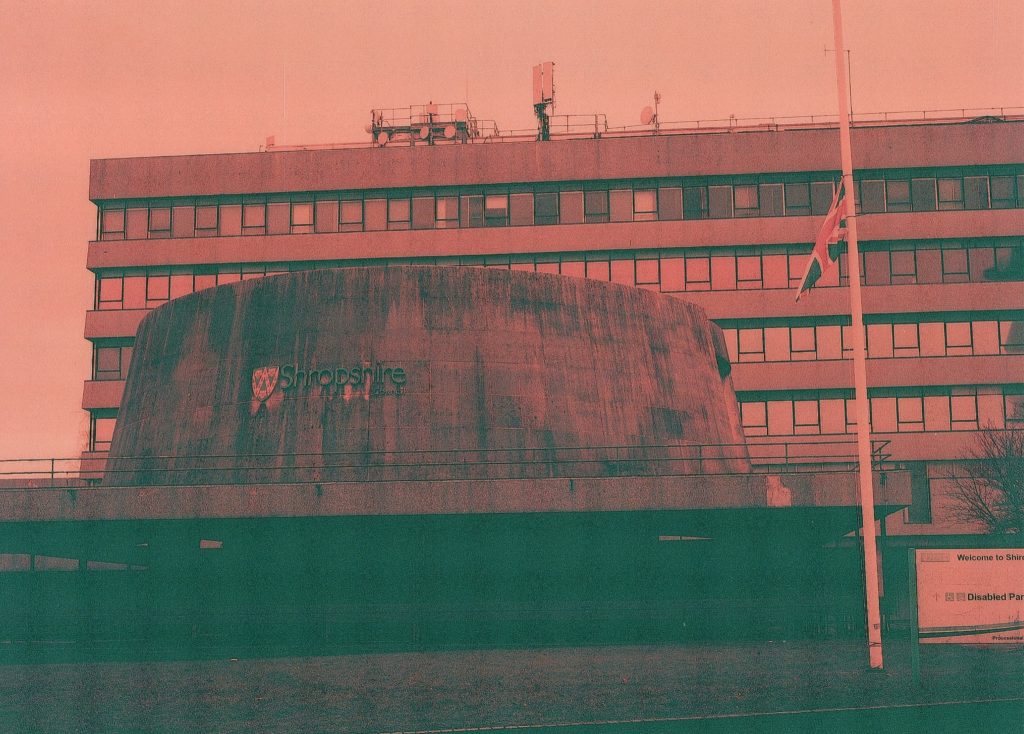
The front of the Shirehall features a dome, covered in Portland Stone, which houses the Council Chamber where debates and decisions were made. I did an intermediate shot of the the front of the dome and then went for a wander underneath to capture the details of the wood, concrete and stone.
Looking at the spreadsheet and the images from the day I can see that the meter was showing 1/15th of a second at f/8 but I had altered the camera to 1/30th and considered it to be over exposing by one stop. Ive just noticed though that this is in fact one stop underexposing. It caught me out a couple of times that I would alter the shutter speed or aperture and have the idea reversed in my weird brain. I’ll now change the spreadsheet to reflect the actual from +1 to -1.


The photo that came from this set up can be seen below and is obviously very badly underexposed. The detail in the rear of the office block comes out nicely but the concrete dome and the underneath shows very little detail. If you look at the bottom of the image in the darker sections you can see the grid shaped pattern from the print. Again, I’ll try and do this on the colour darkroom to see if that is an artifact of the lab scanning the negative before printing it.
Scene 4 – Under Dome

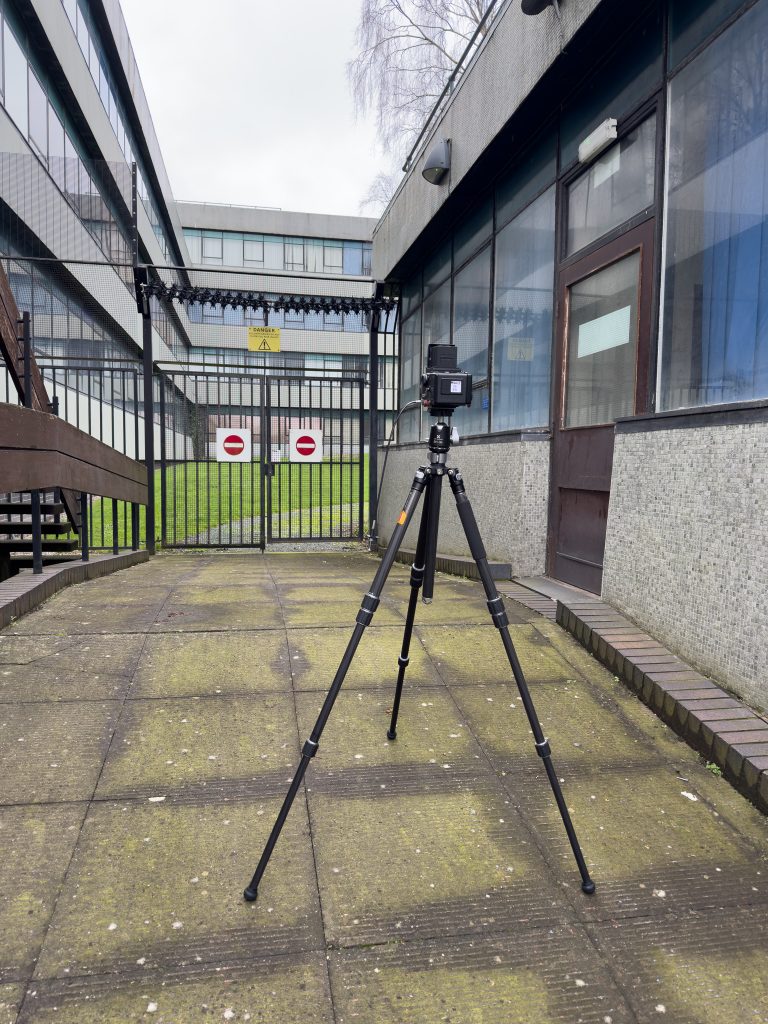
The table above shows the settings I used for the next scene and used the opportunity again to bracket it by one stop each side. The equals sign in the table means that it is exposed as per the guide from the metering. I altered the shutter speed too, to alter the exposure and was using a tripod with a shutter release cable to reduce any chance of blurring due to camera shake.
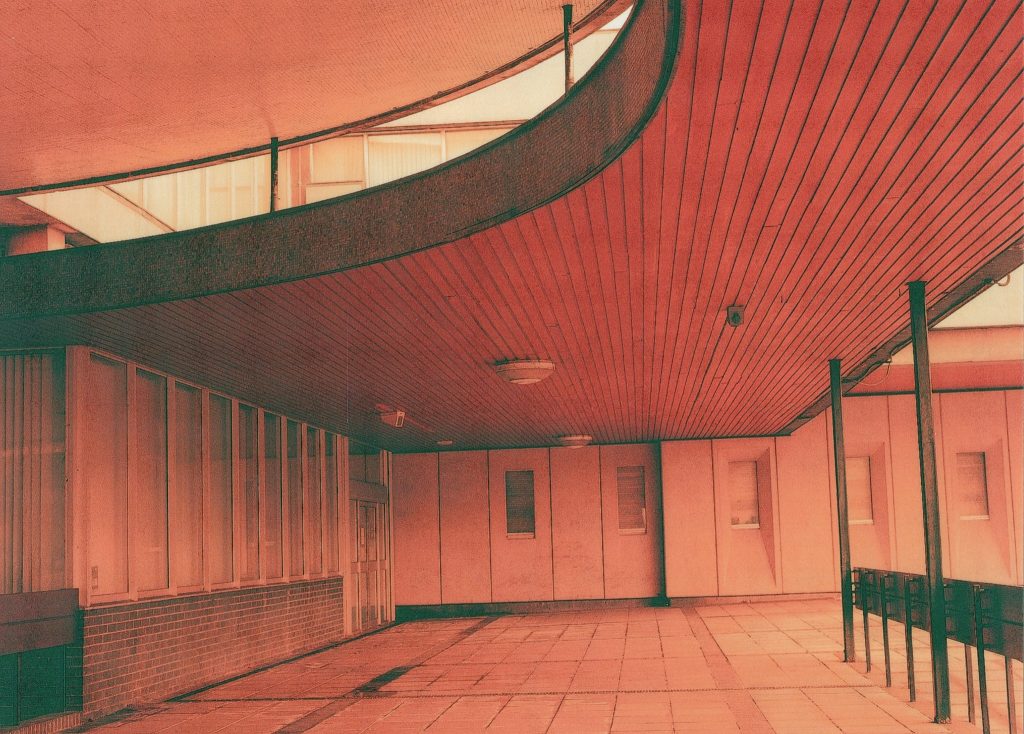
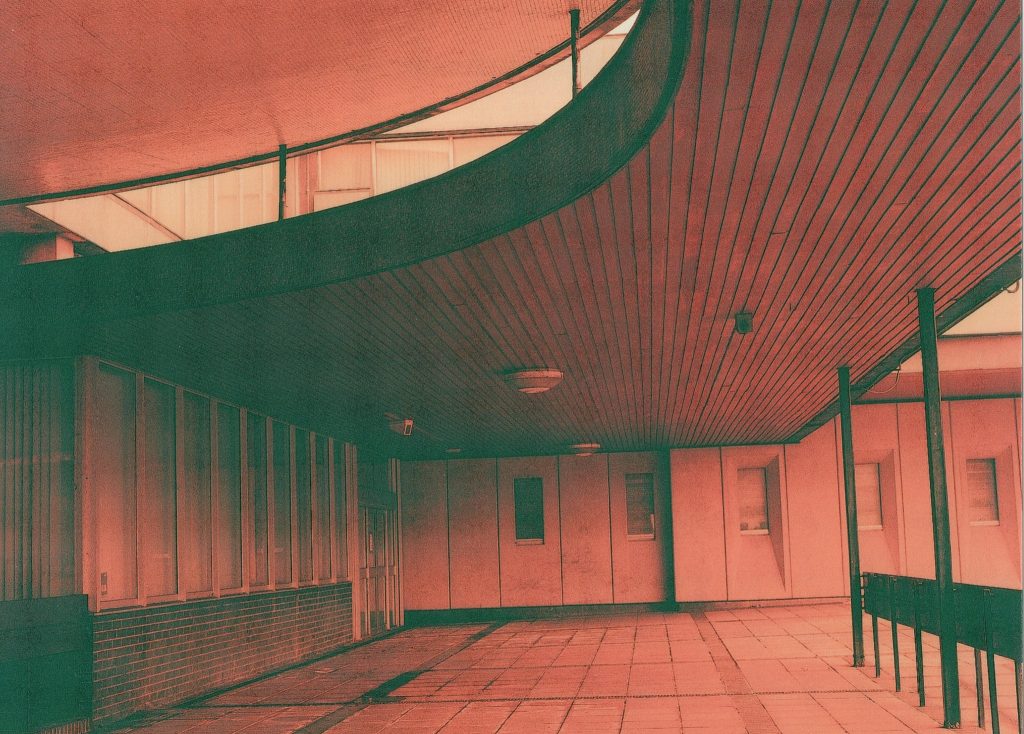
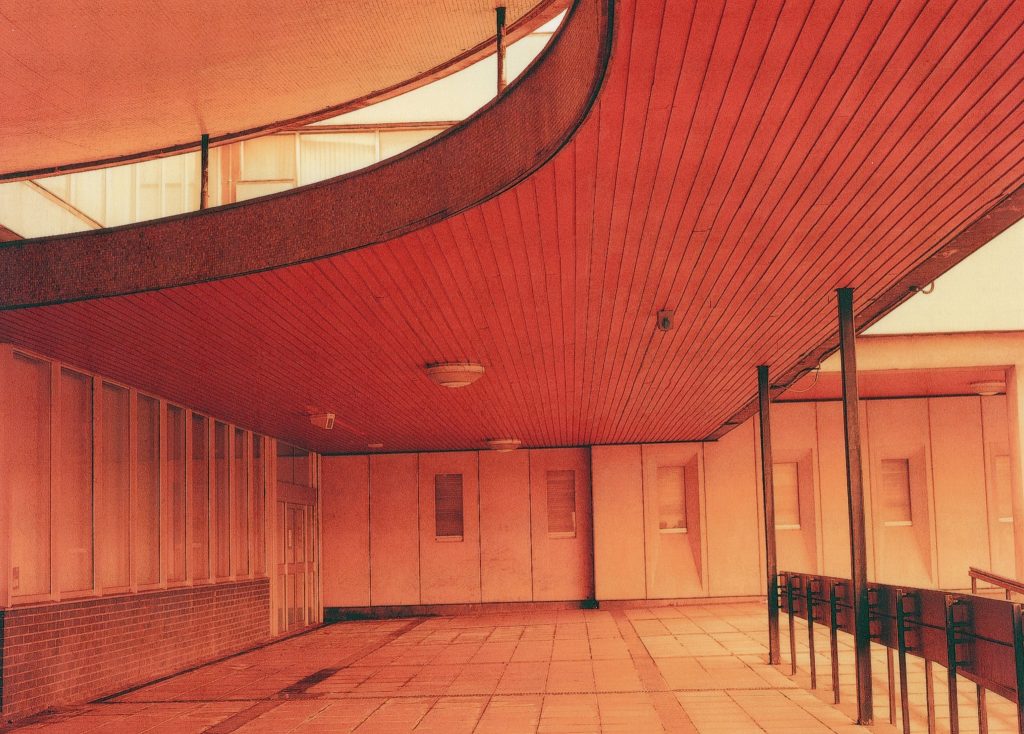
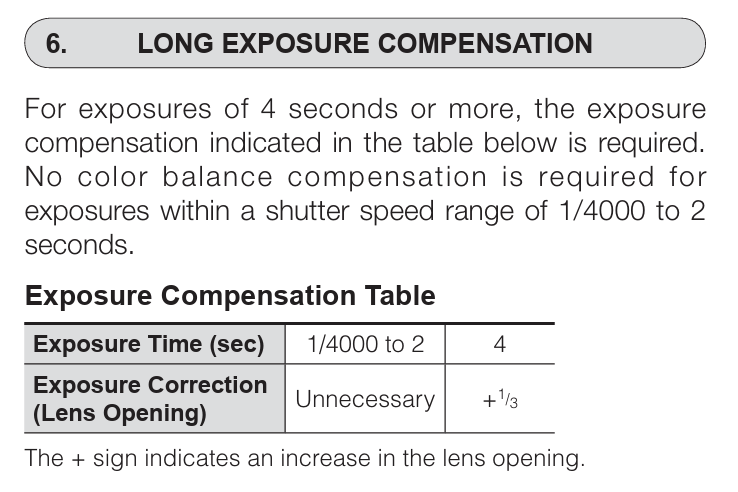
The photos that you can see above are the three mentioned in the table. Clicking on the images will enlarge them for you on the screen. The correct exposure in photo 9 is my favourite of the three and the detail and colour is better than the second as that is much darker, while the third photo is overexposed and seems a bit unreal. This was a long exposure photo and Euripides warned me about the reciprocity but it doesn’t seem to have affected these photos yet. Euripides told me about the issue and the data sheet shows a maximum of two seconds before the need to add extra time.
Scene 5 – Trees and Glass
The next three shots were taken from the area near the dome, where I used to ride my unicycle 15 years ago. Again I was altering the Shutter Speed to change the exposure and this time the + and – signs are the correct way around.

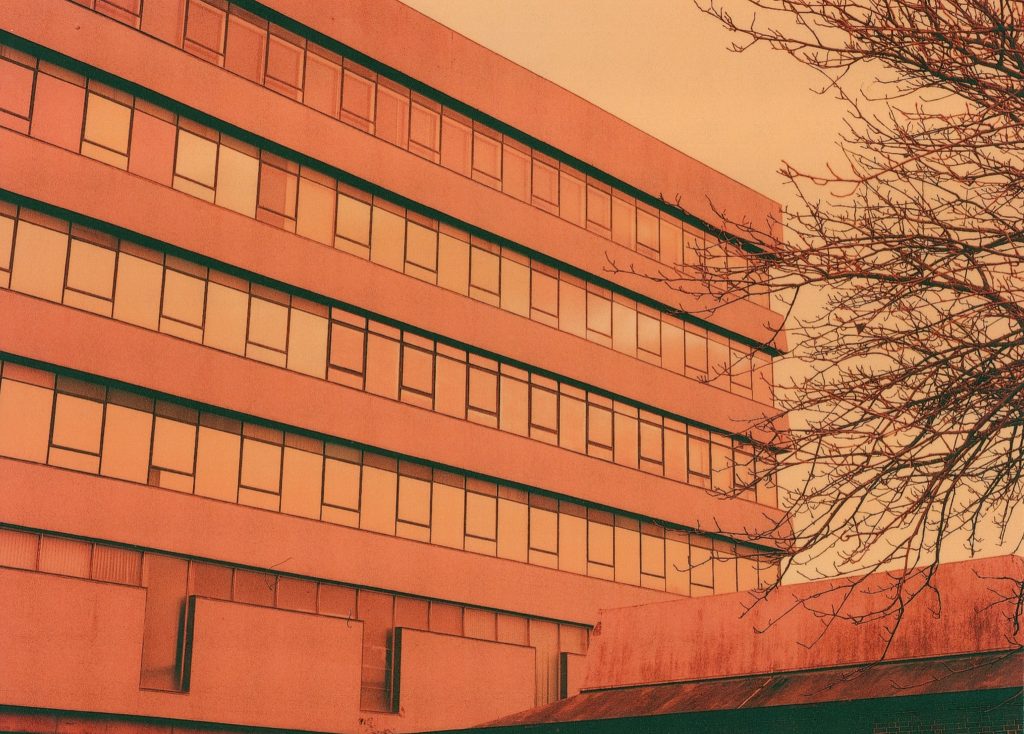

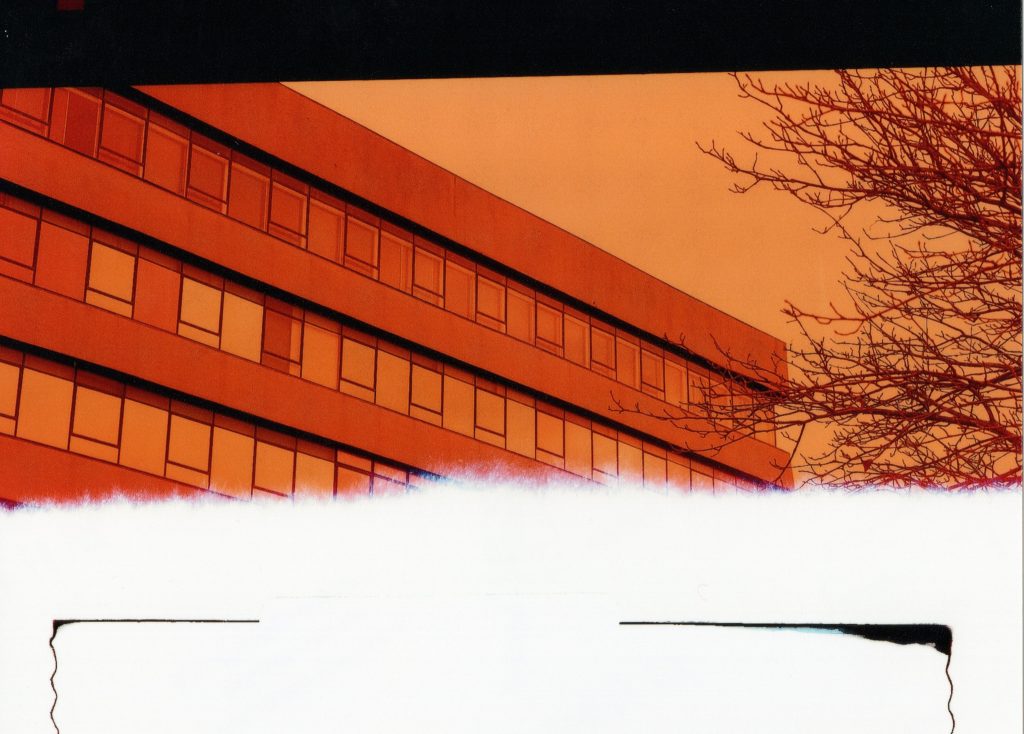
You can see the images above and the colours in the second image in the windows are more appealing to me and the blacks a little darker, picture 3 is very orange too, like going back to the redscale images I made at UEA. You can see on this too that this is the end of the roll and even where the tape is that stuck the film to the backing.
The last image on this roll was a no go, maybe I’d wound it back into the roll incorrectly during the darkroom phase of the operation but it was a photo of the dome on its own. It didn’t come out as it was roll end but never mind.

Roll Two -Fujicolour 400 Pro
The first shot out of this roll of ISO 400 film converted to redscale so that the ISO came down to 25 was a repeat of the Dome photo which should have completed the first roll.

Scene One – Dome
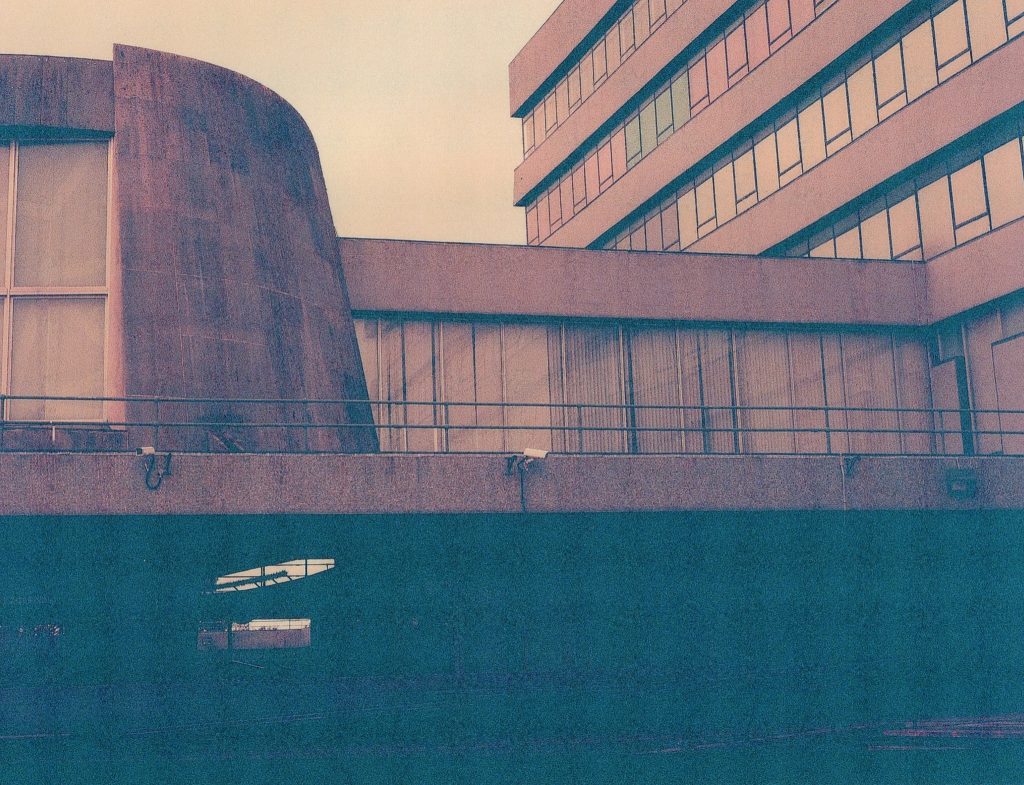
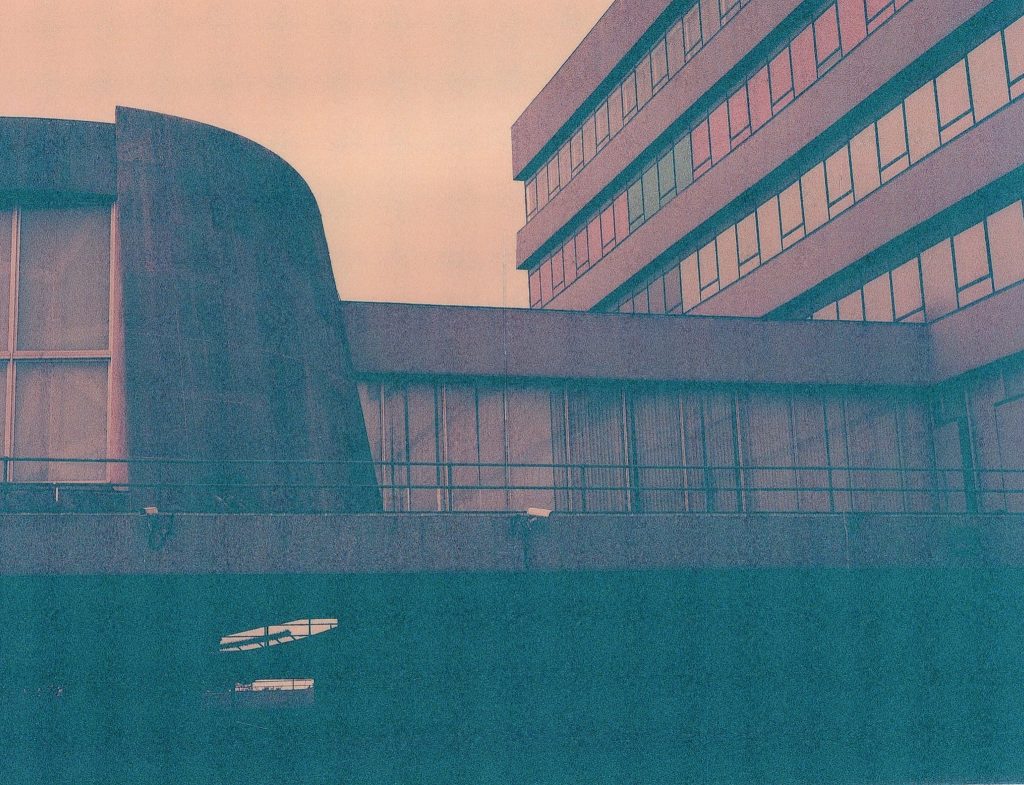
The first two images here are actually the same scene of the domed council chamber and the stairs to the elevated courtyard. The sky was pretty grey and featureless but there was plenty of light around even if it was a bit flat.

As you can see from the images, the first one I shot at an overexposure of +2 stops and has emerged pretty well from the whole process. The blacks are dark enough and there are some lovely subtle tones in the woodwork and across the whole image. In my notebook though it looks like I was underexposing by one stop, yet the Shutter speed is 1/2 of a second, again I think I was confusing the shutter speed being longer and the inverse effect of it. The second frame was shot as per the metered suggestion at 1/8th of a second and it loses most of the detail that the first image pulls out. From this first scene it appears that this roll may suit being overexposed better than under.
The next image from this area was one of the dome and some of the windows up the main block. The first shot was shot at the recommended speed from the LUX app and was 1/8th sec at f/16 and does appear brighter than the second image with more of the detail in the curved stone frontage being discernible, but the shadows under it being greeny black but not black enough.
The second picture above suffers from being too dark and it makes the shadowy area even greener and murky. the sky is more orange but the Portland Stone which is usually a lighter colour looks like dark concrete. This was a stop under the suggested exposure and was shot at 1/15th sec. On both of these scans you can see strange criss-cross pattern in the dark areas that I feel are probably from the lab’s scans of the negatives more than their prints. The scans I have on this post are representative of what the actual prints look like.

Scene Three -Another Column
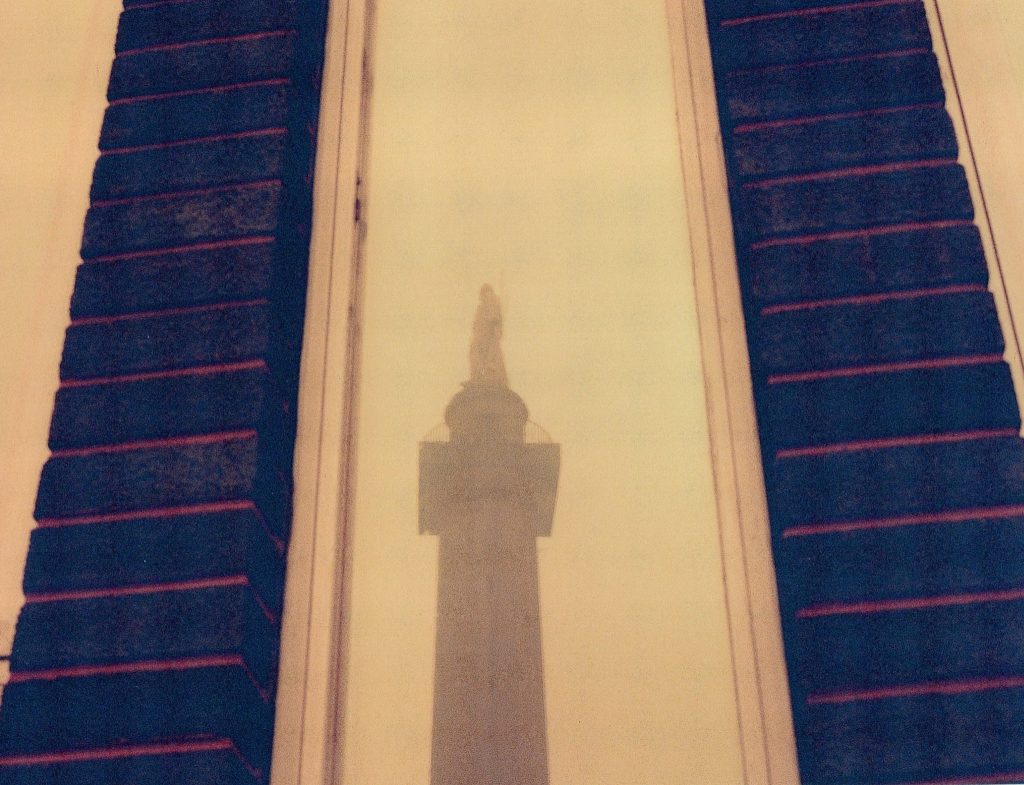
A single image now of a reflection of the newly uncovered statue atop the column. Shot in the window of the court buildings it is not a great image anyway but I like the red strips of mortar in the brickwork.
I shot this at suggested exposure, as per the LUX app which was a 1/4 of a second at f/16 and the detail in it are ok but not really anything special.
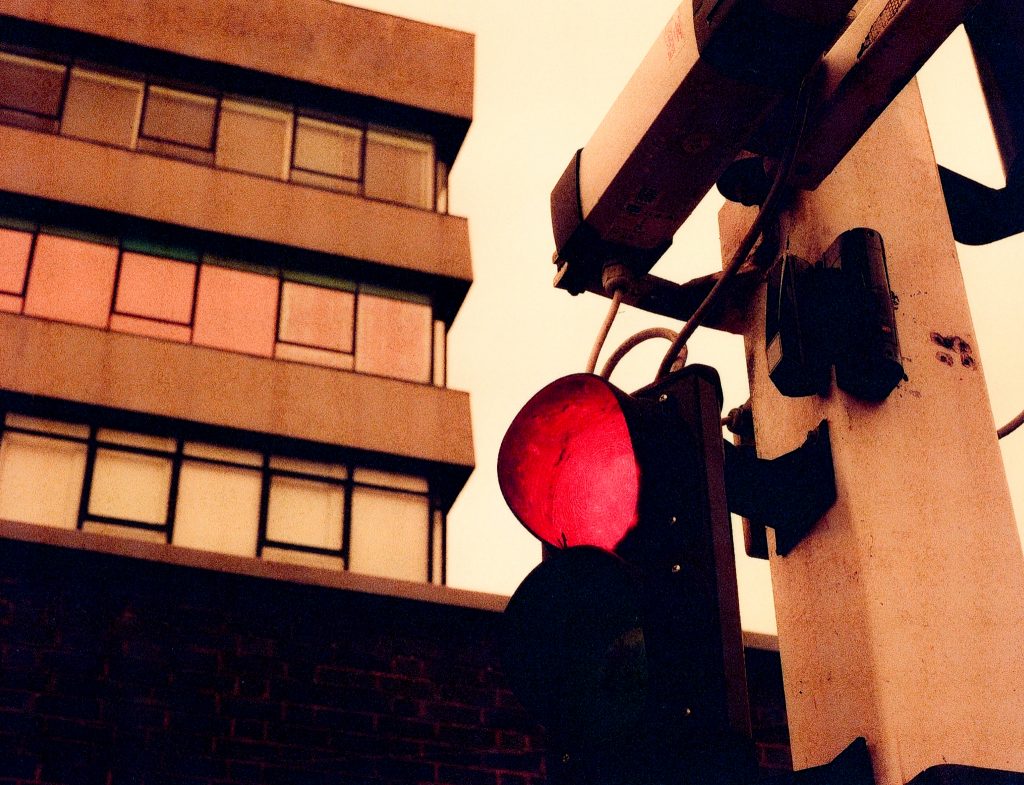
Scene Four – Stop Light
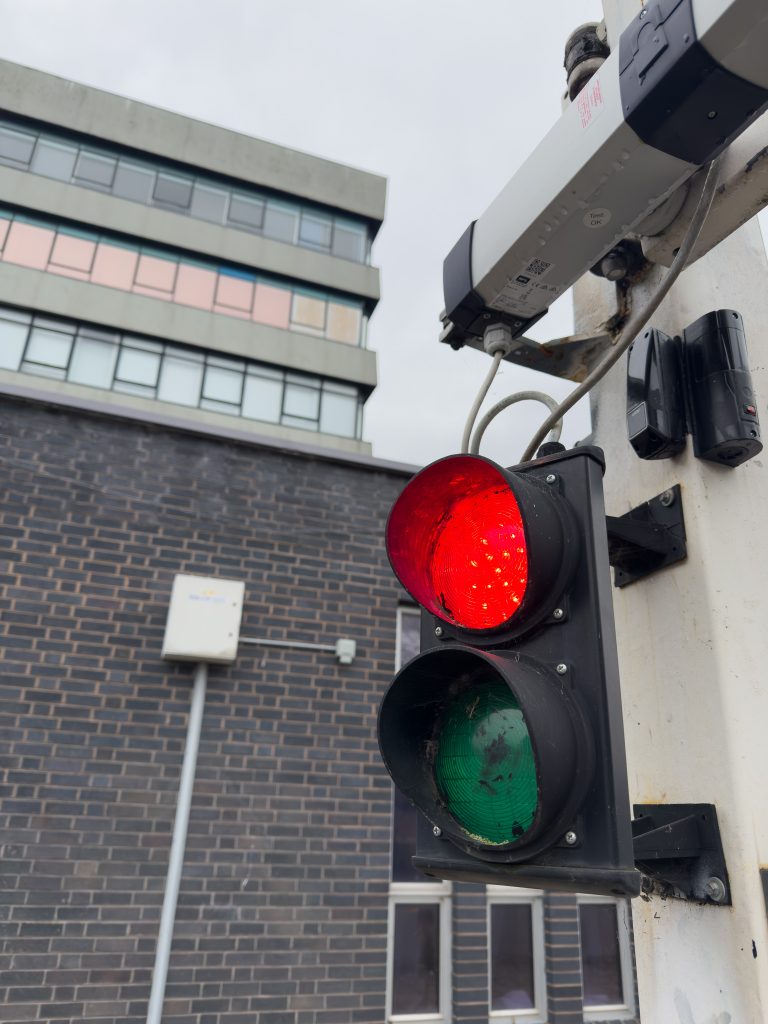
Next up was a scene around the side of the building near the entrances for the courts, where I once entered during my jury duty in the late 1990s. Here an installed gate controls the entry of tall vehicles, preventing caravans from entering the site. There is a red light on the barrier and I wanted to capture this with the glass and reflected colours in the office above and behind the lights.

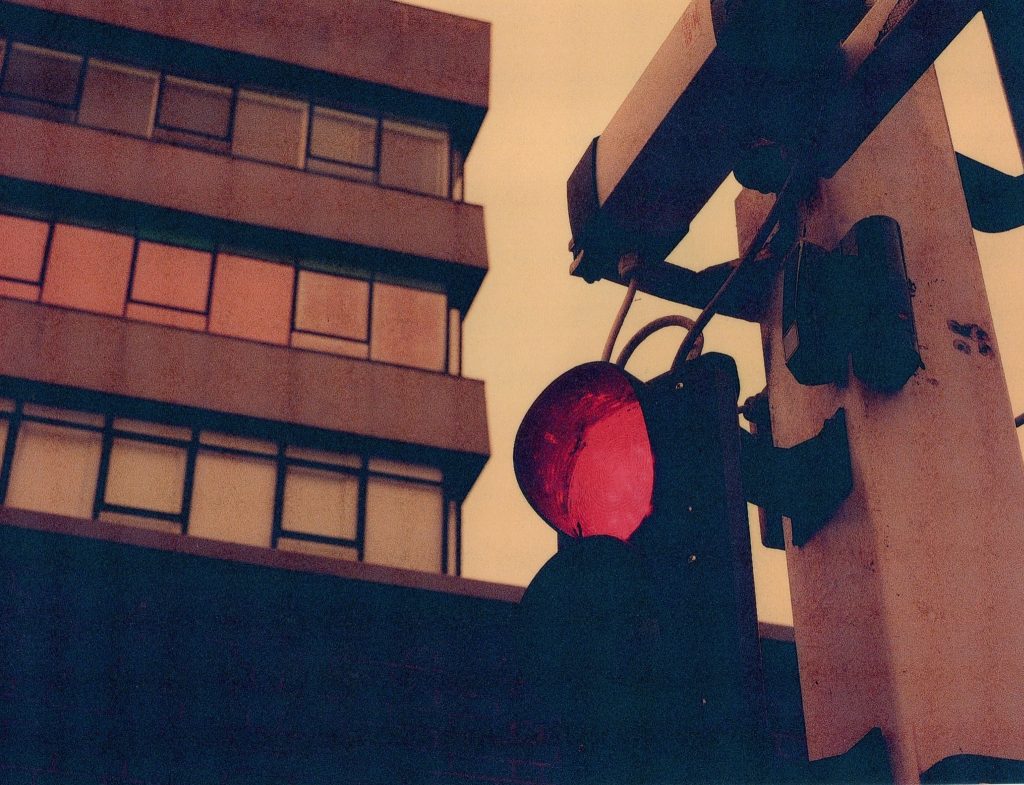
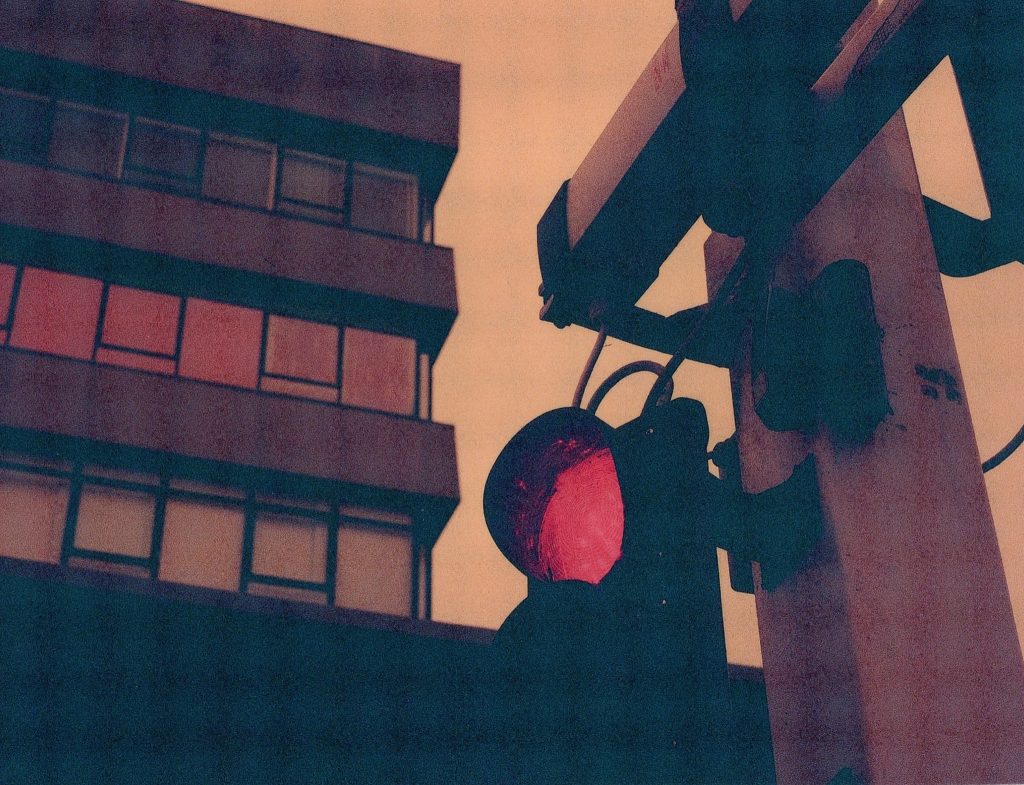

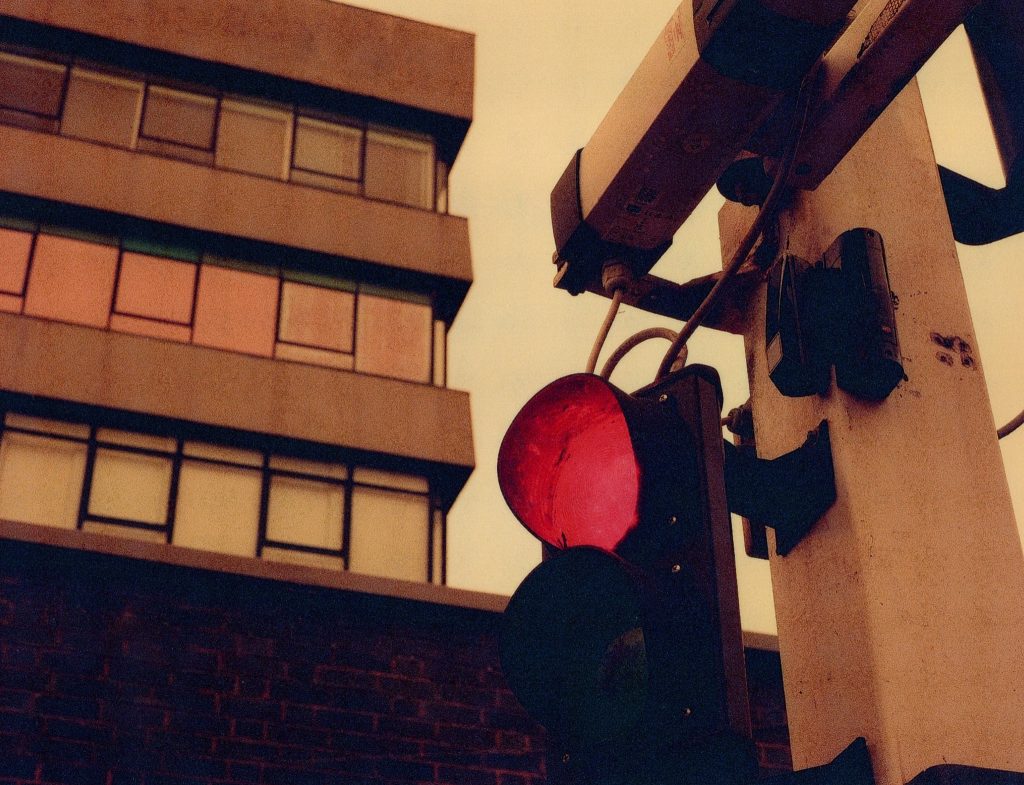
As you might be able to discern from the images above the better picture of the four is number 4. This is an overexposure of +1 stop from the recommended, the picture labelled here as 1 is the suggested exposure of 1/8th sec at f/16 but the intervening pictures, 2 & 3, are underexposed by -1 and -2 stops respectively. Whilst it is a slightly tinged with red picture, it doesn’t feel like a typical redscale image. The fact that this image was also better when adding 1 stop of light to the ISO25 rating and this was similar to other images on the roll, I would be more tempted in the future to shoot at ISO50 which would be three stops lower than the 400 Box speed if it hadn’t been flipped to redscale.
Scene 5 – Danger
Moving to the next area I was trying to capture an image of a bright yellow sign warning of the dangers of climbing over the fences. I wanted the mix of textures and patterns that were evident in the frame and the criss-cross of lines, but the frame comes out a bit messy for my liking.

I had closed the aperture down to f/22 to attempt the inclusion of the sign and the building in the background so it meant that the shutter speed was back up to a healthy 1 second. The first shot I made was at this suggestion and it came out better than the second shot which was subjected to half as much light. In the second picture there is a loss of contrast across the whole frame and a loss of detail in the texture on the fence etc.
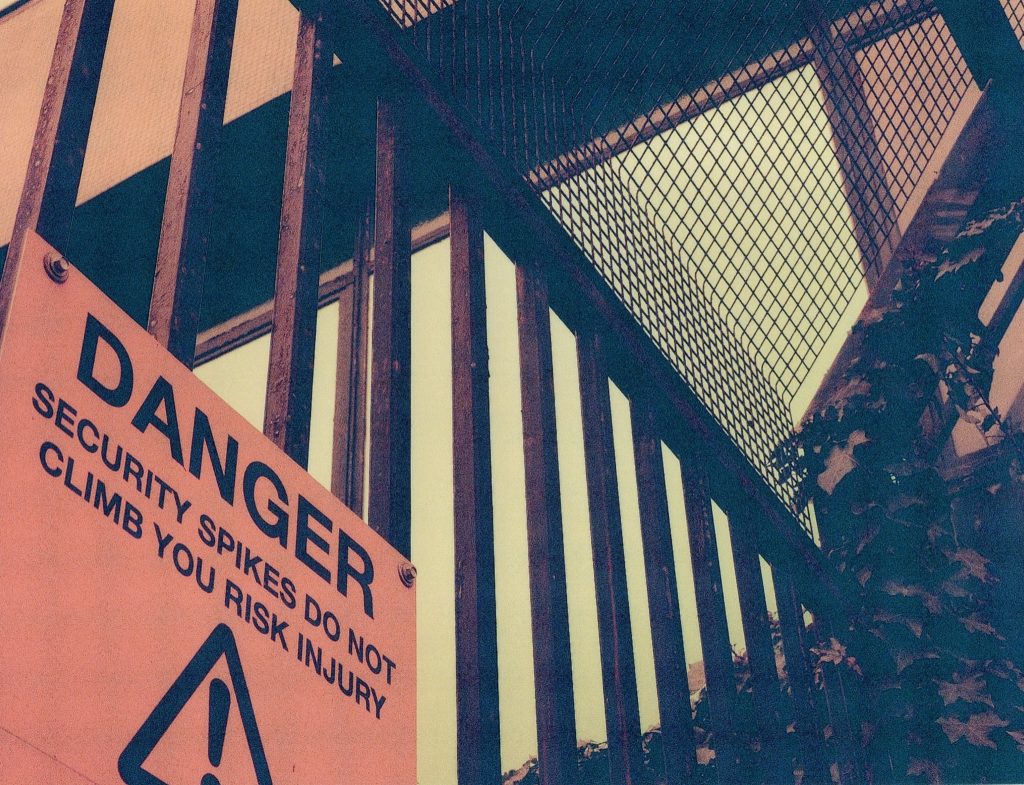
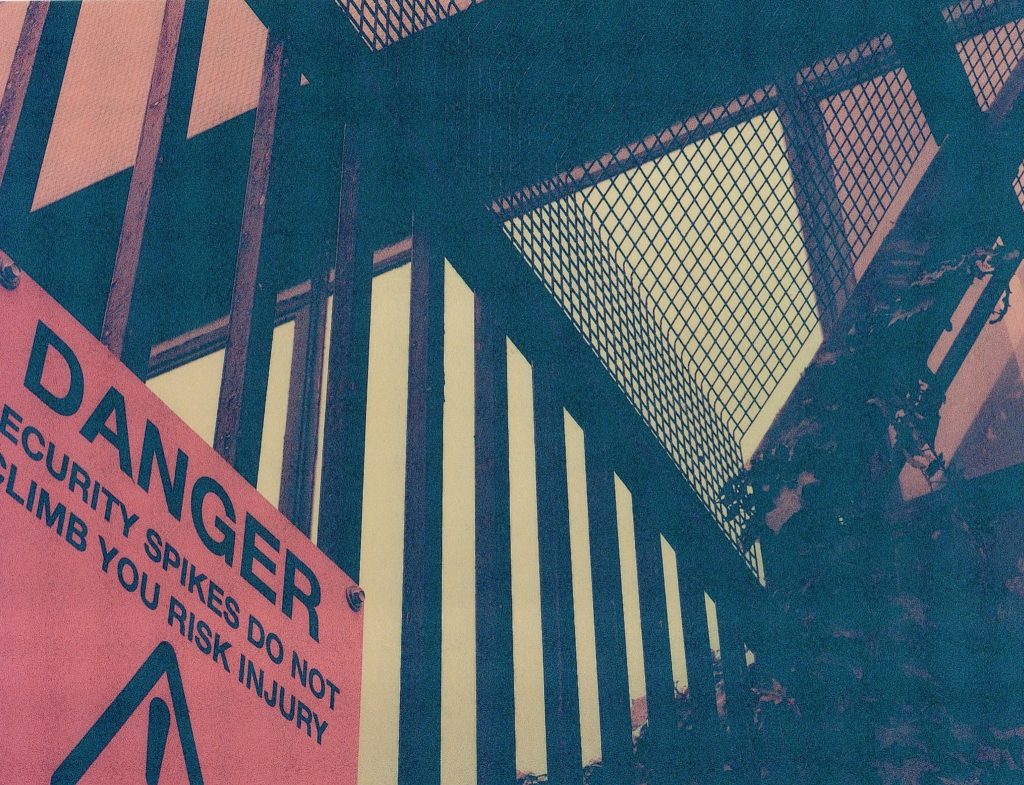
Again, the -1 stop underexposing was not as successful as the suggested exposure and I wish I’d bracketed it completely with a +1 over too but I did not.
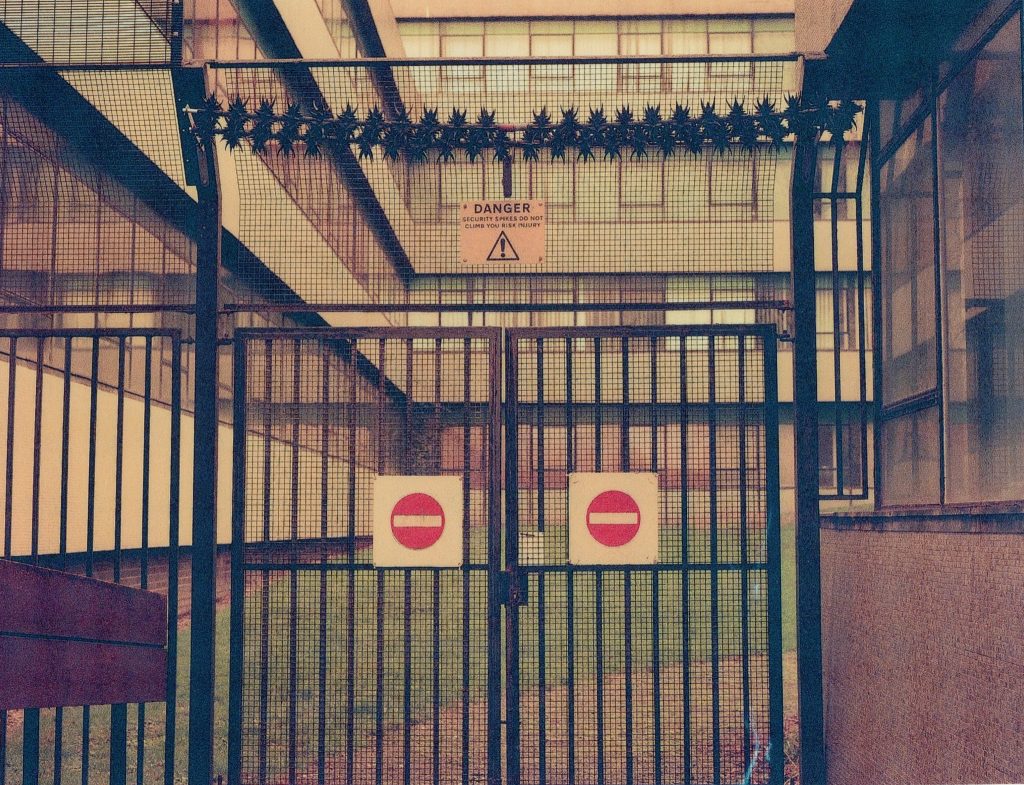
Scene 6 – No Entry
This shot saw me turn the camera around at the gates with no entry signs on that feature in the opening seconds of my first ever unicycling video Unibob 1

The gates were installed far later in the buildings history as these were originally open spaces for the general public to roam around in. I wanted to capture the tones of the grass, the glass, the metal, the stone, tiles and the woodwork and I only took one shot here.The colours in this image look not too disimilar to a normal film exposure of the same scene, barring an overly orange tint.
Scene 7 – Thin End Of The Wedge

For the last three shots on the roll I was pointing the camera at the end of one of the wings of the buildings. There were some nice tints on the windows, the light, concrete and trees all in the frame and it was just beginning to spot with rain. I shot the first at recommended exposure settings and then the second at an underexposed -1 stop. This change to one stop less of light is evident in the photos as the shadows are nowhere near dark enough and that weird green that comes with the underexposing. The colours of everything else in the photo is ok, but the contrast is very murky and the first image is the nicest, but I wonder if I’d overexposed by a stop, as per the last scene, whether the image would have been nicer.
For the very last shot the light was tailing off and rain getting heavier so I shot it, then wound the film onto the roll as it ended the shots available. As you can see from the half of the frame missing, it was again too close to call, so I think that another lesson would be not to rely on the last frame for anything valuable.
Conclusion
Overall then, not a massively successful set of images from these two rolls of redscale film, but it was a successful experiment to see how they behaved in my Bronica and at various exposure brackets to see what they really looked like at the different settings. Changing the aperture rather than the shutter speed led to a poorly focussed image so I was setting the shutter speed rather than the aperture to control the exposure in the end.
Out of the two films, the ISO160 (adjusted to ISO12) appeared to exhibiti more redscale features than the ISO400 (adjusted to ISO25) which appeared to be relatively normal colours with a bit of a tint to them. Comparing the contact sheets side by side it is fairly obvious. Some posts on the web suggest that higher ISO films produce a deeper set of red tones whilst the lower ISO films produce more yellow/orange style photos and that is seen in the comparison below.
I do have a few rolls of expired Fujicolour 400 Pro in 120 format that I will turn over to redscale and I think I will shoot at recommended settings for ISO50 and maybe even try another stop of light too. The 160 ISO film appears to be similar in that a single stop of over exposure improves the images, in my opinion, so I would be tempted to shoot the 160 at ISO25 if I do that again.
I can also try and do the same with a roll or two of 35mm film and put these through a 35mm camera, but I would still need the tripod too, as the long exposure required for this would be tricky to achieve without the stability.
The whole experiment was a good example of trying things out with film, the bracketing, that are even easier to do when using a digital camera. With the digital there is little point in bracketing as adjusting RAW files by a couple of stops is super easy in Lightroom or Photoshop so it makes little sense to waste time on this practice. With the film though it was a good method of getting me to think and clarify the stops over and under the normal exposure and learn the lesson about which way changes to shutter speed and aperture make it over or under…
Out of the 29 photos I made using this experiment there are probably two or three that I like, but I’m not overly excited about.
Be First to Comment